
For realistic toy photography backgrounds, select toys that blend with surroundings, ensuring accessory scale matches. Use natural settings like parks for authentic looks and align with seasonal changes for context. Experiment with textures using fabric or paper for dynamic backdrops, and introduce realistic colors that harmonize with toys. Play with lighting effects and angles to create depth, using layers to tell a story. Ready to master these tips and elevate your toy photography skills?
Choose the Right Scale
How do you guarantee your toy photography looks realistic and engaging? Start by carefully choosing the right scale. You want your toys to seamlessly blend with their background, making them appear life-sized and believable. Pay close attention to the proportions between your toy and surrounding elements. For example, if you're photographing an action figure, make certain any accessories or props match its size to avoid awkward contrasts.
When setting up your scene, experiment with different angles and distances. This will help you determine the best perspective that maintains the illusion of realism. Be mindful of the depth of field; a shallow depth can highlight your toy while blurring distracting elements. By focusing on scale, you'll create fascinating images that draw viewers into your miniature world.
Utilize Natural Surroundings
While toy photography often involves carefully crafted scenes, don't underestimate the power of natural surroundings. Using elements from nature can enhance your toy photography by adding authenticity and depth to your shots. Head outside and explore your backyard, local park, or even a beach. Look for interesting landscapes, lighting, and shadows that can transform a simple toy into a fascinating subject.
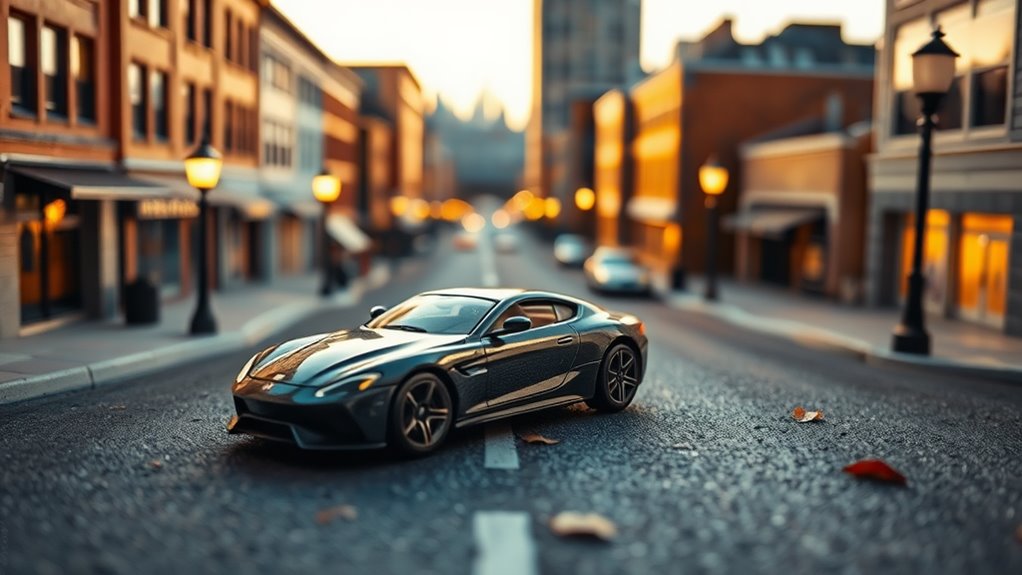
Consider how toys might interact with their environment. A small toy soldier could be positioned strategically among tall grasses, creating the illusion of a jungle mission. Or, place a toy car on a sandy path, capturing the essence of an adventurous road trip. Natural settings offer diverse backdrops that are ever-changing, bringing freshness and life to your toy photography collection.
Experiment With Textures
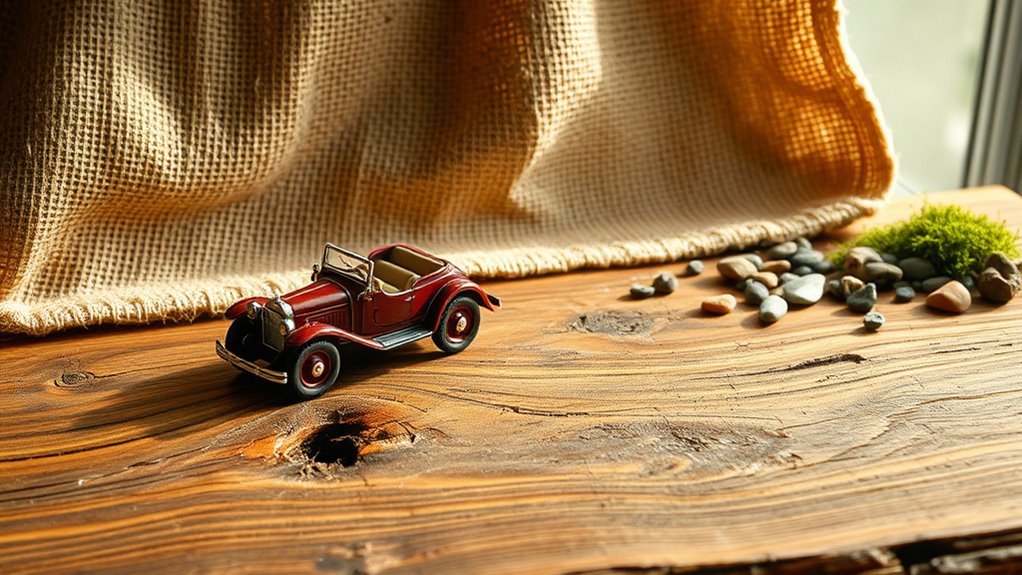
Exploring different textures can elevate your toy photography by adding visual interest and depth. When you experiment with textures, you create a dynamic backdrop that can enhance the storytelling aspect of your images. Textures can transform a plain setup into something extraordinary. Try using materials like fabric, paper, or natural elements to achieve different effects.
- Fabric: Drape a piece of velvet or burlap behind your toys to add warmth or rustic vibes.
- Paper: Crumpled or patterned paper can introduce interesting patterns and shadows.
- Natural elements: Use sand, grass, or leaves to bring a touch of nature and realism.
Incorporate Miniature Props
Adding miniature props to your toy photography can greatly enhance the narrative and provide a sense of scale. These tiny accessories help build a world around your toys, making scenes more believable and engaging. Start by considering the theme or story you want to tell. Are your toys having a picnic? Use small plates, cups, and food items. For a battle scene, include miniature weapons or vehicles.
Look for props that match the size of your toys and maintain consistency in scale. Craft stores, dollhouse suppliers, or online marketplaces offer a variety of options. Don't hesitate to repurpose everyday objects; a bottle cap can become a table, or a pencil can act as a streetlight. Let your creativity guide you, and watch your scenes come to life.
Play With Lighting Effects

When you're working on toy photography, playing with lighting effects can add a whole new dimension to your shots. Try experimenting with shadows to create depth, use color gels for a splash of creativity, and simulate natural light to bring your scenes to life. These techniques can transform your photos from ordinary to extraordinary.
Experiment With Shadows
Lighting can transform your toy photography, and shadow play is a powerful tool to add depth and intrigue. By manipulating shadows, you create dynamic scenes that breathe life into your images. Start by positioning a single light source at different angles to see how shadows change. You'll find that shadows can highlight textures or create dramatic contrasts.
Experimentation is key. Try different setups to see which effects resonate most with your vision. Here are some tips:
- Use natural light: Natural light can produce soft, realistic shadows. Try shooting near a window for varied results.
- Create silhouettes: Place your toy in front of the light source for striking silhouettes.
- Layer shadows: Use multiple objects to cast overlapping shadows, adding complexity to your scene.
Use Color Gels
Though often overlooked, color gels are a fantastic way to elevate your toy photography with vibrant lighting effects. By simply placing gels over your light sources, you can transform ordinary scenes into striking visuals. Experiment with different colors to evoke various moods—red for intensity or blue for a cooler, mysterious vibe.
Start by selecting a light source suitable for gels, like a small LED panel or flashlight. Attach the gel in front, ensuring it's secure. Don't hesitate to mix multiple colors for a dynamic effect. Try placing contrasting gels on different light sources to create depth and intrigue.
Simulate Natural Light
While color gels can add vibrancy to your toy photography, simulating natural light creates an entirely different atmosphere. You can achieve this by using a few simple techniques. Start by positioning your light source at an angle to mimic the sun's natural path. This will create realistic shadows, adding depth to your scene. Use diffusers to soften the light and replicate the gentle glow of sunlight filtered through clouds. Experiment with reflectors to bounce light and fill in harsh shadows, giving your photo a balanced look.
Here are a few tips to simulate natural light:
- Angle the light: Mimic sunlight by positioning the light at a diagonal.
- Use diffusers: Soften harsh light for a more natural feel.
- Employ reflectors: Bounce light to reduce shadows and enhance details.
Use Printed Backdrops
When you choose printed backdrops for your toy photography, focus on selecting high-quality prints that complement your scene. Pair these with proper lighting techniques to guarantee the backdrop enhances rather than distracts from your subject. Don't underestimate the power of a well-lit and well-chosen background to elevate your photos.
Selecting Quality Prints
Selecting quality prints for your toy photography backdrops can greatly enhance the overall aesthetic of your shots. When choosing prints, focus on textures and colors that complement your toys. Always look for high-resolution images; they maintain clarity and detail even in close-up shots. Avoid prints with too many distracting elements, as they can overpower your subject.
Consider these tips when selecting your prints:
- Match the Theme: Verify the print aligns with the scene you're creating. A forest backdrop works wonders for woodland creatures.
- Scale Matters: Choose images that fit the scale of your toys. This verifies realism and immersion.
- Quality Over Quantity: Invest in a few high-quality prints rather than a large collection of lower-quality ones.
With the right prints, your toy photography will truly stand out.
Proper Lighting Techniques
Achieving the perfect light setup is essential when using printed backdrops in toy photography. Proper lighting enhances the realism of your scenes and guarantees the backdrop looks natural. Start by using a softbox or diffused LED lights to avoid harsh shadows on your toys and backdrop. Position your lights at an angle to mimic natural sunlight, which adds depth and dimension. Keep an eye on reflections and glare, especially if your backdrop has a glossy finish.
Experiment with different light temperatures. Warmer tones can create a cozy atmosphere, while cooler tones might suit futuristic scenes. Adjust your camera's white balance for consistency. Don't underestimate the power of bounce cards or reflectors to fill shadows subtly. With practice, you'll master lighting that breathes life into your toy photographs.
Create Depth With Layers
To create depth with layers in toy photography, start by arranging elements at varying distances from the camera. Position your main subject in the foreground, and place other elements behind it to enhance depth perception. This technique adds a three-dimensional feel to your shots, making them more engaging. Incorporate natural elements or props to mimic real-world settings and create a sense of scale.
Try these tips to add interest:
- Foreground Elements: Use small objects like rocks or plants to frame your subject.
- Midground Interest: Add mid-sized items like toy vehicles or buildings to build a narrative.
- Background Details: Use backdrops with landscapes or cityscapes to complete the scene.
Experiment With Angles
Experimenting with angles can transform your toy photography by adding perspective and depth. Try shooting from low and high angles to create dynamic framing choices that make your subjects pop. Don't hesitate to move around and explore different viewpoints for the most engaging shots.
Perspective and Depth
When you play around with angles in toy photography, you reveal a world of perspective and depth that can transform your shots from ordinary to extraordinary. By changing your viewpoint, you create a sense of scale and dimension. This technique can make small toys appear life-sized or create dynamic scenes that draw viewers in. Imagine capturing a toy car from the front, making it look like it's speeding down a highway.
Try these tips to enhance perspective and depth:
- Vary your angle: Shoot from different sides to find the most compelling composition.
- Use leading lines: Arrange elements to guide the viewer's eye into the scene.
- Layer your subjects: Place objects at varying distances to add depth and complexity.
Experiment, and watch your photos come to life!
Low and High Angles
While exploring low and high angles, you'll reveal new dimensions in toy photography that add drama and intrigue to your shots. A low angle can make your toy appear larger than life, giving it a heroic presence. Position your camera near the ground and aim upward for an epic effect. Conversely, shooting from a high angle can create a sense of vulnerability or smallness, emphasizing your toy's place in a vast world. This perspective works well for scenes where you want to convey isolation or exploration.
Experiment with different angles to see how they change the mood and story of your image. Don't be afraid to get creative and push boundaries. By varying your approach, you'll capture engaging photos that captivate viewers and breathe life into your toys.
Dynamic Framing Choices
Angles in toy photography aren't just about changing perspectives; they're about creating dynamic frames that draw viewers into the scene. By experimenting with different angles, you can transform a simple setup into an engaging narrative. Don't hesitate to tilt your camera or get down to eye level with your toys. This approach not only adds depth but also gives life to your miniature subjects. Think of angles as your secret weapon for storytelling.
To achieve compelling dynamic frames, consider these tips:
- Overhead Shots: Capture the scene as if you're looking down from above. It offers a bird's-eye view and a unique perspective.
- Dutch Angle: Tilt your camera slightly to create tension or movement.
- Close-Ups: Focus on details that tell a story within the story.
Experimenting with these angles can make your toy photography truly standout.
Incorporate Realistic Colors
How can you make your toy photography pop with authenticity? One key element is incorporating realistic colors. Start by observing real-world environments and focus on their color palettes. Notice the shades of green in a forest or the muted tones of a cityscape. Use these observations to choose backgrounds and props that complement your toys. You don't have to match every color exactly, but aim for harmony between your scene and the toys.
Lighting plays an essential role in color accuracy. Natural light can enhance realism, while artificial lighting may require adjustments. Experiment with different light sources to see how they affect your colors. Finally, post-processing can help adjust tones and saturation. Just remember, subtlety is key to maintaining a lifelike appearance.
Capture Seasonal Elements
To make your toy photography truly stand out, capturing seasonal elements can add depth and context to your scenes. By aligning your background with the time of year, you create a story that resonates. Whether it's the crisp colors of autumn leaves or the freshness of spring blooms, seasonal details enhance the realism of your toy world. Immerse yourself in nature and scout for elements that reflect the current season.
- Winter Wonderland: Use cotton or white felt to mimic snow, adding a frosty touch to your setting.
- Spring Blossoms: Gather real or artificial flowers to create a vibrant and lively backdrop.
- Autumn Leaves: Collect fallen leaves and scatter them around your scene for an authentic fall atmosphere.
Experiment with these tips to bring your toy photos to life.
Frequently Asked Questions
How Can I Make My Toy Photography Look More Professional?
To make your toy photography look more professional, focus on lighting and composition. Use natural light when possible and play with angles. Add depth by layering elements. Don't forget to edit your photos for a polished finish.
What Camera Settings Should I Use for Toy Photography?
Isn't it fascinating how the right camera settings can transform your toy photos? Use a small aperture for depth, lower ISO to reduce noise, and adjust shutter speed for clarity. Experiment, and you'll find your perfect setup.
How Do I Prevent Glare and Reflections in Toy Photos?
To prevent glare and reflections in your toy photos, use diffused lighting and adjust your angles. Try shooting near a window with sheer curtains, and position the toys to minimize shiny surfaces catching direct light.
What Software Is Best for Editing Toy Photography?
You should try Adobe Lightroom for editing toy photos. It offers powerful tools for color correction and detail enhancement. If you're on a budget, GIMP and Snapseed are great alternatives for achieving professional results without breaking the bank.
How Do I Maintain Consistency in My Toy Photography Style?
Juxtapose vibrant colors with muted tones to create a striking contrast. Use consistent lighting and angles, and maintain a cohesive theme. Trust your unique style, keep it recognizable, and your toy photography will remain consistently enchanting.
At a Glance
You've got all the tips for creating realistic toy photography backgrounds, but remember, it's just child's play, right? With the right scale, textures, and lighting, you're just pretending to be a professional photographer. Incorporating miniature props and capturing seasonal elements are merely illusions. Who needs depth and angles when you've got your smartphone? So go ahead, play with colors and natural surroundings—everyone knows it's just for fun, not like anyone's going to be impressed!


