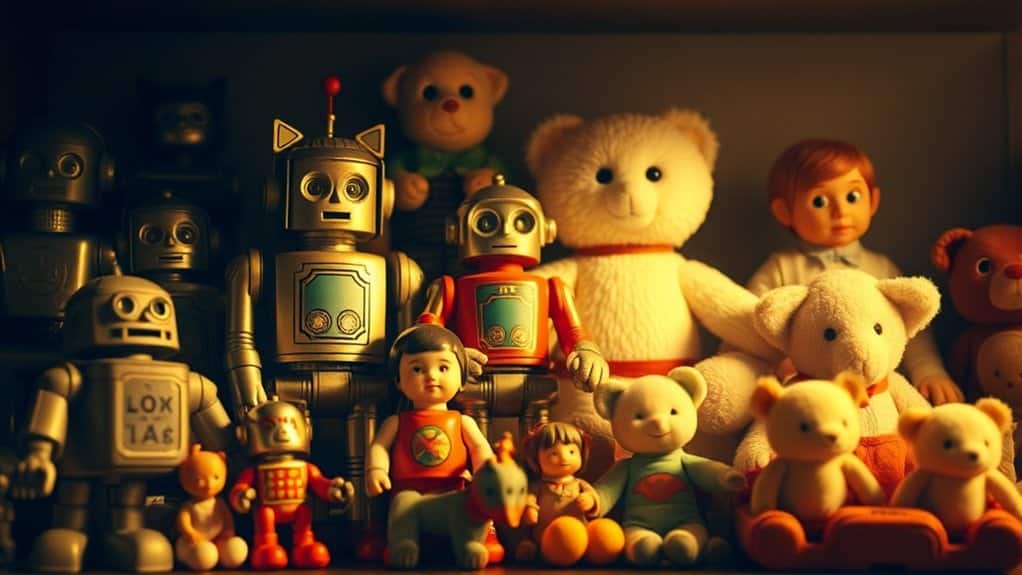
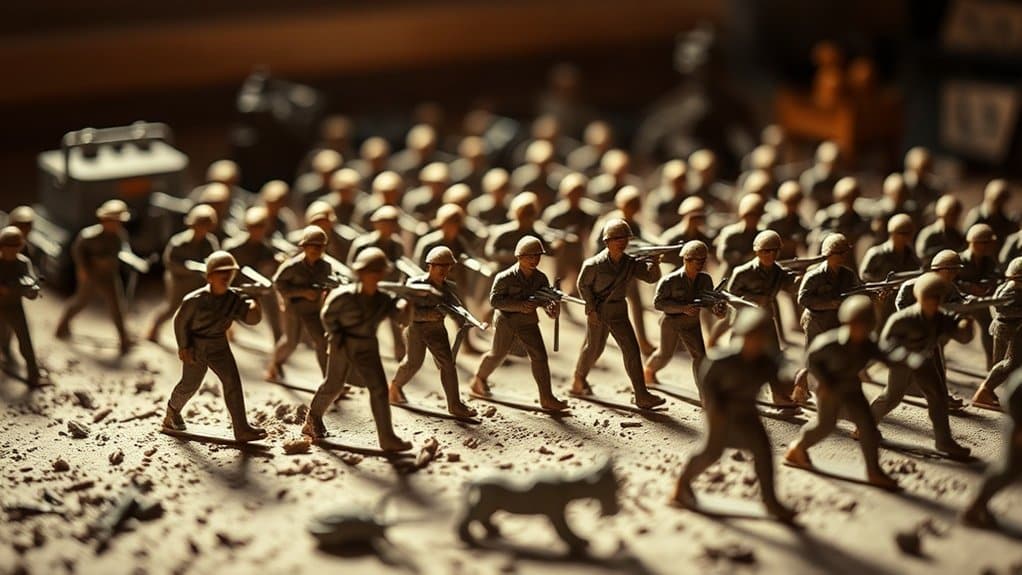
For a charming vintage look in toy photography, select filters with sepia tones and muted hues to evoke nostalgia. Adjust colors by slightly lowering saturation and adding warmth to infuse an old-world charm. Add grain and reduce contrast for that authentic film feel. Play with vignettes to focus on your subject and maintain consistency across your portfolio with standard color grading and lighting setups. Discover more tips for crafting an emotive vintage aesthetic in your toy photographs.
Understanding the Appeal of Vintage Edits

While modern photography often emphasizes clarity and precision, there’s an undeniable charm in the nostalgia of vintage edits. You see, these edits transport your toy photography into another era, evoking emotions that are both warm and timeless. When you apply a vintage look, you’re not just adding a filter; you’re telling a story. Those soft hues and faded tones create a sense of history and depth, making your toys feel alive with character and past adventures.
You might find that vintage edits bring out details you hadn’t noticed before, highlighting textures and shadows that modern styles might overlook. By embracing this retro aesthetic, you connect with viewers on an emotional level, sparking memories and imagination that make your toy photography truly unforgettable.
Choosing the Right Filters for the Job
How do you select the perfect filter to give your toy photography that vintage flair? Start by considering the mood you want to convey. Filters like sepia or muted tones can evoke nostalgia, while grainy textures add depth and character reminiscent of old film cameras. Look for filters that enhance colors associated with vintage styles, like warm yellows or faded blues. Pay attention to what complements your toy’s colors and maintains visual harmony. Explore apps or editing software with a wide range of filter options, allowing you to experiment and find the best match. Remember, subtlety is key. You don’t want to overshadow your subject but enhance its story. Trust your instincts and test different filters until you find the one that resonates.
Adjusting Colors for a Retro Vibe

Once you’ve selected the perfect filter, it’s time to fine-tune the colors to achieve that retro vibe. Start by adjusting the saturation. Lowering it slightly can evoke a faded look reminiscent of old photographs. Next, shift the hue to warmer tones. Vintage photos often have a yellowish or reddish tint, so consider enhancing these shades to mimic that classic feel.
Don’t forget about the contrast. Reducing it a bit can soften the image, giving it a more nostalgic appearance. If your editing tool allows for split toning, add a touch of warmth to the highlights while cooling down the shadows. This contrast of tones can enhance the retro feel. Play around with these settings to find the ideal balance for your toy photography.
Adding Grain for Authentic Texture
When you’re aiming for a vintage look in toy photography, adding grain can bring a sense of authenticity to your images. Choose the right intensity to guarantee the grain enhances the realism without overwhelming the scene. Balance is key, so subtly adjust the grain to create an effect that’s both convincing and visually appealing.
Choosing Grain Intensity
As you commence on giving your toy photography a vintage look, choosing the right grain intensity is essential for achieving authentic texture. You want to mimic the nostalgic feel of old film photography, so selecting the appropriate level of grain can make all the difference. Start by considering the mood and era you’re aiming to evoke. A subtle grain might work well for soft, timeless scenes, while a heavier grain can add drama or emphasize ruggedness.
Adjust the grain filter gradually; it’s easier to add more than to remove excess. Pay attention to how the grain interacts with the details of your toys. Too much can overwhelm, while too little might not be noticeable. Experiment and trust your instincts to find the perfect balance.
Enhancing Realism Subtly
You’ve carefully chosen the right grain intensity, so now let’s focus on enhancing realism subtly by adding grain for authentic texture. Grain can give your toy photography that classic, vintage feel, making your images appear more lifelike and less digital. When you apply grain, guarantee it complements the scene’s overall mood. Use a subtle touch; too much grain can overpower details, while too little might go unnoticed. Adjust the grain size and roughness to match the scale of your toys, enhancing the illusion of a larger world. Experiment with different grain patterns to see which adds depth without overwhelming your composition. Remember, the goal is to enrich the image naturally, so your audience feels drawn into your miniature universe.
Creating a Faded Effect With Highlights and Shadows
To create a faded effect in your toy photography, start by adjusting the contrast to set the right mood. Lowering contrast can soften the image, giving it an aged appearance while balancing light and shadows adds depth. Don’t forget to fine-tune highlights and shadows to enhance the vintage feel, making your photo look timeless.
Adjusting Contrast for Mood
When you’re aiming to evoke a nostalgic mood in your toy photography, adjusting the contrast is key to creating a faded effect that plays with highlights and shadows. Start by lowering the contrast to soften the overall image, which will give it that vintage feel. Reducing contrast helps blend the highlights and shadows, making the photo look more timeless. Pay attention to the highlights—fading them slightly can create a dreamy aura around your toys. Shadows should be gently softened to prevent harsh lines, enhancing the aged look. Use editing tools to fine-tune these elements, ensuring the toys remain the focal point. By carefully adjusting contrast, you can craft a mood that transports viewers back to a bygone era, capturing a sense of nostalgia.
Balancing Light and Depth
While adjusting contrast sets the stage for a nostalgic mood, balancing light and depth through highlights and shadows further enhances the vintage charm in your toy photography. Start by gently increasing the highlights to wash out some details, giving your images that timeless, faded feel. Next, subtly lower the shadows to soften the overall look, ensuring your toys remain the focal point without losing their essence.
Use the dodge tool sparingly to brighten specific areas, drawing attention to key features of your toys. Conversely, employ the burn tool to add depth and mystery to the background elements. Remember, it’s all about creating harmony between light and shadow, capturing that elusive vintage vibe. This balance breathes life into your scenes, making them truly enchanting.
Experimenting With Vignettes and Borders
Adding vignettes and borders can dramatically enhance the vintage feel of your toy photography. Start by experimenting with vignettes to draw attention towards your subject. A subtle darkening effect around the edges can mimic the look of old film cameras, naturally guiding the viewer’s eye to the center. You can adjust the intensity to suit your style, making the vignette either soft or pronounced.
Next, explore adding borders to your images. Borders can frame your toys, giving them a classic Polaroid or postcard appearance. Choose between various border styles, from clean lines to distressed edges, that accentuate the vintage theme. Mix and match vignettes and borders to see what best complements your toys. With practice, you’ll create enchanting images with a timeless appeal.
Tips for Achieving Consistency Across Your Portfolio
To achieve consistency across your toy photography portfolio, it’s important to establish a cohesive style that ties your images together. Consistency strengthens your artistic identity and helps viewers recognize your work instantly. Start by defining your unique aesthetic, focusing on color palettes, lighting, and composition. Stick to a specific editing process to maintain uniformity.
Here are some tips to promote consistency:
- Set color guidelines: Choose a palette that complements your vintage theme and apply it consistently across your photos.
- Standardize your editing workflow: Use the same filters and adjustments for each image to create a harmonious look.
- Organize your setup: Keep your photography setup consistent, promoting similar lighting and background elements.
- Review and adjust regularly: Frequently revisit your portfolio to verify all images align with your established style.
Frequently Asked Questions
How Do Vintage Edits Affect Viewer Perception of Toy Photography?
When you apply vintage edits to toy photography, it evokes nostalgia, enhancing emotional connection. Viewers perceive the toys as timeless artifacts, sparking curiosity and imagination. This transforms the ordinary into art, making your photos more memorable and impactful.
Which Software Is Best for Applying Vintage Filters?
Imagine your photos with a nostalgic glow. Adobe Lightroom’s extensive filter options let you craft that vintage feel effortlessly. Capture the essence of the past with VSCO for quick, vibrant retro effects that pop on screen.
Can Smartphone Apps Achieve Professional Vintage Look Edits?
You can definitely achieve a professional vintage look with smartphone apps. Many apps offer a range of filters and editing tools that mimic classic film aesthetics, letting you create stunning, professional-quality edits right from your phone.
How Much Time Should Be Dedicated to Editing Each Photo?
Editing a photo should feel like cooking a perfect meal; allocate about 15-30 minutes per image. You’ll find that a balance of time and attention brings out the best in each photo’s details.
Are There Any Copyright Issues With Using Certain Vintage Filters?
You should guarantee that the vintage filters you’re using are either in the public domain or have the appropriate licenses. Always verify the terms of use to avoid copyright issues, keeping your creative work legally safe.
At a Glance
In your journey to craft vintage edits for toy photography, think of each filter, adjustment, and effect as a brushstroke on the canvas of nostalgia. These tools are keys opening the door to cherished memories, breathing life and history into your images. As you weave consistency across your portfolio, you’re not just creating photos; you’re telling timeless stories. Remember, every shadow and highlight is a whisper of the past, inviting viewers to step into a world where imagination thrives.


