Master mobile toy photography by focusing on dynamic poses and effective lighting techniques. Use articulation points for storytelling poses and maintain balance for realistic shots. Leverage natural light for soft, diffused effects, and experiment with artificial lighting to control intensity and angles. Consider side lighting for contrast or backlighting for silhouettes. By getting creative with your compositions and experimenting with lighting setups, you’ll reveal the secrets to capturing engaging toy photography stories.
Understanding the Basics of Toy Posing

Understanding the basics of toy posing is essential for creating engaging mobile toy photography. You need to capture the toy’s character and story through dynamic poses. Start by considering the toy’s articulation points. Experiment with different limb positions to convey action or emotion. Pay attention to balance; a well-balanced pose can make a toy look more lifelike. Use props or backgrounds to enhance the scene and add context. Think about the story you want to tell; a simple tilt of the head or bend of the arm can express curiosity or determination. Practice is key, so don’t hesitate to try various poses until you find the one that best captures your vision. With creativity, your toy photos will come to life. Additionally, consider using natural light to enhance the colors and details of your toys, as it can significantly elevate the overall quality of your shots. For those looking for more guidance, exploring mobile photography tips for figures can provide valuable insights into composition, lighting, and editing techniques. These resources can inspire new ideas and techniques, helping you to refine your style and elevate your toy photography to the next level.
Exploring Different Lighting Techniques
How can lighting transform your mobile toy photography? It’s all about setting the mood and directing the viewer’s attention. By playing with light, you can create drama, highlight details, or add a sense of realism to your action figures. Natural light is a great starting point; it’s soft and diffused, perfect for daytime shots. Move your subject near a window, and watch shadows create depth and texture.
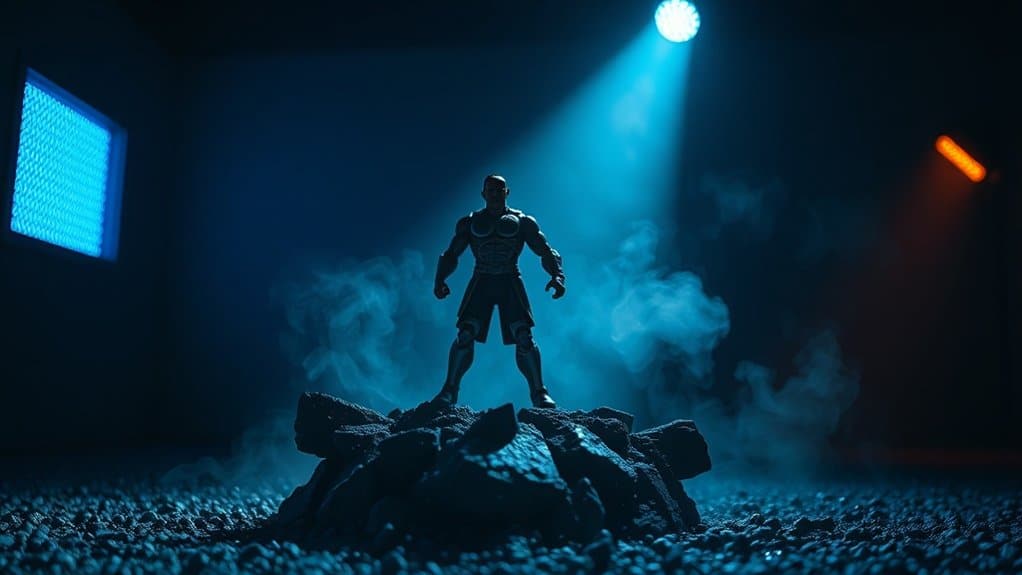
Experiment with artificial lighting too. Use household lamps or LED lights to control intensity and angle. Side lighting adds contrast, while backlighting can make silhouettes pop. Don’t forget about colored lights; they can evoke different emotions and themes. Always remember, the right lighting can turn a simple shot into a mesmerizing image.
Creating Dynamic Scenes With Action Figures
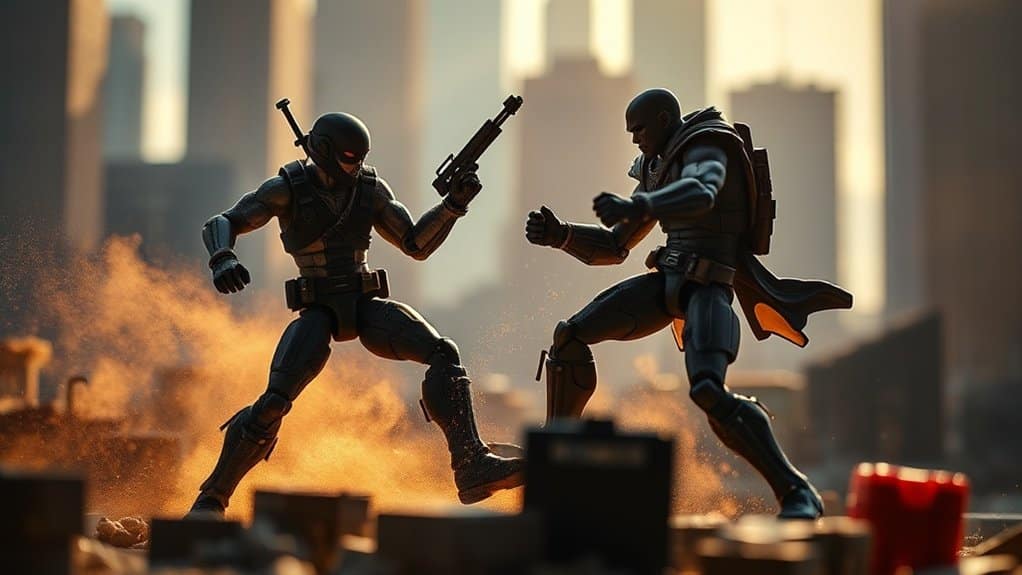
When crafting dynamic scenes with action figures, your imagination is the canvas. Focus on storytelling by incorporating motion and emotion. Consider the scene’s composition and the interplay between figures to create a narrative. Think about how their poses convey action or tension.
Here’s how to enhance your scenes:
- Layer Your Composition: Use different planes—foreground, middle ground, and background—to add depth. This technique enhances the scene’s complexity and makes it more immersive.
- Utilize Props: Incorporate small objects to build a believable environment. Props like rocks, trees, or even household items can transform your setup into a lifelike world.
- Experiment with Angles: Shoot from various perspectives. Low angles can make figures appear larger and more heroic, while high angles can add drama or vulnerability.
Capture the essence of a story with each shot!
Utilizing Natural Light for Stunning Shots
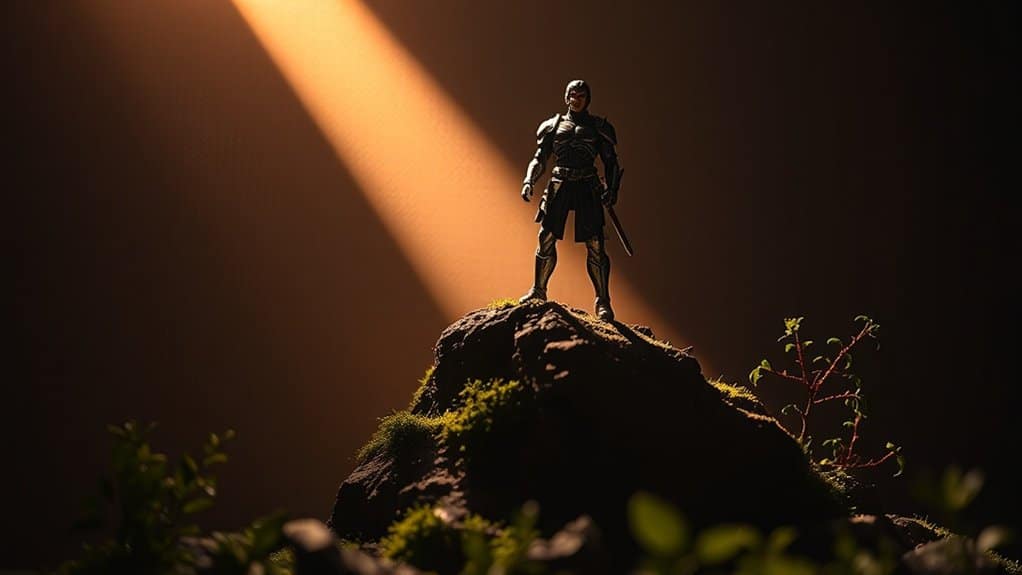
Building dynamic scenes with action figures ignites your creativity, but the right lighting can elevate your work to new heights. Natural light provides a versatile and free resource that can transform your toy photography. Start by observing the light in your environment. Early morning and late afternoon offer soft, golden hues, while midday sun casts sharp, dramatic shadows. Position your figures strategically to capture these effects, enhancing their features and expressions. Overcast days are perfect for achieving even, diffused lighting without harsh contrasts. Move around your setup to explore different angles and intensities of light. Pay attention to reflections and backlighting, which can add depth and intrigue to your shots. Harness natural light, and watch your action figures come to life.
Experimenting With Artificial Lighting Setups
While natural light offers a beautiful ambiance, artificial lighting setups give you complete control over your toy photography. You can manipulate shadows, highlights, and colors to create unique scenes. Start experimenting with three key elements:
- LED Lights: These are versatile and come in various colors. Position them to highlight your figure’s features or create dramatic shadows.
- Diffusers: Use them to soften harsh light and reduce glare. This helps create a more balanced, natural look in your shots, ensuring your figures don’t appear washed out.
- Reflectors: Bounce light back onto your subject to fill in shadows and add depth. They’re great for highlighting details without overpowering the scene.
Master these tools to enhance your toy photography with striking artificial lighting.
Mastering Depth of Field in Toy Photography
To master depth of field in toy photography, you’ll need to understand how aperture and focus control can bring your tiny subjects to life. Balancing the background and foreground is essential for creating enchanting scenes, and the right lens choice will greatly impact your composition. With these tools, you can guarantee your toy photos are sharp and engaging.
Aperture and Focus Control
Understanding how to harness aperture and focus control transforms your toy photography, letting you create stunning images with enchanting depth. By adjusting the aperture, you can control how much light hits your camera sensor and manipulate the depth of field. A wider aperture (lower f-stop) results in a shallow depth, isolating your action figure against a blurred background. Conversely, a smaller aperture (higher f-stop) sharpens more of the scene.
Here’s how to get started:
- Experiment with Aperture: Use your mobile app settings to adjust aperture, exploring different f-stops for varied depth effects.
- Manual Focus: Instead of relying on auto-focus, manually focus to guarantee your toy is sharp and detailed.
- Distance Matters: Control your distance from the subject to enhance focus precision and depth control.
Background and Foreground Balance
Mastering aperture and focus control sets the stage for achieving a harmonious balance between background and foreground in your toy photography. To create depth, start by positioning your action figure in a way that enhances its presence. Adjust your camera’s aperture to blur the background, drawing attention to the toy. This technique, known as a shallow depth of field, isolates the subject, making it pop against a soft backdrop.
Ensure the background complements your action figure without overwhelming it. Consider colors and patterns that enhance rather than distract. Employ natural light to add dimension and avoid harsh shadows. Experiment with angles and distances to find the perfect balance. By focusing on these elements, you’ll craft scenes where your action figures take center stage with vivid clarity.
Lens Choice Impact
When you choose the right lens for toy photography, you greatly impact the depth of field and overall composition. A lens with a wide aperture (like f/1.8) lets you achieve a shallow depth of field, making your action figure pop against a blurred background. With mobile photography, lens attachments can mimic this effect. Here’s how to master depth of field with lens choice:
- Select a Wide Aperture Lens: This creates a creamy bokeh effect, isolating your toy subject effectively.
- Use Macro Lenses: They let you capture intricate details, bringing your action figure to life in close-up shots.
- Experiment with Focal Lengths: Longer focal lengths compress the background, offering a more dramatic look that enhances your toy’s presence.
Composing Shots to Enhance the Story
Although capturing the perfect moment is essential in mobile toy photography, composing your shots thoughtfully can truly enhance the story you’re trying to tell. Start by considering the background and setting—these elements can add context and depth to your action figure’s narrative. Use leading lines to draw the viewer’s eye toward the focal point, whether it’s a dramatic battle or a quiet moment. Experiment with different angles and perspectives to create a sense of scale and drama. Pay attention to framing; sometimes, a tighter crop can intensify the emotion. Don’t forget the rule of thirds, which can guide you in placing your subject off-center for a more dynamic composition. Every detail in your frame should contribute to the story’s impact.
Editing Tips to Enhance Your Toy Photos
When you’re editing your toy photos, start by applying color correction techniques to make the colors pop and look more vibrant. Next, focus on sharpening details to give your toys a crisp and professional appearance. These simple adjustments can greatly enhance the overall impact of your images.
Color Correction Techniques
Capturing the perfect toy photo can be tricky, but mastering color correction transforms a good shot into a great one. By adjusting colors, you make sure your action figures pop and look lifelike. Here’s how you can get started: Experiment with different lighting conditions to see how they affect the colors in your photos. Additionally, capturing the photo shoot behind the scenes can provide insights into your techniques and help you refine your process for future sessions. Don’t forget to take note of the settings that yield the best results for a polished finish.
- White Balance: Make certain your whites are true to eliminate unwanted color casts. Use your editing app’s white balance tool to find the perfect balance.
- Saturation: Enhance your photo’s vibrancy without overdoing it. Slightly increase saturation to make colors stand out, but keep it natural.
- Temperature: Adjust the warmth or coolness of your photo to match the desired mood. Warmer tones can evoke coziness, while cooler tones add drama.
Experiment with these techniques to elevate your toy photography to new heights.
Sharpening Details Effectively
A key step in enhancing your toy photos is effectively sharpening details. Start by selecting a photo editing app with robust sharpening tools. Once you’ve chosen your app, zoom in on your image to identify areas that need sharpening, like the toy’s eyes or textures. Use the sharpening tool subtly; too much can create an unnatural look. Adjust the slider gradually while observing the changes.
Focus on enhancing the edges to make the action figure pop against the background. Remember, the goal is to highlight details without introducing noise. After sharpening, zoom out to check the overall effect. If you’ve overdone it, reduce the intensity. Consistent practice will help you master this skill, making your toy photos more dynamic and engaging.
Frequently Asked Questions
What Type of Camera Lens Is Best for Mobile Toy Photography?
You should choose a macro lens for mobile toy photography. It lets you capture intricate details and create stunning close-ups. Using a macro lens will enhance the overall quality and depth of your toy photography.
How Do I Prevent My Action Figures From Falling During a Shoot?
You can prevent action figures from falling during a shoot by using adhesives like tacky putty or clear stands. Adjust their center of gravity and balance them carefully to guarantee they stay upright while you photograph.
Are There Specific Mobile Apps for Enhancing Toy Photography?
Immerse yourself in the world of apps like Snapseed or Lightroom to enhance your toy photography. They let you adjust lighting, contrast, and color with ease. You’ll transform your shots from plain to picturesque in no time!
Can Weather Conditions Impact Outdoor Toy Photography?
Yes, weather conditions greatly impact outdoor toy photography. You’ll find that natural lighting changes your shots dramatically. Overcast days soften shadows, while sunny days create vivid contrasts. Rain can add dynamic effects, but protect your gear!
How Often Should I Clean My Action Figures to Ensure Photo Quality?
You should clean your action figures regularly, ideally before each photoshoot. Dust and grime can affect photo quality, so a gentle wipe with a microfiber cloth keeps them looking their best and guarantees clear, vibrant shots.
At a Glance
You’ve now got the tools to turn simple toys into epic heroes and mundane settings into magical worlds. By skillfully posing your figures and playing with light, whether natural or artificial, you can create scenes that captivate. Juxtapose the small scale of toys with the grand scope of your imagination. As you master depth of field and composition, remember—it’s the tiny details that tell the biggest stories. Now, go transform your action figures into legends!


