Lighting toy figures with your phone flash and LED lights can create enchanting displays. Position lights strategically to highlight features and experiment with angles for dynamic shadows. Use diffusers like tissue paper for softer effects and make sure LED lights suit your scene’s mood. Adjust flash settings to enhance details without overwhelming them. Playing with backgrounds and poses will enrich the visual storytelling. Mastering these techniques opens up further insights into transforming your toy photography.
Understanding Light and Shadows
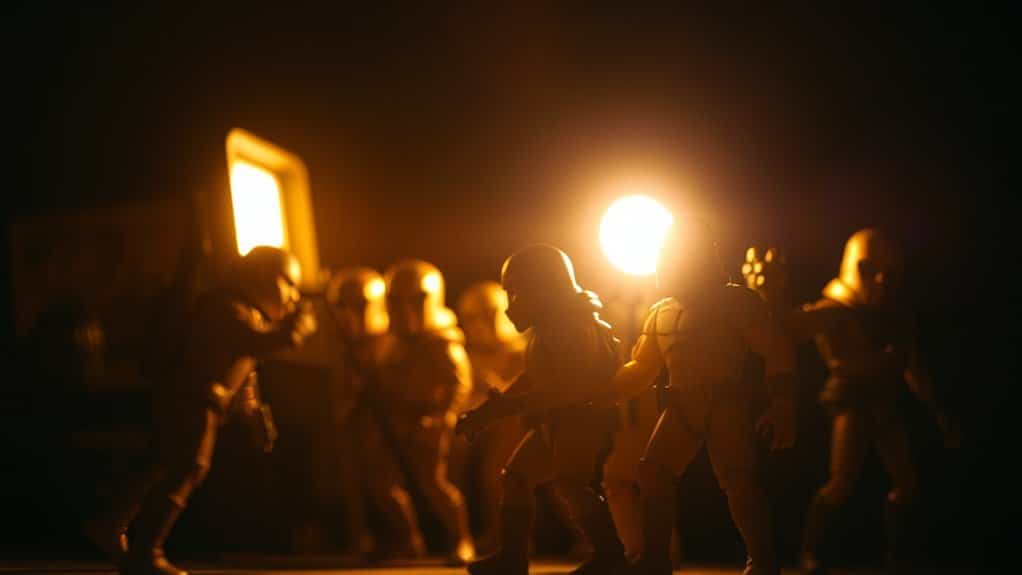
To effectively light toy figures, it’s essential to grasp how light and shadows interact. You’ll want to focus on the direction, intensity, and color of the light. These elements can dramatically alter the mood and appearance of your figures. When the light hits your toy figures, it creates shadows that add depth and dimension. By positioning your light source strategically, you can highlight specific features or create dramatic effects.
Consider how the shadows fall and adjust the angle to achieve the desired look. A lower angle might produce longer shadows, adding drama, while a direct light source minimizes them, offering a cleaner look. Experiment with different angles and distances to discover the most enchanting setup for your toy figures, enhancing their visual impact.
Choosing the Right LED Lights
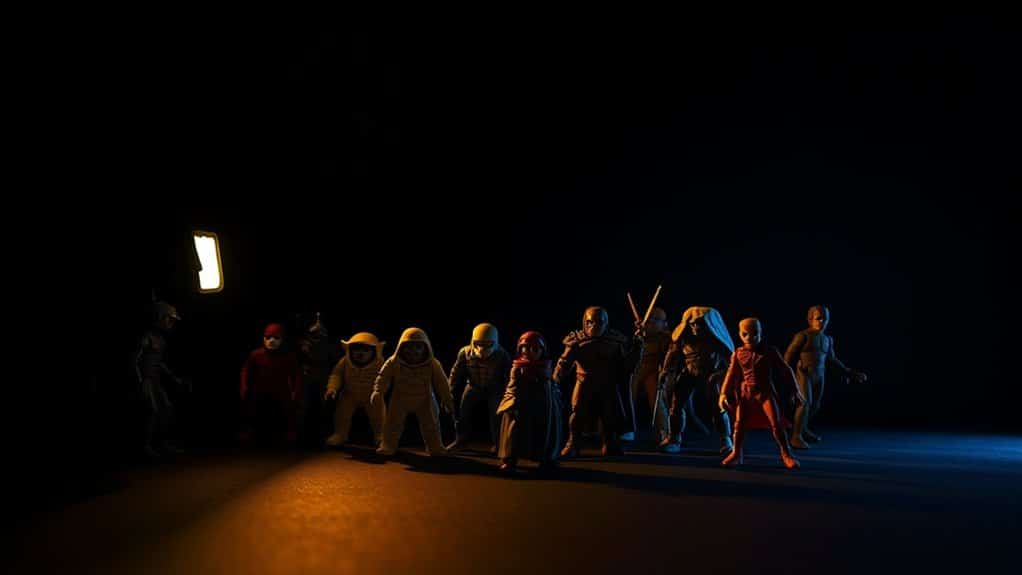
When selecting the right LED lights for your toy figures, consider the color temperature and brightness that best suit your display. A cooler color temperature can give your figures a crisp and modern look, while warmer tones create a cozy, nostalgic feel. Evaluate the brightness level as well; too dim, and your details might be hidden, but too bright can cause harsh shadows. Aim for adjustable LED lights, allowing you to tweak settings based on different displays or moods.
Additionally, check for flicker-free options to avoid any unwanted visual disturbances when photographing or observing your setup. Look for battery-operated lights for flexibility if your display location lacks outlets. By carefully choosing your LED lights, you’ll enhance the visual impact of your toy figures considerably.
Mastering Your Phone Flash

To get the most out of your phone flash, start by adjusting the flash settings to fit your scene. It’s crucial to create soft lighting to avoid harsh shadows on your toy figures. Try using a diffuser or a simple piece of tissue paper over the flash for a gentle, even glow.
Adjusting Flash Settings
Mastering your phone’s flash settings is essential for capturing toy figures in their best light. With the right adjustments, you can highlight details without overwhelming your toy’s features. Here’s how you can enhance your lighting techniques:
- Adjust Flash Intensity: Check if your phone allows you to reduce the flash brightness. A softer flash can prevent harsh shadows.
- Use Flash Exposure Compensation: Some phones let you tweak flash exposure. Decrease it slightly to avoid overexposing your subject.
- Experiment with Flash Modes: Switch between auto, on, and off modes to see what gives the best results. Each scene might need a different approach.
- Try Flash Sync: If supported, sync flash with shutter speed. This can help in freezing motion while maintaining clarity.
These settings will help make your toy figures shine!
Creating Soft Lighting
Anyone can transform a simple photo into an enchanting image with soft lighting. To achieve this with your phone’s flash, start by diffusing the light. Place a thin piece of tissue or a translucent material over your phone’s flash. This step softens the harshness and spreads the light evenly over your toy figure.
Next, adjust the flash intensity if your phone allows it. Lowering the brightness can prevent overexposure and create a gentle glow around the subject. Experiment with angles by moving the phone around the toy to explore how shadows shift and soften.
Finally, use your environment. A white surface nearby can bounce and diffuse the light further, enhancing the softness. With practice, you’ll master this subtle art, creating beautiful, soft-lit photos.
Creating a DIY Light Diffuser
Transform your lighting setup with a DIY light diffuser, a simple tool that can elevate the way your toy figures are illuminated. Building one is easy and cost-effective. You’ll soften harsh shadows and create a more professional look. Here’s how you can make one:
- Materials: Grab a translucent material like baking paper, white plastic, or a thin cloth. These will help scatter the light.
- Assemble: Cut your chosen material to fit over your phone flash or LED light. Secure it with rubber bands or tape.
- Test: Place the diffuser between the light source and your figure. Verify it’s not too close to avoid overheating.
- Adjust: Experiment with different materials for varying diffusion effects.
Enjoy your enhanced photography setup!
Experimenting With Light Angles
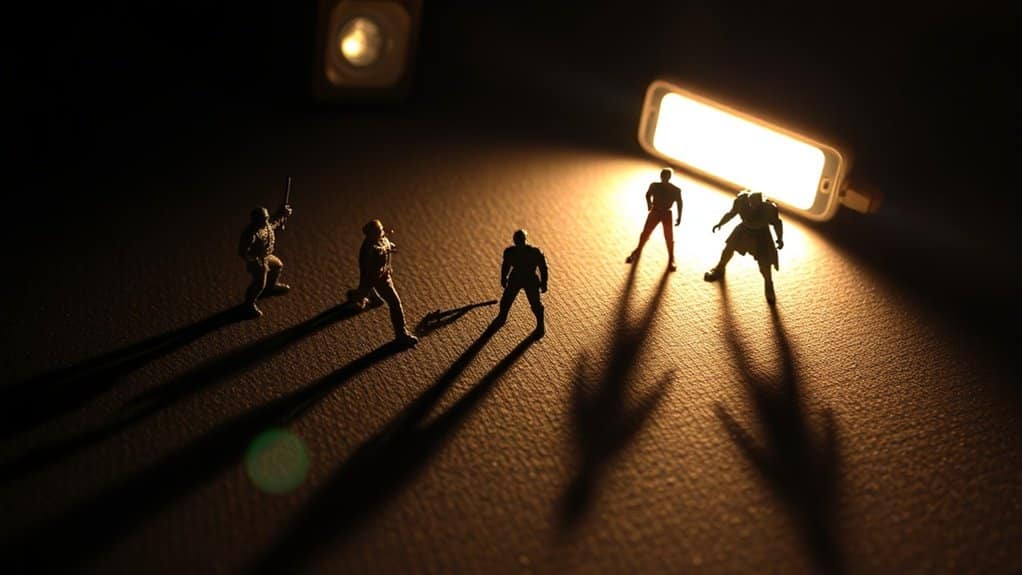
Exploring different light angles can markedly change the mood and detail of your toy figure photography. Start by moving your phone flash or LED light around the figure. Notice how a higher angle enhances shadows, giving a more dramatic look. Lower angles can create mysterious effects, while side lighting highlights textures and contours.
Don’t hesitate to tilt your light source slightly to the left or right; it can reveal unique features you might’ve missed. Experiment with backlighting to create a silhouette effect, adding depth and intrigue. You’ll discover that even slight adjustments can markedly impact the overall composition.
Remember to take multiple shots from various angles and review them. This way, you’ll understand which angles best capture your toy’s personality and details.
Enhancing Colors and Textures
To make your toy figures pop, you’ll want to focus on color balance techniques that enhance their vibrant hues. Experiment with lighting angles to bring out textures, adding depth and realism to the scene. Don’t forget to adjust your lighting to highlight details, making each figure stand out uniquely.
Color Balance Techniques
When capturing the intricate details of toy figures, achieving the right color balance is essential for enhancing both colors and textures. You want your figures to look vibrant and life-like, and color balance plays a significant role. Start by adjusting your camera’s white balance settings to match the light source, whether it’s a phone flash or LED lights. Experiment with different settings to find what works best for your specific lighting conditions.
Here are some steps to perfect color balance:
- Use natural light: Whenever possible, position your toy figures near a window for softer, natural light.
- Adjust white balance: Tweak your camera’s settings to match your light source.
- Experiment with filters: Use filters to enhance colors.
- Review and edit: Always review photos and make necessary edits for perfect balance.
Texture Highlighting Tips
While achieving the right color balance sets the stage for stunning toy figure photography, emphasizing textures brings your images to the next level. To highlight textures effectively, start by positioning your phone’s flash or LED light slightly to the side of your toy figure. This side lighting accentuates surface details, revealing intricate patterns and contours that might otherwise go unnoticed.
Experiment with different light intensities to find the perfect setting that enhances texture without overpowering it. Try using a diffuser, like a piece of paper or a white plastic bag, to soften harsh light and prevent unwanted shadows. Aim for a balance where textures are visible but not overshadowed by glare. Remember, subtle adjustments can make the textures pop and elevate your toy photography.
Lighting Angle Effects
Although the direction of light can dramatically transform your toy figure photography, adjusting the angle is key to enhancing both colors and textures. By experimenting with angles, you can reveal vibrant hues and intricate details that were previously hidden. For ideal results, follow these tips:
- Side Lighting: Position the light source to the side of your figure to create dynamic shadows, adding depth and dimension to the colors and textures.
- Back Lighting: Place the light behind your figure for a glowing effect that outlines the toy and highlights edges, emphasizing texture.
- Top Lighting: Shine light from above to illuminate the top surfaces, adding a soft shine and enhancing the toy’s color saturation.
- Low Angle Lighting: Use a low angle to cast dramatic shadows, accentuating textures and bringing out vivid details.
Using Backgrounds to Your Advantage
To enhance the visual appeal of your toy figures, use backgrounds creatively to set the scene and add depth. Choose a background that complements your figure’s theme. For a sci-fi character, consider a starry night or futuristic cityscape. If you’re working with a fantasy figure, a forest or castle backdrop can create a magical atmosphere.
Experiment with colors and textures. A simple colored paper or fabric can provide contrast, making your figure pop. Alternatively, printed backdrops with intricate designs can add complexity. Make sure your background doesn’t overpower your figure; it should enhance, not distract.
Adjust your lighting to match the background’s mood. Subtle shadows or highlights can add realism, helping integrate your toy figure seamlessly into its setting.
Capturing Dynamic Poses
Capturing dynamic poses breathes life into your toy figures, transforming them from static displays into vivid storytellers. You’ll need creativity and a keen eye to make your figures appear as if they’re in the middle of an action-packed scene. To achieve this, consider the following tips:
- Study Real-Life Movements: Observe how people and animals move. Apply this knowledge to position your figures in realistic and engaging poses.
- Use Props: Incorporate small items to enhance the story. A strategically placed prop can add depth and context to a scene.
- Adjust Angles: Experiment with different angles. A low angle can make figures appear more powerful, while a high angle might suggest vulnerability.
- Capture Mid-Action: Freeze your figures in dynamic mid-action poses to convey motion and energy.
Editing and Post-Processing Techniques
Once you’ve mastered dynamic poses, enhancing your toy figures with editing and post-processing techniques can elevate your photography to new heights. Start by using a photo editing app on your phone. Adjust the brightness and contrast to make colors pop and highlight details. Play with saturation to guarantee your figures look vibrant but natural. Utilize the crop tool to frame your subject perfectly, removing distractions from the background.
Try adding a slight vignette to draw focus to the center of your image. If your phone supports it, use features like selective focus to blur the background and enhance depth. Don’t be afraid to experiment with filters for a creative touch. Remember, subtlety is key; you want to enhance, not overwhelm.
Frequently Asked Questions
Can Different Phone Camera Modes Affect Lighting for Toy Photography?
Yes, different phone camera modes can affect lighting for toy photography. You should experiment with modes like portrait, night, or HDR. They can enhance shadows, highlights, and details, giving your toy figures a more professional and vibrant look.
What Are Some Common Mistakes to Avoid When Lighting Toy Figures?
You often place lights too close, creating harsh shadows. Don’t forget to diffuse the light for even coverage. Avoid inconsistent color temperatures by sticking to one light source. Make certain your background isn’t too busy, distracting from the toy.
How Can I Achieve a Natural Look Without Expensive Equipment?
Think of your phone flash and LED lights as paintbrushes. Position them at angles to mimic sunlight, and diffuse with a simple white sheet to soften shadows. Experiment with distances to achieve that natural, professional look.
Are There Specific Phone Apps to Enhance Toy Figure Photography?
You should try apps like Lightroom or Snapseed. They offer tools to enhance your toy figure photography, adjusting exposure, contrast, and color balance easily. Don’t forget to experiment with angles and lighting for the best results.
How Does Room Size and Layout Impact Lighting Setup?
Your room’s size and layout affect light diffusion and reflection. Smaller rooms amplify light, while larger spaces may need additional sources. Walls and furniture can create shadows, so rearrange to optimize lighting angles for your toy figures.
At a Glance
You’ve now painted a vivid scene, where toy figures spring to life under a dance of light and shadow. With the gentle glow of LED lights and the focused burst of your phone flash, each miniature detail is accentuated. Imagine colors popping, textures whispering stories, and dynamic poses frozen in time. As you adjust angles and backgrounds, you’re not just capturing a figure, you’re crafting a masterpiece. Keep experimenting, and let your creativity shine.


