To ace toy photography with matte and glossy figures, knowing their light responses is key. Use diffused light for matte, employing softboxes to highlight textures. For glossy figures, manage reflections with direct, angled light and polarizing filters. Reflectors can bounce light for shadow fill, while diffusers soften it. Post-processing lets you polish images by adjusting color and removing flaws. Discover more techniques to take your toy photography to the next level.
Understanding the Characteristics of Matte and Glossy Figures
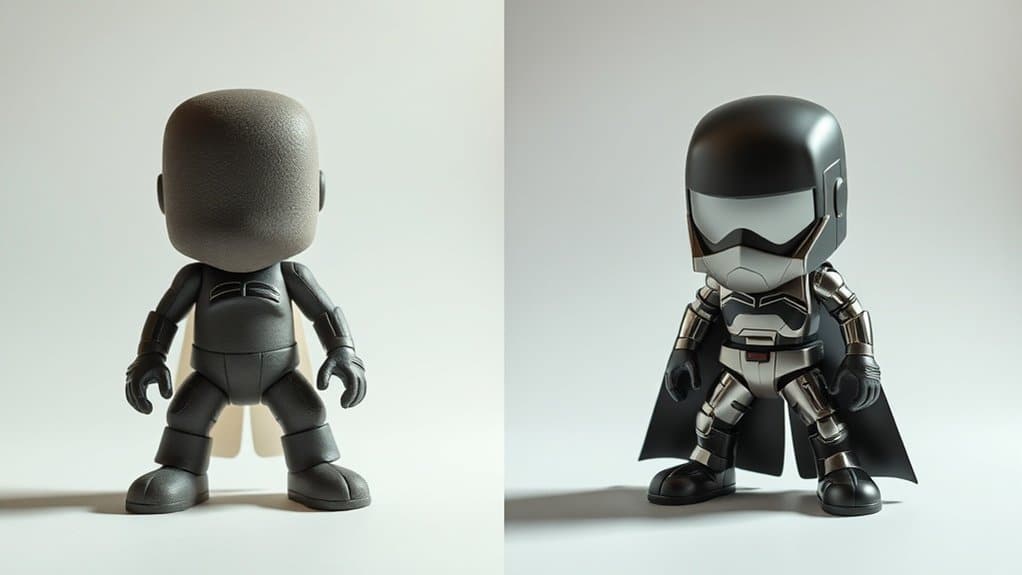
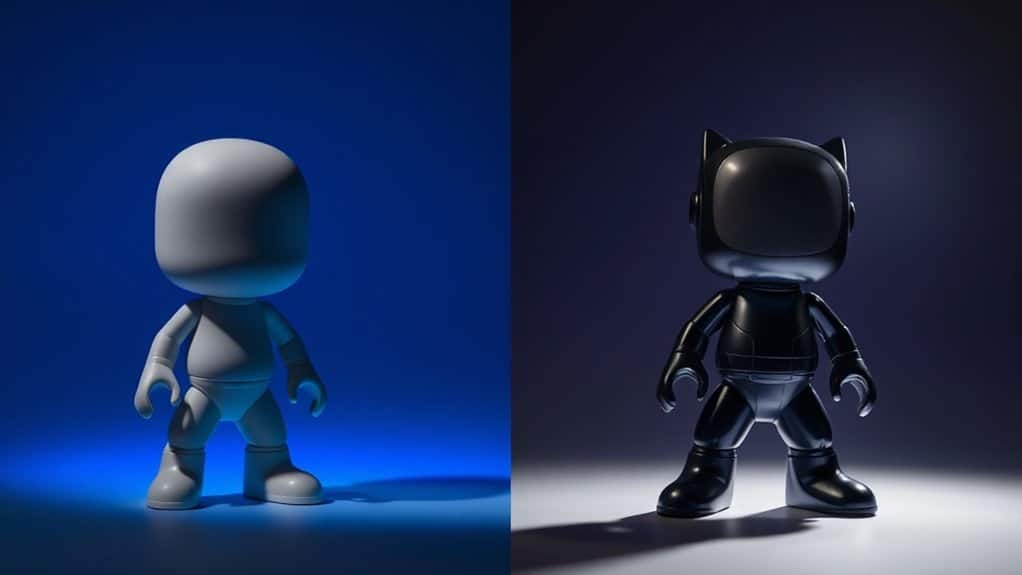
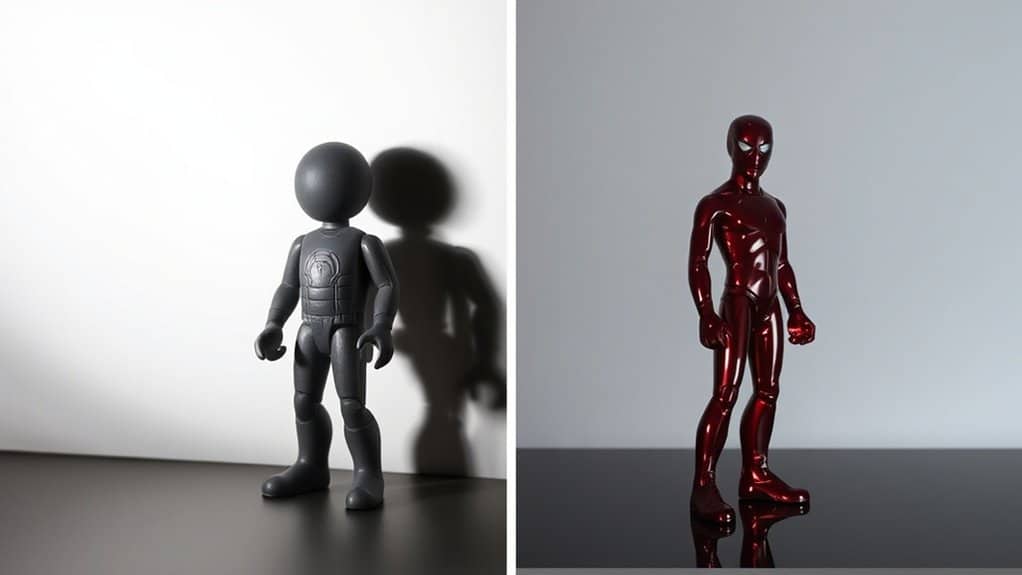
When photographing toys, understanding the distinct qualities of matte and glossy figures is vital. Matte figures have a non-reflective surface that diffuses light, giving them a soft, even appearance. They usually don’t show reflections or glares, making them easier to capture without unwanted highlights. You can focus on the details and colors without distractions. On the other hand, glossy figures shine and reflect their surroundings, adding vibrancy and a dynamic look to your images. However, they can present challenges with glare and reflections, making composition essential. Pay attention to the angles and background, as these can affect how light interacts with glossy surfaces. By recognizing these characteristics, you can better control the visual outcome of your toy photography.
Choosing the Right Light Source for Different Surfaces
While understanding the characteristics of matte and glossy figures gives you a foundation, selecting the right light source can elevate your toy photography. For matte figures, use diffused lighting to highlight textures without creating harsh reflections. Softboxes or umbrellas work well, providing even illumination that prevents unwanted shadows.
Glossy figures, on the other hand, require more controlled lighting. Direct light can create appealing highlights, accentuating the glossy surface. However, you should be cautious with angles to avoid glare. Using a ring light or a focused LED can help you achieve a balanced effect.
Experiment with different light intensities and positions to find what works best. Remember, the key is to complement each figure’s surface properties while maintaining visual interest in your photos.
Techniques for Softening Light on Matte Surfaces
To achieve a natural and soft look for matte surfaces in toy photography, consider using diffused light sources. You can easily create this effect by placing a softbox or using a white umbrella with your light. This spreads the light evenly, preventing harsh shadows and making your matte figures appear more lifelike.
Another technique involves bouncing light off a white reflector or wall. This indirect approach softens shadows without washing out details. If you’re shooting outdoors, an overcast sky naturally provides diffused light, giving your toys a gentle, even glow.
Experiment with different angles and distances to find the perfect balance. Also, try using sheer fabric to filter the light. With these methods, you’ll keep your matte figures looking soft and beautifully illuminated.
Managing Reflections on Glossy Figures
Glossy figures in toy photography can present unique challenges due to their reflective surfaces, which often create unwanted highlights. To manage these reflections, start by controlling your lighting environment. Position your lights at angles that minimize direct reflection back into the camera. Try using softer, diffused light sources to reduce harshness. Adjust your shooting angle to capture the figure’s details without prominent glare. It might also help to move around and test different light placements until you find the perfect setup.
Experiment with the distance between your light source and the figure. Sometimes, simply pulling the light back can lessen reflections. If reflections persist, consider using a polarizing filter on your lens to reduce glare and enhance the figure’s natural color and texture.
Using Reflectors and Diffusers for Balanced Lighting

Balancing lighting in toy photography becomes much easier when you incorporate reflectors and diffusers into your setup. Reflectors bounce light onto your subject, filling in shadows and creating a more even exposure. They’re particularly useful when your primary light source is too harsh or directional. You can use simple materials like white foam board or a professional reflector for the task.
Diffusers, on the other hand, soften the light hitting your toys. By placing a diffuser between your light source and the figure, you’ll reduce harsh shadows and glare, especially on glossy surfaces. This results in a softer, more natural look. Combine both tools to create balanced lighting that highlights details without overpowering your subject. With practice, you’ll master lighting for stunning toy photos.
Experimenting With Angles and Shadows
When you experiment with the position of your light source, you’ll notice how dramatically it can change the mood of your toy photos. By controlling shadow intensity, you can highlight details or create a more mysterious atmosphere. Don’t forget to play with different angles to see how they impact the overall look and feel of your composition.
Light Source Positioning
Positioning your light source effectively can dramatically transform your toy photography, adding depth and interest to your images. By experimenting with different angles and shadows, you can achieve stunning results. Here’s how you can experiment:
- Side Lighting: Place the light source to the side of your toy. This creates dramatic shadows and highlights texture, perfect for matte figures.
- Back Lighting: Position the light behind your toy to create a silhouette effect, enhancing the outline and adding mystery.
- Top Lighting: Shine light from above to emphasize height and form, giving a natural look to your scene.
- Front Lighting: Direct light from the front to reduce shadows, great for showcasing details on glossy figures.
Play around with these positions and watch your images come alive!
Shadow Intensity Control
Exploring light source positioning opens up the opportunity to further refine your toy photography techniques by mastering shadow intensity control. Start by adjusting your light’s angle relative to your figure. A low angle can cast longer, dramatic shadows, adding depth and intrigue to your scene. Conversely, a higher angle creates softer, shorter shadows, perfect for a more balanced look.
Experiment with distance too; moving your light closer increases shadow contrast, while pulling it back softens them. Remember, matte figures absorb light more evenly, reducing harshness, whereas glossy figures reflect light, intensifying shadows. Notice how these changes affect your composition and mood. With practice, you’ll find the sweet spot where shadows enhance rather than distract, giving your photos that professional touch.
Angle Variation Impact
As you explore angle variation impact, consider how altering your light’s direction can dramatically transform your toy photography. By experimenting with angles and shadows, you can create dynamic images that highlight your figures’ features. Here’s how to make the most of angle variations:
- Side Lighting: Emphasize textures by casting shadows across your figure’s surface. This works well for matte figures, revealing their intricate details.
- Backlighting: Create silhouettes or rim lighting effects. This can add depth and drama, especially with glossy figures, enhancing their reflective properties.
- Top Lighting: Simulate natural sunlight for a balanced look. This angle can evenly illuminate your subject, great for both matte and glossy figures.
- Low Angle Lighting: Evoke a sense of power or mystery. Shadows become longer and more dramatic, adding intensity to your shots.
Post-Processing Tips for Enhancing Toy Photography
When you’ve captured your toy photography masterpiece, the journey doesn’t end there; post-processing can elevate your images from good to extraordinary. Start by adjusting exposure and contrast to make your figures pop. For matte figures, enhance textures with subtle sharpening, bringing out details without overdoing it. For glossy figures, focus on controlling highlights to maintain realistic reflections. Use color correction to match the scene’s mood, ensuring your toys look vibrant and lifelike. Don’t forget to clean up any dust or imperfections using spot removal tools. Finally, cropping can refine composition, drawing attention to key elements in your shot. Practice these techniques, and your toy photography will not only capture attention but also tell a compelling story.
Frequently Asked Questions
How Can I Prevent Dust From Showing on Glossy Figures in Photos?
To prevent dust from showing on glossy figures in photos, wipe them with a microfiber cloth before shooting. Use controlled lighting to minimize reflections highlighting dust. Adjust angles to reduce visible dust and improve overall image quality.
What Camera Settings Work Best for Capturing Toy Details?
You might think a high ISO’s necessary, but it can introduce noise. Use a low ISO, set your aperture around f/8 for sharpness, and adjust shutter speed for proper exposure. Don’t forget to stabilize your camera!
How Do Weather Conditions Affect Outdoor Toy Photography?
Weather conditions can dramatically impact your outdoor toy photography. Overcast days provide soft, even lighting, reducing harsh shadows. On sunny days, you’ll need to manage intense light and shadows, possibly using diffusers or reflectors for balance.
Can Smartphone Cameras Effectively Capture Both Matte and Glossy Figures?
“Don’t judge a book by its cover.” Your smartphone camera can effectively capture both matte and glossy figures. It’s all about understanding light and angles. With practice, you’ll enhance your photography skills and surprise yourself with stunning results.
What Are Budget-Friendly Lighting Options for Beginners in Toy Photography?
You should try LED ring lights or desk lamps for budget-friendly lighting. They provide even illumination and are affordable. Experiment with natural light too; it’s free and can create stunning effects in your toy photography.
At a Glance
In the enchanting world of toy photography, your mastery over light transforms static figures into vibrant stories. Whether you’re gently caressing the textures of matte surfaces or taming the wild reflections of glossy figures, the right light is your paintbrush. Embrace the dance of angles and shadows, letting them narrate tales that captivate. In post-processing, polish your gems, ensuring each shot sparkles with life. With these techniques, your toy photography becomes a symphony of light and creativity.


