Craft your own DIY studio props for toy photography by sketching building designs and using materials like foam board to assemble miniature structures. Enhance backdrops with painted cardboard or printed landscapes. Create dynamic effects using LED lights and household items for texture, like crumpled foil or bubble wrap. Craft nature scenes with found materials like twigs and moss. These tips will set the stage for vibrant storytelling, and there’s so much more to explore.
Crafting Realistic Miniature Buildings
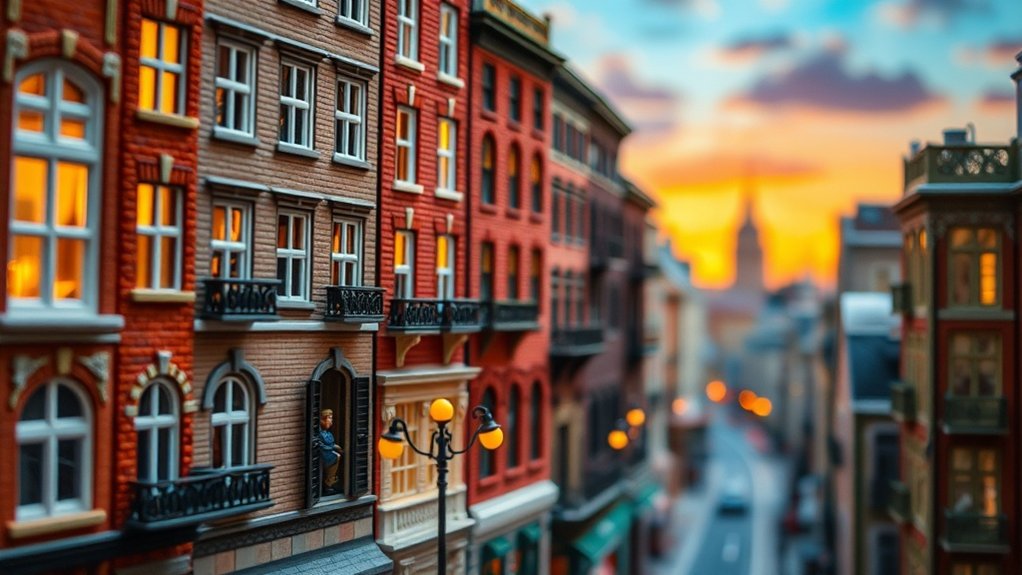
When it comes to crafting realistic miniature buildings for toy photography, every detail matters. You’ll want to start by sketching out the building’s design, keeping the scale in mind to match the toys. Use lightweight materials like foam board or balsa wood for the structure, guaranteeing they’re easy to cut and assemble. Pay attention to the textures; you can replicate brick, wood, or stone using paint techniques. Don’t forget to add windows and doors—these small elements bring your buildings to life. Use thin plastic or acetate for windows to mimic glass. As you assemble, confirm all pieces fit snugly, avoiding gaps. Finally, paint with precision, using a fine brush for details and weathering effects. Your dedication transforms simple materials into enthralling scenes.
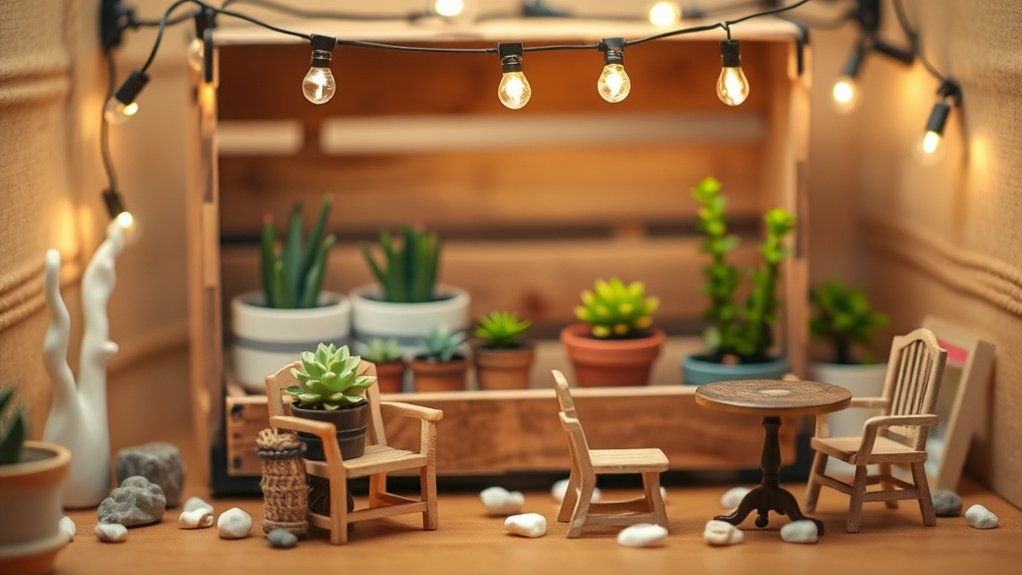
Designing Custom Backdrops With Everyday Materials
Creating custom backdrops with everyday materials can elevate your toy photography to new heights. You don’t need fancy equipment; just a little creativity and some household items. Start by considering the scene you want to create, then gather materials that fit your vision. Here are some ideas to get you started:
- Cardboard and Paint: Use cardboard as a canvas. Paint it with patterns or landscapes to create unique backgrounds. It’s lightweight and easily customizable.
- Fabric Scraps: Old sheets or leftover fabric can make great textured backdrops. Drape them behind your toys to add depth and interest.
- Printed Photos: Print large images of skies, forests, or cityscapes. Tape them to a wall or board for a realistic setting without leaving your home.
Creating Dynamic Water and Fire Effects
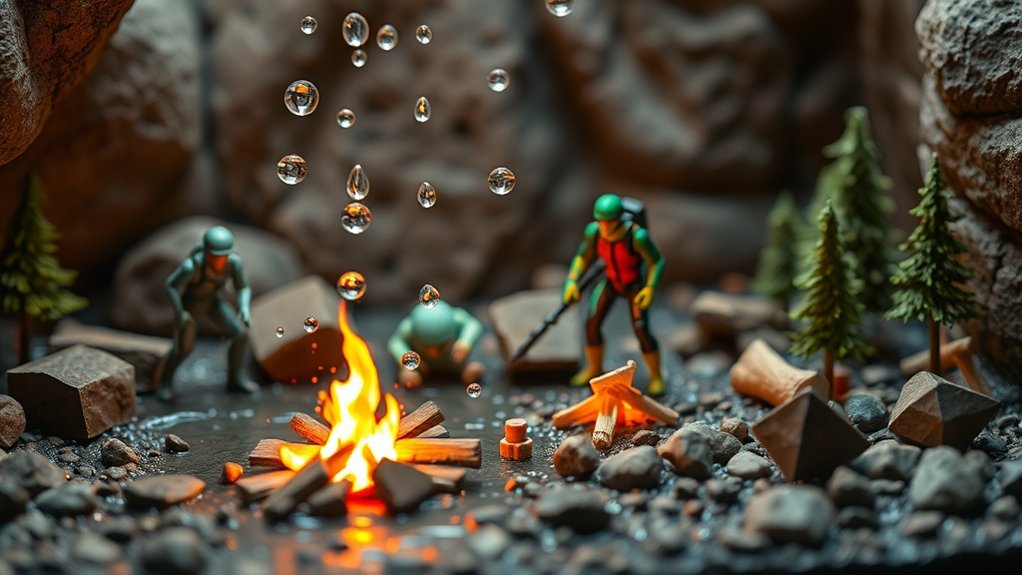
While capturing toy photography, adding dynamic water and fire effects can bring your scenes to life. To create water effects, use a spray bottle to mist the scene lightly, simulating rain or ocean spray. You can also use clear hair gel on a flat surface to mimic still water. For fire effects, small LED tea lights add a warm glow without the risks of real flames. You can cover them with colored cellophane for different hues. Positioning small mirrors or reflective materials can enhance these effects by bouncing light around. Experimenting with angles and lighting will make your water and fire elements more realistic. Remember, the key is to keep the scene safe and manageable while achieving the desired dramatic effect.
Using Household Items for Unique Textures
Toy photography thrives on creativity, and using everyday household items can add unique textures to your scenes. You don’t need to spend a fortune on fancy backdrops or props when you can find hidden gems right at home. Here are three items you can repurpose to create striking textures:
- Aluminum Foil: Crumple it for rocky terrains or use it as a reflective surface to add interesting light effects.
- Bubble Wrap: Lay it down for a bumpy, alien landscape. It works great for futuristic or out-of-this-world scenes.
- Sandpaper: Its gritty surface can mimic desert sands or gritty urban settings, providing a rugged backdrop.
Building Detailed Natural Environments
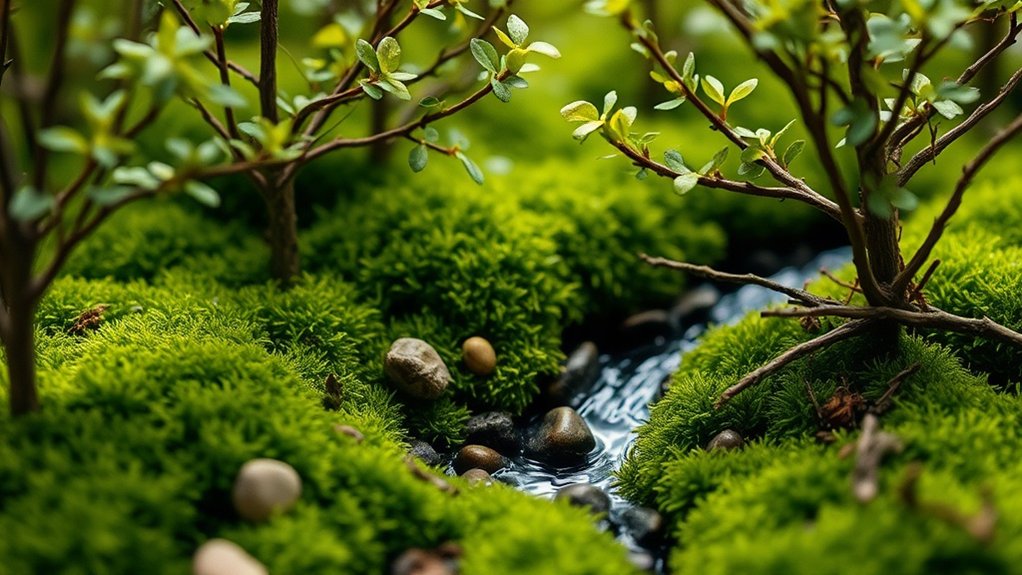
Elevate your toy photography by crafting detailed natural environments that captivate the viewer’s imagination. Start by gathering materials like moss, twigs, and small stones from your backyard or local park. These simple elements can create realistic forest floors or rugged terrains. Use a shallow container to arrange your natural elements, ensuring a tidy workspace. Add depth by layering moss and rocks, then sprinkle in fine sand or soil for texture.
Introduce water features by using a small mirror to mimic a pond or stream. Reflective surfaces can add dimension and light to your scene. For greenery, make tiny trees from wire and foam or use artificial foliage for a lasting effect. Experiment with lighting to enhance shadows and highlights, bringing your miniature world to life.
Frequently Asked Questions
How Do I Safely Light My Toy Photography Scenes?
To safely light your scenes, use LED lights to avoid heat damage. Diffuse the light with softboxes or white paper for even illumination. Position lights to minimize shadows. Remember, always turn off lights when you’re finished.
What Camera Settings Work Best for Capturing Small Details?
Capturing small details is like threading a needle; use a low ISO, around 100-200, to reduce noise. Set your aperture between f/8-f/16 for better depth and use a tripod to guarantee stability.
How Can I Effectively Scale Props for Different Toys?
To effectively scale props for different toys, start by measuring the toy’s height and proportions. Then, create props proportionate to these dimensions. Use reference photos and adjust accordingly to maintain realistic scenes and achieve the desired visual impact.
What Are Some Tips for Organizing and Storing Props?
To organize props, label clear bins by category and stack them for easy access. Use shelves to maximize space, and regularly declutter. Keep frequently used items at eye level, ensuring you can find everything quickly.
How Do I Prevent Glare and Reflections on Shiny Toy Surfaces?
Treat shiny toys like a mirror reflecting the sun. Position lights at angles to avoid direct reflections. Use diffusers or polarizing filters to soften glare. Experiment with various setups until you capture that perfect shot.
At a Glance
You’ve now got a treasure trove of tips for crafting enchanting toy photography scenes. With a sprinkle of creativity and a dash of DIY magic, you’ll transform everyday items into miniature masterpieces. Don’t let the lack of store-bought props rain on your parade; instead, let your imagination soar. Embrace the happy accidents along the way, and watch your toy photography come alive with personality and charm. Your miniature worlds are just waiting to be discovered! Experimenting with macro photography techniques for toys can elevate your images to new heights, capturing intricate details that bring your scenes to life. As you play with different angles and lighting, you’ll uncover new perspectives that make your toys the stars of the show. Remember, the joy is in the process, so keep exploring and let each shot tell its own story! Consider investing in mobile photography tripods and accessories to elevate your shots and ensure stability in various environments. These tools can help you capture intricate details and unique angles that will bring your scenes to life. As you explore and experiment, remember that the journey is just as important as the final image, so keep pushing the boundaries of your creativity!


