In movie-style toy photography, immerse yourself in creating emotion through miniature scenes. Tell intricate stories with carefully posed figures and detailed backdrops, capturing cinematic moments in each frame. Use lighting to add drama, and props to amplify the narrative. Adjust colors and contrast in editing for that blockbuster look. With techniques like the rule of thirds and leading lines, your shots will evoke powerful emotions. There’s much more to explore in crafting these enchanting scenes.
The Art of Storytelling Through Toys

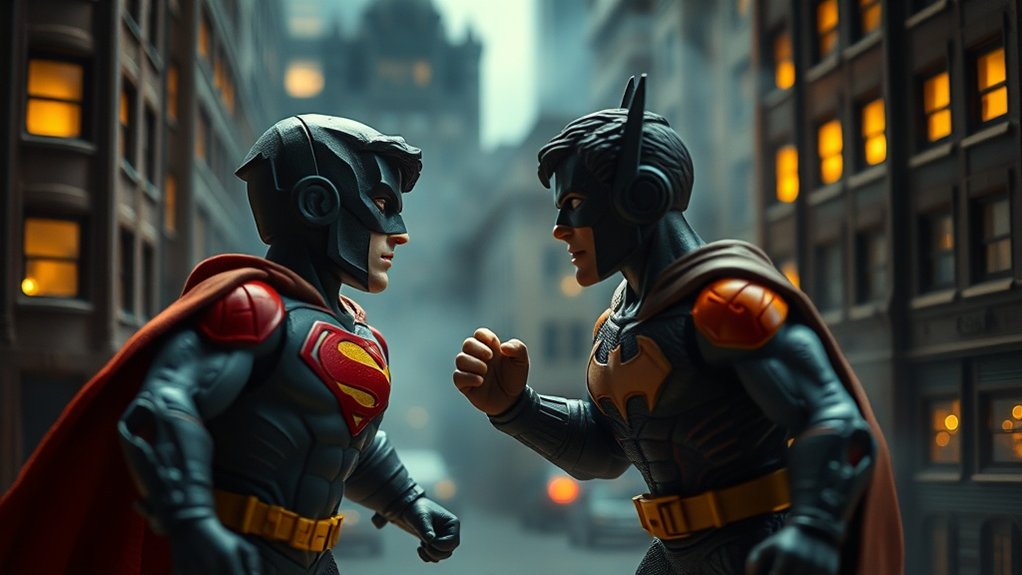
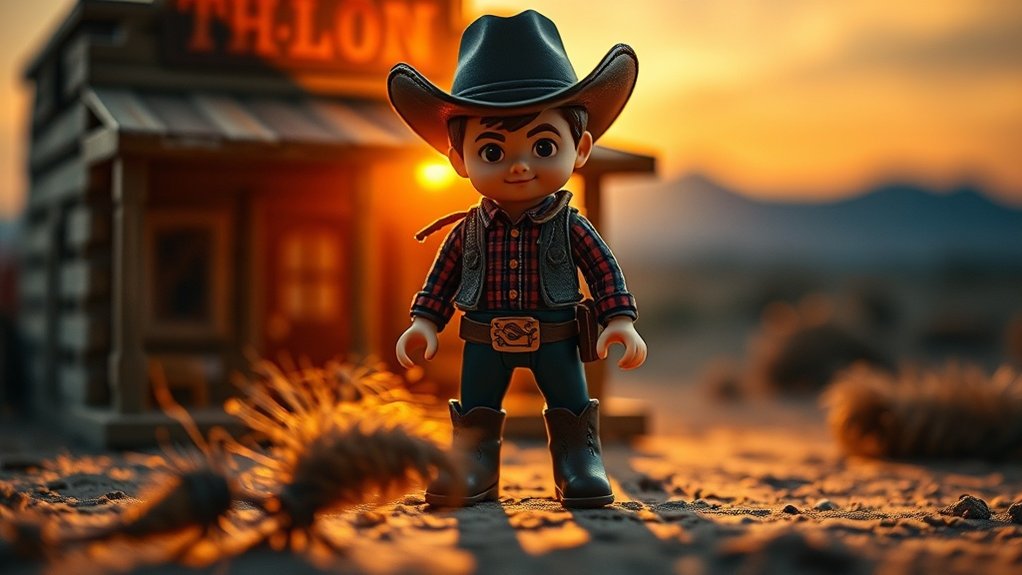
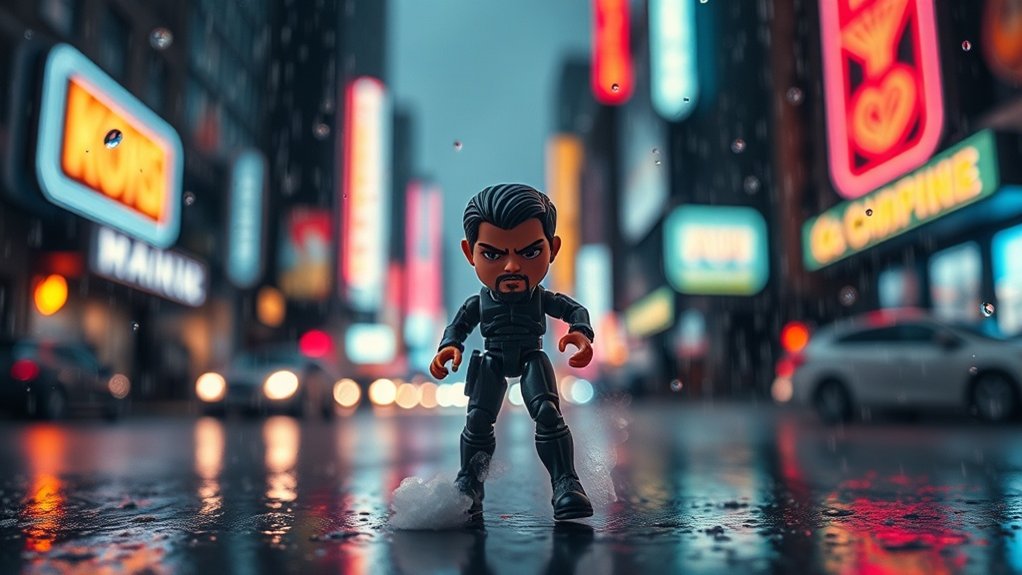
Although it might seem like child’s play, toy photography is a compelling art form that weaves intricate stories through miniature worlds. You can craft entire narratives with just a few figures, capturing moments that echo grand cinematic tales. The key is in the details—every pose, prop, and backdrop contributes to the story you’re telling. As you arrange your toys, think about the emotions you want to convey. Are they on a heroic quest, or caught in a moment of reflection? Engage your audience by focusing on the characters’ expressions and interactions. Your lens becomes the window into their universe, allowing viewers to immerse themselves in the scene. Remember, each shot you take is a frame in a much larger narrative.
Mastering Lighting Techniques for Dramatic Effect
Lighting can make or break your toy photography, adding depth and drama to your scenes. To create a cinematic feel, use a single light source to mimic sunlight or a streetlamp. Position it at an angle to cast long shadows, enhancing the mood. Experiment with different light intensities to highlight textures and details in your figures. Consider incorporating colored gels over your light source to create unique atmospheres that can evoke various emotions. Additionally, exploring mood lighting techniques for photography can further elevate your images, allowing you to create a narrative with just light and shadow. Remember, the interplay between light and dark is key to achieving compelling compositions that capture the viewer’s imagination.
Try using colored gels over your lights for added emotion—blue for somber scenes or red for intensity. Don’t be afraid to play with backlighting to create striking silhouettes, making your toys the star of the show. Reflectors can help bounce light into shadowed areas, maintaining balance. Always remember, subtle changes in lighting can transform a mundane setup into a mesmerizing, emotionally charged image.
Composing the Perfect Shot: Tips and Tricks
Now that you’ve mastered lighting techniques, it’s time to focus on composing the perfect shot. Start by considering the rule of thirds. Divide your frame into a grid and position your subject along these lines for balance. Look for leading lines in your setting to naturally guide the viewer’s eye to your focal point. Don’t forget about angles—experiment with shooting from different heights to add drama and intrigue.
Think about depth. Introduce layers and elements in the foreground, middle ground, and background to create a sense of space. Play with framing; use objects to create a natural frame around your subject, which adds focus. Finally, remember that simplicity is key. Avoid clutter and distractions to guarantee your subject remains the star of the shot.
Creating a Cinematic Atmosphere With Props and Backdrops
When you want to create a cinematic atmosphere in your toy photography, props and backdrops are your best allies. Start by choosing props that complement your scene’s narrative. Miniature furniture, vehicles, and everyday objects add authenticity to your setup. Don’t hesitate to repurpose household items; a simple lamp can become an impressive spotlight or a cereal box might transform into a cityscape.
Backdrops set the stage for your story. Consider printed scenes, colored paper, or fabric to evoke different moods. A cloudy sky print might suggest drama, while a vibrant sunset could convey warmth. Experiment with depth by placing objects at varying distances from the backdrop. This creates a sense of scale and dimension, making your toy photography appear larger than life.
Editing Tips to Enhance the Movie-like Quality
While editing can feel intimidating, it’s the key to transforming your toy photography into cinematic masterpieces. Start by adjusting the contrast and saturation to make colors pop, reminiscent of a Hollywood blockbuster. Use tools like Lightroom or Photoshop to fine-tune lighting, creating dramatic shadows and highlights that add depth.
Don’t forget about the power of cropping. A tighter frame can create tension or focus on your subject, guiding the viewer’s eye exactly where you want. Play with color grading to evoke specific moods; warmer tones can suggest nostalgia, while cooler hues might hint at mystery or suspense.
Finally, add subtle vignettes to draw attention to the center. With these edits, your toy scenes will leap from ordinary to extraordinary, capturing that movie-like essence.
Frequently Asked Questions
How Can I Choose the Right Camera for Toy Photography?
To choose the right camera for toy photography, determine your budget and consider features like macro capabilities, manual settings, and portability. Test different models to see what feels comfortable and suits your style. Don’t forget to research reviews!
What Are Some Budget-Friendly Alternatives for Professional Photography Equipment?
Immerse yourself in the world of photography with a frugal eye. Use your smartphone as your lens and natural light as your canvas. Enhance your shots with DIY reflectors or thrifted tripods to create enchanting images on a budget.
How Do I Prevent Dust and Fingerprints on My Toys During Shoots?
Keep your toys in airtight containers when not in use and handle them with gloves during shoots. Use a microfiber cloth to gently clean before shooting, ensuring your toys stay dust-free and fingerprint-free for perfect shots.
Are There Specific Toy Brands Recommended for Movie-Style Photography?
You should consider brands like Hot Toys, NECA, or Bandai for movie-style photography. They offer high-quality, detailed figures that capture emotions well. Always research specific lines to guarantee they meet your artistic needs and vision.
How Can I Ensure My Photos Have a Consistent Theme or Style?
To guarantee consistent style, set a specific color palette, choose similar backgrounds, and maintain uniform lighting. Edit with the same filters, angles, and compositions. This parallel approach creates harmony, transforming your photos into a cohesive narrative.
At a Glance
You’ve got the tools to bring your toy photography to life, capturing emotion in every miniature moment. With storytelling as your backbone, you’ve mastered lighting, composition, and the art of creating cinematic scenes. Your imagination is the only limit, so don’t be afraid to push boundaries. As you fine-tune the details in editing, remember that practice makes perfect. Keep at it, and soon your photos will speak volumes, becoming worth their weight in gold.


