Selective color editing enhances toy photography by converting images to black and white while keeping select parts in color. This technique directs focus to vibrant elements like a superhero’s cape or a colorful car, creating dynamic visuals. Start with user-friendly apps like Snapseed, or use advanced tools like Adobe Photoshop for greater control. Avoid over-editing to maintain appeal. Refine your skills by exploring different tools and techniques to capture engaging toy photos that tell enthralling stories.
Understanding the Basics of Selective Color Editing
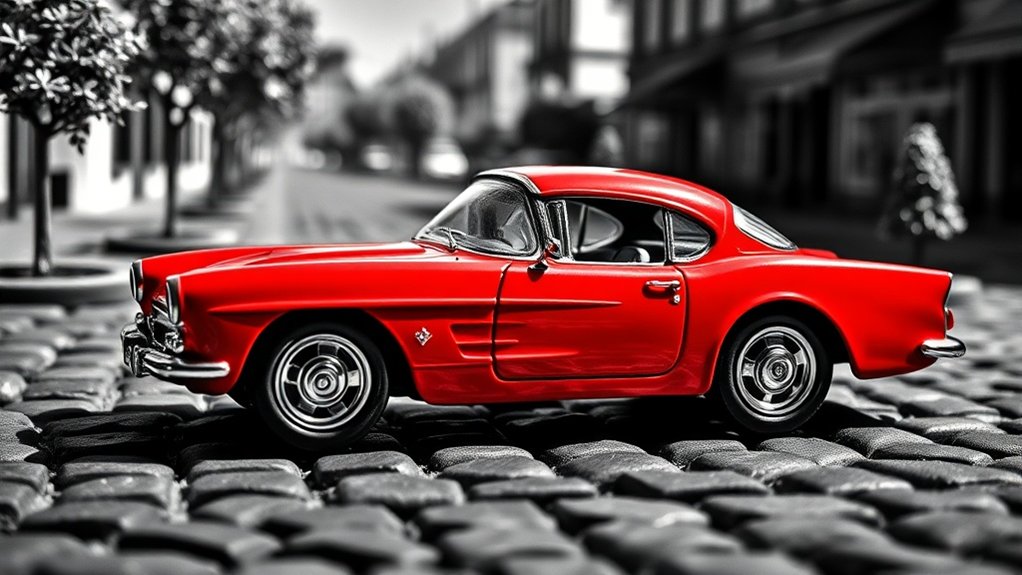
Selective color editing is a powerful tool that can elevate your toy photography by drawing attention to specific parts of an image. This technique involves transforming an entire photo to black and white while retaining color in a chosen area, creating a striking focal point. You’ll start by identifying which part of your toy photograph should stand out. This could be a vibrant superhero cape or a colorful car, anything that adds to your story.
Next, use your editing software to desaturate the image, maintaining color only in the selected area. This highlights the chosen element, guiding the viewer’s eye and enhancing the overall impact. With practice, you’ll master this technique, making your toy photos more dynamic and visually engaging.
Choosing the Right Tools for Your Editing Process
When diving into selective color editing for toy photography, it’s essential to choose the right tools that match your skill level and editing needs. Start by considering whether you prefer desktop software or mobile apps. If you’re a beginner, user-friendly apps like Snapseed or Lightroom Mobile offer intuitive interfaces and fundamental features. For more advanced editing, Adobe Photoshop provides extensive tools to manipulate color precisely, but it might require some learning.
Don’t overlook free options like GIMP, which offers robust editing capabilities similar to Photoshop. Confirm your chosen tool supports layers and masks, as they’re crucial for selective color editing. Read reviews and watch tutorials to gauge how well a tool aligns with your goals. Ultimately, the right tool enhances your creative process without overwhelming you.
Techniques for Isolating and Enhancing Specific Colors
Mastering techniques for isolating and enhancing specific colors can transform your toy photography. Start by using the HSL (Hue, Saturation, and Luminance) sliders in your editing software. This tool lets you target individual colors, adjusting their intensity and brightness. For instance, if you want vibrant reds on a toy car, increase the red saturation while keeping other hues muted. Additionally, pay attention to color temperature control in photography, as it significantly impacts the overall mood of your images. Adjusting the color temperature can create a warm or cool ambiance, enhancing the visual appeal of your shots. Experimenting with different lighting conditions and settings will further allow you to refine the colors, making them pop even more in your final compositions.
Another technique is using layer masks. Create a duplicate layer and apply your desired color adjustments. Then, use a mask to selectively reveal or hide areas, focusing on the toy’s key colors.
Finally, try using the selective color adjustment feature. It allows you to refine specific colors without affecting others, giving you precise control. Practice these methods to make your toy figures pop!
Creating Focus and Emphasis With Color Selection
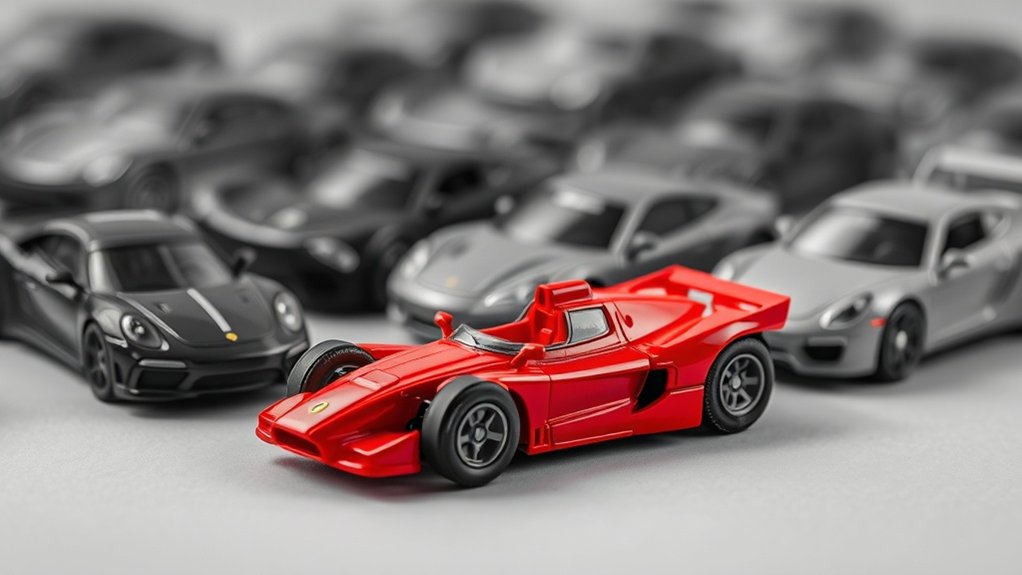
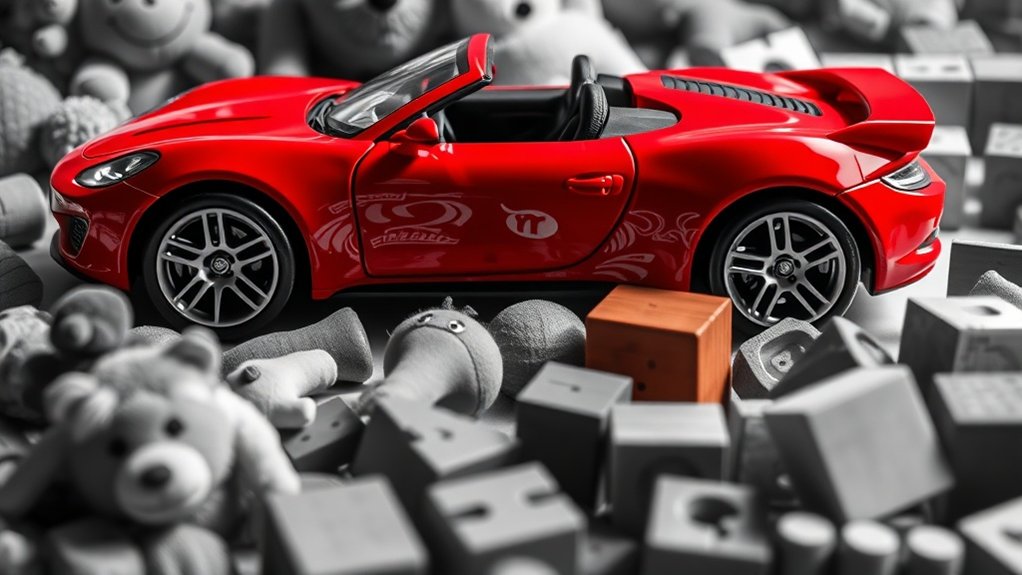
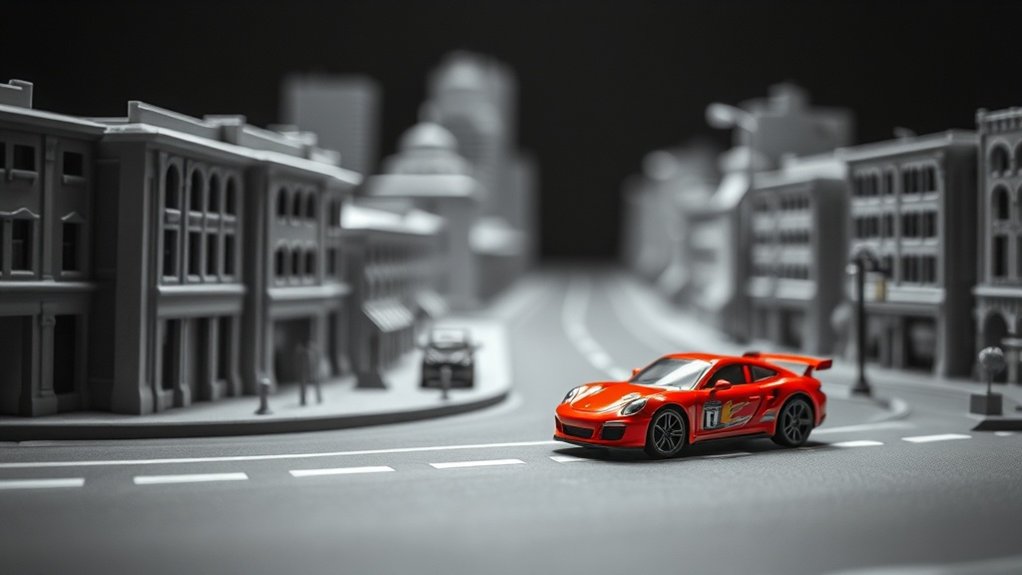
As you explore creating focus and emphasis with color selection, consider how specific color choices can direct the viewer’s attention. By selectively highlighting colors, you can make certain elements in your toy photography pop while others recede into the background. This technique allows you to guide your audience’s gaze and emphasize the most important parts of your composition. For example, you might choose to highlight the vibrant red of a toy’s cape against a monochrome backdrop, instantly drawing attention to the hero of your scene.
To enhance your photos:
- Highlight contrasting colors: Use complementary colors to make your subject stand out.
- Desaturate surroundings: Keep other elements muted to emphasize your focus.
- Play with brightness: Increase brightness on your subject to naturally catch the viewer’s eye.
Developing a Mood or Narrative Through Color
When you use selective color editing in toy photography, you can evoke specific emotional responses and tell compelling stories. By choosing certain hues, you create an atmosphere that influences how viewers perceive the scene. Whether it’s the warmth of a sunset or the mystery of a shadowy room, color becomes your tool for storytelling.
Evoking Emotional Responses
Although often overlooked, the colors in your toy photography can profoundly influence the emotional response of your audience. By adjusting hues, you can create a specific mood or evoke emotions like joy, nostalgia, or excitement. Reds and oranges can convey warmth or energy, while blues and greens might bring calmness or melancholy. Selective color editing lets you highlight certain elements, drawing attention to parts of your scene that are essential for emotional impact. When you carefully choose your color palette, you’re not just showcasing toys but crafting an emotional narrative.
- Experiment with contrasts: Use contrasting colors to make key elements pop and convey a dynamic mood.
- Focus on consistency: Maintain a consistent color theme to reinforce the desired emotional response.
- Use color isolation: Highlight specific colors to direct viewers’ emotions intentionally.
Storytelling With Hues
To craft a compelling narrative in toy photography, start by considering how hues can tell a story or set the mood. Use colors deliberately—bright, bold reds convey excitement or danger, while soft blues evoke calmness or melancholy. Your choice of color can guide the viewer’s emotional journey, making them see the toys not just as objects, but as characters within a story.
Focus on contrasts to highlight pivotal moments. A splash of vivid color against a muted backdrop can draw attention to an essential element, creating tension or anticipation. Think of how a warm sunset glow can suggest an ending or new beginning. Don’t just capture a scene; use selective color editing to breathe life into your photos, weaving a story with every hue.
Highlighting Key Features in Toy Photography
When you’re highlighting key features in toy photography, focusing on specific toy details can make your images stand out. By selectively enhancing certain scene elements, you create a dynamic composition that draws viewers’ attention to where you want it. Use color strategically to emphasize these aspects and bring your toy photos to life.
Emphasizing Toy Details
Capturing the intricate details of toys in photography can transform your images from ordinary to enthralling. You can emphasize these details by using selective color editing to draw attention to specific features. This technique allows you to highlight a toy’s unique aspects, making them pop against a subdued background. Start by selecting the key features you want to emphasize, such as facial expressions or intricate patterns. Use editing software to desaturate the surrounding areas while keeping your chosen details vibrant. This approach not only enhances the toy’s appeal but also guides the viewer’s eye.
- Focus on facial expressions: Emphasize emotions and character.
- Highlight intricate patterns: Showcase craftsmanship and detail.
- Use contrasting colors: Make features stand out boldly.
Enhancing Scene Elements
While capturing the perfect toy photograph, you shouldn’t overlook the importance of enhancing scene elements. Subtle color adjustments can transform a good photo into an extraordinary one. By selectively editing colors around your toy, you draw attention to specific features and set the desired mood. For instance, adding a warm tone to the background can intensify a heroic scene, while cooler hues might emphasize a mysterious atmosphere.
Use selective color editing to make elements like foliage, water, or sky complement the toy’s colors, creating a cohesive and engaging scene. Remember, it’s essential to maintain balance. Over-editing can detract from the toy itself, so aim for enhancements that naturally elevate the entire composition. With careful editing, your toy photography will captivate viewers effortlessly.
Common Mistakes and How to Avoid Them
Although toy photography can be a playful and creative endeavor, it’s easy to stumble into a few common pitfalls, especially with selective color editing. One frequent mistake is overdoing the effect, which can overwhelm the viewer and detract from the story you’re trying to tell. Another issue is inconsistent color grading, where the selective color doesn’t match the rest of the image, making it look disjointed. Finally, failing to plan your composition can lead to awkward results that don’t highlight the toy effectively.
To avoid these pitfalls:
- Moderate the effect: Use selective color sparingly to enhance rather than overshadow.
- Guarantee consistency: Match the selective color with overall image tones.
- Plan composition: Think ahead to guarantee the toy stands out naturally.
Inspiring Examples and Ideas for Your Projects
Toy photography becomes truly enchanting when you draw inspiration from creative examples and ideas. Imagine capturing a classic superhero action figure in a grayscale cityscape, with only their vibrant cape in color. This technique makes the subject pop, creating a dramatic effect. You can also explore nature scenes—perhaps a tiny explorer toy set against a lush, desaturated forest, with only the explorer’s vivid gear highlighted.
Consider using everyday objects to add whimsy to your shots. Picture a colorful balloon held by a monochrome toy, suggesting adventure. Experiment with lighting to enhance your compositions; a splash of color in an otherwise dark setting can evoke mystery. Let these ideas spark your creativity, and soon you’ll develop unique, eye-catching toy photography projects.
Frequently Asked Questions
How Can Selective Color Editing Affect the Overall Composition of a Photo?
Selective color editing can dramatically change a photo’s composition by drawing attention to specific details, enhancing mood, and creating contrast. You can guide the viewer’s eye, emphasizing elements you want to highlight, while adding visual interest.
What Are Some Challenges Unique to Toy Photography in Selective Color Editing?
When you’re trying to hit the nail on the head, challenges like scale, lighting consistency, and maintaining realism in toy photography arise. Avoiding an oversaturated or unnatural look can make selective color editing tricky. Practice makes perfect!
How Does Lighting Influence Selective Color Editing in Toy Photography?
Lighting’s essential because it affects how colors appear. You’ll find that shadows and highlights can alter your selective color choices. Guarantee even lighting to maintain consistency and control over the colors you want to emphasize.
What Role Does Background Play in Selective Color Editing for Toys?
The background’s your secret weapon! It can either make the colors pop like fireworks or drown them in a sea of monotony. Choose wisely, and you’ll transform your toy photos from ordinary snapshots to vibrant masterpieces.
Can Selective Color Editing Be Used in Black and White Toy Photography?
You’re wondering if you can use selective color editing in black and white toy photography. Yes, you can. Highlighting specific colors in a monochrome image draws attention to details, making your toy photography more engaging and dynamic.
At a Glance
In toy photography, you’ve got the power to transform ordinary shots into extraordinary stories. By mastering selective color editing, you emphasize what matters, highlight key features, and elevate your narrative. Choose your tools wisely, isolate colors effectively, and create focus intentionally. Avoid common pitfalls, learn from inspiring examples, and let your creativity shine. With each edit, you’re not just capturing toys; you’re crafting vibrant tales that captivate and inspire. Embrace the art, and make your photos unforgettable. Incorporating toy photography cinematic techniques can further enhance your storytelling by adding depth and drama to your images. Experiment with angles, lighting, and composition to create a scene that draws viewers in and evokes emotion. Remember, each shot is an opportunity to explore new narratives and push the boundaries of your creativity.


