
Creating an urban street diorama for toy figure photography starts by selecting the right scale to guarantee realism and detailing. Gather essential materials like foam boards, paints, and adhesives, then design your layout with balanced elements. Add textures, incorporate lighting to set the mood, and choose figures that match your theme. Capture the perfect shot by experimenting with angles and lighting, and enhance photos with editing. Dive deeper into these tips for an engaging scene.
Choosing the Right Scale for Your Diorama
When you’re planning your urban street diorama for toy photography, choosing the right scale is crucial. Start by considering the size of your figures. If you’re using 1:12 scale action figures, your diorama elements should match this scale to maintain realism. A mismatch might break the illusion, so consistency is key.
Think about the overall scene you want to create. Will it be a bustling city corner or a quiet alleyway? The scale affects how detailed you can get with buildings, vehicles, and street accessories. Smaller scales offer more room for expansive scenes, while larger scales allow intricate detailing.
Don’t forget to account for your camera’s perspective. A well-chosen scale guarantees your photos capture the depth and realism you envision, immersing viewers in your miniature world.
Gathering Materials and Tools
To start building your urban street diorama, gather essential craft supplies like foam boards, paints, and adhesives. Look for urban elements such as miniature street signs and benches at local hobby stores or online. For budget-friendly options, consider repurposing household items or checking thrift stores for unique finds.
Essential Craft Supplies
Creating an eye-catching urban street diorama for toy photography starts with gathering the right craft supplies. You’ll need a sturdy base, like a piece of foam board or MDF, to support your scene. Use acrylic paints for vibrant colors and a set of brushes for detailed work. Grab some textured paper or sandpaper to mimic concrete surfaces. For structural elements, craft sticks and foam blocks work wonders. Don’t forget a craft knife for precision cutting and a hot glue gun for quick assembly. Collect some fine-tipped markers for adding graffiti details. Additionally, invest in a ruler and cutting mat for clean, straight edges. Finally, stock up on miniature props like benches or lampposts to bring your diorama to life.
Sourcing Urban Elements
Before diving into your urban street diorama project, gathering the right urban elements guarantees your scene feels authentic. Start by exploring your local area for inspiration and materials. Look for small, everyday items that translate well into miniature scenes. Consider these four essential elements:
- Textures: Collect materials like sandpaper for road surfaces or small pebbles for sidewalks. These add realism to your diorama.
- Structural Elements: Use cardboard or foam board to construct buildings and walls, giving your scene a solid foundation.
- Decorative Details: Find miniature street signs, benches, or trash cans online or in craft stores for added authenticity.
- Lighting Elements: Integrate LED lights to mimic street lamps, enhancing the overall ambiance and depth of your scene.
These elements will transform your diorama into a vivid urban landscape.
Budget-Friendly Alternatives
While crafting an urban street diorama can become expensive, you don’t have to break the bank to achieve a realistic scene. Start by repurposing household items. Old cardboard or foam board can serve as sturdy bases for your streets. Use leftover paint to create texture on surfaces, adding depth and character. For buildings, cardboard boxes or shoe boxes can be transformed with a bit of paint and creativity.
Scour thrift stores or dollar stores for small items like miniature cars, street signs, or even tiny plants. These places often have hidden gems at low prices. Additionally, consider using recycled materials like bottle caps for manhole covers or tin foil for reflective surfaces. Your imagination is your greatest tool in creating an authentic diorama on a budget.
Designing the Layout and Composition
When designing your diorama, focus on balancing elements and maintaining the correct scale to create a realistic urban scene. Pay attention to how different components interact to form a cohesive visual narrative, ensuring that your composition draws the viewer’s eye to key focal points. By thoughtfully arranging your elements, you’ll enhance the overall impact of your toy photography.
Balancing Elements and Scale
Creating a visually engaging urban street diorama for toy photography requires careful consideration of balancing elements and scale. You need to guarantee that each component complements the others while maintaining realistic proportions. Here’s how:
- Scale Consistency: Guarantee all elements, from buildings to street signs, match the scale of the toy figures. This maintains realism and prevents visual distractions.
- Element Proportion: Balance large and small elements to avoid overwhelming any part of the scene. For instance, don’t let a massive billboard overshadow a small figure.
- Depth Creation: Use layers and varied heights to create depth, making the diorama feel more dynamic and lifelike.
- Varied Textures: Mix different textures, like brick and concrete, to add interest and enhance the urban feel without clashing.
Creating Visual Focal Points
To design an impactful urban street diorama, you must focus on creating visual focal points that guide the viewer’s eye and enhance the narrative. Start by identifying the main element of your scene—perhaps a toy figure or a specific prop. Position this element strategically, ensuring it’s not centered, to add dynamic tension. Use contrasting colors or lighting to make it stand out.
Incorporate leading lines, like roads or pathways, to draw attention toward your focal point. Surround it with complementary elements that enrich the story without overshadowing it. Vary the heights and textures of surrounding objects to maintain interest. Remember, each component should serve the overall narrative, creating a cohesive and engaging composition that captures and holds the viewer’s attention.
Adding Realistic Details and Textures
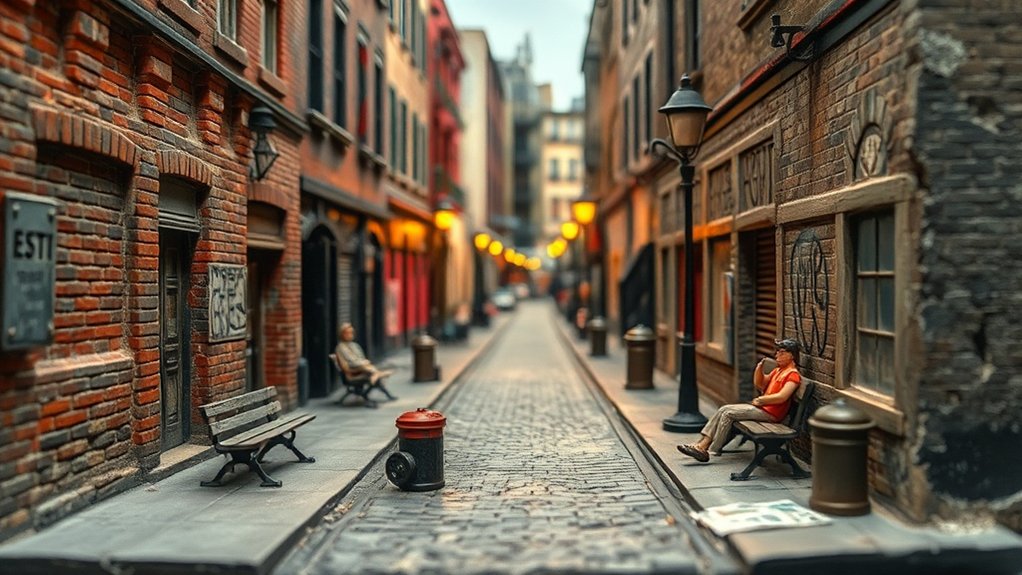
In the pursuit of lifelike urban street dioramas, adding realistic details and textures is crucial. You need to verify each element mirrors the gritty charm of city streets. Start with the basics, like cracked sidewalks and weathered brick walls. Use various materials and techniques to create authenticity. Here’s how you can enhance your diorama:
- Graffiti and Posters: Add miniature graffiti and layered posters to walls for a vibrant urban touch.
- Street Debris: Scatter tiny trash like newspapers, bottles, and leaves for a lived-in feel.
- Weathering Techniques: Apply dry brushing or washes to simulate dirt, rust, and aging effects.
- Textured Surfaces: Incorporate sandpaper or textured paint to mimic concrete or asphalt surfaces.
These elements will elevate your diorama’s realism, engaging viewers.
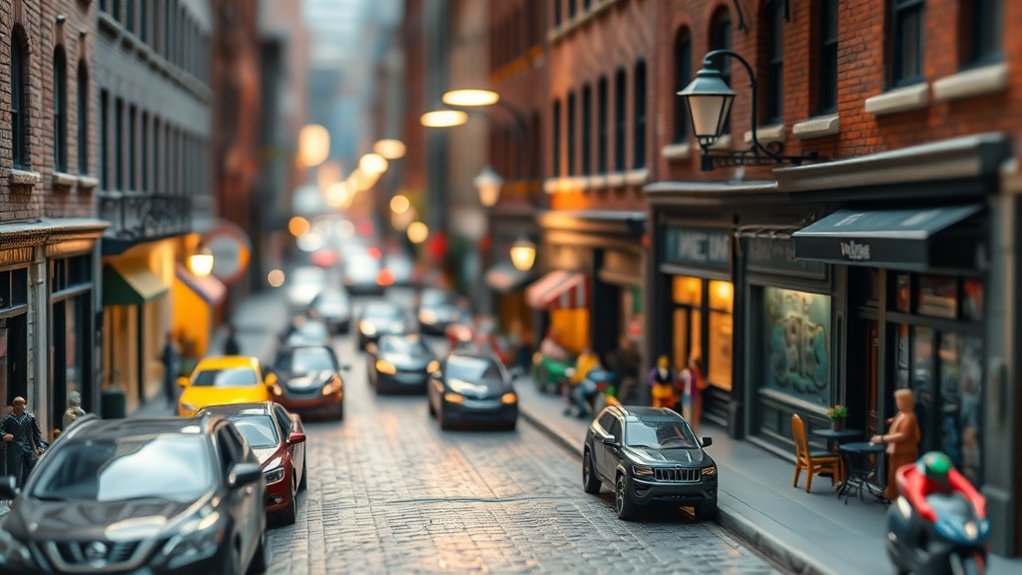
Incorporating Lighting for Atmosphere
Mastering the art of lighting can transform your urban street diorama from ordinary to mesmerizing. Imagine casting soft streetlamp glows or harsh neon lights to evoke different moods. Start by considering the time of day you want to depict. Use warm hues for a sunrise effect or cooler tones for a moody night scene. Position small LED lights to mimic streetlights or windows, and experiment with their angles to create dramatic shadows.
Don’t underestimate the power of natural light, too. Position your diorama near a window for authentic sunlight that enhances textures and colors. Reflectors, like foil, can bounce light into shadowed areas, adding depth. By playing with lighting techniques, you create an atmosphere that immerses viewers, pulling them into your miniature urban world.
Selecting and Posing Toy Figures
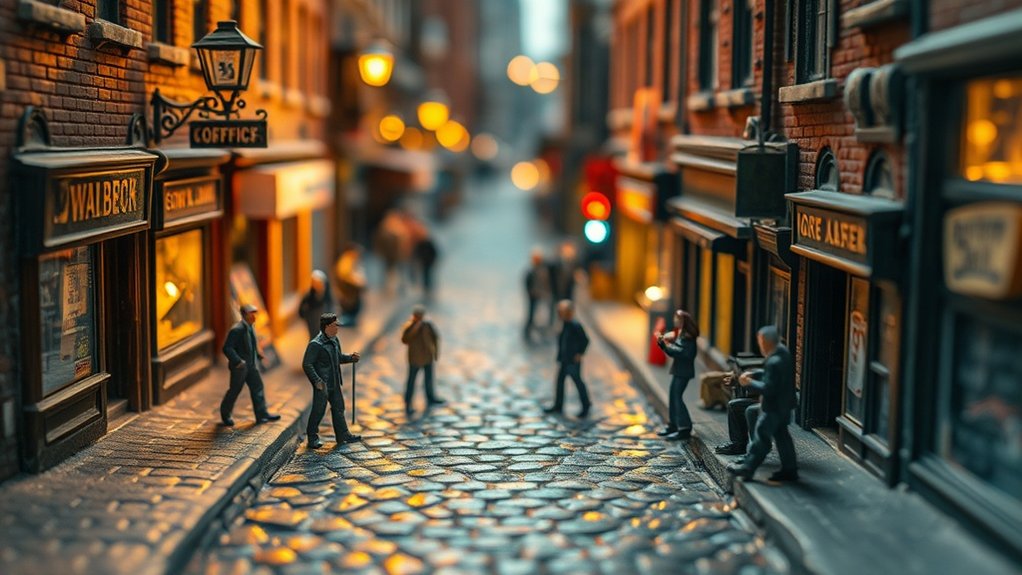
When selecting and posing toy figures for your urban street diorama, think of them as the characters in your miniature narrative. Start by choosing figures that fit the theme and story you want to tell. Consider their clothing, expressions, and accessories to guarantee they add depth and interest. Here’s how you can effectively select and pose them:
- Character Diversity: Mix different figures to reflect a vibrant urban scene. Include a range of ages, styles, and roles to create a dynamic story.
- Expressive Poses: Position figures in natural, engaging postures. This infuses life and personality into your diorama.
- Interaction: Arrange figures interacting with each other or their environment to enhance storytelling.
- Focal Points: Use figures to draw attention to key areas, guiding the viewer’s eye through the scene.
Capturing the Perfect Shot
How do you capture the perfect shot that truly brings your urban street diorama to life? Start by considering the angle. Get down to the level of your toy figures to create an immersive perspective. Next, pay attention to lighting. Natural light enhances realism, so try shooting near a window or outside. If you’re using artificial light, adjust the brightness to avoid harsh shadows or overexposure.
Framing is essential. Use elements in your diorama to guide the viewer’s eye, creating a dynamic composition. Experiment with depth of field by adjusting your camera settings to make the foreground pop while gently blurring the background. Finally, take multiple shots from various angles. This gives you options and increases your chances of capturing the scene perfectly.
Editing and Enhancing Your Photos
Once you’ve snapped your perfect shots, it’s time to enhance them with some thoughtful editing. Start by importing your images into a photo editing software. Next, focus on adjustments that bring out the best in your urban street diorama and toy figures. Here’s a quick guide:
- Crop and Straighten: Trim any unnecessary parts and make sure your photo is level. This helps the viewer focus on your subject.
- Adjust Lighting and Contrast: Enhance the natural light in your scene. Increase contrast to make details pop without losing the mood.
- Color Correction: Tweak saturation and vibrancy to make colors stand out, but keep them realistic.
- Sharpen Details: Use sharpening tools to emphasize textures, bringing your toys and diorama to life.
Frequently Asked Questions
How Do I Store My Diorama When Not in Use?
To store your diorama safely, find a sturdy box or container that fits its dimensions. Wrap fragile parts with bubble wrap or soft cloth. Keep it in a cool, dry place to avoid damage or warping.
What Is the Best Way to Transport a Diorama?
When transporting your diorama, use a sturdy, padded box to prevent damage. Secure any loose parts and guarantee it’s not too heavy to handle. If possible, disassemble larger pieces for easier movement and reassembly.
Can I Use Natural Elements Like Sand and Leaves in My Diorama?
Absolutely, you can use natural elements! Adding sand and leaves will transform your diorama into a mesmerizing mini-ecosystem. It’s like bringing an entire forest or beach into your living room. Just watch those tiny hurricanes or leaf avalanches!
How Do I Repair a Damaged Section of My Diorama?
You’ve got a damaged section of your diorama? Start by evaluating the damage. Use glue for minor breaks or plaster for bigger repairs. Sand it smooth, repaint if necessary, and you’re back on track with your project.
Are There Online Communities for Diorama Enthusiasts?
You’re in luck! There are plenty of online communities for diorama enthusiasts. Check out forums, Facebook groups, and Reddit. You’ll find inspiration, tips, and fellow hobbyists enthusiastic to share their knowledge and passion with you.
At a Glance
You’ve now got all the tools to create an impressive urban street diorama for toy figure photography. Remember, attention to detail and creativity make a considerable difference. Did you know that according to a recent survey, 65% of photographers believe that dioramas greatly enhance the storytelling of their shots? So, plunge into your project with confidence and let your imagination shine. Don’t forget to share your masterpieces and inspire others to join this fascinating hobby!


