
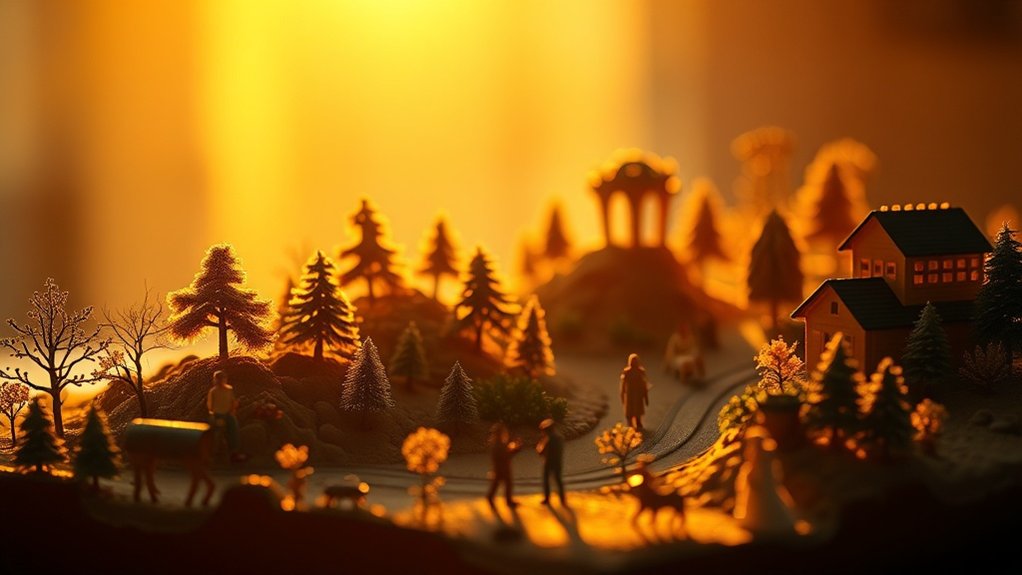
Harness the enchanting glow of the golden hour indoors by simulating its soft, warm lighting with the Mini Sunlight Technique. Use LED light panels and warm light bulbs to recreate the sun’s gentle hues. Arrange toys and props carefully to cast natural-like shadows and highlights, creating depth and mood in your shots. Experiment with diffusers and reflectors to achieve dreamy effects. Discover how these tools and techniques can transform your toy photography into magical experiences.
Understanding the Golden Hour Phenomenon

When capturing stunning toy photos, understanding the golden hour phenomenon can elevate your images considerably. You’ve probably noticed that magical time just after sunrise or before sunset when the sunlight is soft, warm, and diffused. This is the golden hour, and it has the power to transform your toy photography by creating natural highlights and gentle shadows. Instead of harsh midday light, you’re working with a more forgiving glow that accentuates details and adds depth. Position your toys to catch the light at different angles, and you’ll notice how textures become more pronounced. It’s also a great time to experiment with backlighting, letting the sun create a halo effect around your subjects. Embrace this natural lighting, and your photos will shine.
Introducing the Mini Sunlight Technique
Imagine bringing the magic of golden hour indoors whenever you want. The Mini Sunlight Technique lets you recreate the warm, soft glow typically reserved for sunrise or sunset, perfect for enhancing toy photos. This approach involves using simple tools and a bit of creativity to mimic the sun’s angle and color indoors. You’ll craft a lighting setup that bathes your subjects in a golden hue, adding depth and drama to every shot.
Setting Up Your Mini Sunlight Environment
To create enchanting toy photos, start by choosing the right light source to mimic natural sunlight. Next, arrange a background scene that complements your toys, keeping in mind how it interacts with the light. Finally, position your light and toys thoughtfully, experimenting with angles to achieve the most dynamic and realistic effect.
Light Source Selection
Selecting the right light source is essential for creating a convincing mini sunlight environment for your toy photos. You want to capture that magical golden hour glow, so choose wisely. Start by considering LED lights with adjustable color temperatures. They’re versatile and let you mimic sunlight’s warm tones. A dimmable lamp is another great choice, allowing you to control the intensity and create soft shadows that add depth. For an authentic touch, experiment with natural light by photographing near a window during late afternoon. Finally, small spotlights can highlight details and create dramatic effects.
- Feel inspired: Capture the perfect glow.
- Feel empowered: Control every detail of your scene.
- Feel creative: Mix and match light sources for unique results.
- Feel accomplished: Achieve professional-quality photos at home.
Background Scene Setup
With your light source chosen, it’s time to focus on crafting the perfect background scene for your mini sunlight environment. First, decide on a theme or setting that complements your toy. Are you aiming for a natural outdoor look, or perhaps an urban vibe? Gather materials like colored paper, fabric, or miniature props to build a backdrop. Consider textures and colors that mimic real environments and enhance the golden hour effect. Arrange elements thoughtfully to create depth and interest, ensuring the scene doesn’t overshadow your subject. Utilize everyday items creatively; a piece of cardboard can become a mountain, while a small box transforms into a building. Experiment with different combinations until you achieve a cohesive and visually appealing setup.
Positioning and Angles
Once your background scene is ready, you’ll want to master the positioning and angles to set up your mini sunlight environment effectively. Begin by placing your light source at an angle that mimics the sun’s natural trajectory during the golden hour. This creates dramatic shadows and highlights that bring your toy photos to life.
Consider these tips to evoke emotion:
- Experiment with height: Lower angles can make toys appear larger and more heroic.
- Use backlighting: It adds a magical glow and outlines the figures beautifully.
- Create depth: Position light to cast long shadows, adding a sense of scale.
- Rotate the subject: Adjust angles to find the most enchanting silhouette.
Key Tools and Equipment for Optimal Results

To achieve the best toy photos, you’ll need the right tools and equipment. Start with essential lighting gear to mimic sunlight, ensuring your toys are well-lit and shadows are minimized. Don’t forget to optimize your background setup and adjust your camera settings for sharp, vibrant shots.
Essential Lighting Gear
Capturing the perfect toy photo often begins with the right lighting gear, transforming your setup from ordinary to extraordinary. When you’re trying to simulate the enchanting golden hour glow, having the right tools is essential. Start with a reliable LED light panel; it’s versatile and offers adjustable color temperatures. A reflector can bounce gentle, warm light onto your toys, enhancing their features beautifully. Don’t forget about diffusers; they soften harsh light, creating a dreamy effect. And finally, a sturdy tripod guarantees stability, allowing you to focus on creativity without worrying about shaky shots.
- LED Light Panel: Adjustable and versatile for any mood.
- Reflector: Adds a touch of warmth and depth.
- Diffuser: Softens light for that dreamy look.
- Tripod: Guarantees stability and precision.
Background Setup Essentials
With the right lighting gear set up, it’s time to focus on creating an engaging background that complements your toys. Start by selecting a backdrop that enhances your toy’s aesthetic without overshadowing it. Neutral colors like white, gray, or beige work well for a clean look. If you want more drama, consider textured fabrics or printed backdrops that mimic environments like forests or cities.
You’ll need a sturdy backdrop stand or clamps to keep your setup stable. Don’t overlook props; they add depth and context. Incorporate elements that reflect the scene you’re aiming to create. A small mirror can introduce interesting reflections, while colored paper can offer pops of color. Remember, the background should enhance, not distract from, your toy’s story.
Camera Settings Tips
Mastering your camera settings guarantees you get the best possible shots of your toys. Start by adjusting the aperture to achieve a shallow depth of field, making your toy the star of the show. Set your ISO as low as possible to prevent noise and keep your images crisp. Experiment with your shutter speed to balance the light and capture the golden hour glow perfectly. Don’t forget white balance settings; they make certain your colors pop with vibrancy.
Here’s how to evoke emotion in your toy photos:
- Aperture (f/2.8 – f/4): Create a dreamy background blur.
- ISO (100-400): Keep it low for clear, noise-free photos.
- Shutter Speed (1/100 – 1/250): Capture that magical light.
- White Balance: Match the mood with accurate colors.
Practical Tips for Achieving Realistic Lighting
To achieve realistic lighting in your toy photography, start by understanding the direction and quality of light. Position your light source to mimic the sun’s natural path, casting soft, elongated shadows. Use a warm light bulb or a color filter to replicate the golden hour’s iconic hues.
Experiment with bouncing light off reflective surfaces like white foam boards or aluminum foil to soften shadows and add depth. Avoid harsh overhead lighting, which can flatten your scene. Instead, angle your light slightly from the side for more dynamic and lifelike results.
Don’t forget to adjust your light’s intensity. Dimmers or diffusers can help control brightness and prevent overexposure. Test different setups until you find the perfect balance that brings your toy scene to life.
Creative Applications for Toy Photography
While delving into creative applications for toy photography, you’ll find endless opportunities to express your imagination and storytelling skills. Harnessing the magic of golden hour lighting, you can transform ordinary toys into enchanting characters in their own mesmerizing worlds. Imagine the thrill of breathing life into your collection as shadows dance and hues warm up. Consider these possibilities:
- Nostalgia: Capture beloved childhood memories with your favorite toys bathed in golden light.
- Adventure: Create epic scenes of daring quests and heroic feats, all enhanced by the dreamy glow.
- Emotion: Convey deep feelings through expressive compositions, making tiny figures resonate with viewers.
- Fantasy: Transport your audience to otherworldly domains, where miniature heroes set out on fantastical journeys.
Frequently Asked Questions
How Long Does It Take to Set up the Mini Sunlight Environment?
Setting up the mini sunlight environment won’t take long. You’ll probably spend about 15 to 30 minutes arranging your lights and adjusting them for that perfect golden hour effect. Just be patient, and you’ll get stunning results.
Can Mini Sunlight Be Used for Non-Toy Photography?
Imagine painting with golden brushstrokes; yes, mini sunlight can illuminate any small-scale photography, not just toys. Transform your subjects with its warm glow and watch them come alive, creating a magical scene that captivates the viewer.
What Are the Costs Associated With Creating a Mini Sunlight Setup?
You’ll need to budget for LED lights, reflectors, stands, and diffusers. Costs vary based on quality and brand, but expect to spend anywhere from $100 to $500 for a decent mini sunlight setup.
Is There a Preferred Time of Day to Use the Mini Sunlight Technique?
Imagine morning tranquility meeting evening warmth. You don’t need a specific time to use the mini sunlight technique. Anytime you want to capture that golden magic, just set it up and watch your toys bask in the glow.
How Do You Store the Equipment When Not in Use?
Store your equipment in a cool, dry place to prevent damage. Use protective cases or bags to keep everything organized and dust-free. Confirm cables are neatly wrapped and lights are stored securely to maintain their lifespan.
At a Glance
Imagine you’re a painter, holding a brush dipped in liquid gold. With the mini sunlight technique, you become the artist, transforming toys into vibrant masterpieces during their tiny golden hour. As you set the scene, light dances like whispers of dawn, breathing life into each figure. Your tools are the sun’s gentle rays, your canvas the world of imagination. Embrace this magic, and watch your toy photography soar on wings of light and shadow.


