In toy photography, props are essential for adding depth and realism. Choose props that match the toy’s scale for a cohesive scene. Utilize composition techniques like the rule of thirds and leading lines to enhance visual interest. Craft realistic backdrops using materials that mimic real-world textures. Light your scene thoughtfully to set the mood and create depth. Master these fundamentals, and you’ll discover how these elements can transform your toy photography into engaging and immersive narratives.
Understanding the Importance of Props
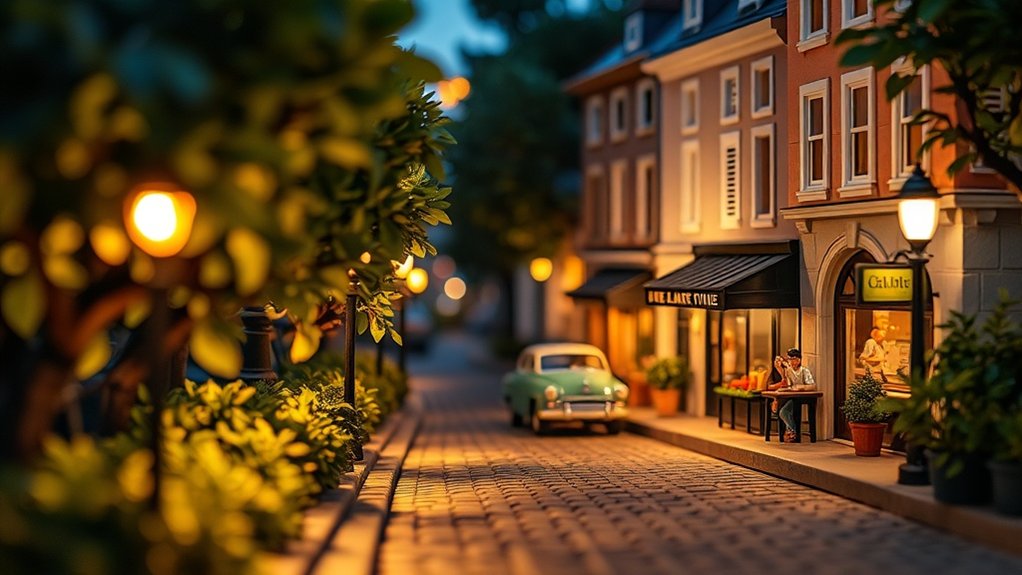
When you plunge into toy photography, understanding the importance of props can make or break your scene. Props add depth, context, and realism to your photos. By strategically placing them, you create a narrative that captivates viewers and transports them into your miniature world. Consider how a tiny chair can transform a simple toy figure into a character with a story.
Use everyday items creatively—like cotton for clouds or paperclips for ladders—to enhance your scene. Props help convey scale, emotion, and interaction between figures, enriching the visual experience. Don’t overlook the power of lighting, as it highlights your props and adds mood to your composition. Remember, props aren’t just accessories; they’re essential elements that bring your toy photography to life.
Choosing the Right Scale for Your Scene
When building a toy photography scene, matching the scale of your toys with the props is essential for a cohesive look. Make sure each element balances well within the scene, avoiding any distractions that could break the illusion. By carefully choosing the right scale, you’ll create a more immersive and visually appealing photograph.
Match Toy and Props
Creating an engaging toy photography scene hinges considerably on matching the scale of your toys with the props you choose. Start by evaluating your toy’s size; it’s essential for maintaining realistic proportions. Imagine using a toy car with a towering skyscraper—unconvincing, right? Make certain props complement, not overshadow, your subject. When selecting items like furniture or plants, verify they’re in proportion to your toy’s dimensions to create a coherent visual story.
Next, consider the setting. A miniature sofa might be perfect for an action figure, while a dollhouse requires smaller elements. Use everyday objects cleverly; a large eraser could be a perfect boulder in miniature scale. Always test different combinations to see what fits best, guaranteeing a harmonious and believable scene.
Balance Scene Elements
To achieve a visually appealing toy photography scene, it’s essential you balance the elements by choosing the right scale. Start by evaluating the size of your main subject and select props that match this scale. If your toy is a 1:12 scale figure, make sure the props, like furniture or vehicles, are also 1:12. This consistency prevents your scene from looking awkward or unrealistic.
Pay attention to background elements, too. A backdrop that’s too large or small can disrupt the harmony of your scene. Consider the perspective and distance between elements to maintain a natural look. Don’t be afraid to experiment with different arrangements until everything feels cohesive. By carefully balancing scale, you’ll create a compelling and harmonious composition that draws viewers into your miniature world.
Mastering Composition Techniques
Although building an engaging scene is essential in toy photography, mastering composition techniques truly elevates your work. Start by understanding the rule of thirds. Divide your frame into a grid of nine equal parts and place your subject on the intersections to create balance. Leading lines guide the viewer’s eye through your scene. Use elements like roads or fences to direct attention where you want it. Framing adds depth, so position toys within natural frames, like arches or windows. Consider background elements to avoid distractions and maintain focus on your main subject. Finally, experiment with angles and perspectives; shooting from a low angle can make toys appear more dynamic. With practice, these techniques will enhance your storytelling through composition. Additionally, always consider the lighting when planning your shots; natural light often provides the most flattering results. By applying these toy photography composition tips, you can significantly improve the visual impact of your images. Remember, the more you experiment and refine your techniques, the more your unique style will emerge.
Crafting Realistic Backdrops
When you’re crafting realistic backdrops for toy photography, attention to detail makes all the difference. Begin by selecting materials that mimic real-world textures, like miniature grass, sand, or fabric. Use cardboard, foam board, or wood to create structures such as buildings or fences. Paint these elements in natural tones for authenticity. Incorporate small details like pebbles, twigs, or moss to enhance realism.
Match your backdrop’s scale to the toys for a cohesive scene. Pay close attention to how elements interact; shadows and lines should align naturally. Arrange your backdrop to guide the viewer’s eye, emphasizing the subject without overwhelming it. Experiment with angles to create depth, making the scene feel expansive. With practice, your backdrops will transport viewers into your miniature world.
Utilizing Lighting to Enhance Your Scene
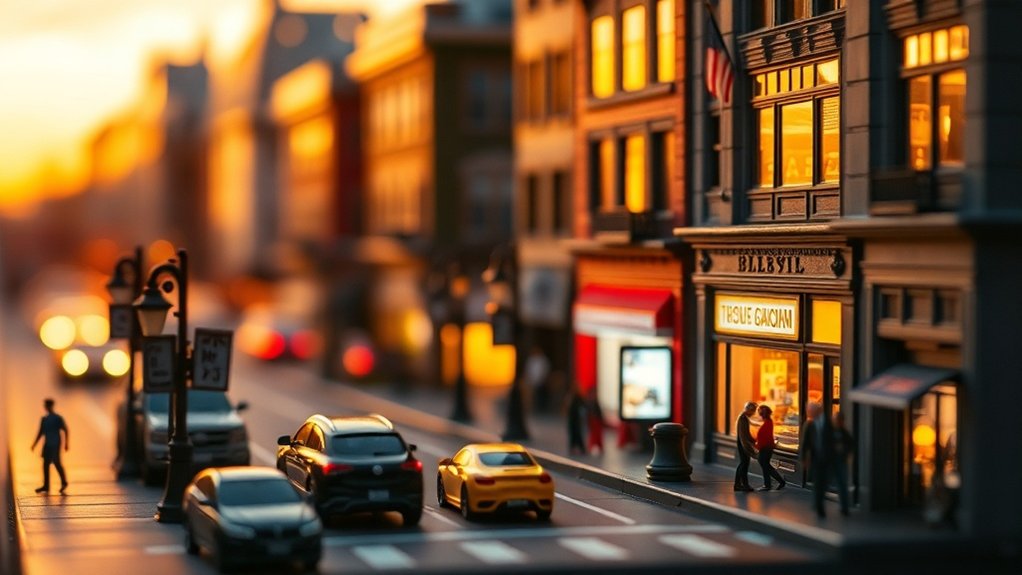
When setting up your toy photography scene, lighting plays an essential role in bringing your vision to life. You’ll want to reflect on the differences between natural and artificial lighting, as each can dramatically change the mood of your photo. Pay attention to how shadows and highlights can add depth, and don’t underestimate the impact of light direction on your scene’s overall effect.
Natural vs. Artificial Lighting
Lighting is the unsung hero of toy photography, transforming simple setups into enchanting scenes. When deciding between natural and artificial lighting, consider the mood and style you want to convey. Natural light provides a soft, authentic glow, perfect for outdoor or daytime scenes. It’s unpredictable, though, requiring patience and flexibility.
On the other hand, artificial lighting offers control and consistency. You can manipulate intensity, direction, and color to match your vision. LED lights and desk lamps are great tools, allowing you to shoot anytime, anywhere. Experiment with both types to discover what suits your creative process best.
Balance is key. Use natural light for ambiance and artificial light to highlight details. With practice, you’ll harness lighting to elevate your toy photography.
Shadows and Highlights
Exploring lighting’s potential doesn’t stop at choosing between natural and artificial sources; it extends into the art of manipulating shadows and highlights to enhance your scene. Shadows create depth and mood, while highlights can draw attention to details. Use a small light source for sharper shadows or a large one for softer edges. Position your light to create dramatic contrasts or subtle shifts, depending on your desired effect. Consider using reflectors or diffusers to control the light intensity, ensuring your scene isn’t too harsh or too flat. Experiment with angles and distances to find the perfect balance. By carefully adjusting shadows and highlights, you can add realism, focus, and emotion to your toy photography, making each shot truly engaging.
Light Direction Effects
Although it might seem straightforward, the direction of light plays an essential role in defining the mood and depth of your toy photography. By adjusting light angles, you can evoke different emotions and highlight specific features. Front lighting can flatten your scene, making it appear less dramatic, while side lighting adds depth by casting dynamic shadows. Backlighting creates silhouettes and highlights edges, adding intrigue and mystery to your shots.
Experiment with various light sources like desk lamps or flashlights to find the perfect angle. Pay attention to how shadows fall and adjust your light to emphasize your subject’s unique features. Remember, even slight changes in light direction can transform your scene, so take your time to find the most compelling setup.
Selecting the Perfect Accessories
How do you elevate your toy photography from good to extraordinary? It’s all about selecting the perfect accessories to complement your scene. Start by considering the story you want to tell. Accessories should enhance the narrative, adding depth to your characters’ worlds. Choose items that match your toys’ scale to maintain realism. Look for miniature items like furniture, tools, or vehicles that fit seamlessly into your composition.
Color and texture are vital, too. They should contrast or blend with your main subject to create visual interest. Don’t overcrowd your scene; instead, opt for a few well-chosen pieces that highlight the focal point. Experiment with different arrangements until you find the setup that feels just right. With the right accessories, your toy photography will truly shine.
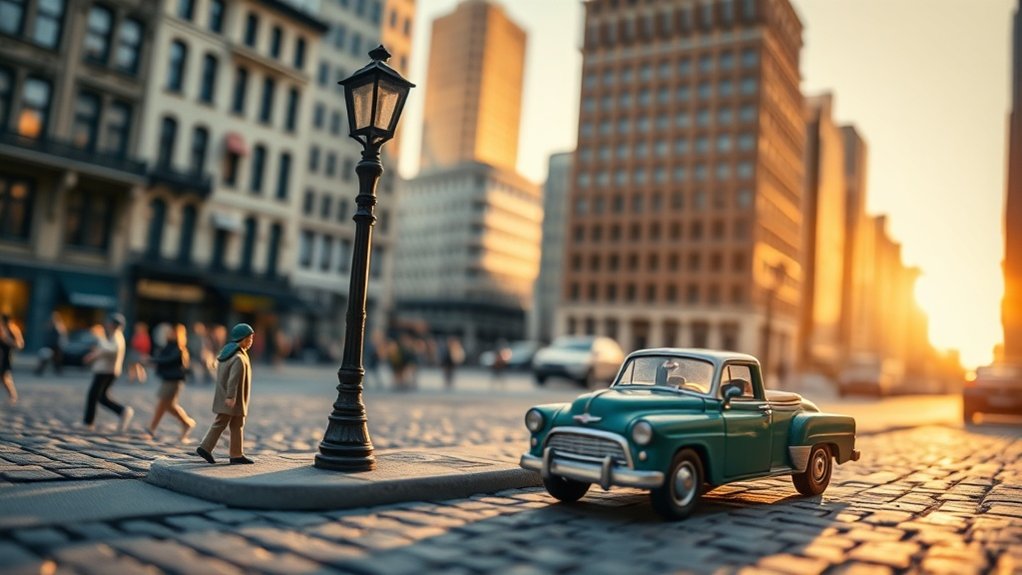
Creating Depth and Perspective
To create depth and perspective in your toy photography, start by layering elements to add visual interest. Use foreground, middle ground, and background objects to guide the viewer’s eye and create a sense of scale. Experiment with different angles and distances to bring your scene to life.
Layering for Visual Interest
When building a scene in toy photography, achieving depth and perspective through layering can greatly enhance visual interest. Start by arranging your toys in layers, placing some in the foreground, others in the middle, and a few in the background. This technique creates a sense of space, drawing the viewer into the scene. Use props like trees, rocks, or buildings to add complexity and dimension. Consider varying heights and angles for each layer to avoid flat compositions.
Lighting plays a vital role in layering. Use shadows and highlights to differentiate between layers, emphasizing the depth. Experiment with focus, keeping the main subject sharp while allowing the background to blur slightly. This selective focus guides the viewer’s eye and reinforces the scene’s depth, creating an engaging image.
Scale Techniques in Photography
Although often overlooked, scale techniques in photography can considerably enhance depth and perspective in toy photography. By manipulating scale, you can create a dramatic sense of realism. Start by placing smaller props in the foreground and larger ones in the background. This tricks the viewer’s eye into perceiving a larger scene. Another technique is to use forced perspective. Align your camera and objects so that they look like they occupy the same space, despite differing sizes. Experiment with angles; shooting from low angles can make toys appear more life-sized and impactful. Remember, the key is balance—too much distortion disrupts the illusion. Practice these techniques, and you’ll find your toy photography scenes gaining an impressive depth and enchanting realism.
Incorporating Color Theory
Exploring color theory can profoundly elevate your toy photography by adding depth and emotional resonance to your scenes. Start by understanding how colors interact and influence perception. Use complementary colors to create striking contrast, making your subjects stand out. Think about the mood you want to convey—warm colors like reds and oranges evoke energy and excitement, while cool colors such as blues and greens suggest calmness and tranquility.
Consider these key tips:
- Contrast: Utilize complementary colors to make elements pop and guide the viewer’s eye.
- Mood: Choose colors that reflect the emotional tone you wish to communicate, enhancing the storytelling aspect.
- Balance: Keep a harmonious color scheme to guarantee cohesion, preventing your scene from appearing chaotic or overwhelming.
With these insights, your toy photography will capture and engage your audience’s imagination.
Storytelling Through Scene Building
Building on the vibrant foundation of color theory, let’s now focus on the art of storytelling through scene building in toy photography. You’ve got the colors down, but how do you create a fascinating narrative with your scene? Start by choosing toys that naturally suggest a story. Consider their expressions, poses, and potential interactions. Your scene should invite viewers to wonder, imagine, and even create their own backstories. Pay attention to the setting; a simple background can evoke different moods and contexts. Compose your elements thoughtfully, ensuring each piece contributes to the narrative. Use props sparingly to enhance, not overwhelm, the story. Remember, every element should serve a purpose, guiding viewers through the tale you’re telling without saying a word.
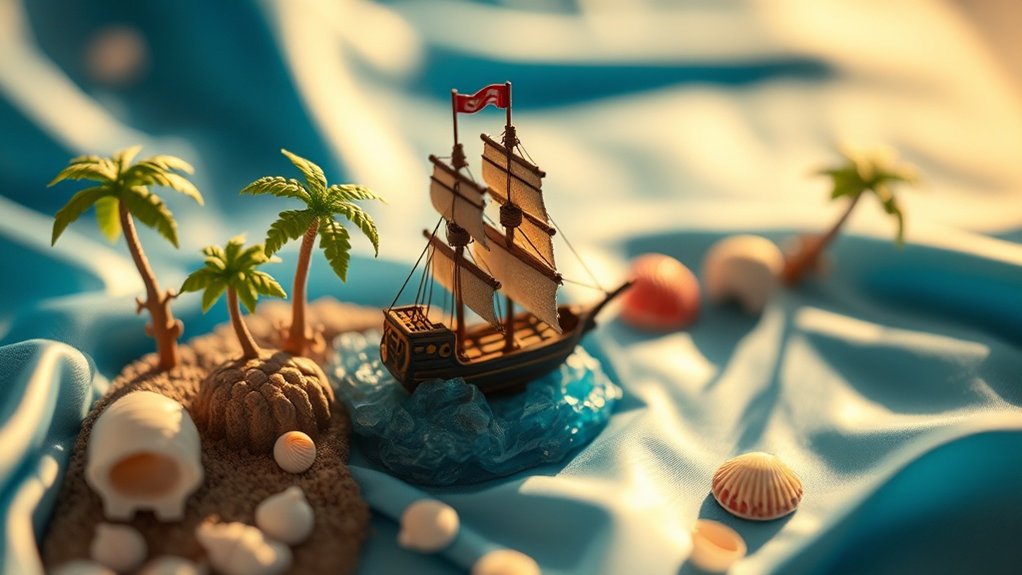
Experimenting With Different Materials
Delving into the domain of materials can transform your toy photography from ordinary to extraordinary. By experimenting with diverse materials, you’ll breathe new life into your scenes. Start by considering the following:
- Texture: Use materials like sandpaper or fabric to introduce texture. These elements can mimic real-world surfaces, adding depth and realism to your scenes.
- Lighting: Experiment with translucent materials like colored gels or cellophane. They can filter light in creative ways, casting intriguing shadows and highlights that enhance your composition.
- Scale: Incorporate materials that play with perception, such as using smaller gravel to simulate larger rocks. This adds a layer of believability and charm.
Frequently Asked Questions
How Can I Ensure My Toy Scenes Are Safe From Damage?
To keep your scenes safe from damage, choose a stable surface and guarantee props are securely placed. Avoid direct sunlight and moisture. Use gentle adhesive if needed, and store everything carefully after use to maintain condition.
What Are Cost-Effective Ways to Source Props for Toy Photography?
You can find cost-effective props by checking thrift stores, garage sales, and online marketplaces. Repurpose household items or craft your own from inexpensive materials. Get creative and think outside the box for affordable, unique scene enhancements.
How Do I Transport My Toy Photography Scene Without Disrupting It?
Secure your scene using reusable adhesive putty for stability. Use a sturdy, cushioned box to transport it. Label fragile items. Transport it in a vehicle with minimal movement to prevent disruption during the journey.
Are There Digital Tools to Enhance Toy Photography Post-Production?
Think of digital tools as magical brushes for your photos. Use software like Adobe Photoshop or Lightroom to enhance colors, adjust lighting, and remove imperfections. They’re essential for elevating your toy photography to professional levels.
How Can I Maintain Consistent Quality in My Toy Photography?
You can maintain consistent quality in your photography by establishing a routine. Use uniform lighting, set camera settings, and edit techniques. Regularly review your shots, learn from past mistakes, and always aim for gradual improvement.
At a Glance
In the domain of toy photography, you’re the wizard crafting a miniature world where every prop is a magical artifact, scale is your enchanted map, and composition is the spell that binds it all together. With backdrops as your canvas and lighting as your guiding star, you create a vivid tapestry of depth and color. Your scenes tell stories, each one a chapter in your fantastical tale, woven together by experimenting with materials, allowing imagination to soar.


