To light toy photography subjects with softboxes, start by choosing the right size and shape. A smaller softbox works well for miniatures. Position it at a 45-degree angle for even lighting, 2-3 feet from the toy for soft diffusion. Adjust the distance to control intensity and experiment with angles to highlight features. Match softbox brightness to natural light for a seamless look. Master these techniques and uncover more to perfect your toy photography setup. Additionally, consider using multiple softboxes to create a more dynamic lighting environment and reduce unwanted shadows. Incorporating reflectors can also enhance your setup by bouncing light back onto the subjects, ensuring every detail is captured beautifully. Exploring various studio toy photography lighting techniques will allow you to find your unique style and elevate your images further.
Choosing the Right Softbox for Toy Photography
When selecting a softbox for toy photography, it is crucial to take into account the size and shape that best suit your needs. A smaller softbox, around 12×12 inches, might be ideal for capturing the intricate details of miniature figures. You’ll want something compact to maintain control over the light spread without overwhelming your subject. Rectangular softboxes are versatile, providing even light distribution, while octagonal ones offer a more natural, wraparound effect. Keep in mind the space you’re working in; smaller setups benefit from more compact softboxes. Additionally, consider the softbox’s portability if you’re frequently changing locations. Remember, the right softbox can highlight your toy’s features, creating depth and dimension, making your images come to life with vibrant detail.
Positioning Your Softbox for Optimal Lighting
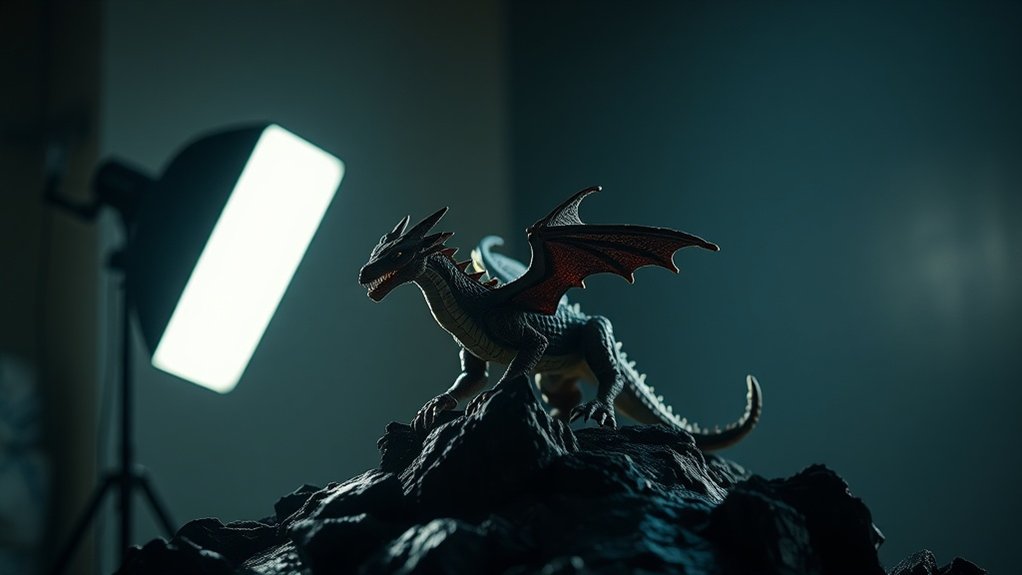
To achieve the best lighting for your toy photography, it is essential to position your softbox thoughtfully. Start by placing your softbox at a 45-degree angle to the toy. This setup creates soft, even lighting and minimizes harsh shadows, giving your toy a natural look. If you want to highlight specific features, try placing the softbox slightly higher or lower. Always keep the softbox close to your subject—around 2-3 feet away—to guarantee the light is soft and diffused.
Consider your background too. Position the softbox so it illuminates both the toy and the backdrop evenly. This creates a cohesive scene and prevents unwanted shadows. Experiment with different positions, and remember, subtle changes can greatly impact the final image quality.
Adjusting the Softbox Angle for Desired Effects
Curious how you can refine your toy photography with just a slight tweak of your softbox angle? Adjusting the angle can dramatically alter your image’s mood and focus. Experimenting with different angles helps you discover the perfect lighting for your subject.
Here’s a quick guide to getting started:
- High Angle: Casts longer shadows, adding depth and drama to your scene.
- Side Angle: Creates striking contrasts and highlights your toy’s contours.
- Low Angle: Softens shadows, producing a more even, diffused light.
Try positioning your softbox at various angles relative to your subject. Notice how each change affects the shadows and highlights. By mastering this technique, you’ll bring out unique details and create compelling compositions that captivate viewers. Don’t be afraid to explore and innovate!
Controlling Light Intensity With Softboxes
For toy photography, managing the light intensity with softboxes is key to capturing the perfect shot. Start by adjusting the distance between your softbox and the toy. Moving the softbox closer increases light intensity, highlighting fine details and creating sharp contrasts. Conversely, pulling it back softens the light, reducing shadows and producing a more diffused look. You can also experiment with the softbox’s inner baffles or diffusion panels to control brightness. For more precise adjustments, consider using a dimmer switch or variable power source. This way, you can easily tweak the light level without repositioning the softbox. Remember, subtle changes can dramatically impact your photo’s mood and detail, so take the time to experiment with different setups.
Balancing Natural and Artificial Light Sources

When aiming to achieve the perfect harmony between natural and artificial light in toy photography, understanding how each source impacts your scene is essential. Natural light provides a soft, even glow, whereas softboxes offer controlled, focused illumination. To create a balanced composition, start by evaluating how the natural light interacts with your subject. Position your softbox to complement this, filling in shadows and enhancing details.
Consider these tips:
- Observe the time of day: Morning and late afternoon provide softer natural light, reducing harsh shadows.
- Adjust softbox intensity: Match the softbox brightness to the ambient light for seamless blending.
- Experiment with angles: Move your softbox around to see how different angles affect the balance and mood of your shot.
Balancing both sources will elevate your toy photography.
Creating Mood and Atmosphere With Softbox Lighting
To create an enchanting mood and atmosphere in toy photography, start by adjusting the light intensity of your softbox to highlight or soften features. Choose the right softbox size to control the spread and focus of light, enhancing the scene’s depth. Experiment with positioning to introduce dramatic shadows and texture, adding a compelling layer to your shots.
Adjusting Light Intensity
Although lighting can make or break a photograph, adjusting light intensity with a softbox offers you the chance to create stunning moods and atmospheres in toy photography. By manipulating the intensity, you can emphasize details, evoke emotions, and draw the viewer’s eye where you want it. Here’s how to get started: Experimenting with various toy photography lighting techniques, such as diffusing light or using colored gels, can further enhance your images by adding depth and interest. Additionally, consider the direction of your light source; side lighting can create dramatic shadows, while backlighting can produce a magical halo effect around your toys. The right combination of these elements will elevate your toy photography to new heights.
- Dim the light: For a moody or mysterious effect, reduce the intensity to create soft shadows and enhance depth.
- Increase brightness: Bright, intense light can highlight vibrant colors and create a cheerful, lively atmosphere.
- Experiment with angles: Changing the softbox’s position alters the light’s impact, letting you spotlight particular features or create dramatic contrasts.
Choosing Softbox Size
Selecting the right softbox size is essential when you’re aiming to create specific moods and atmospheres in toy photography. A larger softbox will produce a softer, more diffused light, ideal for conveying gentle, calm scenes. This works well for tranquil settings or when you want to highlight intricate toy details without harsh shadows. Conversely, a smaller softbox generates more focused, intense light, creating stronger contrasts and dramatic effects. It’s perfect for action-packed scenes or when you want to draw attention to particular aspects of your subject. Always consider the story you wish to tell with your toys. By matching the softbox size to your creative vision, you can effectively shape the mood and atmosphere, enhancing the overall impact of your photographs.
Positioning for Drama
Creating drama in toy photography often hinges on the strategic positioning of your softbox lighting. By carefully adjusting your light source, you can evoke emotion and depth in your shots. Positioning the softbox at different angles transforms the mood:
- Side Lighting: Casts long shadows, emphasizing texture and form. Ideal for creating mystery or a sense of drama.
- Back Lighting: Silhouettes your subject, adding intrigue and highlighting outlines. Useful for creating a dramatic focal point.
- Overhead Lighting: Mimics natural sunlight, lending a dramatic spotlight effect. Perfect for a moody or intense atmosphere.
Experiment with these positions to find the right mood for your scene. Don’t be afraid to adjust and play with shadows until you capture the perfect dramatic shot.
Troubleshooting Common Softbox Lighting Challenges
When you’re using softboxes in toy photography, you might encounter a few common lighting challenges that can affect your shots. Shadows can become too harsh if the softbox is too close or the angle isn’t right. To fix this, adjust the distance and try different angles until you achieve a softer look. If your softbox creates hot spots, it’s likely because the light is too intense. Dim the light or add diffusion material for a more even spread. Sometimes, colors might appear off; this could be due to incorrect white balance settings. Adjust your camera settings to match the light source’s color temperature. Finally, if reflections are distracting, reposition the softbox or use flags to block unwanted glare.
Frequently Asked Questions
How Can I Prevent Reflections on Glossy Toy Surfaces?
To prevent reflections on glossy toy surfaces, position the softbox at an angle, not directly in front. Use a diffuser or polarizing filter to minimize glare. Experiment with different lighting setups until you achieve the desired effect.
What Are the Best Camera Settings for Softbox-Lit Toy Photography?
You’ll want to set your camera to a low ISO, around 100-200, to reduce noise. Use an aperture of f/8 to f/11 for sharpness and adjust shutter speed to balance the softbox’s light.
Can I Use Colored Gels With Softboxes for Toy Photography?
Yes, you can use colored gels with softboxes in toy photography. Just attach the gels to the softbox and adjust your camera settings to balance the colors, enhancing creativity and adding mood to your shots.
How Do I Transport and Store Softboxes for Outdoor Shoots?
When transporting softboxes for outdoor shoots, use a padded bag to prevent damage. Compact them by collapsing the rods and folding the fabric. Store them in a cool, dry place to maintain their condition between sessions.
What Safety Precautions Should I Take When Using Softboxes?
Imagine your softbox catches fire because it’s too close to a hot bulb. Always check for overheating, secure cables properly, and maintain a safe distance between the light source and flammable materials to avoid accidents.
At a Glance
Mastering softbox lighting for toy photography is like painting with light, where each adjustment adds depth and character to your scene. By choosing the right softbox, positioning it strategically, and tweaking its angle, you’ll create enchanting images that tell a story. Don’t forget to balance natural and artificial light to set the mood. With practice, you’ll overcome common challenges and illuminate your toy subjects with the finesse of an artist wielding a brush.


