
To reduce reflections when shooting toys in a studio, identify and cover reflective surfaces nearby. Use polarizing filters on your camera lens and experiment with different lighting angles and intensities. Employ light tents and diffusers to evenly scatter light. After shooting, use post-processing software like Photoshop to touch up remaining glare. By focusing on these strategies, you’ll capture clearer, more vivid images. There’s more to explore for mastering reflection control.
Understanding the Source of Reflections
When you’re trying to reduce reflections in toy photography, understanding the source of reflections is vital. Begin by identifying the surfaces causing reflections, like glossy or transparent areas on toys. These surfaces catch and bounce light, creating unwanted glare. You should also pay attention to your light sources. Overhead lights, lamps, or even natural sunlight can hit toys at angles that produce reflections. By changing the position of your light sources, you can minimize this effect. Additionally, consider the surrounding environment. Reflective surfaces nearby, such as mirrors or polished furniture, can contribute to unwanted reflections. Adjusting or covering these can help. Finally, your camera angle plays a significant role. Experiment with different perspectives to find the angle that reduces reflections the most.
Utilizing Polarizing Filters
A polarizing filter can be a game-changer in reducing reflections in toy photography. It selectively filters out polarized light, minimizing glare and enhancing color saturation. To use one, simply attach the filter to your camera lens. Rotate it while looking through the viewfinder until you see a reduction in reflections on the toy’s surface. This adjustment allows you to capture clearer, more vivid images without distracting highlights.
Adjusting Lighting Techniques
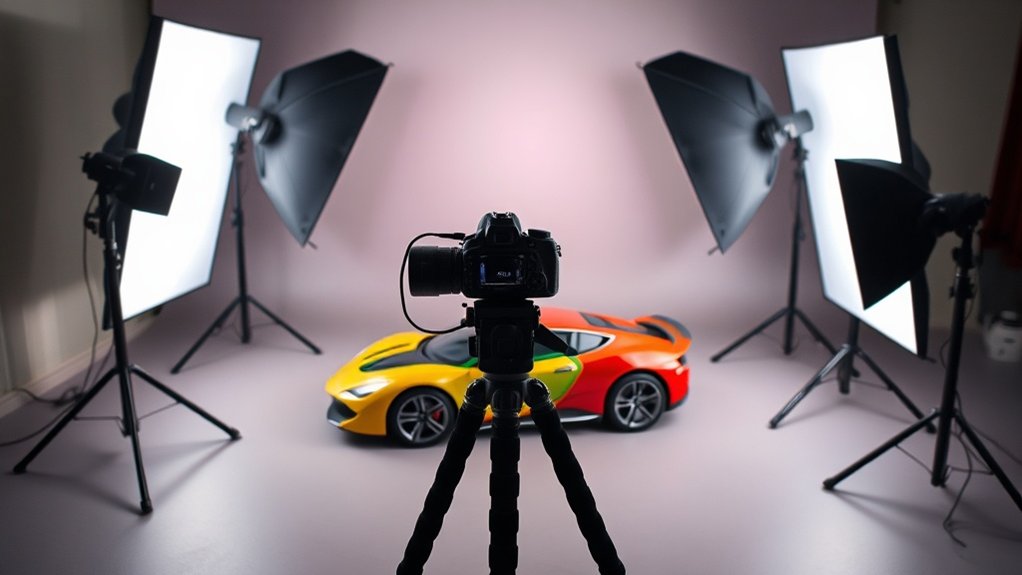
While polarizing filters are effective for reducing reflections, adjusting your lighting techniques can further enhance your toy photography. Start by experimenting with different angles. Changing the angle of your lights can help minimize unwanted reflections. Try positioning your light source at a higher or lower angle to see the difference it makes.
Consider these key adjustments:
- Distance Matters: Move lights closer or further to control the intensity of reflections.
- Multiple Light Sources: Use several lights to evenly illuminate your subject, reducing harsh shadows.
- Soft Light: Opt for softer lighting by using larger light sources or bouncing light off a white surface to create a more diffused effect.
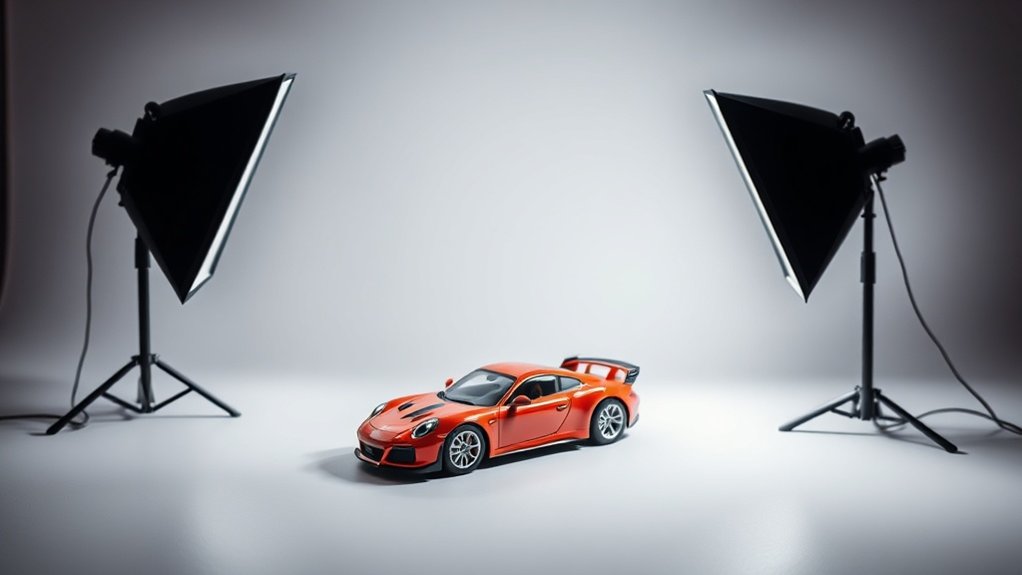
Employing Light Tents and Diffusers
To effectively manage reflections and achieve a professional look in your toy photography, using light tents and diffusers can be invaluable. Light tents create a controlled environment, minimizing harsh shadows and unwanted reflections by diffusing light evenly around your subject. Set up the tent around your toy and position light sources outside it. This setup softens the light, reducing glare and reflections on shiny toy surfaces.
Diffusers, on the other hand, can be used independently or in conjunction with light tents. Place them between your light source and the toy to scatter the light. When light strikes the diffuser, it spreads gently across your subject, greatly minimizing reflections. Don’t forget to experiment with different diffuser materials to find the perfect balance for your shoot.
Post-Processing to Eliminate Remaining Glare
Even after setting up the perfect lighting conditions, you might still find some stubborn glare in your toy photos. Don’t worry; post-processing can be your best friend in these situations. Start by using software like Adobe Photoshop or Lightroom to reduce or eliminate glare. Here’s how you can tackle it:
- Clone Stamp Tool: Use this tool to replace the glare with surrounding textures, creating a seamless appearance.
- Adjustment Layers: Tweak exposure and contrast to minimize the intensity of the glare and bring out details.
- Spot Healing Brush: Quickly remove small glare spots to clean up the image.
Experiment with these techniques to see what works best for your image. A little bit of post-processing can transform your photos from good to great!
Frequently Asked Questions
How Can Camera Settings Impact Reflection Reduction When Photographing Toys?
Adjusting your camera settings can greatly cut reflections. Lower the ISO to reduce noise, use a smaller aperture for greater depth of field, and adjust the shutter speed to control light, minimizing unwanted reflections effectively.
What Are Some Common Mistakes to Avoid When Minimizing Reflections?
Don’t place lights directly in front of shiny surfaces. Avoid using on-camera flash; it creates harsh reflections. Make certain you’re not wearing bright clothes, as they can reflect. Check angles to guarantee minimal glare in your shots.
Are There Specific Toy Materials That Are More Prone to Reflections?
Imagine a glassy lake reflecting the sky. Some toys, like glossy plastics and metals, mirror light similarly. You’ll find softer, matte materials won’t reflect as much. Adjust your lighting and angles to tame those shiny surfaces.
How Can the Angle of the Camera Affect the Appearance of Reflections?
Adjusting your camera’s angle can markedly alter reflections. By positioning your camera at different angles, you can reduce glare or unwanted reflections on surfaces. Experiment with various positions to find the ideal angle for minimal reflections.
What Are Some Budget-Friendly Tools for Reducing Reflections in Toy Photography?
You might think budget tools don’t work, but using diffusers like white bedsheets or DIY reflectors from aluminum foil can minimize reflections effectively. Experiment with polarizing filters and soft lighting to achieve professional-quality results without breaking the bank.
At a Glance
By getting the hang of reflection control in toy photography, you’ll elevate your shots to a whole new level. Start by understanding where those pesky reflections come from, and don’t forget to slap on a polarizing filter like you’re tuning an old radio. Adjust your lighting, use light tents and diffusers, and finish up with some post-processing magic. You’ll be amazed at how your toy photos pop without those distracting glares!


