To minimize reflections in mobile toy photography, focus on lighting and angles. Use diffused natural light by shooting under overcast skies or with sheer curtains. Avoid harsh indoor lights and employ polarizing filters to reduce glare. Position the camera to prevent direct reflections and explore different angles for unique perspectives. Matte backgrounds can absorb light and spotlight the toy. A few more practical tips can enhance your photography game even further.
Understanding the Causes of Reflections

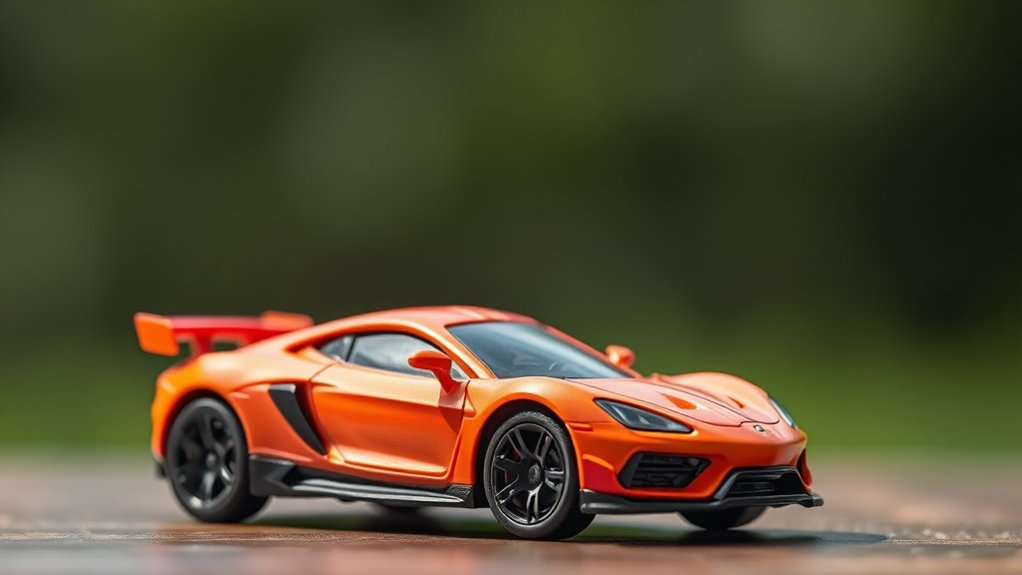
When you’re capturing toys with your mobile camera, reflections can sneak into your photos and become a challenge to manage. You might wonder why these pesky reflections appear in the first place. It’s often because of shiny surfaces on toys, like glossy paint or plastic. These surfaces catch and bounce light, creating unwanted reflections that can distract from your composition.
Additionally, your camera’s flash or nearby light sources can intensify these reflections. Holding your phone at certain angles can also reflect your own image or other objects nearby onto the toy’s surface. Pay attention to your surroundings and light conditions. By understanding these causes, you’ll be better equipped to anticipate and minimize reflections in your toy photography, improving your shots considerably.
Choosing the Right Location
When selecting a location for mobile toy photography, prioritize spots with abundant natural light for vibrant shots. Pay attention to the background to enhance your toy’s story without distractions. Control surface reflections by choosing non-reflective surfaces or adjusting angles to minimize glare.
Natural Lighting Tips
How can you elevate your mobile toy photography with the perfect natural lighting? Start by choosing the right location. Find a spot where the sunlight is diffused, like under a tree or next to a window with sheer curtains. This softens shadows and reduces harsh reflections on toy surfaces. Morning or late afternoon light offers a warm glow, making colors pop without overwhelming your shot. Always avoid direct sunlight; it creates unwanted glare and stark shadows. Experiment with different angles to see how the light interacts with your toy. Move around to find the sweet spot where reflections are minimal. Use reflective surfaces like white paper to bounce light gently. Remember, the right location can transform your photos dramatically.
Background Selection Guide
While capturing the perfect shot, the background you choose can make or break your mobile toy photography. A well-selected background enhances your toy’s features and tells a story. Keep these tips in mind to elevate your shots:
- Natural Elements: Use leaves, rocks, or wood to create a lifelike setting.
- Neutral Colors: Opt for backgrounds with subtle hues that don’t overpower your toy.
- Textures: Incorporate textured surfaces like fabric or paper to add depth without causing distraction.
- Consistent Themes: Match your background with the toy’s theme for a cohesive look.
- Minimal Clutter: Confirm the background is tidy to keep the focus on your toy.
Surface Reflection Control
To achieve stunning mobile toy photography, mastering surface reflection control is vital. Begin by choosing the right location. Seek areas with diffused natural light, like a spot near a north-facing window, which minimizes harsh reflections. Avoid direct sunlight, as it can create unwanted glare on shiny toy surfaces.
Consider shooting outdoors under an overcast sky for soft, even lighting. If you’re indoors, turn off overhead lights to prevent them from causing reflections. Instead, use a lamp with a soft, adjustable shade to direct light as needed.
Pay attention to surrounding surfaces; glossy tables or walls might reflect onto your toys. Position your toys on matte or textured backgrounds to absorb light rather than reflect it. Careful location choice guarantees your photos highlight the toy, not distracting reflections.
Utilizing Natural Light Effectively
To make the most of natural light in toy photography, pay attention to the timing of sunlight. Early mornings and late afternoons offer ideal light that’s both soft and flattering. Don’t forget to manage shadows creatively, using them to add depth and drama to your shots.
Optimal Sunlight Timing
Capturing the perfect moment in mobile toy photography often hinges on the timing of natural sunlight. You’ll discover that certain times of day offer better lighting conditions, reducing unwanted reflections on your toy surfaces. The golden hours, shortly after sunrise and before sunset, provide soft, warm light that minimizes harsh shadows. Here’s how you can identify ideal sunlight timing:
- Early Morning: Capture serene, soft lighting right after sunrise.
- Golden Hour: Use the warm tones an hour after sunrise or before sunset.
- Overcast Days: Take advantage of diffused light for minimal reflections.
- Avoid Noon: Steer clear of midday light that’s too harsh.
- Check Shadows: Experiment with shadow angles for dynamic compositions.
Soft Light Sources
Natural light can be your best ally when creating soft, inviting atmospheres in mobile toy photography. It helps minimize harsh reflections and brings out the toy’s true colors. To utilize natural light effectively, position your toys near a window with diffused sunlight. This kind of light casts a gentle glow without creating intense shadows or reflections.
Avoid direct sunlight, as it can produce unwanted glare and harshness on the toy’s surface. If the light is too strong, use sheer curtains or a white sheet to diffuse it further. Morning and late afternoon provide softer lighting conditions, perfect for capturing your toys’ details. Experiment with different angles and distances from the window to find the perfect lighting that highlights your toy’s features beautifully.
Shadow Management Techniques
While soft light helps enhance your mobile toy photography, managing shadows is just as important to maintain a balanced composition. Shadows add depth and dimension but can also obscure details if not handled well. Here’s how you can manage them effectively:
- Use the golden hour: Take advantage of the soft, diffused light during sunrise or sunset.
- Position toys strategically: Experiment with angles to cast shadows where they enhance rather than detract.
- Employ reflectors: Bounce natural light onto your toys to fill in harsh shadows.
- Utilize diffusers: Soften direct sunlight by placing a sheer fabric or paper between the light and the toy.
- Observe surroundings: Be mindful of nearby objects that might cast unwanted shadows.
These techniques will help you achieve stunning, shadow-managed photos.
Employing Diffusion Techniques
When you want to add a dreamy quality to your mobile toy photography, employing diffusion techniques can make a significant difference. Diffusion softens harsh light, reducing unwanted reflections on shiny toy surfaces. Start by using simple tools like a white sheet or translucent material to diffuse natural light. If you’re indoors, try placing a white curtain over a window or using a softbox with your lamp. These methods evenly spread light across your subject, minimizing glare and creating a more balanced look.
Additionally, you can use a DIY diffuser. Grab some wax paper or parchment paper and attach it to your phone’s flash or another light source. This technique helps achieve a gentle, even illumination, enhancing your toy photography with a subtle, professional finish.
Using Polarizing Filters

Polarizing filters are game-changers in mobile toy photography, offering a simple yet effective way to manage reflections and enhance colors. These filters help you capture the true essence of your toys by minimizing unwanted glare and boosting vibrancy. Attaching a polarizing filter to your mobile device can make a significant difference in your shots. Here’s how they work:
- Reduce Glare: Cut down on reflective surfaces, like glossy toy finishes.
- Enhance Colors: Make colors appear richer and more saturated.
- Improve Contrast: Achieve better contrast in your photos by balancing light.
- Sky and Water Effects: Deepen skies and eliminate reflections on water, if toys are placed outdoors.
- Easy to Use: Simply attach to your phone camera; no technical expertise required.
Try a polarizing filter to elevate your toy photography instantly!
Exploring Post-Processing Options
Even after capturing a great photo, the magic of mobile toy photography often continues with post-processing. Editing apps like Snapseed or Lightroom Mobile can enhance your images dramatically. Start by adjusting brightness and contrast to make your toy pop. Use the healing tool to remove any unwanted reflections or blemishes. Don’t forget about color correction; tweaking the saturation and temperature can bring your toy to life.
Experiment with filters to add a particular mood or style, but don’t overdo it. Subtlety is key. Sharpen the image to highlight details, ensuring your subject stands out. Finally, crop and straighten your photo to improve composition. With practice, these post-processing tweaks will elevate your mobile toy photography to a professional level.
Experimenting With Camera Angles

How can you elevate your mobile toy photography to the next level? Experimenting with camera angles can make your toy photos stand out. By changing your perspective, you can reveal new, intriguing aspects of your subjects. Here’s how you can get creative:
- Low angles: Make toys appear larger than life.
- High angles: Give a sense of vulnerability or innocence.
- Side angles: Highlight details, textures, and depth.
- Overhead shots: Capture a bird’s-eye view for a unique composition.
- Dutch tilt: Add drama and dynamic tension to your shots.
Try these angles and see how your toys’ personalities pop. Don’t be afraid to move around and explore different perspectives. Each angle tells a different story, capturing the essence of your toys in unexpected ways.
Frequently Asked Questions
How Can I Keep My Phone Steady While Taking Toy Photos?
You can keep your phone steady by using a tripod or leaning against a stable surface. Grip your phone with both hands and use your body as support to minimize shaking. Practice makes perfect, so keep shooting!
Are There Mobile Apps Specifically for Toy Photography?
You might think dedicated apps are unnecessary, but they offer specialized features for toy photography. Apps like ProCamera and Snapseed enhance colors and details, giving your toy photos a professional touch. Try them for improved results.
What Phone Settings Should I Use for Toy Photography?
Adjust your phone’s exposure and focus settings manually to enhance details. Use HDR mode for balanced lighting. Reduce ISO for less noise and increase shutter speed to capture sharp images. Experiment with white balance for accurate colors.
How Do I Choose Toys That Photograph Well?
You’ll want to choose toys with matte finishes and vibrant colors. Avoid glossy surfaces that catch light. Look for interesting textures and details, as these will add depth and interest to your photos. Consider size and poseability too.
How Can I Create a Storytelling Element in Toy Photos?
You can create storytelling by setting a scene that evokes emotion. Experiment with angles and lighting to highlight the toy’s character. Use props and backgrounds to craft a narrative, making the photo tell its own story.
At a Glance
You’ve now mastered the art of mobile toy photography, turning those pesky reflections into a thing of the past! By choosing the perfect location, harnessing natural light like a wizard, and employing magical diffusion techniques, you’re unstoppable. Polarizing filters? You’ve got them down to a science. Post-processing? You’re a digital sorcerer. And with your experimental camera angles, you capture toy magic like no other. Go forth and create toy photography masterpieces that dazzle the world!


