To create engaging studio toy photography, start by planning with a clear story or concept inspired by movies or nature. Gather your equipment, including a quality camera, macro lens, and appropriate lighting. Set up a spacious shooting space with neutral backdrops and guarantee good lighting. During the shoot, focus on composition, scale, and sharpness. Finally, refine images through post-processing using color correction and creative editing. There’s a world of advanced techniques waiting for you.
Understanding the Basics of Toy Photography
Toy photography is a fascinating art form where imagination meets skill, allowing you to bring your favorite characters to life in unique and creative ways. To start, it’s important to understand the basics which include scale, composition, and lighting. Scale guarantees that your toys appear realistic in their settings, creating a believable miniature world. Composition draws the viewer’s eye, so experiment with different angles and perspectives to make your shots compelling.
Lighting is vital; it can set the mood and highlight textures. You don’t need expensive gear—natural light or a simple desk lamp can do wonders. Always pay attention to shadows and reflections, as they can enhance or detract from your scene. With these fundamentals, you’re ready to immerse yourself in toy photography with confidence.
Gathering Inspiration and Developing a Concept
With a solid grasp of the basics, your next step is to gather inspiration and develop a concept that will bring your toy photography to life. Start by exploring different sources like movies, comics, or nature. They can spark innovative ideas and themes. Look at the work of other toy photographers; notice their use of lighting, composition, and storytelling. Don’t hesitate to jot down any ideas that come to mind.
Next, think about the story you want to tell. What emotions or actions do you want to convey? Sketch out a rough storyboard to visualize your scene. Consider the character’s pose and their environment. By defining a clear concept, you’ll guarantee your final images are both engaging and cohesive, setting the stage for a successful shoot.
Choosing the Right Equipment for Your Studio

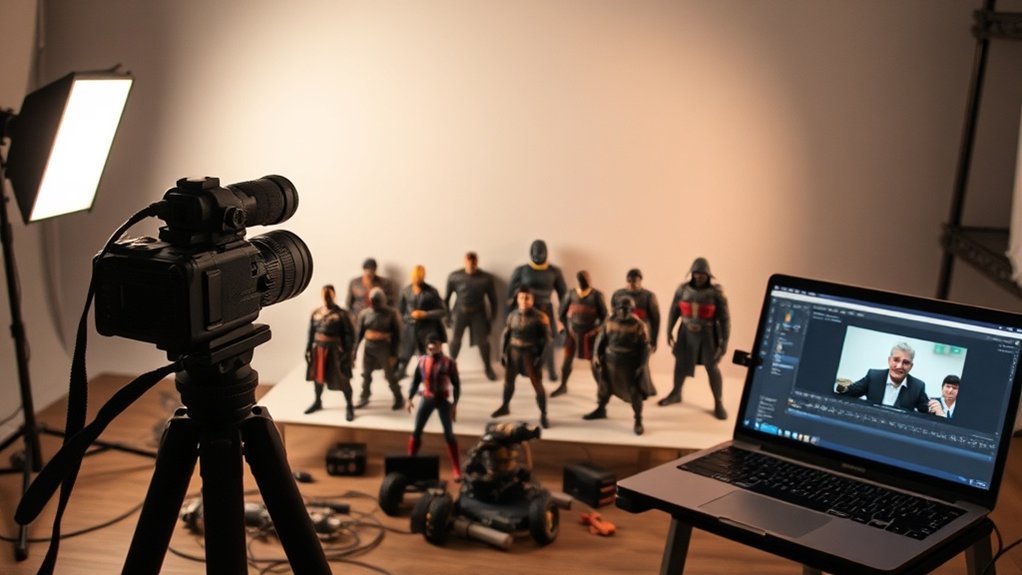
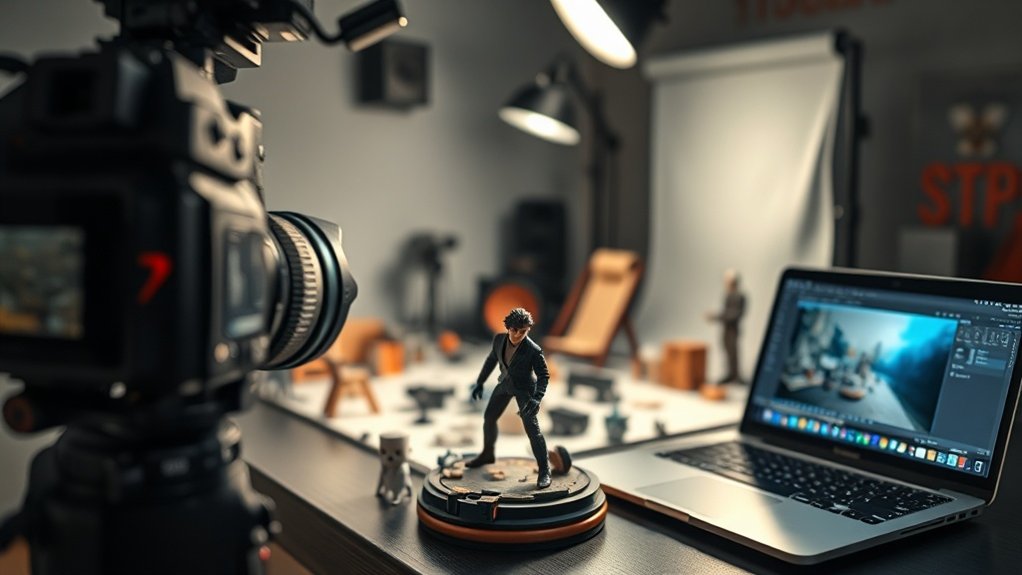
When setting up your studio for toy photography, it’s vital to choose equipment that complements your creative vision and enhances your workflow. Start with a quality camera. You don’t need the most expensive one, but make sure it has manual settings for flexibility. A macro lens is ideal for capturing intricate toy details. Consider lighting next; LED panels or softboxes provide consistent, adjustable lighting without overheating your toys. A sturdy tripod is essential for stability, especially during long exposure shots. Invest in a remote shutter release to prevent camera shake. Don’t forget backdrops; they set the scene and mood. Look for versatile options that match your themes. Finally, organize your gear—easy access helps maintain focus on creativity.
Setting Up Your Shooting Space
Creating an effective shooting space is essential for successful toy photography. You’ll want to choose a spot with enough room to move around comfortably. Think about the backdrop; it should complement your toys without distracting from them. Neutral colors or seamless paper can work wonders. Keep your area tidy to prevent unwanted elements from sneaking into your shots.
Consider these tips to optimize your space:
- Organization: Keep your props and accessories organized to find what you need quickly.
- Flexibility: Set up a portable table or workbench that can be adjusted to different heights for various angles.
- Background Choices: Have a selection of backgrounds ready to create diverse scenes without much hassle.
Mastering Lighting Techniques for Toy Photography
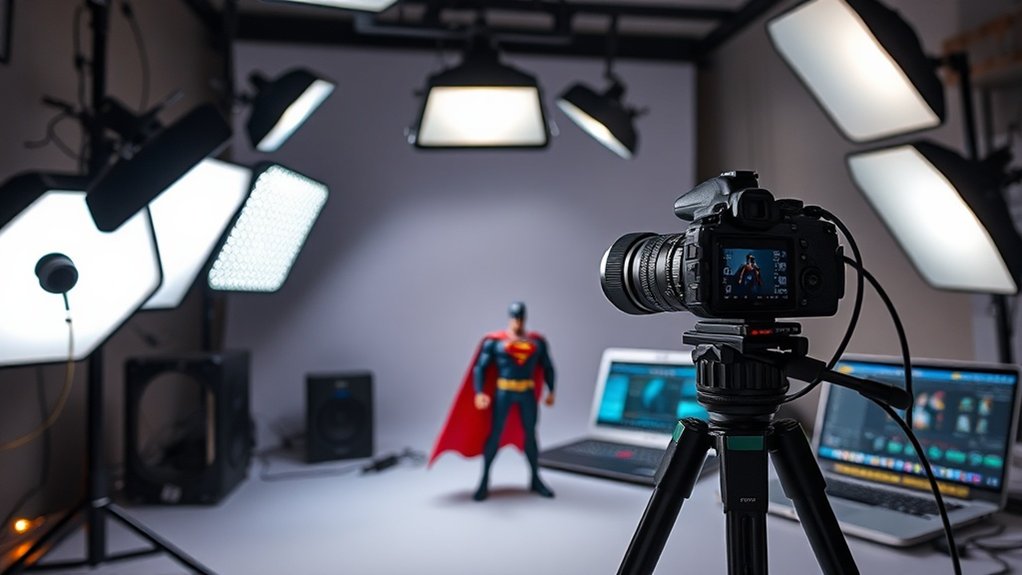
Although lighting can make or break your toy photography, mastering it doesn’t have to be intimidating. Start by experimenting with different light sources. Use a softbox or diffuser to create soft, even lighting that mimics natural light. This helps avoid harsh shadows and brings out details in your toys. Position your lights at various angles to see how they affect your subject. You might want to try backlighting for a dramatic look or side lighting to add depth.
Don’t overlook the importance of reflectors; they can bounce light into shadows, creating a balanced composition. Explore colored gels for creative effects, but use them sparingly. Practicing with these techniques will help you gain confidence and elevate the quality of your toy photography.
Composing the Perfect Shot With Miniature Figures
To capture the perfect shot with miniature figures, focus on creating a compelling composition that draws viewers in. First, think about your scene’s storytelling. What’s the narrative you want to convey? Arrange your figures in a way that highlights their interactions and emotions. Use the rule of thirds to guide your placement, creating balance and interest within the frame. Consider the background and foreground elements, as they can add depth and context to your shot.
Keep these tips in mind:
- Vary Heights: Use different levels to create dynamic layers, making the scene more engaging.
- Add Props: Integrate small props to enhance the story and provide scale.
- Experiment with Angles: Shoot from various perspectives to find the most intriguing composition.
Your creativity will shine through in each thoughtful arrangement!
Capturing Dynamic Action Shots
Bring your miniature scenes to life by mastering the art of capturing dynamic action shots. Start by choosing a compelling narrative that begs for movement. Consider the story you want to tell, whether it’s an epic battle or a playful chase. Use fishing lines or wires to suspend figures mid-air, creating the illusion of motion. Experiment with angles; shooting from a low perspective can make figures appear larger than life. Utilize high-speed shutter settings to freeze action crisply. Lighting is essential—position lights to highlight movement and create dramatic shadows. Don’t be afraid to innovate. Add props like smoke or dirt to amplify realism. Stay patient and experiment with different positions until you capture the perfect action-packed moment.
Post-Processing Tips and Techniques
When you’re post-processing your toy photography, focus on getting the colors just right to make your images pop. Use color correction to enhance the vibrancy and guarantee the tones stay true to life. Additionally, sharpen your images carefully while reducing noise to maintain clarity without losing the details that make your shots stand out.
Color Correction Essentials
While mastering studio toy photography, you’ll find that color correction is an essential step in post-processing that can make or break your images. It guarantees the colors in your photos are true to life, vibrant, and compelling. Begin by adjusting the white balance to remove any unwanted color casts. This helps achieve a neutral base for further edits. Next, tweak the exposure and contrast to enhance the dynamic range and make your toys pop. Finally, fine-tune individual colors to highlight specific details or maintain a consistent theme across your shots.
- Adjust White Balance: Neutralize color casts for a balanced image.
- Tweak Exposure/Contrast: Enhance dynamic range for visual impact.
- Fine-tune Colors: Highlight details and achieve thematic consistency.
Sharpness and Noise Reduction
As you plunge into post-processing, guaranteeing your toy photos are sharp and noise-free is critical to achieving professional-quality results. Start by adjusting sharpness to enhance the details. Use tools like the Unsharp Mask or High Pass filter. Be cautious, though—over-sharpening can create halos or artifacts. Aim for a natural look that highlights your subject without overdoing it.
Next, tackle noise reduction. Noise often creeps in, especially with higher ISO settings. Use noise reduction sliders in software like Lightroom or Photoshop. Focus on reducing noise in the shadows while preserving details in the highlights. Balance is key; don’t let noise reduction smudge the image details. Finish by zooming in and out to guarantee you’ve maintained clarity and reduced noise effectively.
Enhancing Your Images With Creative Editing
Releasing the creative potential of your toy photography often hinges on the magic of creative editing. It’s where your images truly come to life. Start by experimenting with color grading to set the mood—vibrant hues for a playful feel or moody tones for dramatic scenes. Don’t hesitate to play with contrast and exposure to highlight details, making your toys pop against the backdrop. Adding textures can also give depth and dimension to otherwise flat images.
Here’s how to elevate your editing game:
- Experiment with Filters: Use different filters to see how they change the emotion of your image.
- Dodge and Burn: Selectively lighten or darken areas to guide the viewer’s eye.
- Add Lens Flare: Introduce a sense of realism and atmosphere.
Let your imagination run wild!
Frequently Asked Questions
How Can I Safely Store My Toy Collection After a Shoot?
To safely store your toy collection, use dust-free, climate-controlled containers. Separate delicate pieces with soft fabric or bubble wrap. Organize them by size or series, and label containers for easy access. Keep them away from direct sunlight.
What Are Some Tips for Managing Time During a Toy Photography Session?
Think of your time like sand slipping through an hourglass. Prioritize shots, set a timer for each setup, and prepare props beforehand. Stay focused, minimize distractions, and review shots as you go to stay efficient.
How Do I Avoid Lens Flare in Indoor Toy Photography?
To avoid lens flare indoors, position your light source strategically. Use a lens hood or flag to block unwanted light. Diffusing or bouncing the light can also help. Experiment with angles to minimize flare effectively.
What Are Effective Ways to Clean Toys Before Photographing Them?
You should use a soft brush or microfiber cloth to gently remove dust. For stubborn grime, a damp cloth with mild soap works wonders. Make sure you dry thoroughly to prevent any water spots from showing up.
How Can I Create a DIY Backdrop for Toy Photography?
You can create a DIY backdrop by using colored paper, fabric, or poster board. You can add texture with materials like felt or burlap. Change the look by adjusting lighting or adding props for depth.
At a Glance
You’ve navigated the journey from planning to editing in toy photography, transforming simple figures into enchanting stories. Isn’t it fascinating how tiny subjects can evoke such grand emotions? With the right equipment, lighting, and creativity, you’ve honed your skills to capture dynamic shots that speak volumes. Remember, the magic lies not just in the tools but in your imagination. So, keep experimenting and pushing boundaries. What new worlds will you create next through your lens?


