
Transform your toy photography with these tips for realistic effects. Use natural light during the golden hour for a soft glow, and play with artificial lights to control shadows. Match your background to the toy's theme and maintain minimal distractions. Experiment with depth of field to create contrast between your toy and the background. Incorporate real-world textures like leaves or water for added authenticity. Manipulate scale by placing toys with real objects. Choose dynamic angles and enrich your scene with thoughtfully selected props. Finally, post-process your images to fine-tune realism. Discover the potential of these techniques to transform your shots.
Mastering Lighting Techniques
When it comes to toy photography, mastering lighting techniques can, indeed, make all the difference between a mundane shot and an intriguing image. You've got to pay attention to how light interacts with your subject to bring out the details and create engaging shadows and highlights. Start by using natural light whenever possible, as it provides a soft, even glow that's hard to replicate artificially. Position your toys near a window during the golden hour—early morning or late afternoon—when the light is warm and diffused.
Experiment with artificial lighting too. Desk lamps or LED panels can be great tools for controlling light direction and intensity. Try using a white sheet or a diffuser to soften harsh light, preventing unflattering shadows. Don't forget to play with angles; moving your light source can dramatically change the mood of the photo.
Consider adding reflectors to bounce light and fill in shadows. A simple piece of white paper can work wonders. Remember, shadows can add depth and dimension, so use them creatively. By tweaking these lighting elements, you'll start capturing toy photos that are both realistic and visually stunning.
Choosing the Right Background
Lighting sets the stage, but the right background completes the scene in toy photography. When choosing a background, consider the story you want your photo to tell. A background should complement, not overshadow, the toy. Start by matching the background to the theme or mood. For instance, a lush, green setting works wonders for jungle-themed toys, while a cityscape suits superheroes.
Textures also play a significant role. If you're photographing a medieval knight, a stone texture or brick wall can add authenticity. On the other hand, a smooth, neutral background can emphasize the toy itself, especially if it's vibrant or detailed. Don't forget about color harmony. Background colors should enhance your toy's colors. Contrasting colors can make the toy pop, while similar shades create a cohesive look.
Consider using real-world elements. Natural settings, like grass or sand, add realism. Alternatively, craft your own with printed backgrounds or dioramas. Keep distractions minimal. Avoid cluttered or busy backgrounds that draw attention away from the toy. Simplicity often brings clarity to your composition. Finally, always test different angles and distances to see how the background interacts with your toy, ensuring it enhances rather than detracts from your shot.
Utilizing Depth of Field
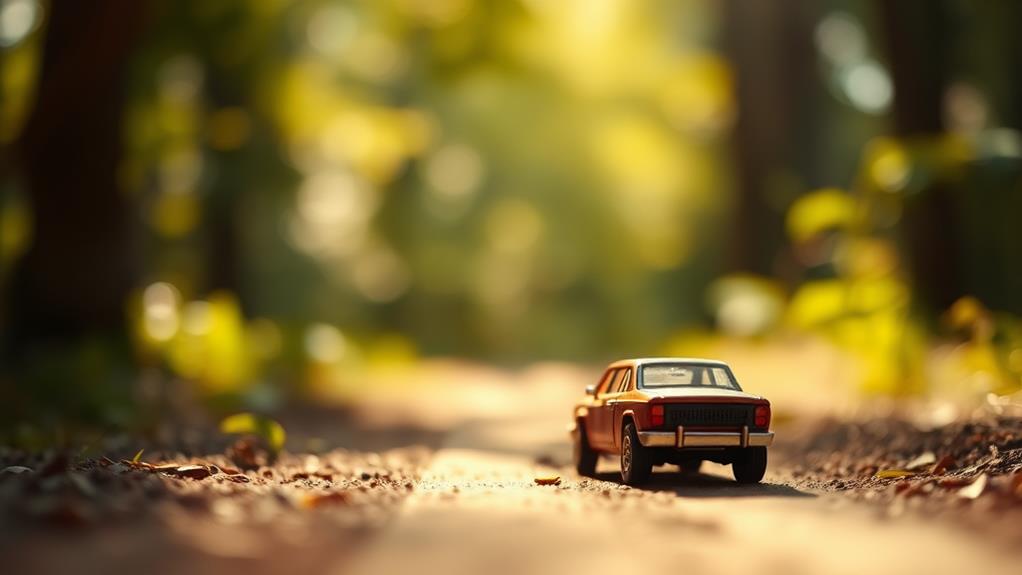
Mastering depth of field can take your toy photography to the next level by drawing attention to your subject while adding depth to the scene. By controlling the focus, you can create a sharp contrast between the subject and its background, making the toy pop. To achieve this, adjust your camera's aperture settings. A wider aperture (lower f-stop number) results in a shallower depth of field, blurring the background and emphasizing the toy. Conversely, a smaller aperture (higher f-stop number) increases the depth of field, keeping more of the scene in focus.
Experiment with the distance between your camera, subject, and background. Moving closer to your toy while keeping the background farther away enhances the depth effect. Use manual focus to guarantee your toy remains the sharp focal point, especially if your camera tends to autofocus on the wrong elements.
Lighting also plays an important role in depth of field. Natural light can provide soft shadows and highlights, enhancing the three-dimensionality of your scene. Play with angles to see how light affects the focus and depth. With practice, you'll find the perfect combination to make your toy photography stand out.
Incorporating Natural Elements
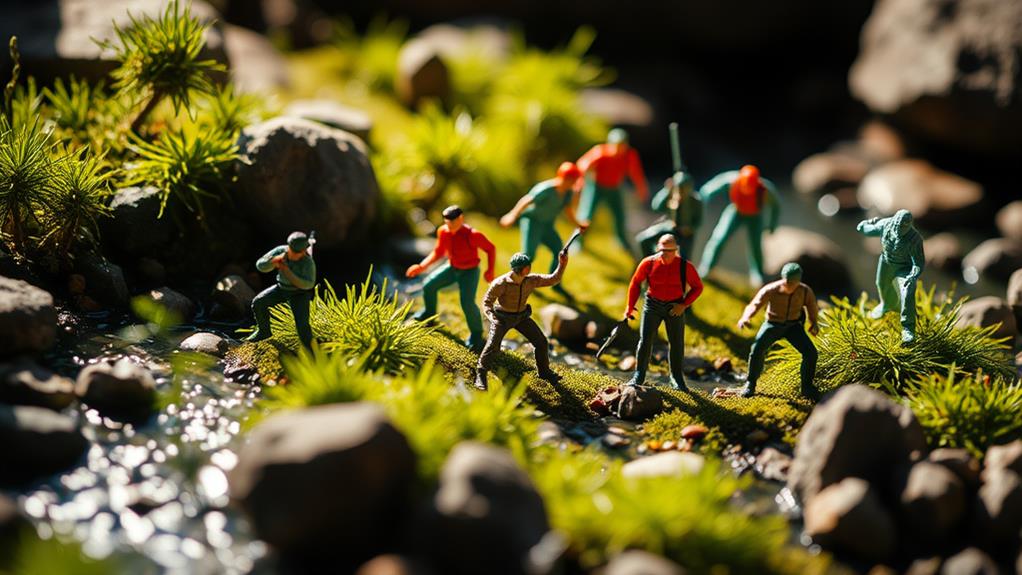
Adding natural elements to your toy photography can really bring your scenes to life. By incorporating real-world textures and surroundings, you create a more immersive and believable environment for your toy characters. Start by taking your toys outside. A simple patch of grass or a cluster of rocks can transform a mundane shot into something special. Nature provides an endless variety of backdrops that can enhance the story you're trying to tell.
Consider these tips:
- Use natural light: The soft glow of early morning or late afternoon sunlight can add warmth and depth to your photos.
- Integrate elements like water or sand: A shallow puddle can become a lake, while a bit of sand can mimic a desert landscape.
- Incorporate leaves or twigs: These can add scale and context, making your scene feel more expansive.
Don't forget to think about the angle and position of your shot. A low angle can give viewers the perspective of being within the scene, enhancing the realism you're aiming for. By carefully selecting and incorporating natural elements, you'll find your toy photography takes on a whole new level of authenticity and charm.
Playing With Scale
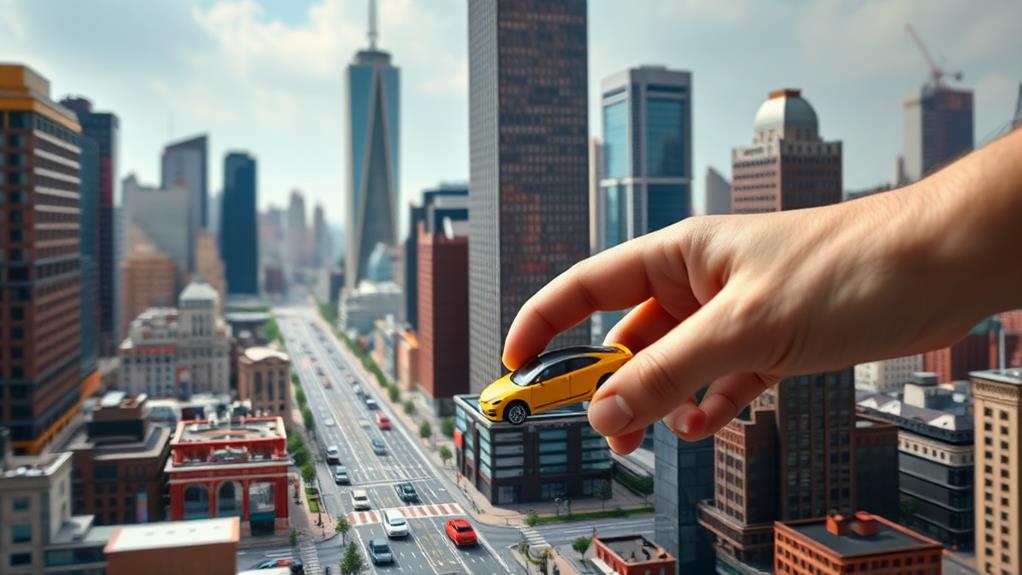
When it comes to toy photography, playing with scale can dramatically alter your viewer's perception of the scene. By cleverly manipulating the size relationships in your photos, you can create the illusion that your tiny subjects exist in a life-sized world. Start by juxtaposing your toys with real-world objects. For example, placing a toy car next to a garden plant can make it appear as if it's traversing a dense jungle. Use everyday items like cups, books, or furniture to amplify this effect.
Invest in a macro lens if you haven't already. This will allow you to capture intricate details that make your toys appear more realistic. Experiment with depth of field to blur the background, enhancing the illusion of scale. By keeping your subject sharp and the background soft, you're tricking the viewer into seeing a much larger scene.
Lighting also plays a vital role. Use natural light to avoid harsh shadows that can betray the toy's true size. Soft light diffused through a window or a lightbox works wonders. Remember, the key is to immerse your viewer in a world where the boundaries between real and imagined blur seamlessly.
Capturing Dynamic Angles
Ever wondered how to inject life into your toy photographs? Capturing dynamic angles can transform a static image into one bursting with energy and excitement. By changing your perspective, you can create the illusion of movement and depth, making your toys seem larger than life.
Start by getting down to the toy's level. This angle often results in a more immersive experience, allowing viewers to feel like they're part of the scene. Don't be afraid to experiment with unconventional angles. Tilt your camera or shoot from below to add drama and tension to your shots. Here are some tips to help you capture the perfect dynamic angle:
- Experiment with height: Try shooting from above or below your toy to add intrigue and scale.
- Use negative space: This can highlight your toy by creating contrast and drawing attention to it.
- Focus on motion: Capture a sense of movement by following the toy's line of action or implied trajectory.
Enhancing With Props

While dynamic angles can elevate your toy photography, props can further enrich your scenes by adding context and storytelling elements. Think of props as the supporting cast that complements your main toy subject, providing depth and a sense of place. By using everyday items like leaves for an outdoor adventure or cardboard cutouts for a cityscape, you can transform a simple setup into a fascinating narrative.
Start by considering the story you want to tell. If you're capturing a superhero in action, small buildings or vehicles can suggest a bustling city scene. For a more domestic setting, items like tiny furniture or kitchenware can create a cozy atmosphere. Match the scale of your props with the toys to maintain realism. Miniature accessories are great, but don't overlook everyday objects that can double as props with a bit of creativity.
Experiment with the arrangement of props. Create layers in your scene by placing objects at varying distances from the camera, adding depth and perspective. Lighting is essential, so play with shadows and highlights to emphasize key elements. With thoughtful prop selection, you'll bring your toy photography to life, making each image tell its own unique story.
Focusing on Detail
Capturing intricate details can transform your toy photography from ordinary to extraordinary. When you focus on the small elements, you breathe life into your images, making them pop with realism. Start by getting up close and personal with your toys. Use a macro lens or the macro setting on your camera to capture those tiny details like texture, paint strokes, or facial expressions. These elements can make your photos feel more lifelike and engaging. Additionally, experimenting with dynamic posing techniques for photography can further enhance the storytelling aspect of your images. Position your toys in action, as if they’re part of a larger narrative, which not only captivates the viewer but also highlights the intricate details you’ve captured. Play with different angles and compositions to create a sense of depth that draws the eye and invites viewers to explore every facet of your creative scene.
Consider the background and setting as well. A cluttered background can detract from the details you want to showcase. Aim for a simple backdrop that complements your toy's colors and theme, ensuring it highlights the toy instead of competing with it.
To enhance detail in your toy photography:
- Use natural light: It brings out textures and colors more effectively than artificial light.
- Steady your camera: A tripod or a steady hand reduces blur, keeping details crisp.
- Experiment with angles: Different perspectives can reveal new intricacies.
Experimenting With Shadows
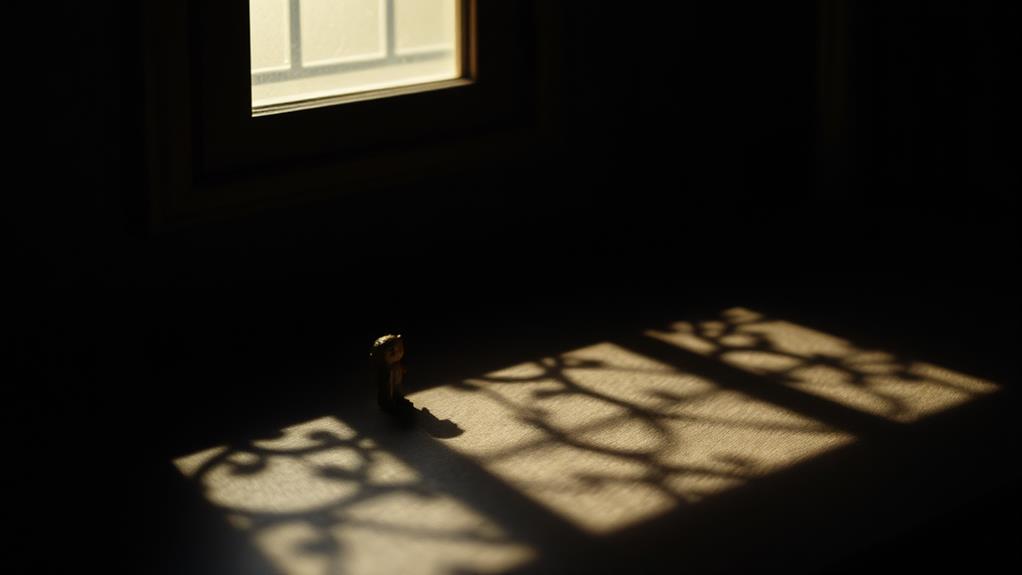
Shadows can add a dramatic touch to your toy photography, giving your images depth and mood. Start by observing how natural light interacts with your toys. Position your toy near a window or outside during the golden hour when the sun is low, casting long, soft shadows. This time of day creates a gentle contrast that adds drama without being too harsh.
Experiment with different light sources to see how they affect shadows. Try using a desk lamp or a flashlight to create a more focused shadow. Angle the light to cast elongated or distorted shadows that add intrigue to your scene. Move the light source around, exploring how changing the angle alters the shadow's shape and intensity.
Consider using props to manipulate shadows creatively. A simple cutout or translucent material can cast interesting patterns on your toy, enhancing the storytelling aspect of your photo. Also, play with the distance between the light source and your toy. A closer light casts sharper, more defined shadows, while a distant one results in softer edges.
Post-Processing for Realism
Achieving realism in toy photography isn't just about the shot itself; it's also about how you process the image afterward. Post-processing can transform your photos from good to breathtakingly realistic. Start by adjusting the exposure and contrast to guarantee your image has a balanced look, making the toys pop just like real-life figures. Don't shy away from using editing software like Photoshop or Lightroom, as these tools can help refine those details that make your photo stand out.
When you're editing, focus on these key areas:
- Color Correction: Confirm the colors in your image are true to life. Use the color balance tool to correct any hues that seem off.
- Sharpening: Enhance the details of the toys, but avoid overdoing it. Subtle sharpening can bring out textures without making the image look artificial.
- Background Enhancements: Sometimes, the background can make or break the realism in your photo. Adjust its brightness and blur to make your subject the center of attention.
Frequently Asked Questions
What Camera Settings Work Best for Toy Photography?
You'll want to use a small aperture like f/8 for depth of field and set ISO low, around 100, to reduce noise. Adjust shutter speed for lighting, and always shoot in RAW for better editing flexibility.
How Can I Make Toys Appear Lifelike in Photographs?
A picture is worth a thousand words. Capture lifelike toys by setting up dynamic backgrounds, adjusting lighting to mimic natural conditions, and using shallow depth of field. Don't forget to experiment with angles to tell a compelling story.
What Affordable Equipment Can Improve Toy Photography Results?
You can improve toy photography with affordable gear like a ring light for even lighting, a macro lens for close-up details, and a simple tripod for stability. Experimenting with backgrounds and props also enhances your shots.
How Do I Prevent Reflections on Shiny Toy Surfaces?
To prevent reflections on shiny toy surfaces, use a polarizing filter on your camera lens. Position the light source at an angle and diffuse it with a softbox. You can also try shooting in a darker environment.
What Editing Software Is Recommended for Beginners in Toy Photography?
Diving into editing is like painting with light. Start with Adobe Lightroom or Snapseed; they're user-friendly and powerful. You'll find countless tutorials online, helping you enhance your toy photos and make them pop like magic.
At a Glance
To truly elevate your toy photography, remember that 90% of a photo's impact comes from lighting. Mastering this will make your images pop. Use natural light for softer shadows and experiment with angles to create depth. By incorporating realistic backgrounds and props, you'll add authenticity to your scenes. Don't forget post-processing; it's essential for refining details and enhancing realism. With these tips, you're on your way to capturing stunning, lifelike toy photos!


