In this enchanting time-lapse, you’ll witness the magic of toy photography unfold as you build your own mini studio. Carefully arrange lighting and props to bring your envisioned scene to life, creating depth and realism through strategic placement and texture techniques. With attention to scale and proportion, transform ordinary toys into enchanting story characters against a crafted backdrop. Discover the art of capturing perfect shots and enhancing them with subtle edits. Stay tuned to uncover more secrets to perfecting toy photography.
Conceptualizing the Miniature Scene
When conceptualizing your miniature scene, start by imagining the story you want to tell through your lens. Picture the narrative unfolding with your toys as the central characters. Will they be heroes on a daring adventure, or perhaps they’re involved in a mysterious encounter? Let your creativity flow as you brainstorm different scenarios.
Next, consider the setting. What’s the environment like? Is it a bustling cityscape, a serene forest, or a fantastical domain? Envision how the background complements your story. Think about lighting, shadows, and perspective—how they can add depth and emotion to your scene.
Finally, determine the mood. Are you aiming for a whimsical, dramatic, or serene atmosphere? Each choice influences how viewers interpret your story. Keep refining until your vision is vivid and compelling.
Gathering Essential Tools and Materials
To get started on your toy photography studio, you’ll need to gather some essential tools and materials. Begin by checking off items from your essential tools checklist, ensuring you have everything from lighting to backdrops. Use the material selection guide to choose the right props and backgrounds that will make your miniature scenes come to life.
Essential Tools Checklist
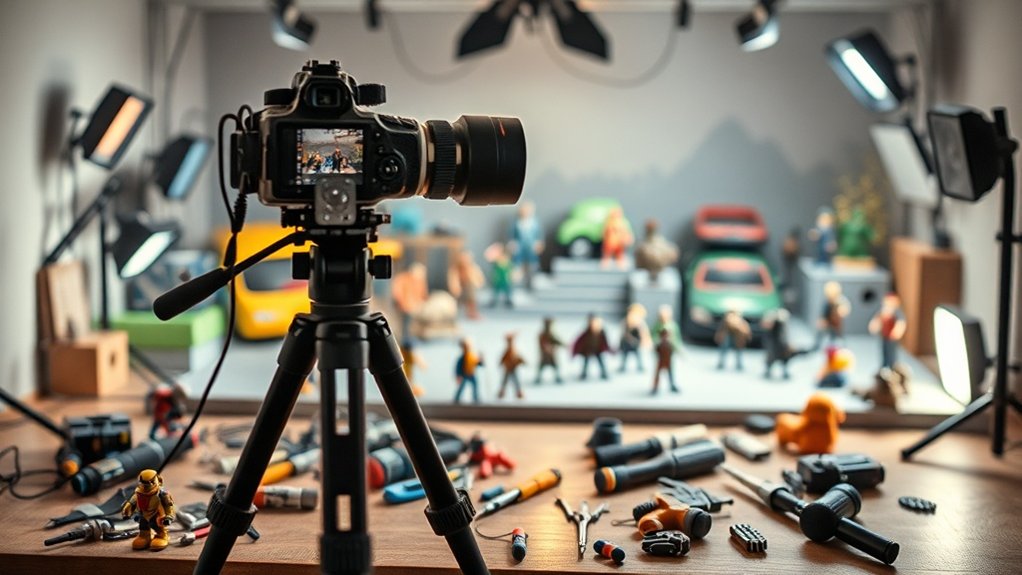
A well-prepared workspace is the backbone of any successful BTS toy photography studio. To get started, you’ll need an essential tools checklist that guarantees efficiency and creativity. First, gather a sturdy table or desk to serve as your main work surface. Lighting is vital, so include adjustable lamps to control shadows and highlights. A good camera tripod holds your device steady for those perfect shots.
Don’t forget small clamps or tape to secure backgrounds and props in place. Scissors and a craft knife are necessary for cutting materials with precision. A ruler and cutting mat provide accurate measurements and protect surfaces. Keep a notebook handy for jotting down ideas and notes during the process. With these tools, your mini studio will be ready for action.
Material Selection Guide
With your workspace set and tools lined up, it’s time to focus on selecting the right materials for your BTS toy photography studio. Start with a sturdy base: think foam board or a small wooden platform. These materials provide a stable foundation for your setups. Next, consider backgrounds. Colored paper or fabric backdrops instantly transform your scene’s mood. Gather a variety of textures like sand, gravel, or moss for added realism. Lighting kits are essential; LED strips or small lamps enhance your ability to manipulate shadows and highlights. Don’t forget adhesives like putty or double-sided tape to keep everything in place. Finally, have a few props ready—miniature figures or objects that complement your theme bring your scene to life. Experimenting with miniature set building techniques can open up new creative avenues for your photography. Try layering different materials to create depth, or incorporating elements like lighting lenses to soften or direct light. The more you explore these techniques, the more dynamic and engaging your scenes will become. Additionally, consider incorporating natural elements from your surrounding environment to enhance your scenes. For example, leaves or rocks can add depth and context, creating a captivating backdrop for your BTS toy photography. Don’t forget to check out some onlocation toy photography tips to elevate your outdoor setups and make the most of different lighting conditions.
Designing the Mini Studio Layout

Creating the perfect mini studio layout requires careful planning and attention to detail. Start by envisioning the scene you want to capture. Determine the dimensions of your space, guaranteeing it accommodates the perspective and scale of your toys. Consider the backdrop and lighting arrangements, as they’ll define the mood and ambiance of your photos. Use flexible lighting options to experiment with shadows and highlights. Arrange your elements to guide the viewer’s eye through the scene, creating depth and interest. Think about the camera angles you’ll use and guarantee easy access to all parts of the setup for adjustments. Keep in mind the overall theme and story you’re aiming to tell, allowing it to influence the spatial arrangement and composition.
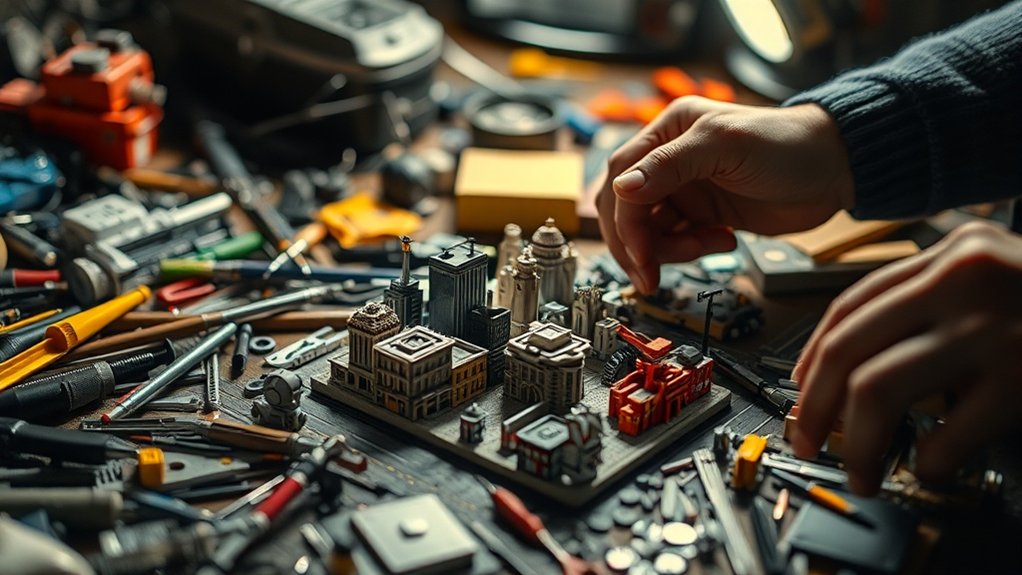
Selecting and Crafting Miniature Props
Although miniature props might seem minor, they play an essential role in bringing your toy photography scenes to life. Start by selecting props that enhance your scene’s story. Look around your house for small items or visit hobby stores for miniature accessories. Think about the theme you’re creating and choose items that naturally fit the environment.
Once you’ve gathered your materials, crafting begins. Use clay, fabric, or paper to create custom props that perfectly match your vision. Don’t shy away from painting or modifying existing items to fit your scene’s aesthetic. Be creative and let your imagination guide you. Remember, these tiny details elevate your photos, making them more engaging and authentic. With well-chosen props, your miniature world will captivate every viewer.
Mastering the Art of Scale and Proportion
When creating engaging toy photography, understanding scale relationships is key to crafting believable scenes. You’ll need to guarantee that every element is proportionate, which helps in balancing depth and enhancing realism. By mastering these aspects, your miniature worlds will hold viewers’ attention and bring your subjects to life.
Understanding Scale Relationships
To truly master toy photography, understanding scale relationships is essential. You need to grasp how different elements within your photo relate to each other in size. This knowledge helps create more believable and engaging images. Pay attention to the relative sizes of your subjects and backgrounds. For instance, when you photograph a toy figure, consider how it interacts with its surroundings.
Small adjustments can make a big difference—position a smaller prop closer to the camera to make it appear larger or vice versa. Tools like rulers or reference objects can guide you in maintaining consistent scale. Experimenting with angles and distances will also enhance your sense of proportion. By honing this skill, you’ll elevate your toy photography, making scenes more dynamic and lifelike.
Proportion in Miniature Scenes
Creating enchanting miniature scenes hinges on mastering proportion. When you’re crafting a small-scale world, accurate proportion guarantees every element feels authentic. To achieve this, consider the following:
- Reference real-life objects: Study actual items to understand their relative sizes.
- Use a consistent scale: Choose a specific scale (e.g., 1:12) and stick with it throughout the scene.
- Check perspective: Position elements to reflect how they’d appear in a real setting.
- Compare sizes: Place objects side-by-side to verify they maintain believable proportions.
- Adjust details: Fine-tune details so that they align with the chosen scale.
Balancing Depth and Realism
While mastering proportion is key to crafting believable miniature scenes, achieving depth and realism takes your artistry to the next level. Start by considering the perspective. Position your camera at eye level with the toys to mimic how they’d appear in real life. Use a shallow depth of field to blur the background slightly, drawing attention to the main subject. Lighting plays a vital role, too. Aim for soft, diffused light to avoid harsh shadows that break the illusion. Experiment with angles, as well. Sometimes, a low angle can make a figure appear more dynamic. Finally, add small details like tiny props or textured backgrounds. These elements enhance the scene’s authenticity, making viewers pause and wonder if it’s real.
Techniques for Creating Realistic Textures
When crafting realistic textures in your BTS toy photography studio, a few key techniques can elevate your scenes from ordinary to extraordinary. Start by considering various materials to enrich the scene’s authenticity. Use everyday items creatively to mimic real-world surfaces. Here are some practical tips:
- Sandpaper: Use it to create rough, gritty surfaces that resemble asphalt or concrete.
- Foam Sheets: Carve and paint them to simulate anything from brick walls to wooden floors.
- Sponges: Dab paint with them for organic textures like moss or bark.
- Tissue Paper: Layer it with glue for crumpled fabric or weathered paper effects.
- Acrylic Gels: Apply them to add depth and dimension, mimicking water or glass.
These textures will bring your toy photography to life.
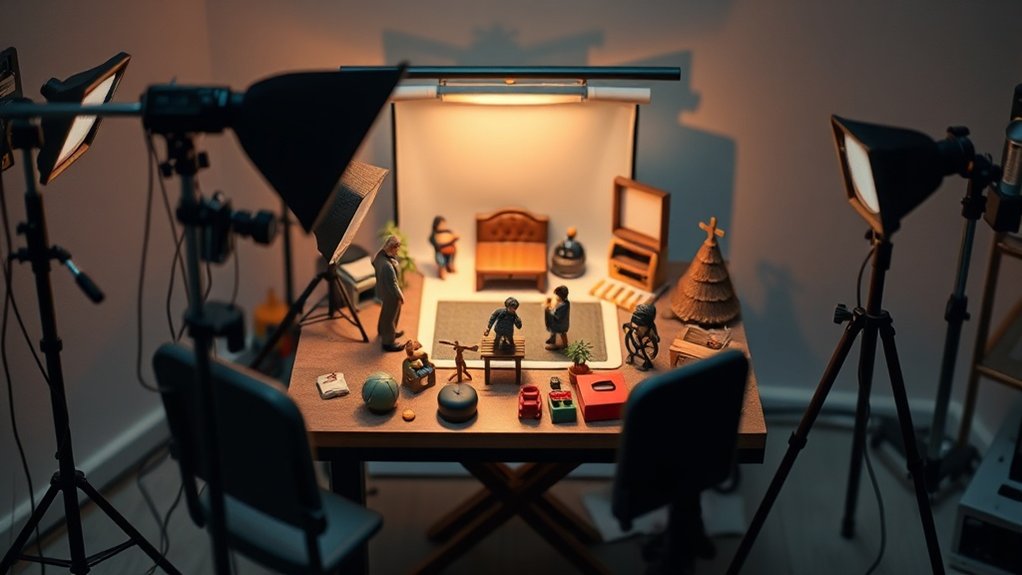
Strategic Lighting for Dramatic Effects
As you perfect those realistic textures in your BTS toy photography studio, the right lighting can greatly enhance their impact. Strategic lighting is essential for adding drama and depth to your scenes. Start by experimenting with different light sources, such as LED panels or desk lamps, to create shadows and highlights that accentuate your textures.
Position your lights at varying angles to see how they interact with the surfaces of your toys. Side lighting can bring out fine details, while backlighting adds a touch of mystery. Don’t forget to play with color gels to introduce mood through hues.
Reflectors or diffusers can soften harsh shadows, giving your images a polished look. With practice, you’ll master the art of light manipulation for stunning, dramatic effects.
Capturing the Perfect Shot
How do you capture the perfect shot in your BTS toy photography studio? First, get to know your gear. Familiarize yourself with camera settings to control focus, aperture, and shutter speed. Position your toys creatively; angles can transform your scene dramatically. Use props that complement your figures to add depth and storytelling. Here’s a quick checklist to guide you:
- Experiment with angles: Low shots can make toys look larger than life.
- Play with perspectives: Alternate views keep the scene dynamic.
- Utilize props: They enhance the narrative and add interest.
- Adjust camera settings: Control exposure to suit the mood.
- Be mindful of backgrounds: Keep them consistent with your theme.
With patience and creativity, you’ll capture shots that truly stand out.
Editing and Enhancing the Final Image
Although you’ve captured a great shot, the journey doesn’t end there—editing can elevate your images to a new level. Start by importing your photo into editing software like Adobe Lightroom or Photoshop. These tools help refine details, adjust lighting, and correct colors. Enhance the image’s vibrancy by tweaking saturation levels, but be careful not to overdo it. Cropping can improve composition by focusing on essential elements, and sharpening can highlight intricate details of the toys. Don’t forget to remove any distractions or blemishes using the clone or healing tools. Finally, apply a subtle vignette to draw attention to the subject. These adjustments guarantee your final image stands out, showcasing your toy photography skills in the best light possible.
Frequently Asked Questions
How Can I Incorporate Narrative Storytelling Into My Toy Photography?
You can incorporate narrative storytelling by crafting a scene that tells a story through your toys’ interactions. Use dynamic poses, lighting, and backgrounds to convey emotions and plot, letting viewers imagine the unfolding story behind the images.
What Are the Best Practices for Photographing Reflective Miniature Surfaces?
You should use a polarizing filter to reduce glare and reflections. Position your light sources at angles to minimize direct reflections. A softbox or diffuser helps create even lighting. Experiment with angles to find the best shot.
How Do I Maintain Consistency in a Series of Toy Photographs?
To maintain consistency in your toy photography series, use the same lighting setup, camera settings, and background. Position toys similarly and edit photos with a uniform style. Keep notes on each session to guarantee repeatability.
How Can I Safely Transport My Mini Studio Setup?
Make certain your mini studio’s components are secure by using padded bags or containers. Wrap fragile parts in bubble wrap. Label each piece for easy reassembly. Avoid rushing, and always double-check everything before transporting to maintain safety.
What Are Some Common Mistakes to Avoid in Toy Photography?
You may overlook lighting, which can create unflattering shadows. Avoid cluttered backgrounds by keeping the focus on the toy. Don’t ignore composition; framing your subject well enhances interest. Always check for dust on your toys.
At a Glance
You’ve built a miniature universe, meticulously crafting each detail with the precision of a watchmaker. Every prop, a masterpiece; every shadow, a symphony. Your studio is a domain where even the tiniest speck holds infinite potential. As you capture that perfect shot, the scene bursts to life, transcending the ordinary. With a few edits, your creation becomes a breathtaking saga, a tribute to your unparalleled skill and imagination. You’re not just a photographer; you’re a magician of miniatures.


