
To give your toy photography a cinematic feel, understand color theory and choose the right software like Photoshop or DaVinci Resolve. Use complementary or analogous colors for mood, adjusting temperature to create warmth or coolness. Enhance contrast for depth with shadows, and apply vignettes for dramatic focus. Experiment with film emulation filters to mimic cinematic qualities. Consistency is key for storytelling. Discover more techniques to transform your photos into enchanting cinematic scenes.
Understanding the Basics of Color Theory

Understanding the basics of color theory is essential for enhancing your toy photography. You’ll want to explore how colors interact to create mood and depth. Start by familiarizing yourself with the color wheel, a fundamental tool that helps you see relationships between colors. Complementary colors, like blue and orange, can make your subjects pop by providing contrast. Analogous colors, such as green and blue, create harmony and cohesion.
Consider how warm colors (reds, oranges, yellows) evoke energy and excitement, while cool colors (blues, greens, purples) bring calmness and serenity. Balance these to guide the viewer’s emotions and focus. Pay attention to color saturation and brightness, as these elements affect the overall tone. Mastering color theory will elevate your toy photography from ordinary to cinematic.
Choosing the Right Software for Color Grading
When diving into color grading for toy photography, selecting the right software is essential for achieving professional results. You’ll find several options, but Adobe Lightroom and Photoshop are popular for their robust features and user-friendly interfaces. If you’re looking for a free alternative, GIMP offers powerful tools without the cost. For more advanced users, DaVinci Resolve provides cinematic-grade capabilities, perfect for those seeking detailed control over color nuances. Each software has unique strengths, so consider your specific needs and skill level. If you’re a beginner, start with something simpler like Lightroom. As you gain confidence, you can explore more complex tools. Remember, the right software enhances creativity, allowing you to bring your toy photography to life with enchanting colors.
Analyzing Cinematic Color Palettes
When you’re color grading toy photography, understanding color theory is essential for creating mood and depth. By analyzing cinematic color palettes, you can draw inspiration from movie-inspired color schemes that evoke specific emotions. This approach will help you transform your toy photos into visually stunning pieces that tell a story.
Understanding Color Theory
Exploring cinematic color palettes can transform toy photography from mundane to mesmerizing. To achieve this, you need to understand the basics of color theory. Start by familiarizing yourself with the color wheel. It’s your guide to harmonizing colors and creating dynamic contrasts. Complementary colors—those opposite each other on the wheel—offer striking visual impact. Meanwhile, analogous colors, which sit next to each other, provide a more harmonious feel.
Consider the emotional weight each color carries. Warm hues like reds and oranges evoke energy and excitement, while cool tones like blues and greens suggest calmness or mystery. By consciously applying these principles, you can craft images that evoke specific moods. Experimenting with different combinations will help you discover what best enhances your toy photography.
Movie-Inspired Color Schemes
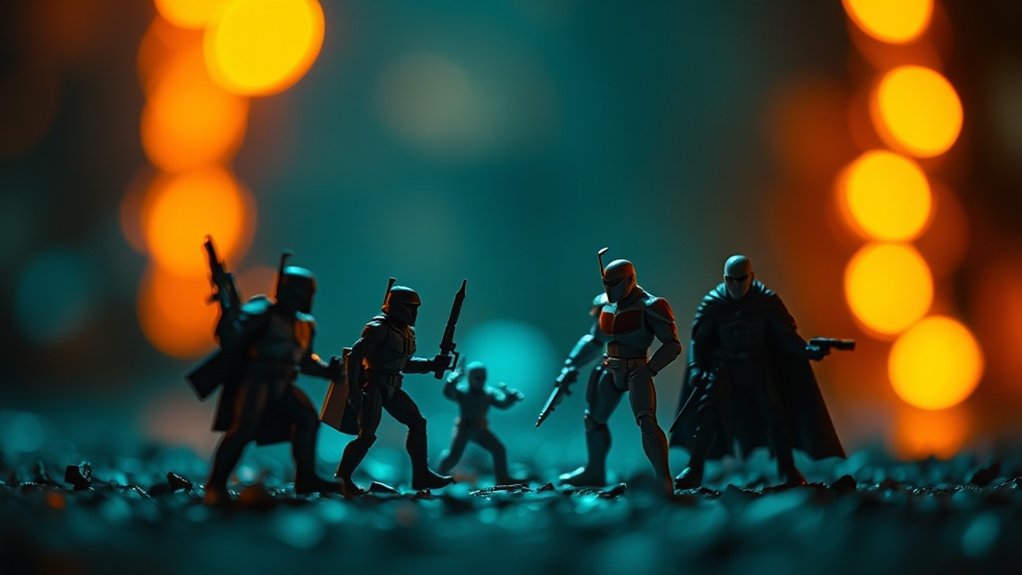
Movie magic isn’t just about the story; it’s also in the colors that bring each scene to life. As you immerse yourself in toy photography, consider how a movie’s color scheme can inspire your shots. Think about how “The Matrix” uses green hues to convey its digital world or the warm tones of “Mad Max: Fury Road” to emphasize the desert’s harshness.
You can apply these palettes to your toy photos to evoke specific emotions. Want to create an adventurous feel? Use the earthy tones from “Indiana Jones.” For a futuristic vibe, try the cool blues from “Blade Runner.” Analyze scenes from your favorite films and extract the primary colors. By doing so, you’ll create visuals that resonate with cinematic depth and atmosphere.
Setting the Mood With Temperature Adjustments
When you’re adjusting the temperature of your toy photography, consider how warm tones can create an intimate feel, while cool hues add a touch of drama. By tweaking these elements, you can transform a simple image into a story that evokes specific emotions. Experimenting with temperature adjustments helps you capture the essence of your scene and engage your audience.
Warm Tones for Intimacy
Setting the right mood in toy photography often comes down to the subtle use of warm tones. By incorporating warm hues like reds, oranges, and yellows, you can evoke feelings of intimacy and comfort in your images. These colors mimic the golden light of sunrise or sunset, adding a cozy, inviting atmosphere. To achieve this, try adjusting the white balance or using filters that enhance these tones.
When you bring out these warm shades, your toys will seem to tell a story of warmth and closeness. Experiment with shadows and highlights to deepen the effect. Keep your audience engaged by making them feel like they’re stepping into a heartfelt scene. Embrace the power of warm tones, and watch your toy photography come alive with emotion.
Cool Hues for Drama
While warm tones create intimacy, cool hues bring a sense of drama and intrigue to toy photography. When you adjust the temperature to cooler shades, your images can evoke feelings of mystery and tension. To achieve this effect, focus on tweaking the blues and greens in your photo editing software.
Here’s how you can set the mood:
- Lower the temperature: Slide the temperature bar towards the cooler end to add a bluish tint.
- Increase contrast: Enhance shadows to make the colors pop, emphasizing the dramatic feel.
- Adjust saturation: Tone down the saturation slightly to prevent the scene from feeling too vibrant.
- Use selective coloring: Highlight specific elements with cooler tones to draw the viewer’s eye.
Experiment with these adjustments to create enchanting, cinematic toy photography.
Enhancing Contrast and Shadows for Depth
To achieve a sense of depth in toy photography, enhancing contrast and shadows is essential. Start by increasing the contrast in your image. This will make the highlights brighter and the shadows darker, giving your toys a more three-dimensional look. Use your editing software’s contrast sliders to find the right balance; too much can make your photo look harsh.
Next, focus on shadows. They’re vital for adding realism and drama. Use tools like the burn tool to deepen shadows around the toys, especially where they naturally fall. This technique helps anchor the toys to the surface, preventing them from appearing as if they’re floating. Remember, subtlety is key; you want to enhance the scene without overpowering it. Experiment until you find what works best.
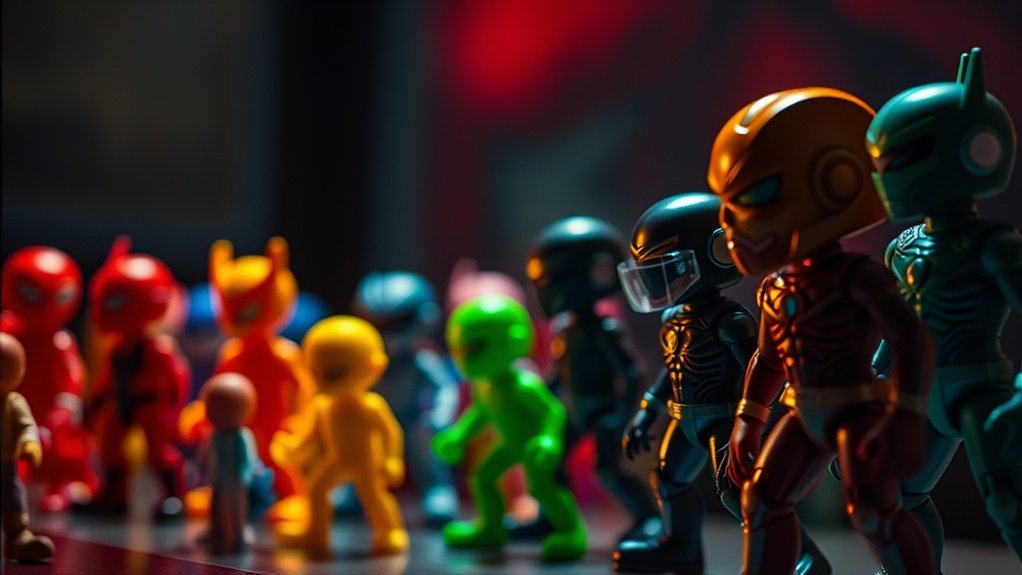
Utilizing Selective Color Adjustments
After enhancing contrast and shadows to create depth, it’s time to focus on selective color adjustments to further elevate your toy photography. By honing in on specific hues, you can add a cinematic touch and direct the viewer’s eye. Here’s how you can master selective color adjustments:
- Identify Key Colors: Determine which colors should stand out. This could be the vibrant red of a superhero’s cape or the cool blues of an icy landscape.
- Adjust Saturation: Increase saturation to make colors pop or decrease it for a more muted, dramatic effect.
- Manipulate Hue: Shift hues slightly to create a mood or match a specific lighting scenario.
- Balance Complementary Colors: Use complementary colors to create harmony and guarantee your subject is the focal point.
Apply these techniques to achieve striking results.
Applying Vignettes for Focus and Drama
A well-applied vignette can transform your toy photography by drawing the viewer’s eye directly to the subject and adding an element of drama. When you darken the edges of your photo, it creates a spotlight effect, making your central figure pop. Start by choosing a subtle, circular vignette that doesn’t overpower the scene. Adjust the feathering to guarantee a smooth shift from the vignette to the main subject, avoiding harsh lines. Pay attention to the intensity; too much darkness can distract rather than focus. Use vignettes to enhance the mood, whether it’s a mysterious shadowy corner or a bright, inviting space. Experiment with different shapes and sizes to see what best complements your composition and the story you’re telling.
Experimenting With Film Emulation Filters
Film emulation filters can breathe new life into your toy photography by infusing it with nostalgic charm or cinematic flair. These filters mimic the look of classic films, allowing you to evoke specific moods and atmospheres. When experimenting with film emulation, consider the following:
- Choose a Film Type: Decide whether you want the warmth of Kodak Portra or the cool tones of Fuji Velvia. Each type offers distinct qualities.
- Adjust Intensity: Play around with the filter’s intensity. A subtle touch can enhance, while a stronger application might transform the scene entirely.
- Blend Modes: Experiment with different blend modes to see how they affect your image’s depth and texture.
- Layer Filters: Don’t hesitate to layer multiple emulations for a unique, customized look.
Achieving Consistency Across a Series
When you’re photographing a series of toys, achieving consistency is key to creating a cohesive and professional look. Start by maintaining uniform lighting. Use the same light source and settings for each photo to guarantee a steady atmosphere. Next, stick to a particular color grading style. Apply similar filters or adjustments across all images. This technique keeps the series visually harmonious. Additionally, pay attention to framing and composition. Consistent angles and perspectives help maintain a unified narrative. Organize your editing workflow by creating presets or templates. They can streamline the process and guarantee every image aligns with your vision. Consistency doesn’t mean monotony; it’s about creating a seamless experience that connects each piece in your series.
Balancing Creativity With Realism
When balancing creativity with realism in toy photography, you should use creative color palettes that capture your vision while ensuring the lighting remains true to life. It’s essential to master realistic lighting techniques to maintain believability, even within imaginative scenes. By thoughtfully selecting colors, you can enhance storytelling, guiding viewers through the narrative you wish to portray.
Creative Color Palettes
How can you strike the perfect balance between creativity and realism in toy photography? It’s all about using creative color palettes wisely. Here’s how you can achieve that:
- Understand Your Scene’s Mood: Think about the story you want to tell. Warm tones can evoke nostalgia, while cooler tones might suggest mystery or tension.
- Choose a Dominant Color: Select a primary color to set the scene’s tone. This helps in creating a cohesive look.
- Use Complementary Colors: Introduce contrasting colors to highlight specific elements, making your scene pop without overwhelming it.
- Adjust Saturation and Brightness: Subtle shifts in saturation can make your toys appear vibrant yet realistic, while brightness adjustments can enhance depth.
With these tips, your toy photography will feel both imaginative and authentic.
Realistic Lighting Techniques
Lighting can transform your toy photography from ordinary to extraordinary. To achieve a cinematic feel, balance creativity with realism by simulating natural light sources. Use a softbox or diffuser to mimic the sun’s gentle glow, creating depth and dimension. Position lights at angles that replicate how sunlight or indoor lighting would naturally fall on your subject.
Experiment with bouncing light off reflectors to fill shadows, adding a touch of realism while preserving the scene’s mood. Pay attention to the direction and intensity, as harsh lighting can make your photos look artificial. Consider using colored gels subtly to mimic environmental hues, enhancing the overall atmosphere.
Practice these techniques, and you’ll infuse your toy photography with an enchanting realism that feels true to life.
Storytelling Through Colors
Although color might seem like a simple aesthetic choice, it plays an essential role in storytelling within your toy photography. Colors evoke emotions and set the tone for your narrative, guiding viewers through your miniature worlds. Here’s how you can balance creativity with realism:
- Choose a Color Palette: Decide on a palette that complements your story. Warm tones can convey nostalgia, while cool tones might evoke mystery.
- Use Color Contrast: Highlight focal points by contrasting colors. This draws attention to key elements in your composition.
- Consider Color Symbolism: Integrate colors with symbolic meanings to deepen your story. For instance, red can suggest danger or passion.
- Maintain Consistency: Guarantee your color choices remain consistent throughout the series, reinforcing your narrative and immersing viewers.
Frequently Asked Questions
How Do I Avoid Over-Saturating Colors in Toy Photography?
You can avoid over-saturating colors by adjusting the saturation slider carefully. Keep an eye on the histogram and guarantee colors look natural. Consider using reference images to guide your adjustments and maintain a balanced, realistic look.
What Are Common Mistakes in Color Grading Toy Photos?
You often make mistakes like over-saturating colors, ignoring white balance, and using inconsistent tones. Pay attention to these aspects to enhance your toy photos without losing their charm or making them look unrealistic. Practice makes perfect!
How Can I Make Toy Photos Look More Lifelike?
To make your toy photos pop like a jack-in-the-box, focus on realistic lighting and shadows. Use natural backgrounds, adjust depth of field, and pay attention to small details. Don’t forget post-processing for added lifelike touches!
What Are the Best Practices for Batch Processing Toy Images?
You should organize your images first. Use consistent settings with editing software, like Lightroom, to streamline the process. Apply presets for uniformity, and don’t forget to review each photo to guarantee quality isn’t compromised.
How Do I Choose the Best Color Grading Tools for Beginners?
Start by exploring user-friendly tools like Lightroom or Snapseed. They offer intuitive interfaces for beginners. Look for those with presets and tutorials. Test different apps to see which suits your style and workflow best.
At a Glance
As you journey through the world of color grading in toy photography, think of each adjustment as a brushstroke on your canvas. You’re not just enhancing images; you’re crafting stories where colors whisper emotions. With the right tools and techniques, your photos become windows to cinematic worlds. Let each hue symbolize the mood you wish to convey, and remember, consistency is the thread that weaves your narrative together. Embrace creativity, yet keep one foot in reality.


