To achieve stunning toy photography, combine natural and artificial lighting for flexibility and control. Position toys near windows to capitalize on soft, warm natural light, enhancing scenes with reflectors. Introduce artificial light to manage shadows and highlights, mixing warm and cool sources for balance. Use diffusers to soften harsh lights, and adjust distances for dynamic effects. Experiment with techniques to find your unique style, and there’s more to explore for perfecting every shot.
Understanding the Basics of Natural and Artificial Lighting
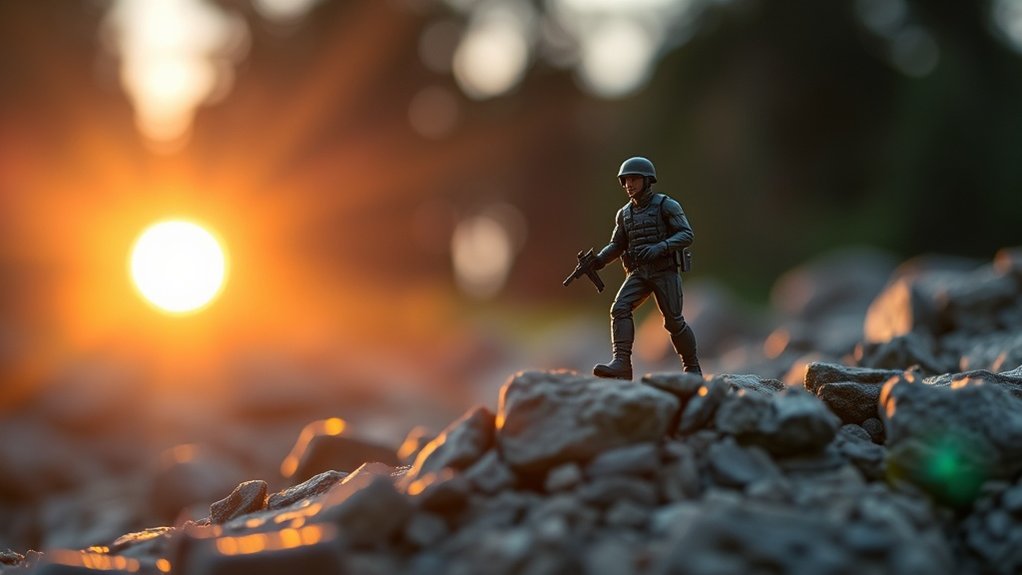
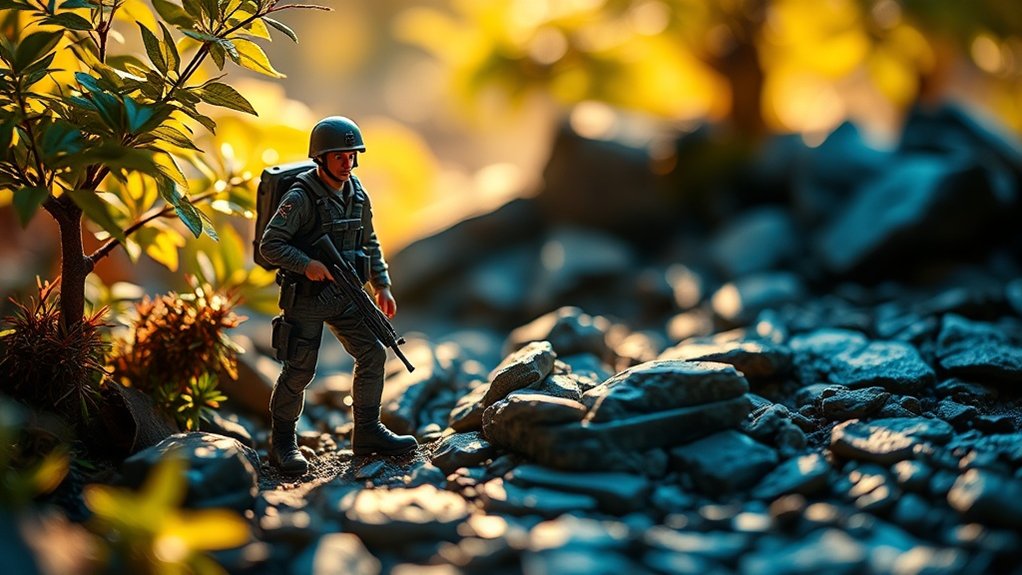
Lighting forms the backbone of toy photography, and understanding both natural and artificial sources is essential to creating stunning images. You’ll want to harness natural light for its softness and warmth. Early mornings or late afternoons are perfect for capturing those golden hour shots. Position your toys near a window to make the most of diffused sunlight, but be mindful of harsh shadows. Exploring various lighting techniques for toy photography can elevate your shots even further. Experiment with reflectors to bounce light and fill in shadows, or use small LED lights to create dramatic highlights and shadows. Understanding how to manipulate light will not only enhance your subjects but also add depth and interest to your compositions. Additionally, mastering different lighting techniques for toy photography can allow you to achieve distinct moods and atmospheres in your images. Experimenting with colored gels on your artificial lights can introduce vibrant tones that enhance the narrative of your scenes. Remember, each lighting scenario presents a new opportunity to tell a story through your toys, making creativity and experimentation key components of the process.
Artificial lighting lets you shoot anytime and gives you control over the scene. Use LED panels or desk lamps to spotlight your subjects. It’s all about experimenting with angles and distances to get the desired effect. Don’t shy away from combining both sources. You’ll find that mastering the interplay between natural and artificial light elevates your toy photography to new heights. Additionally, remember to take advantage of the golden hours, when the sun casts a warm glow that can enhance your images. Natural light benefits in photography are significant; it can create soft shadows and highlight details that artificial lights may overlook. Integrating both light sources will not only add depth to your photos but also allow for greater creative expression.
Choosing the Right Equipment for Your Lighting Needs
When diving into toy photography, having the right equipment can make a significant difference in your results. Start with a reliable camera that suits your budget; DSLRs and mirrorless cameras offer great control and quality. Pair it with a sturdy tripod to prevent shaky shots. For lighting, consider a combination of natural light and artificial sources like LED panels or ring lights. These allow you to control shadows and highlights effectively.
Don’t overlook modifiers such as diffusers and reflectors; they help soften light and enhance details. Small, adjustable stands can position lights precisely. Finally, invest in remote triggers or intervalometers to manage shots without touching the camera. With the right tools, you’ll capture your toy scenes with precision and creativity.
Techniques for Blending Natural and Artificial Light

When blending natural and artificial light in toy photography, focus on balancing light sources to create a harmonious scene. You can use diffusers to soften harsh shadows and make your subjects stand out. Experiment with different color temperatures to enhance the colors creatively and bring your setup to life.
Balancing Light Sources
Although mastering toy photography can be challenging, blending natural and artificial light to create a balanced scene is essential for achieving stunning results. Start by analyzing the existing natural light. Determine its direction and strength. Use this as your base. Next, introduce artificial light sources to fill in shadows or highlight specific areas. Position your artificial lights carefully so they complement the natural light without overpowering it. Use reflectors or white surfaces to bounce light where needed. Adjust the intensity of the artificial lights using dimmers or by moving lights closer or farther away. Balancing these elements involves experimentation, so take test shots and make fine adjustments. Remember, your goal is to create a seamless blend that enhances your toy’s details and mood.
Diffusing Harsh Shadows
Capturing the perfect shot often means dealing with harsh shadows that can detract from your toy’s intricate details. To soften these shadows, try using diffusers. You can make a simple diffuser from materials like white cloth, baking paper, or translucent plastic. Position it between your light source and the subject. This will scatter the light, reducing harshness and creating a more even, natural glow.
Combine natural light with artificial light by placing your setup near a window while using a softbox or lamp. Adjusting their distances will help you achieve a balanced light. Reflectors can also assist in bouncing light into shadowed areas. A white foam board or aluminum foil works well. With these techniques, you’ll highlight details without overshadowing them.
Enhancing Colors Creatively
To creatively enhance colors in your toy photography, blend natural and artificial light for dynamic results. Start by identifying the natural light source, like sunlight streaming through a window, and use it as your base. Position your toy to maximize this light’s soft, natural hues. Then, introduce artificial lighting, such as LED lights or a small flashlight, to accentuate specific areas or colors. Experiment with different colored gels on your artificial lights to create vibrant contrasts and highlights.
Adjust the intensity by moving the light source closer or farther and playing with angles. This mix of lights allows you to craft striking color combinations and depth. Remember, subtle tweaks can make a big difference, so keep experimenting until you achieve your desired effect.
Creating Dynamic Shadows and Highlights
When creating dynamic shadows and highlights in toy photography, you’ll want to balance your light sources to avoid overpowering the scene. Experiment with shadow placement to add depth and intrigue to your subjects. By enhancing highlights naturally, you can bring out textures and details that make your toys come to life.
Balancing Light Sources
While setting up your toy photography scene, balancing light sources is essential for creating dynamic shadows and highlights that bring your subjects to life. Start by evaluating the natural light available and consider how it interacts with your artificial sources. You want to create a harmonious blend that enhances your scene’s mood and detail.
Here are some tips to help you balance your light sources effectively:
- Position your lights at varying heights to add depth and dimension.
- Use diffusers to soften harsh artificial lights and create more natural-looking highlights.
- Experiment with light intensity to find the perfect balance between shadows and highlights.
- Adjust the distance of lights from your subject to play with shadow length.
- Mix warm and cool light sources for a balanced color palette.
Shadow Placement Techniques
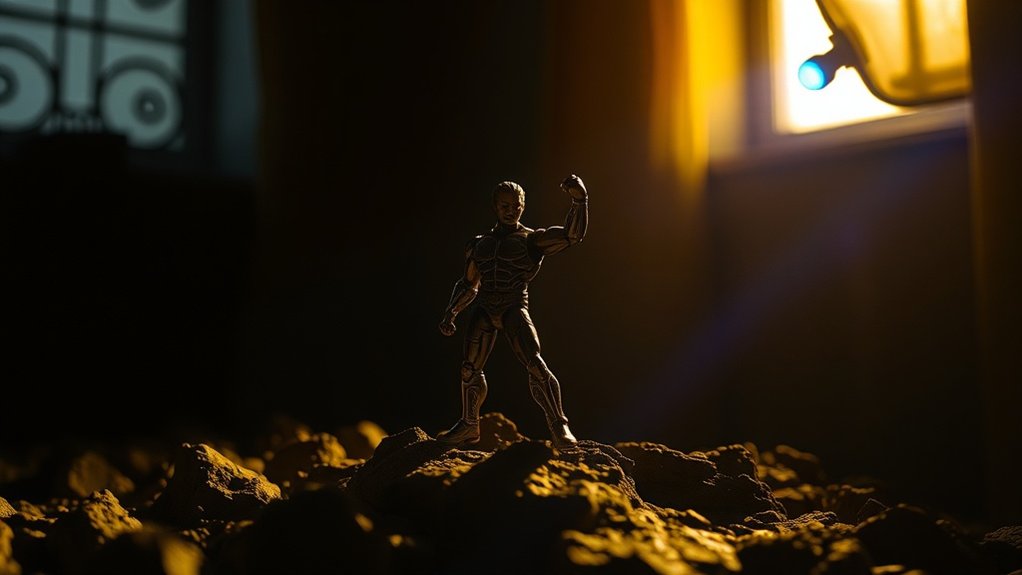
Even though toy photography might seem straightforward, mastering shadow placement can greatly elevate your images. By carefully controlling shadows, you can add depth and drama to your scenes. Start by observing the natural light direction; this is your guide. Position your toys to catch light at an angle, creating intriguing shadows that enhance realism. Use reflectors or small light sources to control shadow intensity. Try placing a light behind the subject for a striking silhouette effect. Adjust angles and distances to see how shadows change, adding different moods to your photos. Remember, shadows can direct the viewer’s attention and emphasize key features. Experiment with various setups to discover what works best for your creative vision, making each shot unique and enchanting.
Enhancing Highlights Naturally
Capturing the perfect balance of light and shadow is essential to dynamic toy photography. To naturally enhance highlights, you’ll want to focus on creating depth and interest without overwhelming the scene. Use natural light sources like windows or diffuse sunlight to softly illuminate your subject. Positioning is vital; move your toys to catch the light just right. Reflectors can also bounce light back onto your subject, accentuating highlights without harshness. Consider these techniques:
- Place toys near a window during golden hour for warm, soft lighting.
- Use a white foam board to reflect light and enhance highlights.
- Position toys at an angle to the light source for natural shadow play.
- Experiment with backlighting for dramatic silhouettes.
- Adjust your camera settings to capture subtle light variations.
Experimenting With Color Temperature and Effects
Exploring color temperature and effects can greatly enhance your toy photography, adding depth and mood to your images. Start by adjusting your camera’s white balance to match the light source, whether it’s warm sunlight or cool LED lights. This helps you create the desired atmosphere. Experiment with gels or colored lights to introduce unique effects—try using a blue gel for a nighttime look or a red one for drama. Mixing different color temperatures can add an interesting dynamic to your shots, making them pop.
Don’t be afraid to play with shadows, too. Shadows can add intrigue and help tell a story. Remember, post-processing tools can further refine your colors and effects, allowing you to perfect your vision. Keep experimenting to discover what works best for your style.
Practical Tips for Setting Up Your Toy Photography Scene
Setting up your toy photography scene requires thoughtful planning and creativity. It’s all about crafting a miniature world that tells a story. Start by selecting a suitable backdrop that complements the toy’s theme. Pay attention to scale—props should match the toy’s size for a realistic effect. Consider using both natural and artificial lighting to highlight details and create depth. Here are some practical tips for perfecting your setup:
- Backdrop Selection: Choose a background that enhances your toy’s narrative.
- Lighting: Use a combination of natural sunlight and controlled artificial lights.
- Props: Incorporate items that are proportional to the toy.
- Angles: Experiment with different angles to add dynamic perspectives.
- Focus: Use a shallow depth of field to draw attention to your subject.
These tips guarantee an engaging scene every time.
Frequently Asked Questions
How Can I Achieve Consistency in Lighting Across Different Toy Photo Sessions?
You can achieve consistent lighting by documenting your setup details, like light positions and camera settings. Use uniform backgrounds and schedule shoots at similar times. Practice and refine your techniques to guarantee each session matches your desired outcome.
What Are Common Mistakes to Avoid in Toy Photography Lighting Setups?
You might overexpose subjects or create harsh shadows by placing lights too close. Avoid inconsistent color temperatures and forgetting to diffuse light. Make certain your background doesn’t distract from your toy, and always test setups before shooting.
How Do I Maintain the Quality of My Lights Over Time?
Make certain your lights last by cleaning them regularly to prevent dust buildup. Store them properly when not in use, and replace any worn-out parts promptly. Invest in quality bulbs and handle everything with care to maintain performance.
Are There Any Lighting Apps Recommended for Toy Photography?
Lighting apps can be your secret weapon in toy photography. You’ll find options like Lume Cube and Light Spectrum Pro guiding your creative journey. These apps help you control brightness and color, enhancing every tiny detail.
How Can I Use Light to Convey Emotions in Toy Photography?
You can convey emotions in toy photography by experimenting with light angles and colors. Use soft lighting for a calm feel, or intense, contrasting shadows for drama. Warm tones evoke happiness, while cool tones suggest melancholy.
At a Glance
Imagine your toy photography setup as a painter’s canvas, where the brushstrokes of natural and artificial light bring your subjects to life. By blending these lighting techniques, you create a dynamic dance of shadows and highlights, adding depth and intrigue to your scenes. Don’t shy away from experimenting with color temperatures and effects; they’re your palette. With the right equipment and a bit of creativity, you’ll transform your toy photography into enchanting works of art.


