Enhancing depth in toy photography edits involves mastering various techniques. Start by skillfully using shadows and highlights to add realism. Incorporate layering to balance foreground and background, and adjust depth of field to spotlight your subject. Perspective shifts enrich visual narratives, while color grading sets the mood. Lighting creates atmosphere, and textures offer intricate detail. By crafting enchanting backgrounds, you blend your entire scene seamlessly. There's more to discover that can elevate your toy photography depth to new levels. Experimenting with composition can also significantly enhance your images; try the rule of thirds to guide the viewer’s eye. Additionally, familiarizing yourself with essential editing techniques for toy photos, such as color correction and sharpening, can bring out the best in your shots. Remember, the art of storytelling through your edits can transform an ordinary scene into a captivating visual experience.
Utilizing Shadows and Highlights for Realism
When it comes to toy photography, mastering shadows and highlights can make your images pop with realism. You'll want to study how light interacts with your subjects. Position your light sources deliberately to cast natural-looking shadows, which add depth and dimension. Use a flashlight or lamp to mimic sunlight, emphasizing textures and contours. Adjust your camera settings to capture the delicate balance between light and dark.
Don't underestimate the power of editing software to fine-tune these elements. Enhance shadows to give toys a grounded appearance, and boost highlights to accentuate reflective surfaces. By paying close attention to these details, you'll create images that feel more lifelike. Remember, subtle adjustments often make the biggest impact, turning simple snapshots into stunning visual stories. Experiment with different editing techniques for toy photography to discover what works best for your style. Play with contrast and saturation to bring out the colors and textures of your subjects, allowing them to stand out against their backgrounds. Ultimately, the right combination of editing can transform your images, making each shot not just a photo, but a captivating scene that tells a story.
Incorporating Layering Techniques
When working with toy photography, layering techniques can transform your images by balancing background and foreground elements. You'll create depth by using shadows strategically and incorporating overlapping elements. By mastering these techniques, your photos will have a dynamic and engaging look.
Background and Foreground Balance
Achieving a harmonious balance between background and foreground in toy photography requires a keen eye and skillful use of layering techniques. You need to think about how different elements interact within your frame. Start by selecting a background that complements, rather than competes with, your toy subject. A blurred background can help the toy stand out, drawing attention where it matters most. Use layers in editing software to adjust background and foreground elements separately. You can tweak brightness, contrast, or even add subtle textures to enhance depth. Experiment with positioning to create visual interest, ensuring neither background nor foreground overwhelms the other. This balance not only makes your toy pop but also tells a more compelling story through your photograph.
Creating Depth With Shadows
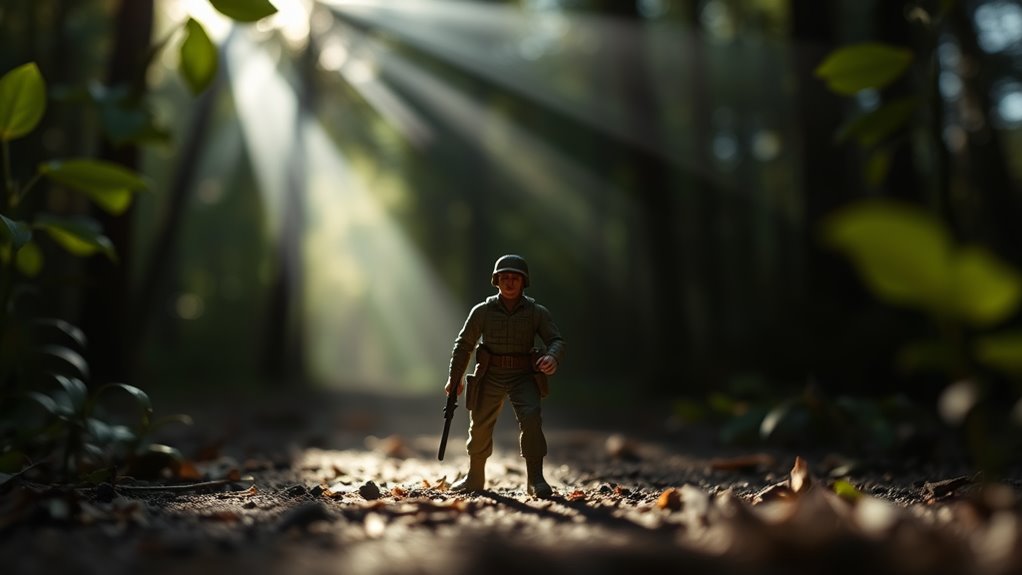
To create a sense of depth in toy photography, utilizing shadows effectively can transform a flat image into a more dynamic scene. Start by considering the light source's direction and intensity. Position your toys so the shadows cast extend towards the viewer, creating an illusion of space. Use natural light or a flashlight to craft these shadows.
Layering techniques enhance this effect by adding multiple shadow layers, each slightly offset from the others. Adjust opacity and blur to mimic realistic shadow gradients. Experiment with different angles and intensities to see how shadows can emphasize your toys' features. By playing with shadow length and placement, you'll add a three-dimensional quality to your photos that captivates viewers and elevates the storytelling in your miniature worlds.
Utilizing Overlapping Elements
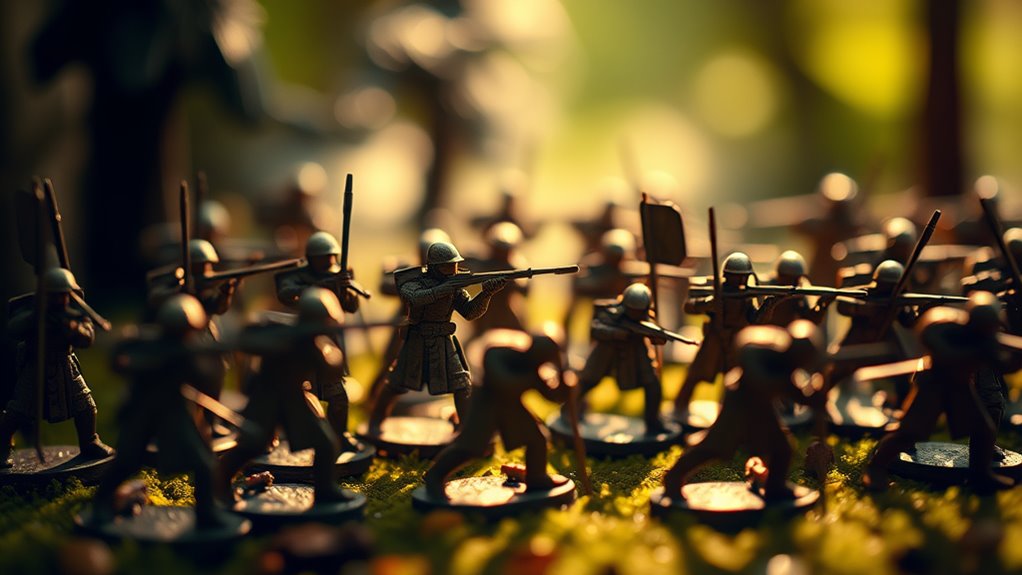
Incorporating overlapping elements through layering techniques can add depth and complexity to your toy photography. Start by positioning toys in the foreground, middle ground, and background. Imagine your scene as a stage, with each toy playing its part. By overlapping them, you create a sense of space and dimension. Use props like plants, rocks, or buildings to enhance these layers. Adjust your camera angle to emphasize the depth you've created; lower angles often work well. Pay attention to the lighting, as it can highlight the layers and shadows between elements. Experiment with different positions and elements until you find a composition that feels dynamic and engaging. Layering isn't just about placement—it's about telling a story through your scene's arrangement.
Mastering Depth of Field Adjustments
When you're working on toy photography, mastering depth of field adjustments can transform your images. Start by blurring background elements to make your subject pop, ensuring it remains sharp and enchanting. By layering these effects, you can create a sense of visual depth that draws viewers into your miniature world.
Blurring Background Elements
Although mastering depth of field adjustments may seem intimidating at first, blurring background elements can greatly enhance your toy photography by drawing attention to your subject. You'll want to create a sense of depth, making the toy the star of the shot. Here's how:
- Use a Wide Aperture: Set your camera to a low f-stop (e.g., f/2.8) to achieve a shallow depth of field, causing the background to blur effectively.
- Increase Distance: Position your toy far from the background. The greater the distance, the blurrier the background will appear.
- Experiment with Angles: Try different angles to find the perfect balance between your subject and the blurred background.
- Post-Processing Tools: Use software like Photoshop or Lightroom to selectively blur parts of your image for added effect.
Emphasizing Subject Sharpness
To make your toy photography truly stand out, focus on emphasizing subject sharpness by mastering depth of field adjustments. Start by understanding your camera's aperture settings. A low f-stop (like f/2.8) creates a shallow depth of field, making your subject pop against a creamy background blur. Experiment with different f-stops to find the perfect balance for your scene. Positioning is essential—keep your subject at an ideal distance from the background. Use manual focus to guarantee pinpoint sharpness on your toy's features. Don't forget to stabilize your camera with a tripod to avoid unwanted blurriness. Also, lighting plays a key role; make sure it's bright and even to highlight details. Practice patience and precision, and your toy photos will capture viewers' attention.
Layering for Visual Depth
Having mastered subject sharpness, let's explore how layering can add visual depth to your toy photography. Layering involves creating distinct foreground, middle ground, and background layers to make your scene pop. Here's how you can achieve it:
- Foreground Elements: Place small objects in front of your main subject. This creates a sense of depth and directs the viewer's eye.
- Middle Ground Focus: Position your toy in the middle ground. It should be the focal point, drawing attention while blending naturally within the scene.
- Background Blur: Use a wide aperture to blur the background. This emphasizes the subject, making it stand out against a soft backdrop.
- Natural Overlaps: Allow elements in different layers to overlap slightly. This adds a realistic touch and enhances depth perception.
Implementing Perspective Shifts
When capturing toy photography, implementing perspective shifts can transform static scenes into dynamic visual narratives. You start by considering the angle and distance from which you photograph your toys. By changing the viewpoint, you can emphasize the scale and drama of the scene. Get low to the ground for a towering effect or shoot from above for a more diminutive look. This shift in perspective draws viewers into the scene, making them feel part of the toy's world. Experiment with tilting your camera slightly or shifting your position to create a more immersive experience. These subtle changes can make your photos more engaging, giving them a sense of movement and life. Remember, perspective can be as powerful as any other editing tool.
Adding Depth Through Color Grading
While perspective shifts can dramatically alter the feel of your toy photography, color grading adds another layer of depth that can completely transform the mood and atmosphere. Color grading lets you evoke emotions and create a cohesive visual story. Here's how you can enhance your toy photos through color grading:
- Select a Color Palette: Choose colors that complement your subject and background. Consistency is key to making your scene feel unified.
- Adjust Contrast and Saturation: Boosting contrast can make your toys pop, while saturation adjustments can amplify or mute emotions.
- Experiment with Temperature: Warm tones can create a cozy feel, whereas cool tones evoke calmness or mystery.
- Use Presets Wisely: Presets can save time, but tweak them to suit your specific vision and style.
Employing Atmospheric Effects
To elevate your toy photography, consider employing atmospheric effects that breathe life into your scenes. These effects can transform a simple setup into an immersive world, capturing your viewer's imagination. You might use mist or fog to create mystery or smoke for an action-packed moment. Dust particles or digital overlays can add depth and make your toys appear part of a larger story.
Utilizing elements like rain or snow can evoke emotion and context, making your scenes dynamic and engaging. You don't need elaborate equipment; sometimes a simple spray bottle or a handheld fan can work wonders. Experiment with different materials and techniques to discover what enhances your specific theme. Crafting atmosphere can be the key to making your toy photography truly stand out.
Leveraging Lighting to Create Mood
Building on atmospheric effects can greatly enhance your toy photography, but lighting is what truly sets the mood. By manipulating light, you can evoke different emotions and atmospheres. Here's how to effectively use lighting in your edits:
- Direct Light: Use harsh, direct light for dramatic shadows and high contrast. This works well in action scenes or intense moments.
- Soft Light: Create a calm, serene atmosphere with diffused light. This is perfect for gentle, reflective scenes.
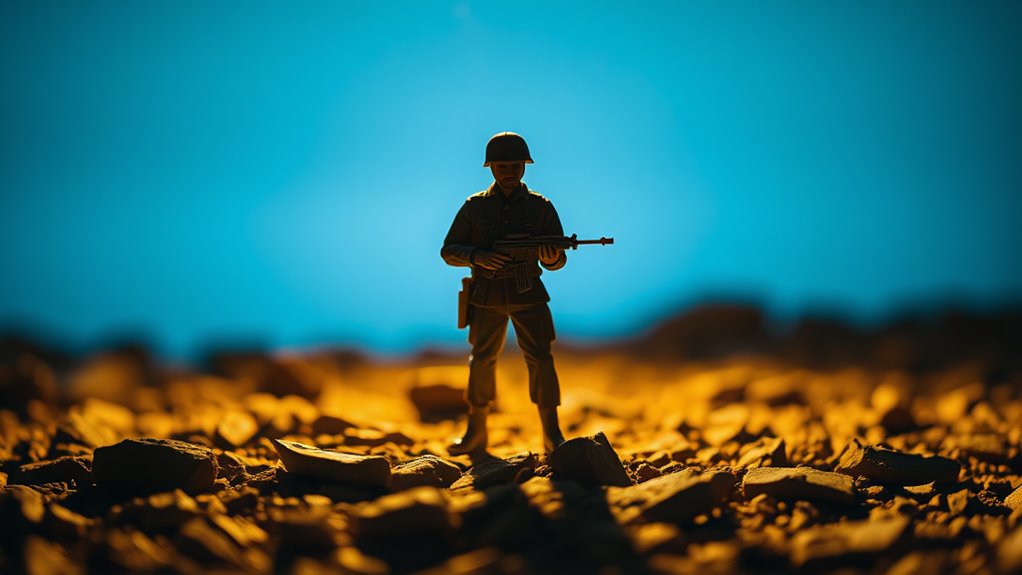
- Backlighting: Position the light source behind the subject for a silhouette effect, adding mystery and depth.
- Colored Gels: Apply colored gels to your lights to infuse scenes with specific moods, like warm orange for coziness or cool blue for tranquility.
Experiment and find what suits your narrative best!
Using Textures for Enhanced Detail
Incorporating textures into your toy photography can greatly enhance detail and bring your scenes to life. Textures add a tactile element, making surfaces appear more realistic. You might use textures like wood grain, fabric fibers, or gritty concrete to elevate the story you're telling. To begin, consider photographing real-world textures or downloading high-quality texture images online. Once you have your textures, layer them in photo editing software. Adjust blending modes to see how they interact with your scene. Don't shy away from experimenting; sometimes unexpected combinations yield the best results. Pay attention to scale and perspective to guarantee the textures look natural. By thoughtfully integrating textures, you'll create enchanting images that captivate viewers and make your toy photography stand out.
Crafting Backgrounds for Visual Interest
Textures can breathe life into your toy photography, and backgrounds hold just as much power in shaping your scene's narrative. A well-crafted background can transform an ordinary photo into something extraordinary. Consider these ideas to create visually interesting backgrounds:
- Use Natural Elements: Incorporate leaves, rocks, or water to add a realistic touch. They provide texture and make the scene more immersive.
- Play with Color: Vibrant or contrasting colors can draw attention to your subject and set the mood.
- Create Depth: Position objects at varying distances to give a sense of dimension. This adds realism and intrigue.
- Experiment with Lighting: Shadows and highlights can dramatically alter the background, influencing the atmosphere and focus.
These techniques will elevate your toy photography, making it engaging and dynamic.
Blending Multiple Images for Dynamic Scenes
When you blend multiple images for dynamic scenes, you open up a world of creative possibilities in toy photography. By combining different shots, you can craft a sense of motion or drama that a single image might lack. Start by capturing various angles or elements separately. Then, use editing software to layer these images, adjusting opacity and alignment to achieve a seamless look.
Pay attention to lighting and shadows to guarantee consistency across your composition. This technique allows you to create unique scenarios, such as a toy superhero leaping from a building or a miniature car racing through a bustling city. Experiment with foreground and background elements to add depth and intrigue. Blending images transforms your work, making each scene more vivid and storytelling-rich.
Frequently Asked Questions
What Camera Settings Are Ideal for Achieving Depth in Toy Photography?
You should adjust your camera settings to a wide aperture for a shallow depth of field. Lower your ISO for less noise, and use a fast shutter speed to capture sharp images, enhancing the overall depth effectively.
How Can Props Enhance Depth in Toy Photography Scenes?
Did you know 68% of toy photographers use props for depth? By strategically placing props at varying distances, you create layers that lead the eye through the scene, making your toy photography more immersive and visually engaging.
What Are Common Post-Processing Mistakes That Diminish Depth in Images?
You might overuse blur or neglect lighting, flattening your image. Avoid excessive sharpening or saturation that can diminish realism. Guarantee correct perspective and don't ignore shadows, as these elements can make or break your photo's depth.
How Does Lens Choice Affect Depth in Toy Photography?
You know how a magician picks the right wand? Your lens is that wand. Wide apertures blur backgrounds, creating depth. A macro lens reveals details, while a telephoto compresses space. Choose wisely to enhance your toy photography.
Are There Any Apps Specifically for Editing Depth in Toy Photos?
You can use apps like Snapseed and AfterFocus to enhance depth in toy photos. These apps offer tools to create depth of field effects, blur backgrounds, and adjust focus, making your toy photography more dynamic and realistic.
At a Glance
You've now revealed the secrets to transforming your toy photography into masterpieces that rival reality itself! By expertly wielding shadows, highlights, and color grading, you create depth that jumps off the screen. With layering techniques and perspective shifts, your scenes gain unparalleled dynamism. Master the art of depth of field, and every photo becomes a vivid story. Embrace these techniques, and your toy photography will captivate like never before, making viewers question if it's real or imaginary! To elevate your skills even further, incorporate outdoor toy photography tips that utilize natural light and environmental elements to enhance your compositions. Experiment with various settings and backgrounds that add context to your narrative, as this will breathe life into your scenes. By allowing the surroundings to interact with your subjects, you’ll create a captivating atmosphere that draws viewers into your imaginative world. Additionally, consider exploring the enchanting realm of macro photography of toys, where the intricate details come to life in breathtaking clarity. This close-up approach allows you to highlight textures and features that often go unnoticed, adding a new layer of storytelling to your work. Experimenting with different angles and lighting in macro shots can further enhance the magic of your toy scenes, making them truly unforgettable.


