Immerse yourself in toy photography by mastering realistic water effects. You can start by understanding light and shadow to add depth, then use glossy surfaces for reflections. With everyday items, create dynamic splashes and effects like mist or ripples. Experiment with angles for realism and use post-processing for enhanced visuals. Perfecting these techniques transforms ordinary scenes into enchanting stories. Keep exploring techniques and transform your miniature photography sessions into magical adventures.
Understanding the Basics of Light and Shadow

Understanding the basics of light and shadow is essential in creating realistic water effects in toy photography. You need to know how light interacts with water to capture stunning images. Imagine how light bounces off surfaces, creating highlights and casting shadows. Adjust your light source to control the intensity and direction of shadows, which adds depth to your scene.
When setting up your shot, consider the angle of the light. A low angle can create long shadows, adding drama to your composition. Diffusing light softens shadows, offering a more subtle effect. Experiment with different light sources, like natural sunlight or artificial lighting, to see how they change the mood. Remember, mastering light and shadow gives you the power to transform ordinary scenes into enchanting photographic stories.
Crafting Realistic Water Reflections
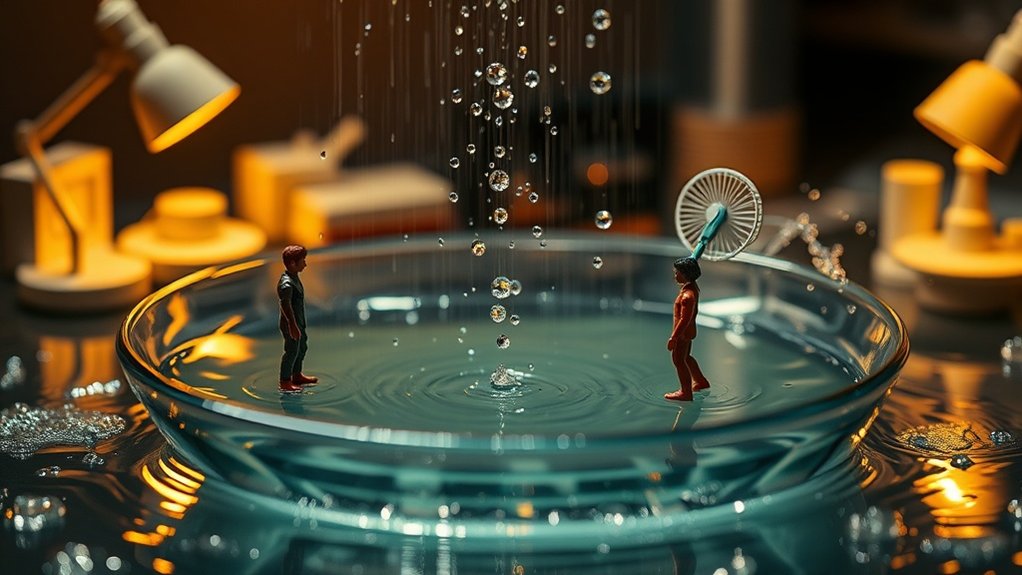
To craft realistic water reflections in toy photography, start by considering the surface where the reflection will appear. Use a smooth, glossy material like a mirror or a shallow glass tray filled with water. Make certain the surface is clean and free of dust or smudges to achieve a crisp reflection. Position your toy at a slight angle above the surface to capture an accurate reflection without distortion.
Next, adjust your lighting. Soft, diffused light works best to avoid harsh shadows and to enhance the reflective quality of the water. Experiment with different angles until you find the one that highlights the toy while maintaining a believable reflection. Finally, use a tripod to stabilize your camera, making certain a sharp and focused image for both the toy and its reflection.
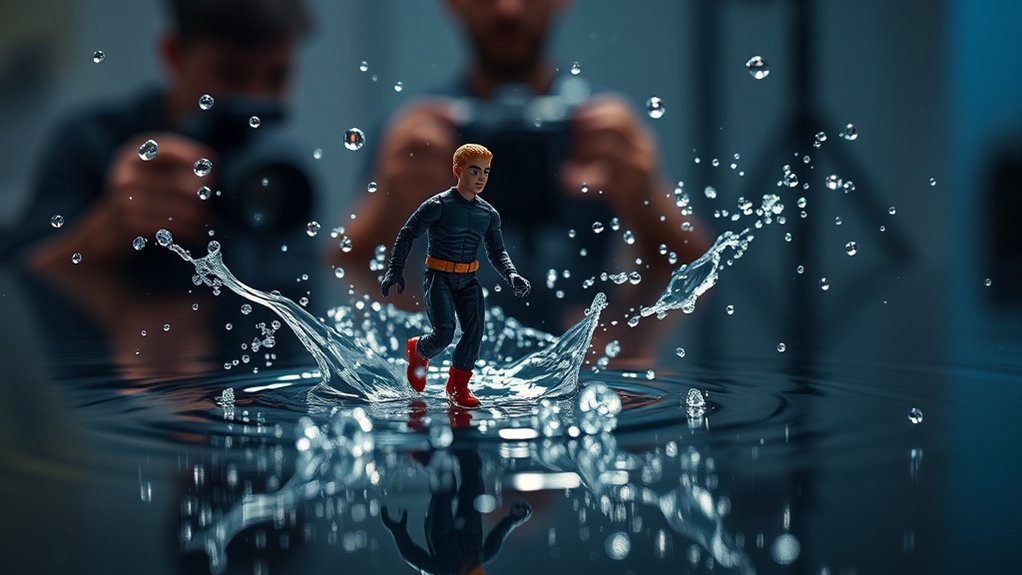
Creating Dynamic Water Splashes
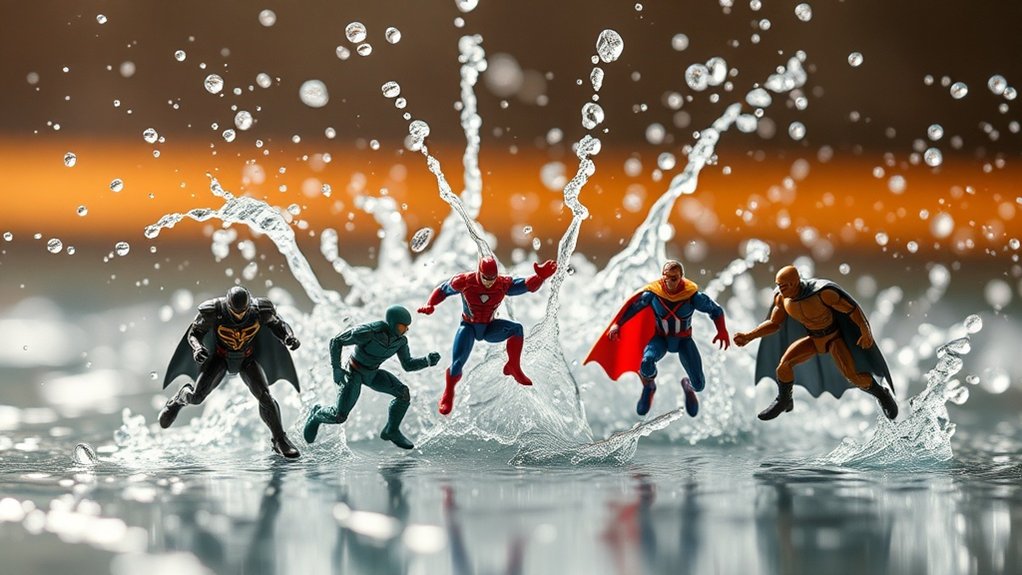
You’re ready to make those toy photos pop with dynamic water splashes by mastering splash timing techniques. Capture that perfect moment with just the right amount of motion blur to add energy and excitement. Don’t forget how light reflections can enhance the drama and realism of your splash scenes.
Splash Timing Techniques
Creating dynamic water splashes in toy photography requires patience and precise timing. You need to guarantee that you capture the splash at its most dramatic moment. Begin by setting up your scene and camera. Use a fast shutter speed to freeze the action. It’s essential to anticipate the exact moment the toy interacts with the water. Practice dropping objects from various heights and angles to see how splashes form and evolve. You might want to use a remote shutter release or a burst mode to increase your chances of capturing the perfect shot. Timing is everything, so experiment with different techniques, like tossing the toy or using a pipette to create controlled splashes. Keep refining your skills to master this exciting aspect of toy photography.
Motion Blur Effects
Capturing the essence of motion blur in toy photography can elevate your water splash shots to a new level of dynamism. To achieve this, you’ll need to experiment with your camera settings and timing. Embrace slower shutter speeds to create the desired blur effect, as it can beautifully convey the motion of water. Position your toys strategically to enhance the sense of movement, making the splash appear more dramatic.
Consider these tips for a successful motion blur effect:
- Use a tripod: It stabilizes your camera, preventing unwanted blur in the stationary parts of your shot.
- Play with shutter speed: Adjust it to balance between sharpness and motion blur.
- Experiment with angles: Different perspectives can emphasize the fluidity of the splash.
These techniques will add energy to your water effects.
Light Reflection Tips
When aiming to capture dynamic water splashes in toy photography, understanding light reflection can make all the difference. Position your light source to hit the water at an angle, creating highlights and shadows that add depth and realism. Experiment with backlighting to accentuate the splash’s edges, making it pop dramatically against the background. Use reflective surfaces, like white foam boards, to bounce light back onto the water, enhancing its texture and sparkle.
Adjust your camera settings to capture the light’s interaction with the water. A fast shutter speed freezes the motion, while a wider aperture can help isolate your subject, blurring the background. Don’t be afraid to adjust and experiment. The right lighting transforms a simple splash into a dynamic, eye-catching element in your scene.
Using Simple Household Items for Water Effects
You can create stunning water effects in your toy photography using simple household items. Everyday objects like spray bottles and straws become your tools for DIY water droplets and simple splash techniques. Experiment with these items to bring your scenes to life with realistic water action.
Everyday Objects as Tools
Creating realistic water effects in toy photography doesn’t require fancy equipment; in fact, everyday household items can work wonders. You can achieve stunning results with just a few common objects. Start with a simple spray bottle to create mist and simulate rain. Adjust the nozzle for different droplet sizes, adding depth and mood to your scene. A clear glass or plastic sheet can be used to mimic a water surface. Place it in front of your lens to capture reflections and ripples. For those looking to enhance their creations further, consider editing toy photography scenes using software to adjust colors, brightness, and contrast, bringing out the vividness of water effects. Adding digital overlays of splashes or droplets can elevate the realism, complementing the physical techniques you’ve applied. Experimenting with different lighting conditions during your shoot will also yield varied moods and textures, enhancing your overall composition.
For more creative effects:
- Use a small fan to create gentle water ripples.
- Try a straw to blow air and form bubbles.
- Employ a pipette to create controlled water streams.
Experiment with these tools, and you’ll enhance your toy photography with dynamic water effects.
DIY Water Droplets
Achieving realistic water droplets in toy photography is easier than you might think with just a few household items. Begin by using a simple spray bottle filled with water. This allows you to control the size and distribution of the droplets on your toys. Opt for a fine mist setting to create delicate droplets, perfect for simulating dew or rain. For more precise placement, a small paintbrush can help you apply individual droplets exactly where you want them.
Additionally, glycerin mixed with water can create longer-lasting droplets. Glycerin is thicker than water, so the droplets won’t evaporate as quickly, giving you more time to capture the perfect shot. Experiment with different mixtures to achieve the right consistency and effect, enhancing your toy photography.
Simple Splash Techniques
When it comes to adding dynamic splash effects to your toy photography, a little creativity goes a long way. You don’t need expensive equipment to create compelling water effects; simple household items can do the trick. Start by using a shallow tray filled with water as your base. This helps control splashes and keeps your setup tidy. Next, use a small spoon or a pipette to create different splash patterns. Varying the height from which you drop the water can change the splash dynamics dramatically.
Here are some quick tips to get you started:
- Plastic Wrap: Stretch it over a surface to create ripples.
- Straws: Blow through them gently to form small waves.
- Paintbrushes: Flick them to create tiny droplets and splashes.
Perfecting Angles for Maximum Realism
How do you capture that perfect angle for maximum realism in toy photography? Start by considering the viewpoint of the subject. Imagine being eye-level with the toy, and adjust your camera to mimic that perspective. This approach creates a more immersive and life-like scene. Experiment with various angles, such as low or high, to see how the light interacts with the water and toy. Angling the camera slightly can add dynamic tension or highlight specific details, making the scene more engaging. Don’t forget to move around the setup. Sometimes, a small shift in position can reveal the most realistic angle. Remember, the goal is to make the viewer feel like they’re peeking into a miniature world, so focus on perspective and depth.
Post-Processing Tips for Enhanced Water Effects
To truly make your toy photography stand out, enhancing water effects during post-processing is essential. You can transform a good shot into a mesmerizing one by following a few simple steps. Start by adjusting the contrast and brightness to make the water pop against your toy figures. Next, use color grading to emphasize the blue or green hues, giving your water a more natural look. Finally, don’t overlook the importance of adding reflections or highlights to mimic sunlight hitting the water’s surface.
Here are three quick tips for a stunning transformation:
- Adjust Shadows and Highlights: Boosts water texture and depth.
- Layer Blending: Helps integrate water seamlessly.
- Use Masks: Refines details without affecting the entire image.
These techniques will elevate your toy photography to new heights.
Frequently Asked Questions
What Type of Camera Settings Are Best for Capturing Water Effects?
To capture water effects, you’ll want a fast shutter speed to freeze motion. Use a smaller aperture for depth and increase ISO if needed. Experiment with angles and lighting to enhance the water’s texture and reflections.
How Can I Prevent Water From Damaging My Toys During a Shoot?
To prevent water damage during your shoot, wrap your toys in a clear, waterproof film or use a time-traveling umbrella. Keep a towel handy and dry them immediately after shooting. Always test your setup beforehand.
Are There Specific Toys Better Suited for Water Photography?
Choose toys with waterproof materials like plastic or coated finishes. Avoid electronic parts or delicate paints. Action figures and rubber toys often work best. Test in water briefly to confirm they won’t absorb water or get damaged.
What Is the Best Time of Day for Outdoor Water Photography?
Imagine the golden hour’s soft glow, casting shimmering reflections on water. You should shoot during early morning or late afternoon. Sunlight’s angle creates dramatic contrasts, enhancing your photos’ depth and emotion. Embrace nature’s light show!
How Do I Keep Water Effects Consistent Across Multiple Shots?
To keep water effects consistent, control your lighting and use a tripod to maintain camera position. Adjust your camera settings for each shot and use the same water source and angle to guarantee uniformity across your photos.
At a Glance
You’ve mastered the art of turning a simple sink into a cascading waterfall and a glass of water into an oceanic spectacle. Isn’t it ironic that creating realistic water effects for toy photography requires more imagination than real water? As you tweak those light angles and splash techniques, remember: the magic lies not in the water itself, but in the way you capture it. So, go on—make waves in the world of toy photography, one droplet at a time.


