To build a dramatic desert diorama for toy photography, start with sturdy materials like foam or wooden boards as your base. Use sandpaper or textured paint for realistic ground, and add miniature cacti or rocks for authenticity. Arrange elements strategically for balance and depth, and experiment with lighting to create mood and enhance textures. Post-processing can refine your scene further. For more insights, discover techniques that can elevate your diorama’s impact.
Choosing the Right Materials for Your Desert Diorama
When creating a desert diorama for toy photography, it’s crucial to choose the right materials that capture the essence of arid landscapes. Start with a sturdy base, like a wooden or foam board, to support your scene. For the ground, use sandpaper or textured paint for a realistic sandy texture. Incorporate small stones or pebbles to mimic scattered rocks found in deserts. Craft miniature cacti or use preserved moss dyed in earth tones for added authenticity. You can even use dried twigs to represent sparse desert vegetation. Don’t forget lighting gels to replicate the harsh, warm sunlight typical of desert settings. This careful selection of materials guarantees your diorama feels authentic, allowing your toy photography to transport viewers to a sun-drenched, parched world.
Designing the Layout for Maximum Impact
To make your desert diorama truly impactful, focus on strategic element placement that guides the viewer’s eye through the scene. Use lighting to create atmosphere and enhance the mood, making your toy photography more immersive. Incorporate visual depth techniques to add layers and dimension, giving your diorama a dynamic and realistic look.
Strategic Element Placement
Crafting a compelling desert diorama for toy photography requires keen attention to strategic element placement. Placing elements thoughtfully enhances the scene’s realism and narrative impact. Start by considering the scale of your toys and diorama components. Placing larger elements in the foreground can create depth and lead the viewer’s eye through the scene. Incorporating varied textures and colors further enriches the visual appeal of your setup. When selecting diorama sets for toy photography, consider how each piece complements the toys and contributes to the overall theme. Additionally, utilizing lighting techniques can dramatically alter the mood, highlighting specific elements and enhancing the storytelling aspect of your diorama.
- Balance: Maintain a harmonious arrangement by distributing elements evenly without overcrowding.
- Focal Points: Place key items strategically to draw attention, guiding the viewer’s gaze naturally to your main subject.
- Layering: Use layers to add depth. Position objects at different distances to create a sense of space and dimension.
These strategies enhance the storytelling aspect of your photography, making each shot more engaging and visually striking.
Lighting for Atmosphere
While strategic element placement sets the foundation for an engaging desert diorama, lighting breathes life into your scene, transforming it from static to dynamic. Use lighting to create moods—dawn’s soft glow, midday’s harsh brightness, or dusk’s long shadows. Position lights at various angles to emphasize the textures in your diorama and highlight details on your figures. Experiment with colored gels to simulate the warm hues of a desert sunset or the cool tones of moonlight. Shadows add drama, so play with their length and direction to suggest different times of day. Avoid flat lighting; it makes scenes look dull. Instead, use contrasting lights to create depth and intrigue, making your toy photography truly enchanting.
Visual Depth Techniques
Creating visual depth in your desert diorama is key to making your toy photography engaging and immersive. Start by considering the placement of elements within your scene. Position larger objects, like rocks or cacti, in the foreground to draw viewers in. Mid-sized items should occupy the middle ground, while smaller details create interest in the background. These layers add depth and dimension, making your photos pop.
To enhance this effect, remember to:
- Vary heights: Mix tall, medium, and short objects to create visual interest.
- Use color contrast: Different hues can help separate elements and add vibrancy.
- Incorporate shadows: Shadows cast by different objects can add realism and depth.
Experiment with these techniques, and you’ll discover how dynamic your desert dioramas can become.
Crafting Realistic Sand Textures and Dunes
To create realistic sand textures for your desert diorama, start by selecting the right materials like fine sand or textured paint. You’ll want to experiment with shaping techniques to form natural-looking sand dunes, using tools like brushes or even your hands. Remember, the key is to mimic the flow and contours found in real deserts for the most authentic look.
Materials for Sand Creation
Crafting realistic sand textures and dunes for your desert diorama can transform a simple scene into a stunning masterpiece. To achieve this, choosing the right materials is essential. Start with fine sand, which you can find at craft stores or online. It provides a realistic texture and is easy to work with. You might also take into account using colored sand for added vibrancy, especially if you want to mimic the hues of a particular desert.
Here are some materials to take into account:
- Fine sand: Offers a natural look and smooth texture.
- Colored sand: Adds depth with various shades.
- Sawdust: Lightweight and can be dyed to simulate sand.
Experimenting with combinations can help you achieve the perfect look. Remember, the right materials can bring your diorama to life!
Shaping Realistic Sand Dunes
While working on your desert diorama, you’ll find that shaping realistic sand dunes is both an art and a science. Start by layering fine sand over a pliable base like sculpting clay or foam. Gently press down to create ridges and valleys, mimicking natural dune formations. Use brushes or spatulas to refine the shapes, ensuring smooth shifts and realistic contours.
To add texture, sprinkle slightly coarser sand or even baking soda for a subtle contrast. Carefully blend these elements with a soft brush, maintaining natural patterns. Don’t forget to vary the dune sizes for depth and perspective. Lighting can enhance realism, so experiment with shadows to highlight the dunes’ curves. Mastering these techniques will elevate your toy photography backdrop, making your scene truly immersive.
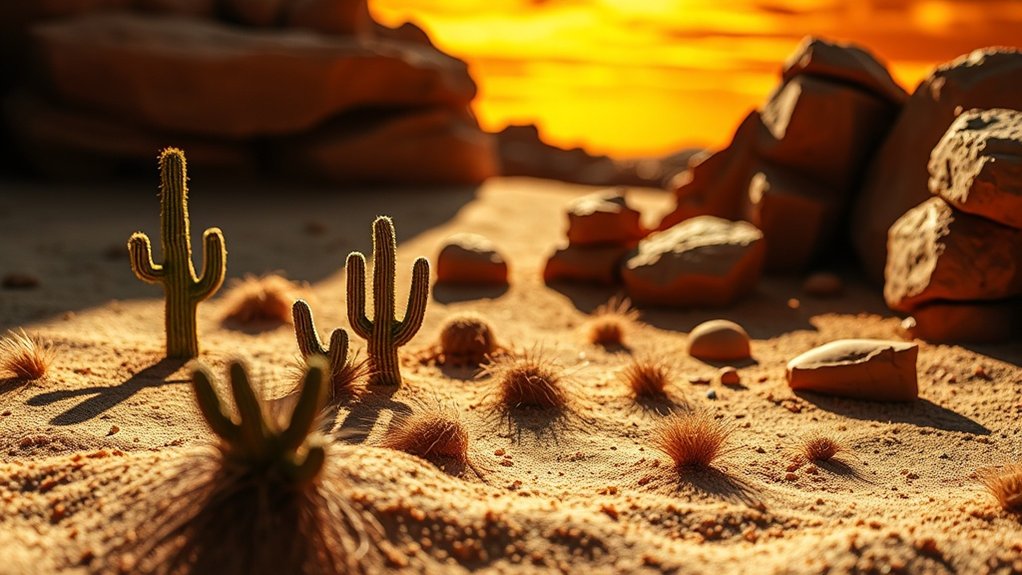
Incorporating Rocks and Cacti for Authenticity
When creating a desert diorama for toy photography, incorporating rocks and cacti can elevate the scene’s authenticity. You’ll want to choose elements that mimic the natural environment. Start by selecting rocks with varied shapes and textures to add depth and interest. You can use real stones or lightweight resin replicas, depending on your diorama’s size and weight constraints.
Cacti are another essential addition. Craft them from materials like clay or foam for a realistic look. Choose different sizes and shapes to reflect the diversity found in nature.
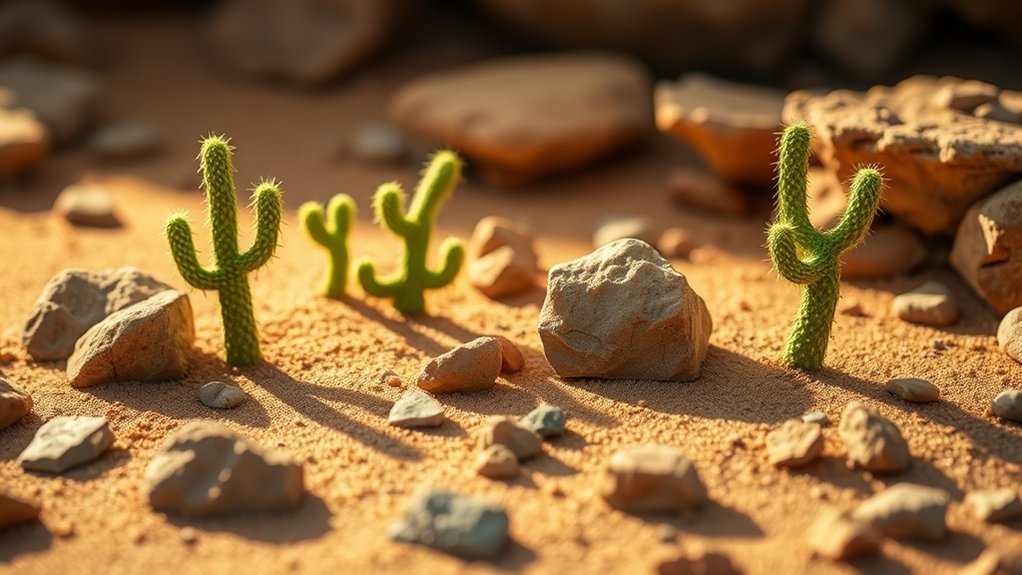
Consider these tips for authenticity:
- Use natural colors: Stick to earthy tones for a genuine feel.
- Vary sizes: Mix large and small elements for scale.
- Create clusters: Group items naturally to mimic real desert growth.
These elements will enhance your diorama’s realism, making your toy photography more compelling.
Lighting Techniques to Enhance the Desert Ambiance
How can you bring your desert diorama to life with the right lighting? Start by mimicking natural sunlight. Use a warm, yellowish light to recreate the sun’s glow at different times of day. Position your light source at an angle to cast long, dramatic shadows, enhancing the terrain’s texture. Don’t shy away from experimenting. Try backlighting to create stunning silhouettes of your toy figures against the desert backdrop. To simulate the intense heat, incorporate a diffuser to soften harsh lights, preventing overexposure. You might also use colored gels to replicate the distinct hues of sunrise or sunset. Reflectors can bounce light into shadowed areas, adding depth and dimension. With these techniques, your desert scene will truly capture that authentic, sun-drenched ambiance.
Creating a Sense of Scale With Miniature Elements
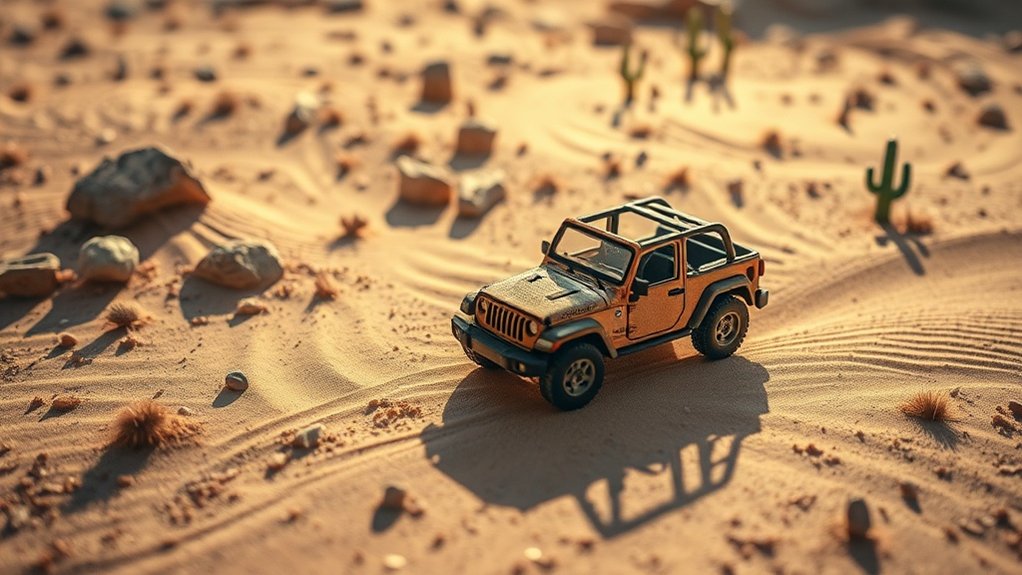
Craftsmanship is key when creating a sense of scale in your desert diorama for toy photography. You’ll want tiny details to make your scene believable and engaging. Start by selecting miniature elements that replicate the vastness of a desert landscape. Consider the following to enhance scale:
- Proportionate Props: Use objects like small rocks or dried plants to mimic natural desert features.
- Layering Techniques: Position elements in the foreground, middle ground, and background to add depth and dimension.
- Contrast in Sizes: Place items of varying sizes to create visual interest and highlight the toy’s size.
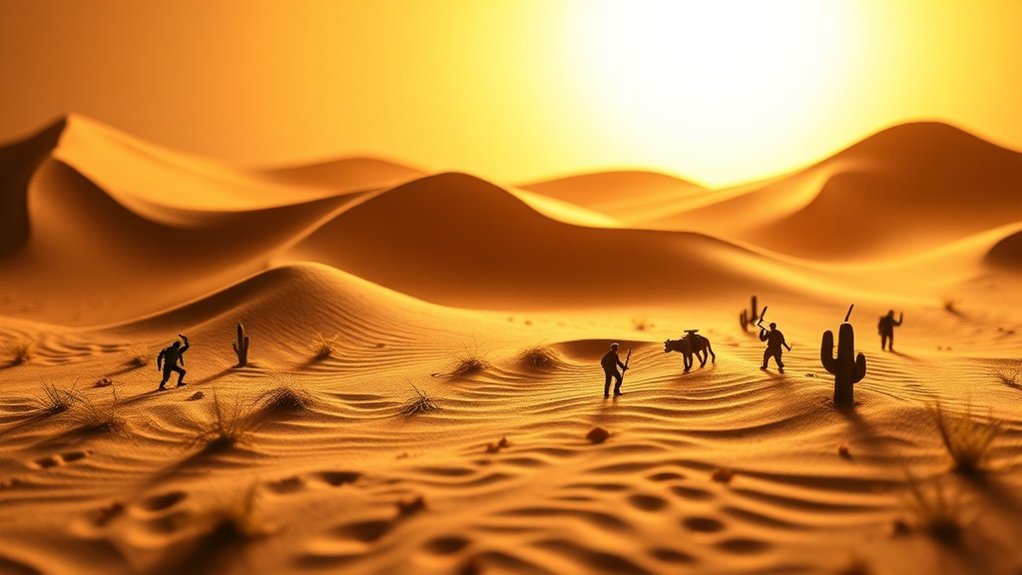
Adding Dynamic Elements for Action Shots
To capture the excitement of action shots in your desert diorama, incorporate dynamic elements that bring a sense of movement and energy. Start by adding effects like sand clouds or dust trails behind vehicles or characters to simulate motion. You can create these using fine sand or craft materials like cotton or translucent fabric.
Position small rocks and debris strategically to suggest recent activity or impact. Use wire or clear rods to suspend figures mid-leap or in combat, making them appear as if they’re defying gravity. Consider integrating windblown elements, like flowing capes or flags, to enhance the sensation of speed and action.
Capturing Different Times of Day for Varied Moods
While dynamic elements breathe life into your action shots, the time of day you choose to portray can evoke a completely different atmosphere in your desert diorama. Capturing varied moods with lighting enriches your toy photography, making scenes unique and memorable.
Consider these scenarios:
- Golden Hour: Early morning or late afternoon light casts long shadows, creating warmth and depth.
- Noon: Direct, harsh sunlight emphasizes stark contrasts and highlights desert textures, perfect for intense scenes.
- Twilight: Soft, diffused lighting adds a mysterious or calm mood, ideal for contemplative settings.
Experiment with these times to find the perfect lighting for your storytelling. Each brings its own mood, enhancing the narrative of your desert setup. Adjust your diorama’s orientation to capture the best light, and watch your scenes transform.
Post-Processing Tips to Enhance Your Desert Scenes
Anyone diving into toy photography knows that capturing the perfect shot is just the beginning. Post-processing can bring your desert scenes to life. Start by adjusting the exposure to match the dramatic lighting of a desert environment. Boost the contrast to emphasize the textures of sand and rock. Use the temperature slider to add warmth, enhancing the sun’s glow. Consider using a vignette effect for a natural focus on your subject. Don’t forget to sharpen the details to make your miniature world pop. If you’re feeling creative, experiment with color grading for a unique stylized look. Finally, always compare your edits with the original to verify you’re enhancing, not overdoing. With practice, your desert scenes will captivate viewers.
Frequently Asked Questions
How Can I Waterproof My Desert Diorama for Outdoor Shoots?
You want to waterproof your diorama for outdoor shoots. Start by sealing the base with a waterproof spray. Use a clear acrylic sealer for added protection. Make certain all materials are weather-resistant to withstand outdoor elements effectively.
What Tools Are Essential for Building a Desert Diorama?
You’ll need a utility knife, glue gun, sandpaper, and paintbrushes. Don’t forget a cutting mat for safety. Use pliers for shaping wire and foam cutters for precise detailing. These tools will make your diorama-building process smoother.
How Do I Transport a Large Desert Diorama Safely?
To safely transport a large diorama, you should secure it in a sturdy box with padding. Use bubble wrap and foam inserts to prevent movement. Verify the box is tightly sealed and label it as fragile.
What Are Some Tips for Storing a Desert Diorama Long-Term?
Store your diorama in a cool, dry place to prevent damage. Use dust covers or airtight containers to protect it. Keep it away from direct sunlight. Label and organize pieces for easy access when you’re ready to use it again.
How Do I Prevent Dust From Accumulating on My Diorama?
Think of dust like an uninvited guest; it sneaks in quietly. Use a clear cover or display case to shield your diorama. Regularly check and gently brush the surface to keep it pristine and inviting.
At a Glance
You’ve now got the tools to transform your toy photography into a domain of endless possibilities, where each snapshot tells a story as vivid as a desert sunset. By choosing the right materials, designing impactful layouts, and mastering lighting and post-processing techniques, your desert diorama becomes a stage for adventure. Let your creativity flow like a river through the sands, capturing the essence and drama of the desert, one frame at a time.


