

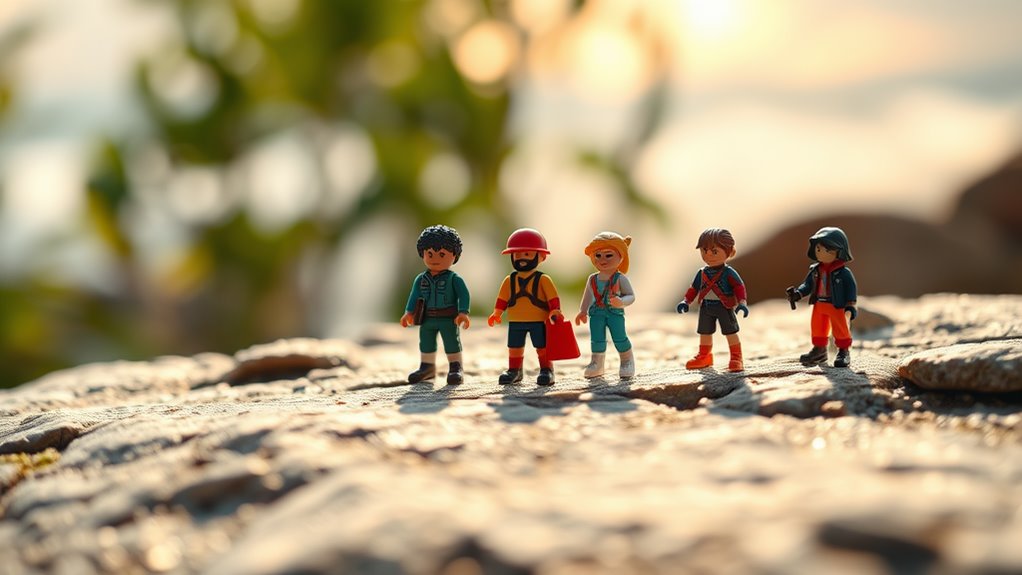
For realistic toy photography, start by choosing a background that complements the toy without overpowering it. Use natural lighting during golden hours to create gentle shadows and vibrant colors. Incorporate scale-appropriate props for a believable setting, and play with angles to uncover interesting perspectives. Enhance realism in editing by adjusting brightness, contrast, and saturation subtly. Slight vignette can draw attention to the subject. Discover more ways to perfect your toy photography skills. Experiment with different materials and textures for your backgrounds, such as fabric, paper, or natural elements like leaves and stones, to add depth to your scene. For comprehensive guidance, look for realistic toy photography backgrounds tips that can help you select the perfect setting for your photoshoots. Remember, the right background can significantly elevate the overall impact of your images. Experimenting with different focal lengths can also alter the perception of depth, making the scene more dynamic. Additionally, mastering techniques for toy photography, such as using a shallow depth of field, can help isolate your subject and create a dreamy effect. Don’t hesitate to review your work and seek inspiration from other photographers to continuously improve your craft.
Choose the Right Background
The background you choose can make or break your toy photography. It sets the scene and enhances your toy's story. Start by considering the theme or mood you want to convey. Are you aiming for a whimsical fantasy or a gritty urban tale? Use materials you've got at home, like colored paper, fabric, or textured surfaces, to complement your toy's character. Pay attention to the background's colors and patterns; they should highlight your subject, not overpower it. For a clean and professional look, opt for a neutral background. If you're outdoors, be mindful of elements that might clutter your shot. Think creatively and don't hesitate to experiment with various setups until you find the ideal backdrop that elevates your toy's narrative.
Utilize Natural Lighting
When capturing toy photography, natural lighting can make all the difference in bringing your scene to life. Position your toys near a window or take them outside during the golden hours—shortly after sunrise or before sunset. This soft, warm light enhances colors and creates gentle shadows, adding depth and realism to your photos. Avoid direct sunlight, which can cause harsh shadows and washed-out details.
Experiment with different angles by moving around your subject. A slight shift in perspective can dramatically change the mood of your shot. Remember, cloud cover acts like a natural diffuser, offering even lighting that's perfect for minimizing glare. Don't shy away from overcast days; they can provide the perfect conditions for beautifully lit, realistic images without the need for additional equipment.
Incorporate Scale-Appropriate Props
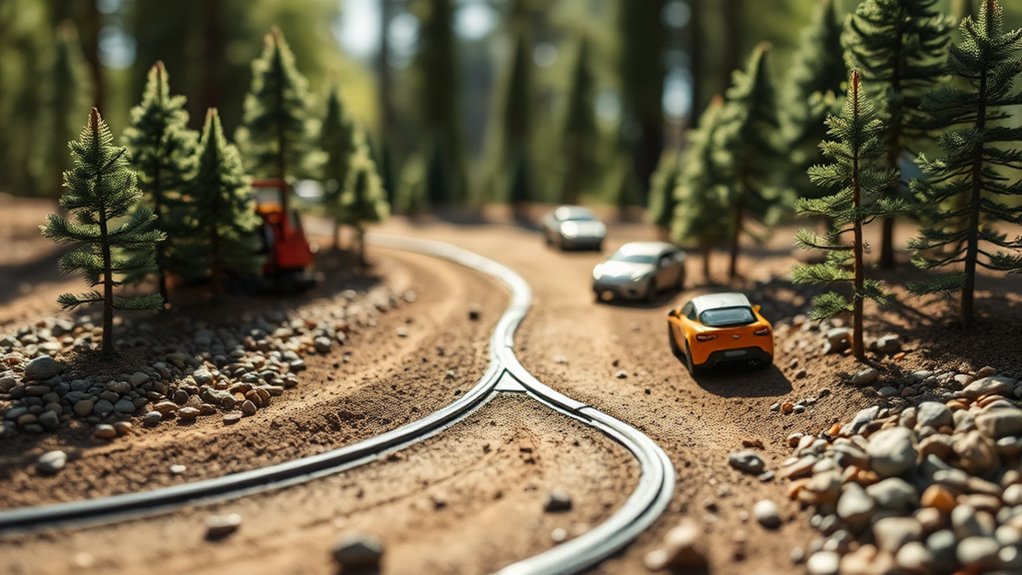
Props can transform your toy photography from ordinary to extraordinary by creating a believable world for your subjects. Choosing scale-appropriate items enhances realism, making your scenes more engaging. Start by considering the environment you want to create and selecting props that match your toys' size.
Here are some tips to help you incorporate props effectively:
- Miniature furniture: Perfect for creating cozy indoor scenes.
- Natural elements: Use small rocks, twigs, or moss for outdoor settings.
- Everyday items: Coins or matchboxes can add realistic detail.
- DIY props: Craft tiny items like books or food to suit your scene.
- Backgrounds: Use printed backdrops or fabric to set the mood.
Experiment With Angles and Perspectives
How can you capture the perfect shot that brings your toy photography to life? It's all about experimenting with angles and perspectives. Don't just take photos from eye level—get low, get high, and try everything in between. Each angle reveals something new. By shooting from a toy's perspective, you can create a sense of scale and immersion. Move around your subject and see how different angles impact the mood and story of your photo. Incorporating dslr photography tips for toys can also elevate your shots by utilizing depth of field. Experiment with various apertures to blur backgrounds and highlight your subject, drawing attention to the intricate details of the toys. Lastly, consider the lighting; natural light can enhance textures, while artificial sources can create dramatic effects, adding to the overall narrative of your images. Additionally, consider using the optimal camera settings for toys to enhance clarity and depth in your images. A wider aperture can help blur the background, making your toys stand out even more prominently. Experimenting with lighting can further elevate your shots, highlighting textures and details that draw viewers into the scene.
Consider using dramatic perspectives to emphasize particular features of the toy or scene. A low angle might make your toy appear larger-than-life, while a high angle could create a more vulnerable feel. Play with distance, too. Close-ups capture intricate details, while wider shots offer context. Keep experimenting until you find that magic shot!
Edit for Enhanced Realism
After experimenting with angles and perspectives to capture the perfect shot, it's time to enhance your images further through editing. To make your toy photos pop with realism, focus on subtle adjustments. First, tweak brightness and contrast to bring out details and textures. Adjust the saturation to make colors vibrant yet true to life. Use sharpness sparingly to define edges without making them look unnatural. Shadow and highlight corrections can add depth and dimension, mimicking natural lighting. Finally, consider a slight vignette to draw attention to your subject. Experimenting with these adjustments can really elevate your toy photography to the next level. Additionally, researching the best editing techniques for toy photos can provide you with new ideas and inspiration to enhance your images even further. Don’t forget to save your edits in layers so you can revisit and refine them as your skills improve.
- Brightness & Contrast: Enhance details and textures.
- Saturation: Keep colors vibrant but realistic.
- Sharpness: Define edges subtly.
- Shadows & Highlights: Add depth and dimension.
- Vignette: Focus on the subject with subtlety.
Frequently Asked Questions
What Camera Settings Are Best for Toy Photography?
You should use a low ISO for reduced noise, a small aperture for depth of field, and adjust your shutter speed based on lighting. Don't forget to manually focus for precision in capturing those tiny details.
How Do I Create Depth of Field in Toy Photos?
Want to create depth of field in your toy photos? Use a wide aperture like f/2.8 or f/4 to blur the background. Position your subject away from the background and focus carefully to enhance that dreamy effect.
What Are Ideal Toy Photography Locations?
You're wondering about ideal toy photography locations. Use natural settings like parks or gardens for authenticity. Indoors, create miniature scenes with everyday objects. Lighting's essential, so experiment with sunlight or lamps to enhance the toys' features and shadows.
How Do I Prevent Reflections on Glossy Toy Surfaces?
When chasing perfection, avoid reflections by using diffused lighting. Like a gentle breeze on a still lake, soften the light source. Use polarizing filters or adjust angles to keep those glossy surfaces reflection-free and your photos enchanting.
What Are Affordable Tools for Stabilizing My Camera?
You can use a tripod with flexible legs or a smartphone stabilizer for affordable camera stabilization. If you're on a tight budget, try bean bags or DIY solutions like using a stack of books for support.
At a Glance
You've got all the tools in your toolkit to create stunning, realistic toy photography. Remember, the devil's in the details, so pay attention to every little element from background to lighting. Use props wisely to maintain scale and experiment with different angles to find the best perspective. Finally, a touch of editing can be the cherry on top, enhancing realism. So, go ahead, and let your creativity run wild—your toy photography will truly shine!


