To create dynamic composition in cinematic toy photography, play with lighting, perspective, and motion. Experiment with various light sources and positions to reveal toy details and mood. Use angles and foreground elements for depth and scale, making toys feel alive. Incorporate props and dynamic positions to suggest movement. The rule of thirds and thoughtful framing enhance storytelling. For a polished look, use post-processing tweaks like contrast adjustments. Want to explore further techniques and storytelling elements?
Mastering the Art of Lighting in Toy Photography

When you’re diving into toy photography, mastering the art of lighting can elevate your work from amateur to awe-inspiring. You’ll want to experiment with different light sources, like natural sunlight or LED lights, to see how each affects your subject. Position your lights strategically to highlight details, create shadows, and set the mood. Remember, the direction and intensity of light can dramatically change the atmosphere of your scene. Using diffusers can soften harsh shadows, while reflectors can bounce light into darker areas, adding depth and dimension. Don’t forget to adjust the white balance on your camera to guarantee colors appear true to life. With practice, you’ll find the perfect lighting setup that makes your toy subjects come alive.
Utilizing Perspective to Create Depth and Scale
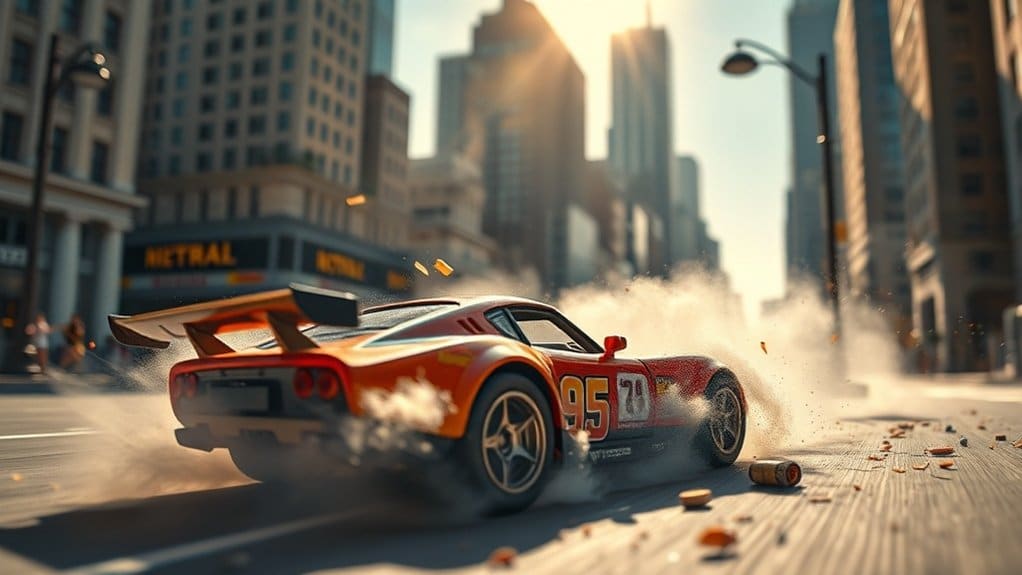
While mastering lighting sets the foundation, employing perspective breathes life into your toy photography by adding depth and scale. By adjusting your camera angle, you can make a toy figure appear towering or tiny, depending on the story you want to tell. Get low and close to create an imposing presence or shoot from above to diminish a subject’s stature.
Use foreground and background elements to enhance depth. Position toys at different distances from the lens to simulate a three-dimensional space. Experiment with leading lines, like roads or fences, to guide the viewer’s eye through the scene. Don’t be afraid to play with focal length; a wide-angle lens can exaggerate depth, while a telephoto lens compresses space, offering unique storytelling opportunities.
Crafting Motion and Energy in Static Scenes
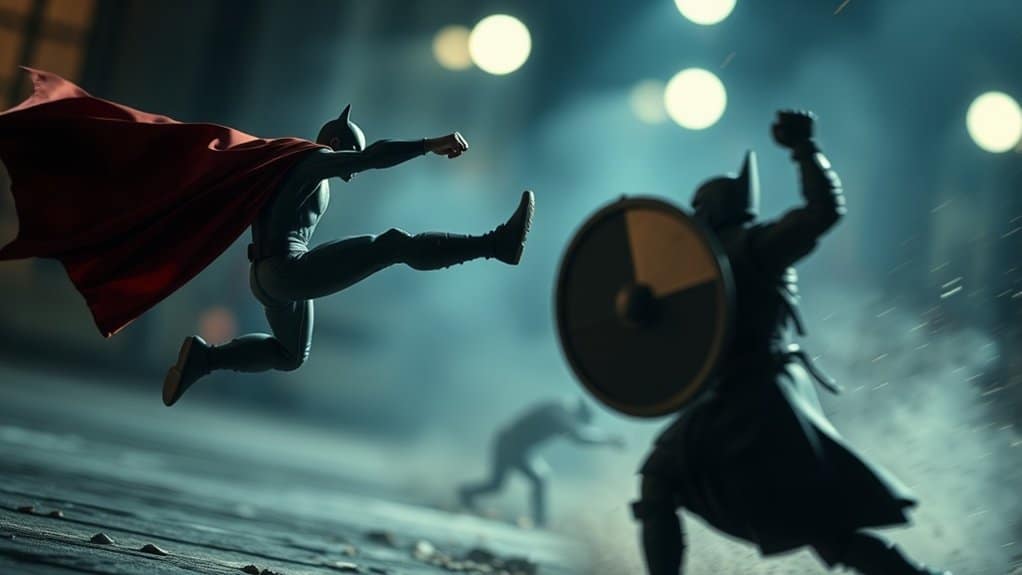
To infuse motion and energy into your static toy scenes, focus on dynamic positioning and implied movement. Position your figures in action-packed poses, like mid-jump or leaning into a turn. This creates a sense of urgency and excitement. Tilt your camera slightly to add drama and suggest momentum. Use props strategically—wind-swept capes, flowing hair, or scattered debris can enhance the illusion of movement.
Light plays an essential role, too. Direct it so it casts long shadows or highlights specific angles to suggest speed or direction. Incorporate blurred backgrounds through shallow depth of field to simulate speed. Finally, experiment with lines and angles in your composition; diagonal lines can lead the viewer’s eye through the scene, enhancing the feeling of motion.
Storytelling Through Composition and Framing
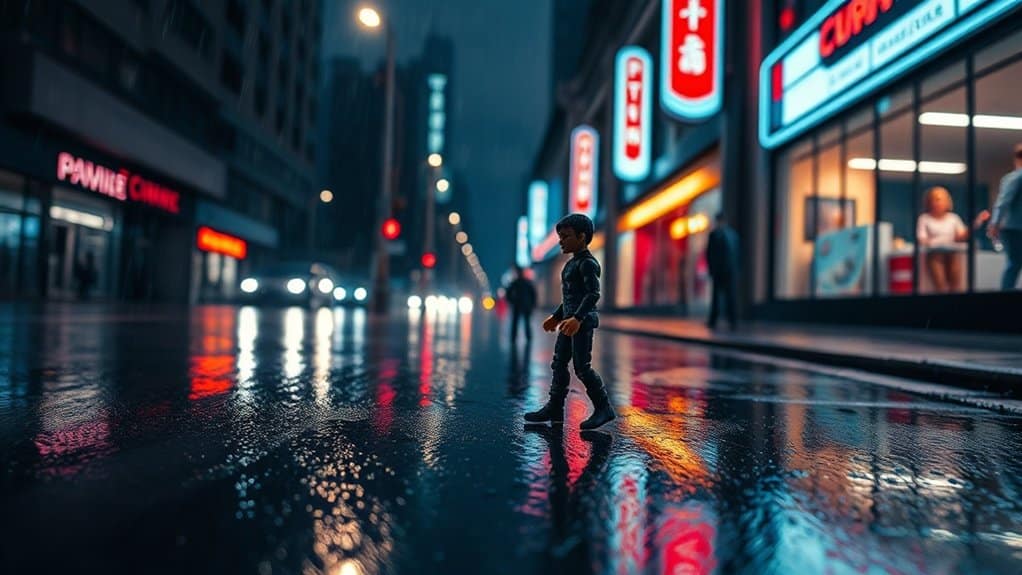
Although toy photography often involves static figures, storytelling can transform a simple scene into a fascinating narrative. You can achieve this by carefully considering composition and framing. Focus on the rule of thirds to guide the viewer’s eye and create balance. Position your toys to convey action or emotion, telling a story that resonates. Use leading lines to direct attention and create depth. Consider the background, as it adds context and enhances your narrative. Framing elements, like a window or a doorway, can draw viewers into your scene, making them feel part of the story. Remember, every angle and detail is purposeful, so experiment with different perspectives. Through thoughtful composition, you’ll craft compelling tales that captivate your audience.
Post-Processing Techniques to Enhance Cinematic Impact
In toy photography, post-processing can elevate your images from simple snapshots to enchanting cinematic scenes. Start by adjusting the contrast and saturation to make colors pop and shadows deepen, adding drama and mood. Use cropping to refine composition, drawing the viewer’s eye to essential elements. Add layers of vignettes or light leaks to give a nostalgic or dreamy feel.
Experiment with color grading to create specific atmospheres, such as warm tones for a sunset or cool hues for a mysterious night. Sharpen key details to make textures stand out, but don’t overdo it. Consider adding subtle effects like lens flares or motion blur to suggest movement and realism. Finally, always review your work to guarantee enhancements complement your story, not overshadow it.
Frequently Asked Questions
What Camera Settings Work Best for Dynamic Toy Photography?
You’ll want to use a low aperture for a blurred background, a fast shutter speed to capture motion, and adjust ISO for lighting. Experiment with these to achieve the best dynamic effect in your toy photography.
How Do I Choose the Right Toys for Cinematic Scenes?
Choosing the right toys is like casting actors. Avoid the ones with less charisma than a soggy cardboard box. Opt for figures with expressive features and dynamic poses that scream “Oscar winner” for your cinematic scenes.
What Is the Best Way to Prevent Reflections in Toy Photography?
To prevent reflections in toy photography, adjust your lighting setup to minimize glare. Use diffusers or softboxes to scatter light evenly. Experiment with angles to avoid direct reflections and consider polarizing filters to reduce unwanted shine.
How Can I Create Realistic Weather Effects in Toy Photography?
Imagine storm clouds brewing over your toy landscape. You can create lifelike weather effects using cotton for fog, a spray bottle for rain, or a hairdryer for wind. Experiment with light angles to enhance the drama.
What Are Some Tips for Selecting Appropriate Backgrounds for Toy Scenes?
Choose backgrounds that match your toy’s theme and era. Use printed scenes, natural settings, or digital backdrops. Make certain they don’t overpower the subject. Pay attention to lighting and depth to create a cohesive, immersive scene.
At a Glance
You’ve now opened the universe of cinematic toy photography, where your shots leap off the screen and tell stories that resonate. With the mastery of lighting, perspective, motion, and storytelling, you’re not just capturing toys—you’re creating epic sagas. Each frame is a blockbuster waiting to captivate audiences. Immerse yourself in post-processing to add that final, breathtaking touch. Remember, in your hands, a simple toy becomes a legend. So go forth and let your imagination run wild!


