When editing toy photography for realism, focus on balancing shadows and highlights. Use the Curves tool to control contrast and tone. Apply Dodge and Burn tools to add depth and dimension to specific areas. Carefully align shadows with your light source for natural depth, and fine-tune exposure to guarantee highlights don’t overpower. Avoid over-editing, which can break the scene’s realism. Master these techniques to transform miniatures into lifelike scenes, engaging both the eye and imagination. Discover more here.
Understanding Light Sources and Their Impact
When it comes to editing toy photography, understanding light sources and their impact is essential. You need to ponder how different light types—natural, artificial, and mixed—affect your images. Natural light gives a soft, realistic feel, ideal for outdoor scenes. Artificial light offers control and consistency, letting you highlight specific details or create mood. Mixed lighting combines the best of both, but requires careful balance to avoid overpowering shadows or highlights.
Adjusting exposure settings during editing allows you to enhance the primary light source’s effect, making toys appear more lifelike. Pay attention to how light interacts with colors and textures; it can alter the mood dramatically. By mastering these light sources, you’ll elevate your toy photography, making it vibrant and engaging.
The Role of Shadows in Creating Depth
When editing toy photography, you should focus on shadows to enhance visual contrast and create depth. By manipulating light direction, you can achieve realistic proportions that make your subjects feel more lifelike. Don’t underestimate how shadows can transform a flat image into a dynamic scene with just a few adjustments.
Enhancing Visual Contrast
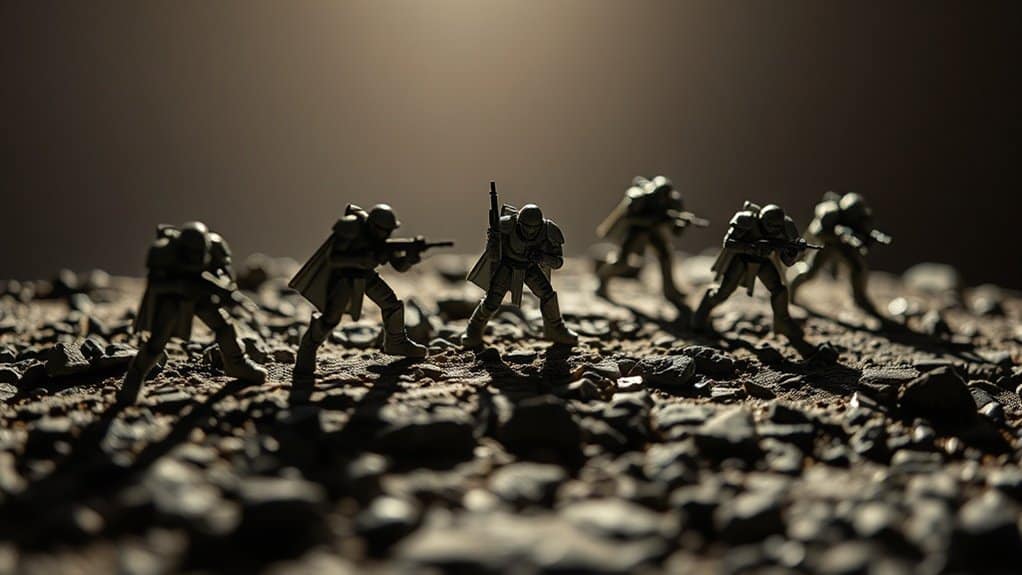
Shadows, though often overlooked, play an essential role in enhancing visual contrast and creating depth in toy photography. By strategically placing shadows, you can make your toy figures pop against their background, adding layers and intrigue to your images. This contrast helps distinguish your subject from its surroundings, making it the focal point. Utilizing lowkey photography techniques can further enhance the drama and emotion in your toy photography. By controlling light and shadow, you can evoke feelings and create a more immersive atmosphere. Experimenting with various angles and intensities of light will allow you to discover unique compositions that truly highlight your subject.
To achieve this, experiment with different lighting angles. A light source positioned to one side will cast longer shadows, adding more depth and dimension to your scene. Adjusting the intensity of light can also alter shadow sharpness, giving you greater control over the mood.
Achieving Realistic Proportions
Building on the idea of using shadows to enhance visual contrast, you can also leverage them to achieve realistic proportions in toy photography. Shadows play an essential role in creating depth, which is vital for making miniature subjects appear life-sized. By carefully placing shadows, you guide the viewer’s eye and create a sense of space and dimension. Shadows help define the contours and edges of figures, making them pop against the background.
To achieve this, pay attention to the intensity and direction of the shadows. Soft, diffused shadows suggest a gentle, natural light, while sharp, defined shadows imply a strong, direct source. Experiment with shadow placement to enhance the realism of your composition. Adjust shadow size and angle to mimic real-world lighting conditions, giving your toys a lifelike appearance.
Manipulating Light Direction
Although many photographers focus primarily on their subjects, the direction of light is equally essential in toy photography. The way you manipulate light can transform a flat image into a dynamic scene with depth and realism. Pay attention to how shadows fall; they define the contours and create a three-dimensional effect. By adjusting the light’s angle, you can emphasize certain features or create dramatic moods.
Experiment by moving your light source around your toy subject. Observe how shadows shift and change the scene’s overall feel. A low, side light can create long, dramatic shadows, adding intensity. Meanwhile, overhead lighting might make the scene appear more natural. By mastering light direction, you’ll enhance the storytelling aspect of your toy photography, making it more engaging.
Highlight Techniques for Enhanced Detail
While editing toy photography, employing highlight techniques can greatly enhance detail, making your subjects pop with vibrancy and realism. Start by refining the highlights to draw attention to specific areas, accentuating textures and features. You’ll find that controlling highlights can transform a flat image into a dynamic one. Focus on these techniques:
- Dodge Tool: Use it sparingly to brighten key areas, adding depth and interest without overexposing.
- Layer Masks: Apply these to selectively enhance highlights, maintaining control over which parts of the image are affected.
- Blend Modes: Experiment with modes like “Screen” or “Overlay” to intensify brightness without losing detail.
- Curves Adjustment: Fine-tune light and contrast, pulling up highlights to emphasize details while preserving the overall balance.
Utilize these methods to bring your toy photography to life.
Tools for Adjusting Shadows and Highlights
When you’re editing toy photography, mastering the tools for adjusting shadows and highlights is essential for achieving a balanced and enchanting image. Start with the basics: your photo editing software likely has a “Shadows/Highlights” adjustment. This tool helps you brighten dark areas without overexposing the highlights, and vice versa. Use the “Curves” tool for more control, allowing you to adjust contrast and tonal range. Experimenting with the “Dodge” and “Burn” tools can add depth and dimension, letting you selectively lighten or darken specific areas. Don’t overlook the “Exposure” settings for global changes. Remember, subtlety is key; small adjustments can make a big difference. Practice and experimentation will help you find the perfect balance for your toy photography.
Balancing Light and Dark for Realism
When editing toy photography, you’ll want to carefully place shadows to create depth and dimension. Adjust highlights to guarantee they don’t overpower the scene, maintaining a balanced look. Simulating natural light can make your photos more realistic, so consider how sunlight would naturally interact with the toys.
Shadow Placement Techniques
Capturing the perfect balance of light and dark in toy photography is essential for achieving realism. To create realistic shadow placements, you’ll need to take into account a few key techniques. Begin by observing natural light sources and how they interact with your scene. Shadows should fall consistently with the direction of light. Pay attention to the softness or hardness of shadows, which can dramatically alter the mood of your image.
Here are some techniques to guide you:
- Light Source Direction: Confirm shadows align with the primary light source.
- Shadow Softness: Use diffusers or distance to adjust shadow hardness.
- Object Proximity: Closer objects create sharper, darker shadows.
- Background Interaction: Reflect on how shadows interact with the background for added depth.
Mastering these techniques enhances realism in your toy photography.
Highlight Adjustment Tips
With your shadows expertly placed, it’s time to focus on managing highlights to balance light and dark in your toy photography. Start by identifying areas where highlights naturally occur, such as the top of the toy or reflective surfaces. Adjust these highlights subtly using editing tools like brightness or dodge, ensuring they don’t overpower the composition.
Avoid excessive brightness, which can flatten the image and lose detail. Instead, aim for highlights that add depth and dimension, enhancing the toy’s textures and features. Use a soft brush for more control, allowing you to blend highlights smoothly with surrounding areas. Consider using layer masks to isolate specific areas if necessary. Balancing highlights this way makes your toy photography more realistic and visually appealing.
Natural Light Simulation
To create a realistic feel in toy photography, simulate natural light by carefully balancing light and dark areas. This involves understanding how light naturally interacts with objects. Adjust shadows and highlights to mimic the way sunlight might fall on your toys. You want your images to have depth and dimension, making them appear life-like.
Consider these tips for natural light simulation:
- Observe Real-life Lighting: Notice how light falls on objects around you. Use this as a reference.
- Use Editing Tools Wisely: Adjust brightness, contrast, and shadow levels to create a natural effect.
- Experiment with Angles: Different angles can alter shadow and highlight intensity.
- Layer Multiple Light Sources: Combining soft and hard light sources can add depth to your photos.
Balancing these elements enhances realism in your toy photography.
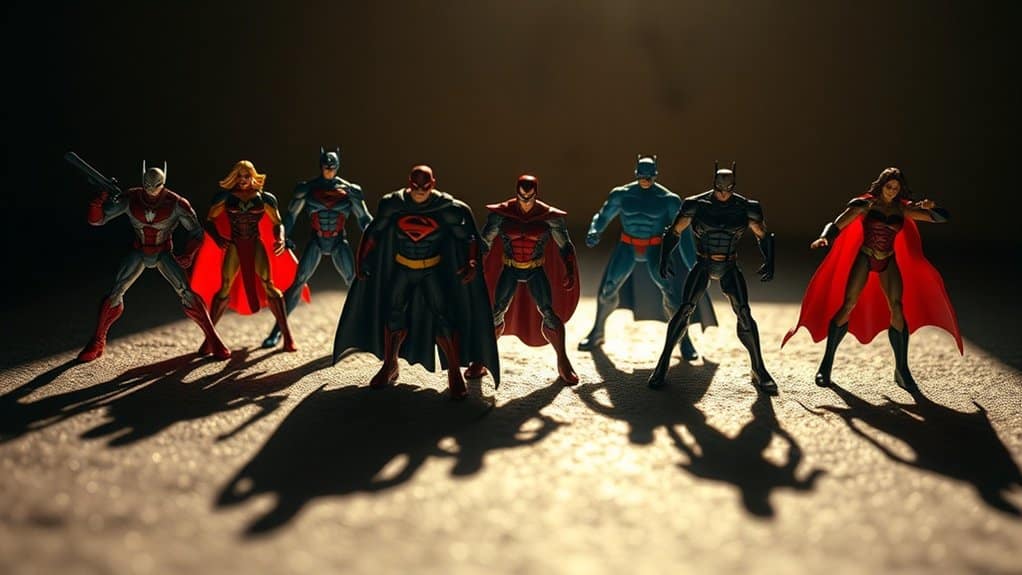
Using Contrast to Define Shape and Form
In toy photography, contrast is a powerful tool to highlight the intricate details of your miniatures and bring depth to your scenes. By adjusting the contrast, you can define shapes and forms, making your subjects pop against the background. Start by examining your image and identify areas where the details seem flat or blend in. Increase the contrast to enhance these areas, drawing attention to the contours and textures of your toys. Be careful not to overdo it, as excessive contrast can lead to loss of detail. It’s about finding the balance that accentuates the miniature’s features while maintaining a natural look. Use contrast to guide the viewer’s eye, emphasizing the parts of the scene you want to highlight.
Post-Processing Tips for Dynamic Lighting
Although creating dynamic lighting in toy photography can initially seem challenging, mastering it can elevate your images to new heights. Post-processing is key to achieving that polished look. Start by adjusting your image’s exposure to guarantee the highlights and shadows complement the dynamic lighting. Don’t forget to fine-tune the contrast, as it will help emphasize the depth and form of the subjects. Here are some tips:
- Use Curves: Adjust the RGB channels to balance the lighting and color tones.
- Dodge and Burn: Highlight or darken areas to add depth and dimension.
- Selective Color: Enhance specific colors to make the scene pop.
- Vignette: Add subtle edges to focus the viewer’s attention on the main subject.
With these techniques, your toy photography will shine with realism.
Common Mistakes and How to Avoid Them
Even the most experienced toy photographers can fall into common pitfalls that detract from their images. One major mistake is over-editing shadows and highlights, which can make the scene look unnatural. Stick to subtle adjustments; too much contrast can ruin the realism. Another error is inconsistent light sources. Ascertain your shadows and highlights align with your scene’s light direction to maintain authenticity. Also, don’t ignore the background. Overlooking its impact can lead to mismatched lighting and awkward reflections. Always check for any distracting elements that might shift focus away from your subject. Finally, remember to calibrate your monitor. Inaccurate colors and brightness can mislead your editing choices. By avoiding these mistakes, your toy photography will maintain its realistic charm.
Frequently Asked Questions
How Can I Create Natural-Looking Shadows in Indoor Toy Photography?
To create natural-looking shadows in indoor toy photography, position a single light source at an angle, mimicking sunlight. Use diffusers to soften shadows. Adjust exposure settings and post-edit to enhance realism. Experiment with angles for depth.
What Are the Best Camera Settings for Capturing Toy Details?
You’ll want to use a gentle touch with your ISO, keeping it low for crisp details. Set your aperture to a cozy range like f/8 for depth, and a slower shutter speed for the perfect capture.
How Do Weather Conditions Affect Toy Photography Lighting?
Weather conditions greatly impact your toy photography lighting. Overcast skies provide diffused light, reducing harsh shadows. Sunny days create strong contrasts and vibrant colors. Adapt by using reflectors or shade to control light and enhance your photo’s realism.
Can Smartphone Apps Effectively Edit Toy Photography for Realism?
Can apps on your phone truly transform toy photos into realistic masterpieces? Yes, they can! With features like adjustable brightness and contrast, you’ll enhance realism and bring your miniature worlds to life with just a few taps.
How Do I Prevent Lens Flare in Outdoor Toy Photography?
To prevent lens flare in outdoor toy photography, use a lens hood or position yourself so the sun is behind you. You can also shield the lens with your hand or use a reflector for controlled lighting.
At a Glance
In the world of toy photography, you’re the magician wielding light and shadow as your wand. By understanding and manipulating these elements, you breathe life into your miniature subjects, making them leap off the screen with vivid realism. As you balance light and dark, you paint with contrast, sculpting shapes and forms that dance in dynamic lighting. Avoid common pitfalls, and your creations will tell stories that captivate, leaving viewers entranced by your tiny, illuminated worlds.


