To add fire, smoke, and effects in toy photography, choose user-friendly editing software with strong layering and masking features. Opt for high-quality fire textures and smoke brushes, and use blending modes for seamless integration. Adjust layer opacity to match scene lighting. Fine-tune with color balance and soft edges for realism. Patience in editing guarantees enthralling results by enhancing depth and dimension. For detailed techniques and tools, stay tuned as more insights unfold.
Choosing the Right Editing Software
When it comes to toy photography, how do you choose the right editing software? Start by identifying your specific needs. Do you want to add fire, smoke, or special effects? Look for software that offers a wide range of creative tools and advanced features. Consider user-friendliness—no one wants to spend hours learning complicated interfaces. Popular choices like Adobe Photoshop or Lightroom offer powerful editing capabilities, while simpler options like GIMP or Canva might suit beginners.
Check if the software supports your file formats and offers extensive tutorials. Budget is important too; some programs offer free versions or trials. Make sure your computer’s system requirements align with the software to avoid performance issues. Ultimately, choose a program that fits your skill level and artistic vision.
Understanding Layers and Masking
Mastering layers and masking is essential for adding depth and realism to your toy photography. Layers allow you to stack multiple elements, like fire or smoke, over your base image. Think of layers as transparent sheets; you can adjust each one without affecting the others. This flexibility lets you experiment and refine your effects until they’re just right.
Masking, on the other hand, gives you precision. With masks, you can hide or reveal parts of a layer, ensuring that effects blend naturally. For instance, you might want smoke to wrap around a toy’s arm but not obscure its face. By using a soft brush on a mask, you can control where each effect appears, making your edited images look seamless and polished.
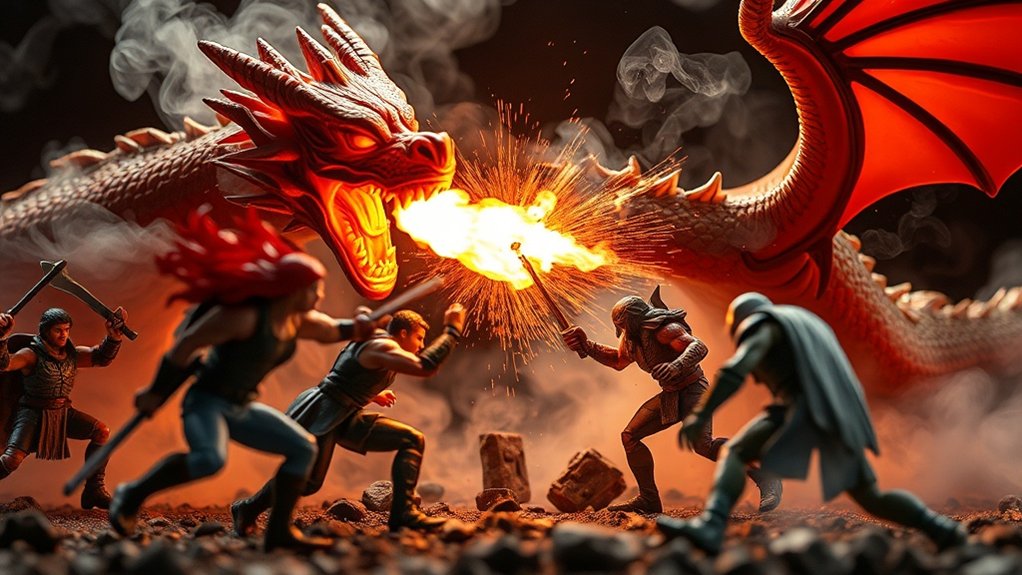
Adding Fire Effects to Your Images
To add fire effects to your toy photography, start by selecting high-quality fire textures that match your scene’s lighting and mood. Use blending techniques to integrate these textures seamlessly, ensuring the fire looks realistic and enhances the overall image. Experiment with layer opacity and different blend modes until the fire effect feels natural and impactful.
Selecting Fire Textures
Ever wondered how to make your toy photography truly pop with fiery drama? Start by selecting the right fire textures. Look for high-resolution images that capture the vibrant colors and dynamic movement of real flames. You’ll want textures that are varied—consider flames that flicker, dance, and swirl. Make certain the textures match the scale and perspective of your toys to maintain realism. Websites offering stock images or free texture resources can be great places to find what you need. Pay attention to the light source in your scene; choose fire textures that mimic that orientation. This guarantees the fire blends naturally into your composition. Remember, selecting the right fire texture is essential to enhancing the drama and authenticity of your shots.
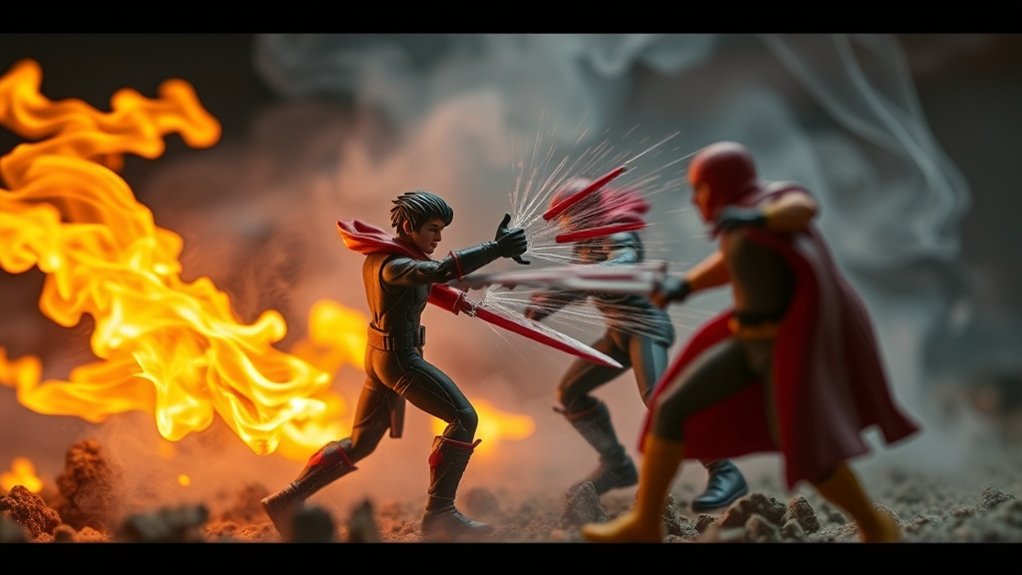
Blending Techniques for Realism
Having chosen the perfect fire textures, it’s time to seamlessly integrate them into your images for a realistic effect. Start by selecting the layer blend mode that best suits your photo. “Screen” or “Lighten” often work well for fire, removing dark areas and letting the flames shine through. Adjust the opacity to balance the fire’s intensity with your image’s overall look.
Use layer masks to refine the effect, erasing parts of the fire that don’t naturally blend with the scene. Pay attention to light and shadow; add a subtle glow around the fire to mimic natural illumination. For extra realism, tweak the color balance, ensuring the fire’s hues match the surrounding environment. These blending techniques will make your toy photos truly ignite.
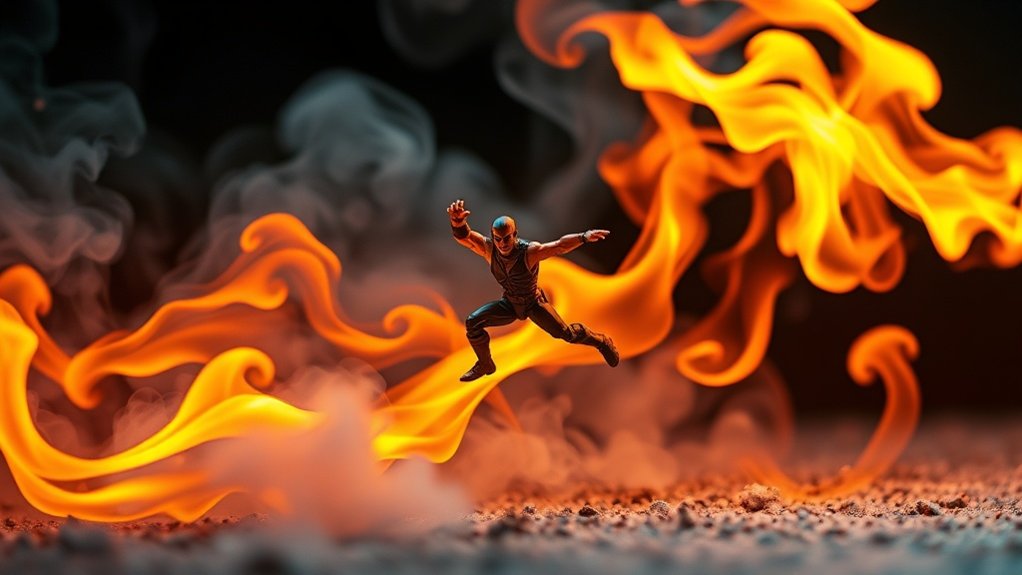
Creating Realistic Smoke Details
When you’re looking to create realistic smoke details in your toy photography, understanding the right techniques and tools is essential. Start by choosing a high-resolution smoke brush pack to give your images a lifelike touch. In Photoshop, create a new layer and use the brush to paint smoke, experimenting with different sizes and opacities. Adjust the layer’s blending mode to “Screen” or “Soft Light” for a natural look.
Next, refine the smoke by using the “Gaussian Blur” filter to soften edges, ensuring it seamlessly blends with the scene. Pay attention to the direction of the light source and adjust the smoke’s brightness and contrast accordingly. Don’t forget to layer multiple smoke elements for depth and dimension, enhancing realism in your toy photography.
Enhancing With Additional Special Effects
Building on your skill in creating realistic smoke details, you can elevate your toy photography by adding special effects that capture a viewer’s imagination. Begin by incorporating sparks or embers for a dynamic, fiery look. Use editing software to layer glowing particles around your subject, intensifying the scene’s drama. You can also add lens flares to simulate sunlight or other light sources, creating a more immersive environment. Consider including debris effects by using digital brushes to scatter tiny fragments, adding chaos to action-packed scenes. Reflective surfaces can enhance realism, so play with reflections and shadows to add depth. These effects, when thoughtfully applied, bring your toy scenes to life, making them more engaging and enchanting for your audience.
Fine-Tuning and Final Adjustments
As you wrap up your toy photography project, focus on adjusting the color balance to guarantee the hues look just right. Enhance the lighting effects to create depth and make your scene pop. Finally, refine any smoke details to add a polished, realistic touch to your composition.
Adjust Color Balance
To elevate your toy photography, adjusting the color balance is essential for creating an image that truly pops. Start by evaluating the overall tone of your photo. Does it feel too warm or too cool? Use your editing software’s color balance tool to tweak the hue, guaranteeing that colors appear natural and vibrant. Focus on the highlights, midtones, and shadows separately for more control. By fine-tuning these elements, you can bring out the rich reds of fire or the cool blues of smoke effectively.
Don’t forget to pay attention to skin tones if your toys have them; they should appear lifelike. Always compare your adjustments to the original image to verify enhancements don’t diverge too much from your initial vision. This step makes your toy scenes more compelling.
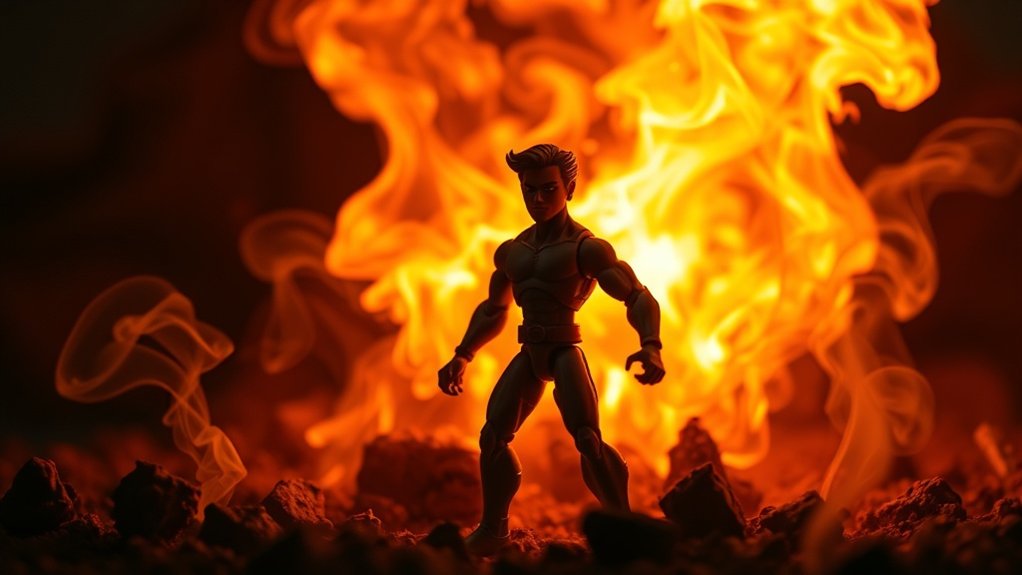
Enhance Lighting Effects
Lighting can make or break your toy photography, turning a good photo into a mesmerizing masterpiece. To enhance lighting effects, start by evaluating your image’s existing light sources. Use editing software to adjust brightness and contrast, making highlights pop and shadows more dramatic. Apply dodge and burn tools to selectively lighten or darken areas, adding depth and dimension. If your scene has fire or other light-emitting elements, amplify their glow with a soft brush tool set to a low opacity. This adds a realistic radiance. Don’t forget to check the overall color temperature; warm tones can intensify a fiery scene, while cooler hues might suit a mystical setting. Fine-tuning these elements will elevate your toy photography to new heights.
Refine Smoke Details
Enhancing lighting effects lays the groundwork for creating an enchanting atmosphere, but achieving realism often requires meticulous attention to smoke details. Start by zooming in to confirm your smoke doesn’t look too uniform or flat. Vary the opacity and blend modes to add depth and a sense of movement. Use tools like the smudge brush to soften edges, making the smoke appear more natural. Adjust the color balance to match the overall tone of your scene. Don’t forget to layer your smoke effects, adding shadows and highlights to mimic real-world lighting. Continuously step back to assess the overall composition, confirming the smoke integrates seamlessly. With patience and precision, your toy photography will captivate with its lifelike smoke elements.
Frequently Asked Questions
How Can I Achieve a Natural Lighting Effect in Toy Photography?
You can achieve a natural lighting effect by using soft light sources like diffused lamps or natural sunlight. Position them strategically to create shadows and highlights. Adjust your camera settings to enhance realism without overexposing your subject.
What Camera Settings Work Best for Shooting Toys for Editing?
You should use a low ISO to reduce noise and a high aperture for sharpness. Set your shutter speed to capture motion if needed. Shooting in RAW format gives you flexibility during editing. Adjust settings based on lighting.
Are There Any Safety Concerns When Using Real Fire in Toy Photography?
When using real fire, prioritize safety by keeping water nearby, maintaining a safe distance, and avoiding flammable materials. Always supervise the scene, wear protective gear, and plan your shots to minimize risks. Safety first, creativity second!
Can Smartphone Apps Be Used Effectively for Editing Toy Photos?
You can definitely use smartphone apps for editing toy photos effectively. Apps like Snapseed or Lightroom offer powerful tools to enhance images. Experiment with filters and effects to make your toy photography stand out effortlessly.
How Do I Prevent Toy Reflections in My Images?
You can reduce reflections by using diffused lighting, adjusting your shooting angle, and incorporating polarizing filters. Experiment with matte backgrounds and reposition your light sources to minimize glare. Your setup adjustments will lead to clearer images.
At a Glance
You’ve transformed static toys into dynamic scenes, breathing life into inanimate objects. By mastering layers and masking, you’ve added fire that crackles with energy and smoke that whispers of mystery. The digital world contrasts with the tangible, yet your edits blur these boundaries. As you add the final touches, remember: it’s not just about creating effects; it’s about crafting stories. With each click, you bridge imagination and reality, inviting viewers to step into your vivid creations.


