
To add glow or neon effects to your toy photography, start by selecting software that fits your skill level; Adobe Photoshop for experts or Canva for beginners. Prepare your image by sharpening details and adjusting contrast. Use vibrant or pastel colors based on your scene’s mood. Apply blending modes like “Screen” for glow and overlay to deepen contrast. Layering builds intensity while post-processing fine-tunes luminescence. With practice, you’ll enhance your creative exploration even further.
Selecting the Right Software for Editing
When it comes to selecting the right software for editing, you’ve got plenty of options that cater to various skill levels and needs. If you’re a beginner, start with user-friendly programs like Adobe Photoshop Elements or Canva. They offer intuitive interfaces and essential tools for enhancing your toy photography. For more advanced features, consider Adobe Photoshop or Lightroom, which provide extensive editing capabilities and support for glow effects. Affinity Photo is another great choice, offering a one-time purchase for powerful tools. If you prefer free options, GIMP is a solid alternative with a bit of a learning curve. Evaluate what each software offers, keeping in mind your editing goals and budget, to find the best fit for your creative projects.
Preparing Your Image for Glow Effects
Before adding glow effects, you’ll want to enhance your image quality to make those effects stand out. Focus on sharpening details and adjusting contrast, ensuring your subject pops. Next, use background isolation techniques to keep the glow from bleeding into areas where it’s not needed, maintaining a clean and professional look.
Image Quality Enhancement
To achieve stunning glow effects in your toy photography, start by enhancing the image quality to guarantee your edits look their best. Begin by ensuring your image is sharp and well-exposed. Use software like Adobe Lightroom or Photoshop to adjust brightness, contrast, and saturation. Boosting these elements can make your toy figures pop, setting a strong foundation for the glow effects.
Next, reduce noise to keep the image clean and detailed. Use the noise reduction tools available in your editing software to smooth out any graininess, especially in low-light shots. Fine-tune the clarity to sharpen edges without overdoing it, maintaining a natural look. By optimizing your image quality, you’re setting the stage for more impactful and vibrant glow effects in your toy photography.
Background Isolation Techniques
Having optimized your image quality, focus on isolating the background to make your glow effects stand out. This step guarantees your glowing elements don’t get lost amid distracting details. Here’s how you can isolate the background effectively:
- Masking: Use photo editing software to create a mask around your subject. This separates it from the background, allowing you to enhance the glow without affecting the entire image.
- Blur: Apply a blur effect to the background. This not only isolates the subject but also adds depth, making the glow appear more vibrant and focused.
- Desaturation: Decrease the color intensity of the background. A less colorful background makes neon effects pop and keeps the viewer’s attention on your subject.
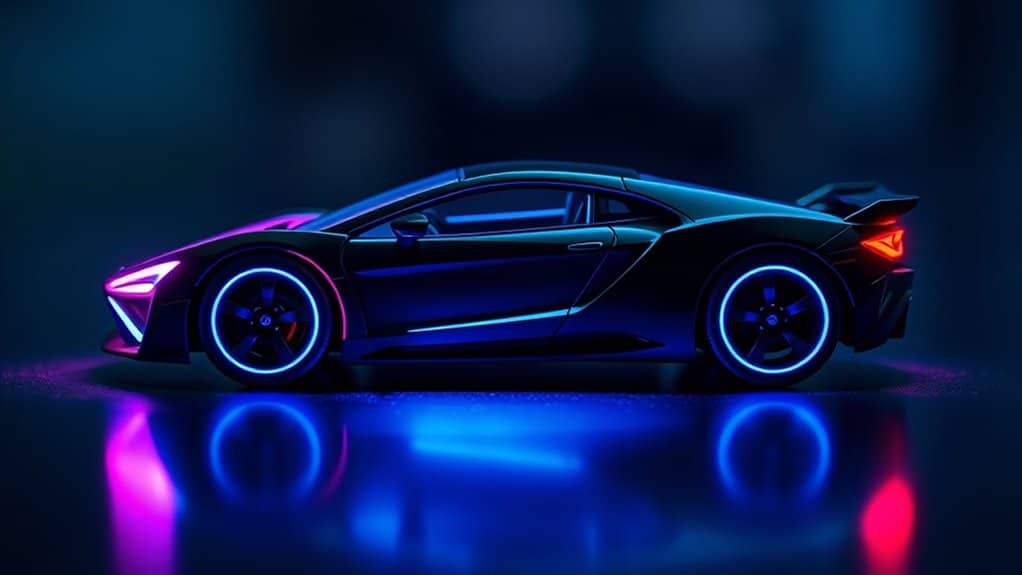
Choosing the Perfect Colors for Your Neon

How do you guarantee that your neon colors captivate and enhance your toy photography? Start by considering the mood and theme of your scene. Vibrant hues like electric blue or neon pink can inject energy and excitement, perfect for action figures or sci-fi settings. For a softer, more mystical atmosphere, opt for pastel or muted neon shades.
Contrast is key. Choose colors that stand out against your backdrop to draw attention to your subject. If your background is dark, bright neon will pop, whereas softer tones work well against lighter settings. Consider the toy’s existing color palette, too. Complementary neon colors can highlight features and create harmony. Experiment with digital tools to preview different colors before committing, ensuring they align with your creative vision.
Applying Basic Glow Techniques
To start adding glow effects to your toy photography, experiment with layer blending modes to create the desired luminosity. Use a soft brush to gently apply the glow, ensuring it looks natural and enhances the toy’s features. By combining these techniques, you’ll create a striking and professional glow effect in your images.
Layer Blending Modes
When you’re exploring the art of toy photography editing, understanding layer blending modes is essential for adding enchanting glow effects. These modes let you seamlessly integrate different elements and create magical visuals. Here’s how you can use them effectively:
- Screen Mode: Lightens your image by blending the glow layer with the one beneath. It’s perfect for adding soft, subtle highlights, making your toys appear luminous.
- Overlay Mode: Enhances contrast by mixing the glow with the underlying layer. Use it to make your neon effects pop with vibrant intensity.
- Color Dodge: Brightens the image dramatically by dodging the colors on the glow layer. It’s excellent for creating striking, high-impact lighting effects, giving your toy scenes an otherworldly shine.
Experiment with these modes for stunning results!
Soft Brush Application
Although mastering layer blending modes can elevate your toy photography, applying a soft brush is where the magic truly begins. Start by selecting a soft round brush in your editing software. Set the opacity to around 30% for a subtle effect. Choose a color that matches the desired glow—perhaps a warm yellow for a lantern or cool blue for a sci-fi gadget. Gently brush over the areas where you want the glow to appear. Build up the effect by layering strokes, but don’t overdo it. The key is subtlety. Use the eraser tool with soft edges to refine the glow, ensuring it doesn’t spill over unintended areas. With practice, you’ll add life and dimension to your toy photos effortlessly.
Enhancing Glow With Layering Methods

Layering methods can greatly enhance the glow effects in your toy photography, giving your images a magical touch. By using layering techniques effectively, you’ll create depth and intensity, making the glow appear more vibrant and realistic. Here’s how you can do it:
- Duplicate Your Layer: Start by duplicating your base layer. This allows you to work on the glow effect without altering the original image, giving you more control.
- Change Blending Mode: Set the duplicated layer to a blending mode like “Screen” or “Overlay.” These modes enhance brightness and make colors pop, perfect for creating that glowing effect.
- Adjust Opacity: Fine-tune the opacity of your layers. Lowering it can create a subtle glow, while increasing it makes the glow more pronounced.
Creating Realistic Neon Light Sources
To create realistic neon light sources in your toy photography, begin by selecting the areas you want to illuminate with precision. Use a soft brush tool to outline these segments, ensuring you maintain clean edges. Choose vibrant, neon-like colors such as electric blue, hot pink, or bright green to mimic the glow of real neon lights. Adjust the brush opacity to around 50% for a more natural blending between colors and surrounding areas. Layer multiple strokes to build intensity where needed. You can add a subtle Gaussian blur to soften the glow and make it blend seamlessly into the scene. Remember, the goal is to mimic how real neon lights diffuse and interact with nearby surfaces, creating a convincing and magical effect.
Adding Depth and Dimension to Your Glow
When enhancing your toy photography with depth and dimension in glow effects, it’s crucial to contemplate the interaction between light and shadow. This balance transforms a flat neon glow into a dynamic, realistic element in your image. To achieve this, consider these steps:
- Layering: Use multiple layers in your editing software. Create separate layers for different light intensities and colors to build a more complex glow.
- Gradient Masks: Apply gradient masks to control the fall-off of the glow. This technique helps mimic how real light diffuses and fades naturally.
- Shadow Integration: Enhance shadows to contrast with the glow. Adjust the shadow’s opacity and direction to make the light appear as though it’s genuinely interacting with surrounding objects.
These techniques will bring your toy photography to life!
Fine-Tuning the Luminescence in Post-Processing
While achieving the right glow is essential, refining luminescence during post-processing can make all the difference in your toy photography. Begin by adjusting the brightness and contrast to enhance the glow’s visibility. Use adjustment layers to selectively increase or decrease exposure, focusing on areas needing more emphasis. Don’t forget about saturation; boosting it slightly can make colors pop, giving your subject a vibrant, neon-like effect.
Next, play with the highlights and shadows. Increasing highlights can intensify the glow, while tweaking shadows can add depth and dimension. Utilize feathered masks to smoothly blend your enhancements, guaranteeing a natural shift. Finally, check your work on different devices to confirm the luminescence appears consistent across platforms. Remember, subtle adjustments often lead to striking results.
Experimenting With Advanced Techniques and Styles
You’ve refined the art of luminescence in your toy photography, and now it’s time to embrace advanced techniques that push your creativity further. Immerse yourself in experimenting with new styles that add a unique flair to your images. Here’s how you can take your glow effects to the next level:
- Double Exposure: Blend multiple shots to create surreal scenes where toys light up against dramatic backdrops. This technique enhances depth and intrigue.
- Light Painting: Use a small flashlight or LED to “paint” light around your subject during long exposures. This technique highlights specific areas, adding dynamic glow trails.
- Color Grading: Adjust hues and saturation to give your neon effects a mood that fits the scene. This helps in transforming a simple glow into a story-driven element.
Frequently Asked Questions
How Can I Prevent the Glow Effect From Overpowering the Main Subject?
Start by adjusting the glow’s opacity and size to guarantee it complements rather than dominates. Use layers and masks to control the effect’s intensity. Always focus on enhancing your subject, not overshadowing it, for balanced composition.
What Tools Are Best for Creating a Subtle Neon Effect?
You should use tools like Adobe Photoshop or Lightroom for subtle neon effects. Adjust the brush opacity, blend modes, and layer masks. Experiment with the outer glow settings to achieve a balanced, realistic neon look.
How Can I Make the Glow Effect Look More Natural in Daylight Scenes?
To make the glow effect look natural in daylight scenes, adjust the opacity and blend mode of your glow layer. Use soft brushes and layers to integrate the effect subtly, matching the scene’s lighting and shadows.
Are There Any Shortcuts for Quickly Creating Neon Outlines?
You can quickly create neon outlines by using layer styles like Outer Glow or Stroke in editing software. Duplicate your layer, apply the effect, and adjust until satisfied. Shortcuts help streamline your creative process.
Can I Use Glow Effects on Black and White Photos?
Did you know 60% of photos online are in black and white? You can definitely use glow effects on them. It adds a striking contrast, making your images pop and evoking nostalgia with a modern twist.
At a Glance
You’ve mastered the art of adding glow or neon effects to your toy photography. By coincidence, each step you’ve taken—from choosing the right colors to experimenting with advanced techniques—mirrors the process of creating an enchanting scene. Just like a toy’s light-up feature, your skills now illuminate your work, adding depth and realism. So, let your creativity shine and your photos glow with vibrancy, knowing you’ve revealed the secret to bringing your images to life.


