To capture heroic poses in toy photography, pick toys with excellent articulation and strong, defined features. Position them in confident stances with expressive facial details, using wide stances and raised chins. Enhance the scene by experimenting with dramatic lighting and dynamic angles. Utilize props like swords or shields for added narrative depth. Post-process your images with contrast adjustments and color enhancement to emphasize heroism. Discover how each element creates a bold and enchanting scene.
Choosing the Right Toys for Heroic Poses
When you’re setting up a toy photography scene, how do you decide which toys will best capture heroic poses? First, focus on toys with great articulation. Action figures with multiple joints let you create dynamic, lifelike poses. Look for toys that have strong, defined features and vibrant colors, as these will stand out in your photos. Characters known for their heroism or iconic stances often work well, like superheroes or legendary warriors. Consider the scale of the toy too; larger toys might be more striking and detailed, whereas smaller ones can offer versatility in scene-building. Also, think about the material—sturdy toys will hold poses better. Finally, let your imagination guide you. Choose toys that inspire you to tell a compelling story.
Understanding the Basics of Heroic Poses
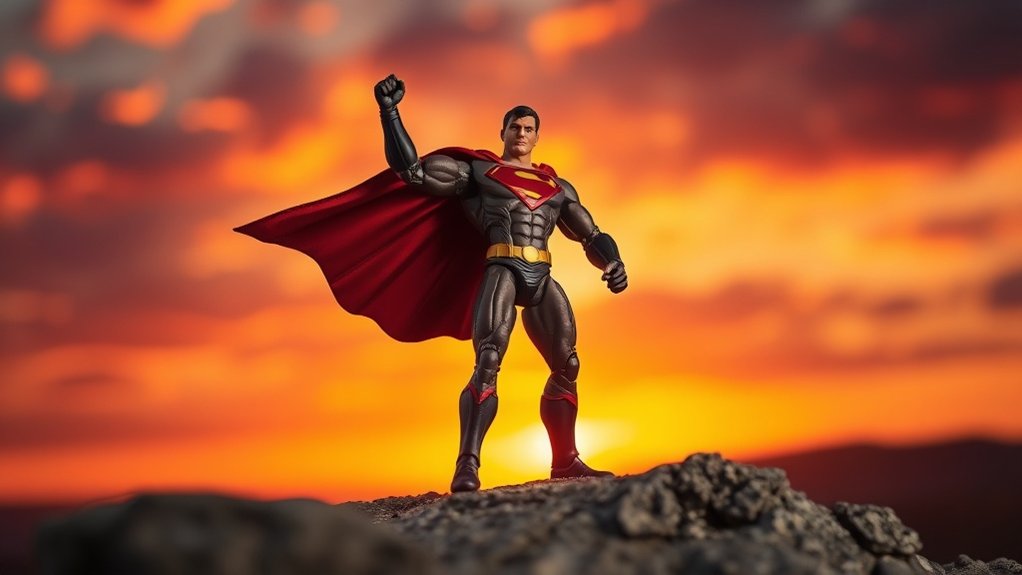
Although it might seem straightforward, mastering heroic poses in toy photography requires a keen eye and understanding of the elements that convey strength and valor. Start by considering the posture of your toy figures. A wide stance, raised chin, and open chest often suggest confidence and bravery. Pay attention to arm positioning; an outstretched arm or a clenched fist can add a sense of action and determination. Don’t forget facial expressions if your toys have them—eyes looking upward or a focused gaze can enhance the heroic vibe. Experiment with angles, shooting from a lower perspective to make the figure appear larger than life. By understanding these basic elements, you’ll create enthralling scenes that embody the essence of heroism.
Mastering Lighting Techniques for Dramatic Effects
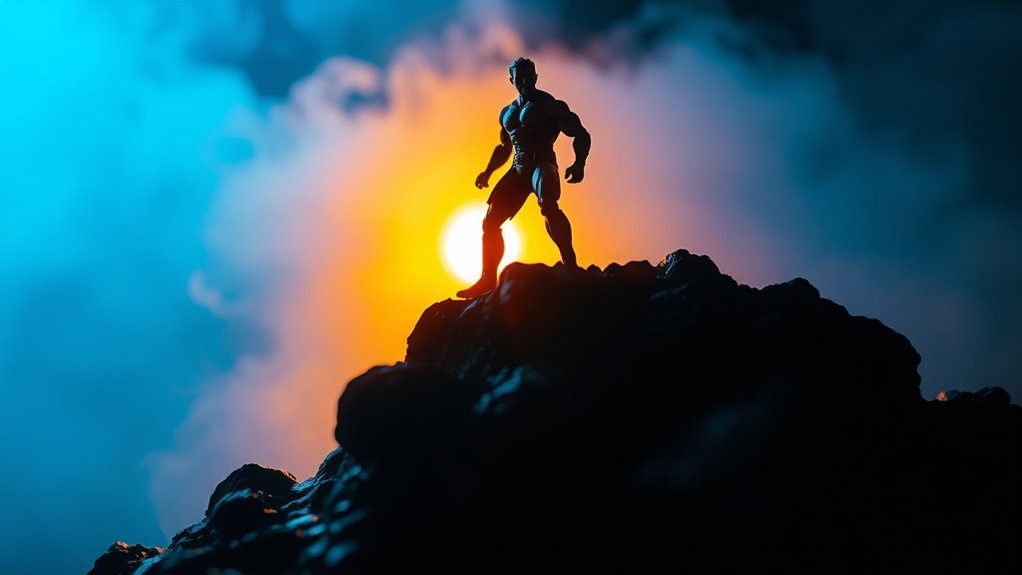
Lighting is your secret weapon in toy photography, transforming ordinary scenes into extraordinary ones. By mastering lighting techniques, you can create dramatic effects that emphasize the heroic nature of your subjects. Start by experimenting with different light sources, such as natural light, lamps, or LED panels. Position your light source to create strong contrasts and shadows, which add depth and dimension to your scene. Try using backlighting to create a silhouette effect, or side lighting to highlight textures and details. Don’t forget to adjust the intensity of your light to avoid harsh highlights or deep shadows that might obscure important features. Reflectors or diffusers can help soften the light, ensuring your toys maintain their heroic stance without overpowering glare.
Composing Dynamic Scenes for Maximum Impact
To create scenes that captivate, start by using the rule of thirds to guide your composition. Balance the foreground and background elements to give your photo depth and interest. Experiment with dynamic camera angles to add movement and energy to your shots.
Rule of Thirds
Mastering the rule of thirds can elevate your toy photography to a new level, creating more dynamic and engaging scenes. Instead of centering your subject, imagine a grid dividing your frame into nine equal parts. Place key elements along these lines or at their intersections. This technique draws viewers’ eyes naturally through your scene, adding depth and interest.
When photographing heroic poses, position your toy at one of the intersecting points, emphasizing action or emotion. For instance, if a toy is leaping, align its trajectory with one of these lines to enhance movement. The rule of thirds can also create tension or balance, making your composition more visually appealing. Experiment with different angles and placements to find what best showcases your toy’s heroic stance.
Foreground and Background Balance
While capturing toy photography, achieving a striking balance between the foreground and background is essential for dynamic scenes. Start by selecting focal points. Place your hero toy in the foreground to grab attention, ensuring it doesn’t overpower the background. Use elements like trees or buildings in the background to add depth and context. Experiment with different depths of field to create a sense of hierarchy and lead your viewer’s eye through the scene. Pay attention to scale; a mismatched scale can distract from the heroic pose. Use color contrasts to separate your toy from the background, adding visual interest. Remember, the background should complement, not compete with, your subject. With practice, balancing these elements will enhance your toy photography dramatically.
Dynamic Camera Angles
When it comes to composing dynamic scenes in toy photography, using creative camera angles can elevate your work from ordinary to extraordinary. Start by experimenting with low angles to give your toy figures a larger-than-life appearance. This perspective adds drama and makes them look more heroic. Try tilting the camera slightly to introduce a sense of movement and tension. High angles, on the other hand, can convey vulnerability or a broader scene. Don’t be afraid to get close and capture details or use wide shots to showcase the environment. Move around your setup, explore different heights, and adjust the focus to find the most impactful composition. Remember, dynamic angles can transform a static pose into a compelling story, so keep experimenting.
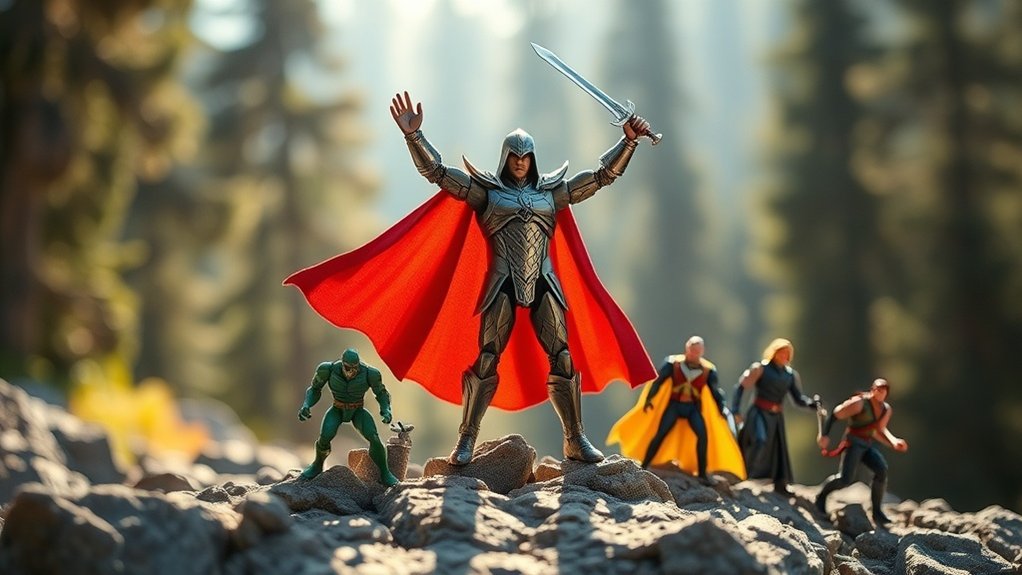
Utilizing Props to Enhance the Heroic Narrative
To truly bring your toy photography scenes to life, integrating well-chosen props can elevate your narrative and highlight the heroism of your subjects. Props provide context, depth, and a sense of realism, making your scenes more compelling. Here’s how you can use props effectively:
- Select Symbolic Items: Use props that symbolize strength or bravery, like swords, shields, or capes. These instantly convey heroism.
- Create a Believable Environment: Incorporate background elements like rocky terrains or urban landscapes that match your hero’s story.
- Add Interactive Elements: Introduce objects your toy can interact with, like vehicles or gadgets, to enhance the narrative and suggest action.
Techniques for Capturing Action and Movement
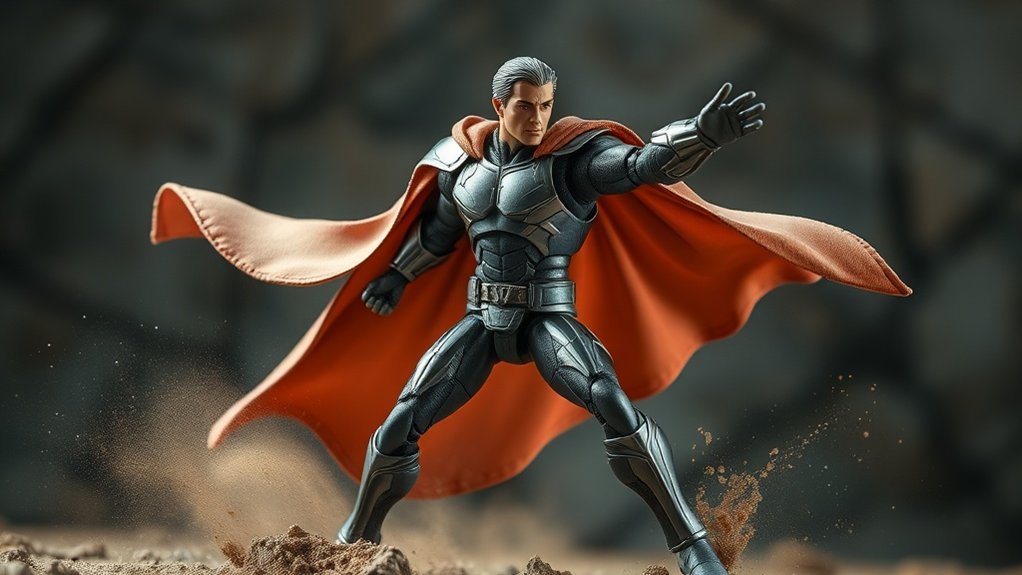
Capturing action and movement in toy photography requires a keen understanding of dynamic composition and timing. You’ve got to think like a director choreographing a scene. Start by choosing a pose that conveys the essence of action, like a hero mid-flight or in a powerful leap. Use wire stands or transparent supports to hold toys in gravity-defying positions. Frame your shot to emphasize motion—angled lines and diagonals can suggest speed and energy. Experiment with shutter speed; a faster shutter freezes motion, while a slower one creates a blur effect for more drama. Focus on the toy’s face or the most expressive part to steer attention. Practice patience, as capturing that perfect moment takes time and experimentation. Consider integrating elements from the environment to amplify the action—such as blowing wind, throwing confetti, or pouring water—to create a more immersive experience. Explore various toy photography scene ideas that portray conflict or adventure, like a battle between characters or a high-speed chase, to enhance the narrative. Utilizing different angles and perspectives can also add depth and excitement to your shots, inviting viewers to engage with the dynamic storytelling.
Creating Depth and Perspective in Your Shots
Creating depth and perspective in your toy photography can transform a flat image into a more engaging and lifelike scene. To achieve this, focus on using different techniques to add layers and dimension. Here’s how:
- Foreground Elements: Incorporate objects in the foreground to create a sense of depth. These could be rocks, plants, or other toys, which guide the viewer’s eye through the scene.
- Leading Lines: Use lines that draw attention from the foreground to the background. This could be a road, a river, or even the outstretched arm of a hero.
- Varying Heights: Position your toys at different heights and distances to create a dynamic scene. This will help to simulate a real-world environment, making the shot more immersive.
Post-Processing Tips for Enhancing Heroic Features
When enhancing the heroic features of your toy photography in post-processing, focus on emphasizing the attributes that define your characters. Start by adjusting the contrast to make the colors pop, highlighting the boldness of your toys’ costumes. Use sharpening tools carefully to accentuate details like muscles or facial expressions, guaranteeing they stand out. Play with lighting effects to create dramatic shadows or bright highlights that can enhance the scene’s intensity.
Consider using vignette effects to draw attention to the central figure, guiding the viewer’s gaze to the hero. Adjust the saturation levels to guarantee your hero looks vibrant and full of life. Remember, enhancing heroic features is about balance; don’t overdo the edits. Subtle enhancements can make your toy photographs truly epic.
Experimenting With Angles for Unique Perspectives
Experimenting with angles can transform your toy photography from ordinary to extraordinary. Try a low angle to add dynamics and drama, making your toys appear larger than life. An overhead shot can introduce an unexpected twist, while a side view might highlight details you didn’t notice before.
Low Angle Dynamics
Why not challenge traditional viewpoints by shooting from a low angle to bring your toy photography to life with dynamic perspectives? Capturing toys from below can make them appear larger-than-life and add an element of drama to your shots. By experimenting with low angles, you can transform your toy photos into epic scenes that evoke a sense of wonder and adventure.
Consider the following tips:
- Get close to the ground: Position your camera at the same level as the toy, emphasizing its stature and importance.
- Use a wide-angle lens: This exaggerates the perspective, making the toy appear more imposing and dominant in the frame.
- Play with lighting: Shadows cast from low angles can enhance the dramatic effect, highlighting textures and details.
Embrace low angles for compelling toy photography!
Overhead Shot Drama
Although often overlooked, overhead shots can bring a fresh and dramatic flair to your toy photography. By capturing a scene from above, you add a unique perspective that transforms ordinary setups into compelling narratives. Start by positioning your camera directly above your toys, ensuring everything you want to highlight is in the frame. This bird’s-eye view can convey vulnerability, power dynamics, or just an intriguing aspect of your subject.
Experiment with lighting to enhance the mood—shadows can play an integral role in adding depth and emotion. Use this angle to showcase complex scenes or interactions between characters. Don’t be afraid to try different heights to see how the perspective shifts. Remember, the goal is to capture something unexpected that tells a story from a new viewpoint.
Side View Impact
When you shift your camera to capture a side view, you reveal a whole new dimension of storytelling in toy photography. This angle adds depth, drama, and a enchanting perspective that can transform ordinary scenes into epic narratives. Imagine capturing a superhero in mid-leap or a battle-ready stance, the side view highlights dynamic motion and intensity. To master this technique:
- Depth Creation: Position the toy in relation to the background to generate layers, enhancing the three-dimensional effect.
- Focus and Blur: Use a shallow depth of field to spotlight your subject while softly blurring the background, drawing the viewer’s eye.
- Lighting Play: Experiment with side lighting to create shadows and contrast, emphasizing the toy’s features and adding mood.
Experiment and discover the impact of side views!
Telling a Compelling Story Through Heroic Poses
Capturing the essence of heroism in toy photography requires careful attention to poses that convey strength, determination, and narrative depth. Start by thinking about the story you want to tell. Is your hero facing a formidable foe, or standing victorious amid chaos? Use dynamic poses that highlight the character’s role and emotion. A raised arm can suggest triumph, while a crouched stance might indicate readiness.
Position your toys to interact with their surroundings, enhancing the story’s impact. Angle the camera to emphasize their expressions and movements. Lighting sets the mood; dramatic shadows can add tension or highlight key actions. By combining these elements, you’ll create powerful images that don’t just show toys, but bring their stories to life.
Frequently Asked Questions
What Camera Settings Work Best for Capturing Toy Heroism?
You’ll want a low ISO for less noise, a narrow aperture for depth, and a fast shutter speed to freeze action. Adjust lighting to highlight details, and experiment with angles to capture your toy’s heroic essence.
How Do I Prevent My Toys From Appearing Too Shiny in Photos?
Avoid creating glare worthy of a thousand suns by diffusing your light source. Use soft, natural lighting, or a DIY diffuser with parchment paper. Adjust your camera’s settings and angle to minimize unwanted reflections and shine.
Which Materials Are Ideal for Making Homemade Toy Backdrops?
You should use materials like foam boards, fabric, or cardboard for homemade toy backdrops. They’re easy to manipulate, paint, and customize. Don’t forget to experiment with textures and colors to create the perfect scene for your shots.
How Can I Avoid Making Toys Appear Too Small in Photos?
To avoid making toys appear too small, use a low angle and fill the frame with the toy. Adjust the camera’s focus and depth of field to emphasize the toy, creating a larger-than-life appearance.
What Are Effective Techniques to Stabilize Toys During a Shoot?
To stabilize toys during a shoot, use clear stands or sticky tack to keep them steady. You can hide supports with strategic angles or photo editing. Experiment with different methods to find what works best for you.
At a Glance
You’ve become the da Vinci of toy photography. With your army of action figures and lighting wizardry, you’re ready to conquer Instagram, one heroic pose at a time. Remember, it’s not just about the toys; it’s about telling epic tales where plastic heroes save the day. So go ahead, create drama, add some depth, and let your action figures shine—because who needs Hollywood when you’ve got a shelf full of tiny superheroes?


