
To set up a portable studio for toy photography on-the-go, choose a DSLR or mirrorless camera with a macro lens. Get a sturdy tripod, wireless remote shutter, and portable LED lights. Choose lightweight, reversible backdrops for versatility. Master lighting using compact lights and reflectors, and experiment with various angles and compositions like low or eye-level shots. With the right gear and techniques, you’ll capture stunning shots anytime, anywhere. Dive deeper to reveal more creative insights.
Selecting the Right Camera and Lens for Toy Photography
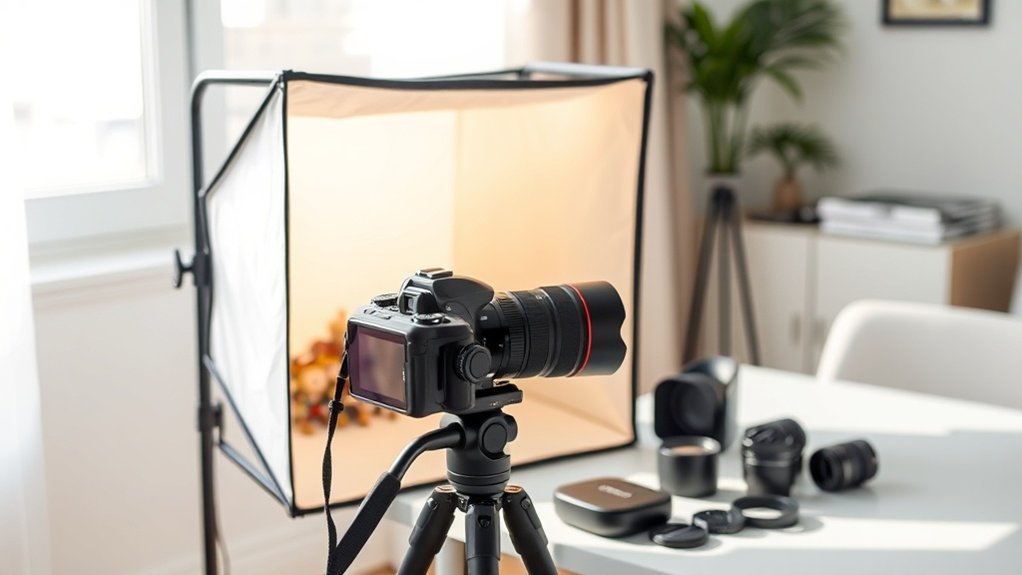
When diving into toy photography, how do you choose the best camera and lens? Start by considering what you want to capture. For detailed shots of small figures, a camera with a macro lens is essential. Look for a camera with manual settings to control focus and exposure effectively. A DSLR or mirrorless camera gives you flexibility and quality, but don’t overlook advanced compact cameras if you prefer something lighter. In choosing a lens, aim for a focal length of 50mm to 100mm, as it provides a natural look and good depth of field. Pay attention to aperture; a low f-stop number allows for better low-light performance and beautiful background blur. Focus on versatility and portability to suit various shooting environments.
Essential Accessories for a Portable Toy Photography Studio
Creating a portable toy photography studio requires a few essential accessories to guarantee your shots are both creative and professional. First, invest in a sturdy tripod. It assures stability, helping you capture sharp images without blur. A wireless remote shutter allows you to take photos without touching the camera, reducing the risk of shaking. Consider portable LED lights—they’re compact and versatile, providing consistent lighting wherever you are. Don’t forget about reflectors; they help manipulate natural light, adding depth and dimension to your images. A carrying case is vital to keep your gear organized and protected during transit. Finally, pack a microfiber cloth for cleaning your lens and toys, making sure dust and fingerprints don’t ruin your perfect shot. Additionally, familiarize yourself with onlocation toy photography techniques to fully utilize your surroundings and elevate your images. Experimenting with different backgrounds and natural light can lead to stunning results that showcase your creativity. Lastly, always be prepared to adapt your setup to the environment, ensuring that you capture the best possible shots no matter where you are.
Choosing Compact and Versatile Backdrops
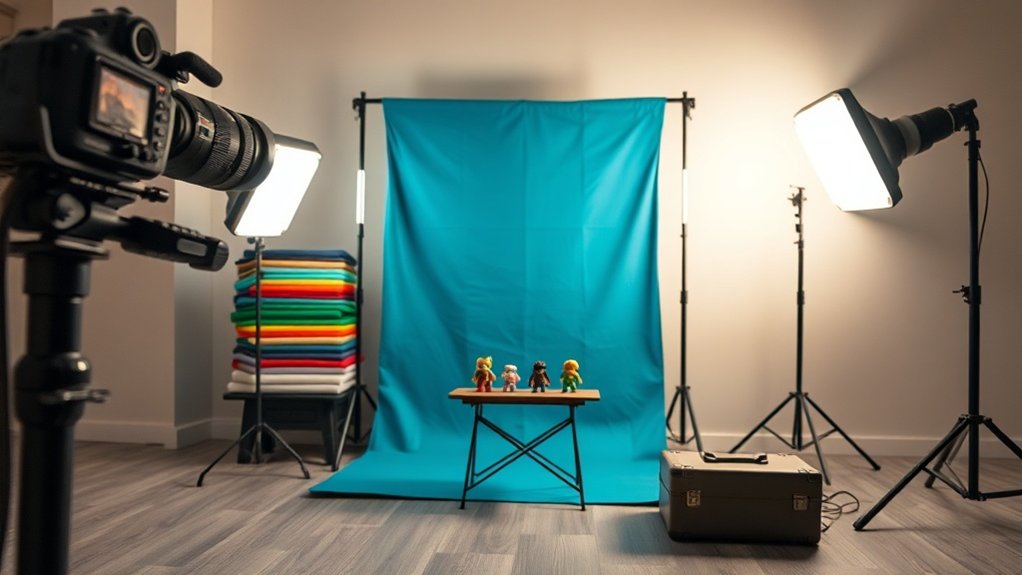
When setting up your portable toy photography studio, you’ll want to focus on compact and versatile backdrops. Opt for lightweight fabric options—you can easily transport and store them without taking up much space. Pair these with foldable backdrop stands to quickly change scenes and capture varied shots effortlessly.
Lightweight Fabric Options
Everyone needs the perfect backdrop for toy photography, and lightweight fabric options offer just that. They’re easy to carry and versatile, making them ideal for on-the-go shoots. You can find fabrics in various colors and patterns, allowing you to switch up settings without lugging around heavy gear. Consider materials like muslin or polyester that fold neatly into your bag without wrinkling too much.
When selecting your fabric, think about the texture and how it complements your toy’s features. Smooth surfaces work well for sleek, modern toys, while textured fabrics can add depth to vintage or rustic themes. You’ll also want to opt for fabrics that are easy to clean, so you can keep them looking fresh and ready for your next creative session.
Foldable Backdrop Stands
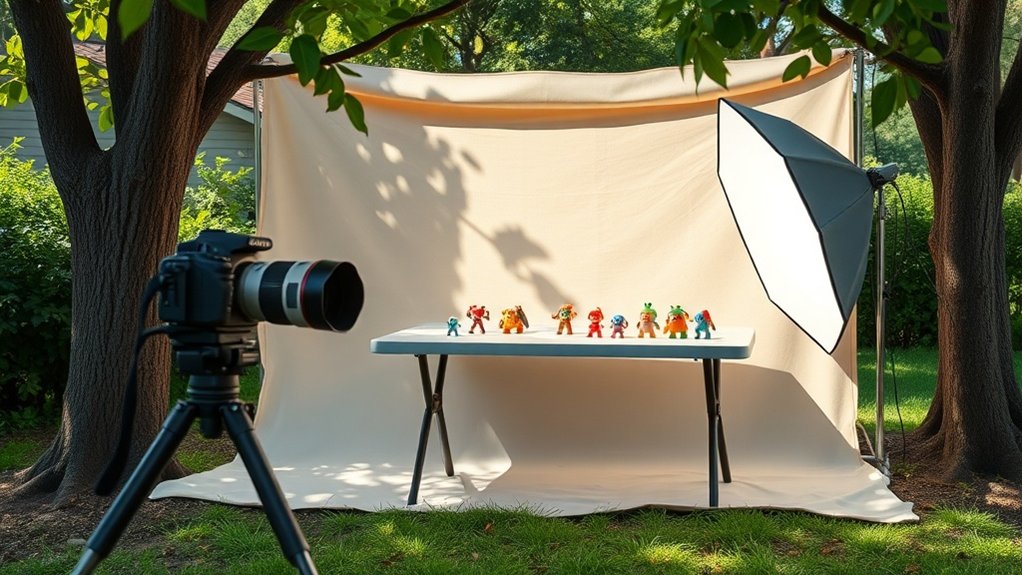
One essential component of a portable toy photography studio is a foldable backdrop stand. These stands are compact, easy to set up, and allow you to bring various backgrounds to life anywhere you go. Choose stands that collapse into a small size for effortless transport and storage. Opt for ones with adjustable heights to accommodate different toy scales and angles.
When selecting backdrops, go for versatile, lightweight materials like muslin or vinyl, which are easy to clean and come in a variety of colors and patterns. Consider reversible backdrops for more variety without extra bulk. Make sure the backdrop attaches securely to the stand to prevent slipping during your shoot. With the right foldable backdrop stand, setting up your on-the-go studio becomes a breeze.
Mastering Lighting Techniques With Portable Equipment
To master lighting techniques with portable equipment, start by choosing compact light sources that are easy to adjust and position. You’ll also want to use reflectors effectively to control shadows and enhance the overall brightness of your scene. By balancing these elements, you can create stunning, well-lit toy photos anywhere.
Choosing Compact Light Sources
While starting on your journey into toy photography, mastering lighting techniques with portable equipment is essential for achieving stunning results. Choosing compact light sources is a vital step. Look for options like LED panels or portable ring lights that offer versatility and ease of transport. These light sources are lightweight, energy-efficient, and provide consistent illumination, making them ideal for on-the-go shoots. Consider adjustable brightness settings to gain more control over your lighting conditions. Battery-powered options are convenient, especially when shooting outdoors or in locations without easy access to power outlets. Don’t forget to experiment with different color temperatures to create mood and depth in your images. By selecting the right compact lights, you’ll enhance the quality of your toy photography effortlessly.
Utilizing Reflectors Effectively
When you’re working with portable equipment, reflectors can be a game-changer in mastering lighting techniques for toy photography. They allow you to manipulate light easily, enhancing your shots without needing bulky gear. Start by choosing a reflector that fits your setup—silver for contrast, gold for warmth, or white for soft light. Position it opposite your light source to bounce light back onto your subject, eliminating harsh shadows and creating depth.
Adjust the angle of the reflector to see its effects in real-time. You’ll notice how it can highlight textures and details, making your toy figures pop. Don’t hesitate to experiment with distances and angles to find the perfect balance. Reflectors are versatile and lightweight, making them indispensable for capturing stunning images on-the-go.
Tips for Composing and Framing Your Shots
Capturing stunning toy photography requires more than just a good camera—it’s about mastering composition and framing to bring your miniature scenes to life. Start by considering the rule of thirds; position your toy off-center to create a dynamic balance. Use leading lines to guide the viewer’s eye naturally towards the focal point. Think about the angle—eye level can make your toy feel larger-than-life, while a low angle might add drama. Don’t forget about the background; a clutter-free space guarantees your toy remains the star. Experiment with depth of field to blur backgrounds and draw focus. Finally, frame your shot tightly to eliminate distractions and emphasize details. With practice, you’ll create engaging and memorable compositions every time.
Post-Processing Tools and Techniques for On-the-Go Editing
Having composed and framed your toy photograph perfectly, it’s time to bring out its full potential with post-processing tools and techniques for on-the-go editing. Start by downloading user-friendly apps like Snapseed or Lightroom Mobile. These apps offer powerful features for tweaking your images right from your smartphone or tablet. Adjust the exposure, contrast, and saturation to make your colors pop. Use the selective tool to highlight specific areas, making sure your subject stands out. Don’t forget to crop or straighten if needed for a polished look. Experiment with filters but keep them subtle to maintain your image’s authenticity. Finally, save your edited masterpieces in high resolution to guarantee top quality when sharing or printing. Embrace these tools to elevate your toy photography instantly!
Creative Ways to Utilize Your Surroundings for Unique Shots
Why not let your surroundings inspire creative shots in your toy photography? Embrace the unexpected by using everyday objects as backdrops or props. A simple park bench can become a stage for a dramatic scene, while a patch of grass transforms into an expansive jungle. Look for interesting textures like brick walls or tree bark to add depth and character.
Consider the lighting around you. Natural light filtering through leaves can create stunning shadow patterns. Use reflections from puddles or mirrors to add a dynamic element to your shots. Keep an eye out for architectural features that can act as frames or lead lines.
Experiment with angles and perspectives. Sometimes, a low angle can make your toys appear larger than life, adding a sense of adventure to your photos.
Frequently Asked Questions
How Do I Transport My Portable Studio Safely While Traveling?
Make certain you pack your portable studio components securely in a padded bag. Use bubble wrap for delicate items. Don’t forget to label the bag and keep it within your sight during transit to prevent damage or loss.
What Are Some Budget-Friendly Options for Setting up a Portable Studio?
Envision a compact, magical world in your bag. Use foam boards, a foldable lightbox, and your smartphone. Grab small LED lights and colored paper for backdrops. You’ve created an enchanting, budget-friendly studio for toy photography adventures.
How Can I Ensure the Durability of My Portable Studio Equipment?
To guarantee your portable studio equipment’s durability, choose sturdy materials, invest in protective cases, and handle everything with care. Regularly inspect for wear and tear. Keep equipment clean and store it properly to extend its lifespan.
What Are Some Common Challenges Faced When Shooting Outdoors?
Outdoor photography’s a dance with nature. You’ll face unpredictable weather, changing light, and curious onlookers. Adapt quickly by packing versatile gear, checking forecasts, and choosing secluded spots to minimize distractions and keep your creative rhythm flowing.
How Do I Maintain Creativity When Shooting in Similar Locations Repeatedly?
Keep your creativity alive by experimenting with angles, lighting, and props. Change up your perspective, try new techniques, and incorporate different backgrounds or themes. Challenge yourself to tell a fresh story with each shoot.
At a Glance
With your portable studio set up, you’re ready to plunge into the tiny worlds of toy photography. Remember, every shot is a dance between light and shadow, so let your creativity be your guide. Use your surroundings to add flair and depth, and don’t shy away from experimenting. Edit on-the-go to capture the magic instantly. With the right tools and a dash of imagination, you’ll turn small subjects into larger-than-life stories.


