Simulating motion blur in toy photography involves using editing software to creatively capture movement. Choose user-friendly software compatible with your system, ensuring it supports high-resolution images. Use linear motion blur for speed and path blur for complex toy movements. Fine-tune blur settings and combine techniques for realism, applying layer masks to control effects. Don’t overdo it; subtle adjustments create the best storytelling. Explore further to master these techniques to truly elevate your toy photography. Experiment with different angles and lighting to enhance the dramatic effect of your images. Incorporating toy photography techniques for action scenes can also help convey a sense of urgency and excitement, making your compositions more engaging. Lastly, study the work of other toy photographers to gain inspiration and discover new methods for achieving captivating effects.
Understanding Motion Blur and Its Impact on Toy Photography
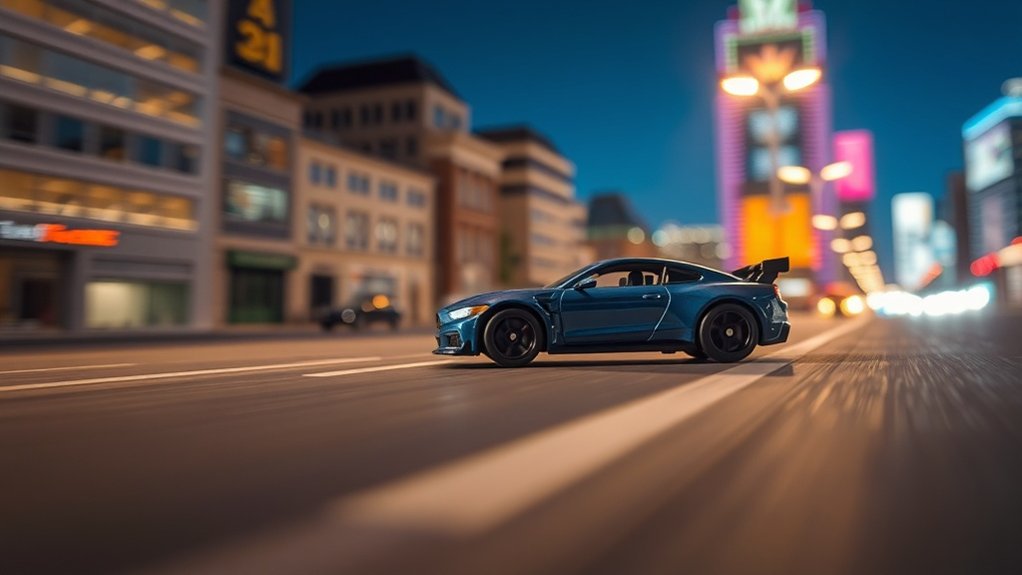
When capturing toy photography, understanding motion blur can transform your images from static to dynamic. You’ll create a sense of movement, making your toy scenes come alive. Motion blur occurs when a moving object appears blurred along its path of movement, adding realism and excitement. Incorporating this effect into toy photography involves setting the right shutter speed and experimenting with different angles. A slower shutter speed captures more motion blur, while a faster one freezes action.
Position your toys thoughtfully to emphasize their movement direction. Consider how motion blur affects the story you’re telling. It can suggest speed, create drama, or imply action. Mastering motion blur encourages viewers to engage with your work, making your toy photography more engaging and immersive.
Choosing the Right Editing Software for Motion Blur Effects
When you’re picking editing software for motion blur effects, make sure it’s compatible with your device and supports your image format. A user-friendly interface is essential, so you can focus on creativity instead of struggling with complex tools. Look for software that balances ease of use with powerful features to enhance your toy photography.
Software Compatibility Considerations
Choosing the right editing software for simulating motion blur in toy photography can greatly enhance your creative process. It’s vital to confirm the software you choose is compatible with your current system. Here are some considerations to guide you:
- Operating System Compatibility: Make sure the software supports your operating system, whether it’s Windows, macOS, or Linux. Compatibility guarantees smooth installation and operation.
- File Format Support: Check if the software can handle various file formats, such as RAW, JPEG, and PNG. This flexibility allows you to work with different types of images without conversion issues.
- Hardware Requirements: Verify if your computer meets the software’s hardware specifications. Adequate RAM, processor speed, and graphics capability are essential for efficient performance and preventing slowdowns.
User-Friendly Interface Options
A user-friendly interface is essential when selecting editing software for motion blur effects in toy photography. You want software that’s easy to navigate so you can focus on creativity rather than struggling with complex menus. Look for programs with intuitive design and clear labels, allowing you to apply motion blur effects quickly.
Consider software that offers drag-and-drop features or interactive tutorials, making the learning curve much smoother. Adobe Photoshop, for instance, is popular but can be overwhelming if you’re new. Alternatives like Luminar Neo or Affinity Photo provide simpler interfaces with powerful tools.
Always check for customizable workspaces, letting you tailor the interface to your preferences. This saves time and enhances your editing flow, making the process enjoyable and efficient.
Preparing Your Toy Photographs for Editing
Before diving into the editing process, guarantee your toy photographs are well-prepared for the best results. Start by reviewing each image to confirm they’re sharp and well-composed. Any blurriness or poor framing can hinder your final outcome. Pay attention to lighting, as it impacts how your subject interacts with its surroundings.
Here are three essential steps to prepare your images:
- Organize Your Files: Create a dedicated folder on your computer for easy access and management.
- Back Up Your Work: Utilize cloud storage or an external drive to prevent data loss.
- Check Image Quality: Confirm your photos are in a high-resolution format to maintain detail during editing.
These preparations set the stage for a successful editing journey.
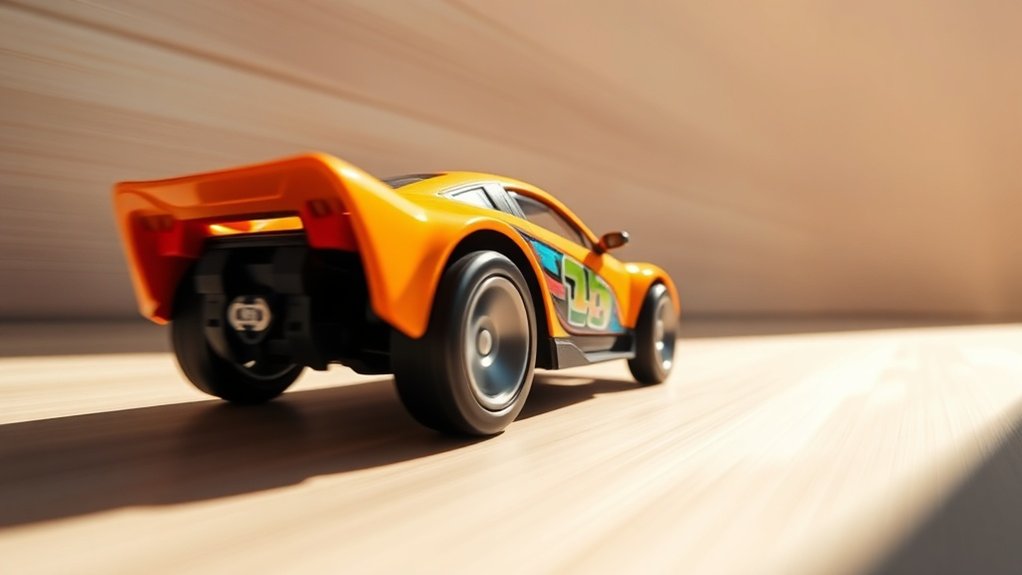
Applying Linear Motion Blur for a Sense of Speed
When you want to convey a sense of speed in your toy photography, applying linear motion blur can be an effective technique. Start by selecting the toy subject you want to emphasize. Open your image in your preferred editing software. Look for the motion blur filter, often found under the blur menu. Choose linear motion blur and adjust the angle to match the direction of the toy’s intended movement. Increase the distance settings to create a longer blur, enhancing the speed effect. Don’t overdo it; subtlety can make the motion look more natural. Preview the changes to guarantee the blur aligns with your vision. Once satisfied, save your image. This method gives your toys the dynamic impact they need.
Creating Radial Motion Blur for Spinning and Rotating Effects
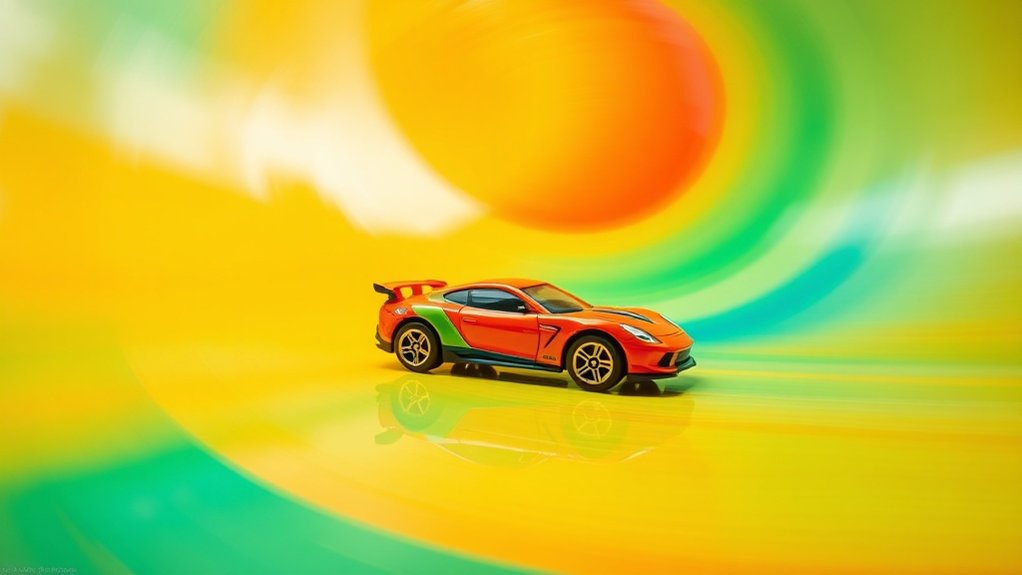
Linear motion blur adds a sense of speed, but what if your toy is spinning or rotating? To capture that dynamic effect, you’ll want to use radial motion blur. This technique makes it look like your toy is in a whirlwind of action. Here’s how you can do it:
- Select the Right Tool: Use a photo editing software with radial blur capabilities. Photoshop is a popular choice.
- Position the Center: Place the blur’s center on the toy’s pivot point. This creates a realistic spin effect.
- Adjust the Amount: Increase or decrease the blur intensity to match the desired speed of rotation. A subtle blur can suggest a gentle spin, while a strong one implies rapid movement.
Now, you’re ready to bring your spinning toy to life!
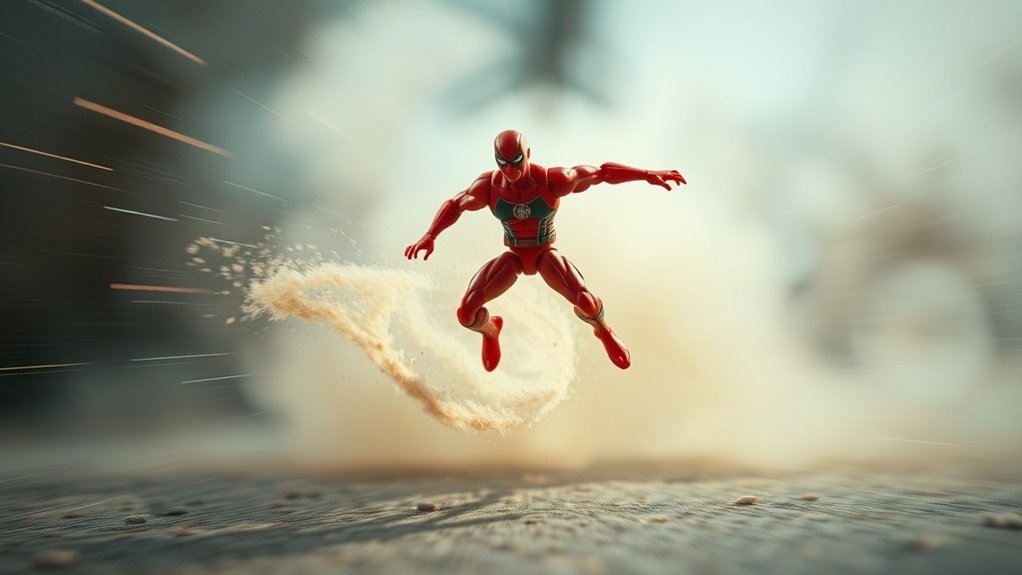
Using Path Blur to Simulate Complex Movements
To simulate complex movements in your toy photography, you can use the path blur technique, which allows you to mimic motion along a defined path. By customizing motion path curves, you can create more realistic and dynamic effects that enhance the depth of your images. Experiment with different curves to bring your toy scenes to life and capture the essence of action.
Defining Path Blur Technique
Capturing the essence of movement in toy photography can transform static scenes into dynamic stories, and the path blur technique is a powerful tool in your creative arsenal. By using path blur, you can simulate complex movements, giving toys the illusion of action. To get started, follow these steps:
- Plan Your Scene: Visualize the motion you want to depict. Consider how the toy should move, like a superhero leaping or a car speeding.
- Apply Path Blur: Select the toy subject and use path blur in your editing software to create a motion trail that follows the intended path.
- Adjust Settings: Fine-tune the speed and direction of the blur to match the desired motion effect, ensuring it complements your scene.
This technique adds life and excitement to your toy photography.
Customizing Motion Path Curves
While path blur can initially seem straightforward, customizing motion path curves allows you to simulate intricate and realistic movements in toy photography. By adjusting the path, you can create the illusion of toys leaping, spinning, or gliding. Start by selecting the object you want to blur. When you apply a path blur, you’ll see a default straight line appear. Don’t stop there! Click on the line to add anchor points, then drag them to form curves that mimic the desired motion. Adjust the speed and taper settings to refine the effect. The more you experiment with angles and curves, the more dynamic and lifelike your images will become. This technique transforms static shots into scenes full of action and storytelling.
Enhancing Depth and Dynamics
Although mastering toy photography can be challenging, using path blur to simulate complex movements adds depth and dynamics to your images. This technique helps convey motion and excitement, making your photos more engaging. To get started, follow these steps:
- Select the Right Path: Choose a path that matches the intended movement of your toy. A curve can simulate a swinging or turning action, while a straight line implies direct motion.
- Adjust Blur Settings: Fine-tune the speed and direction of the blur to match the scene’s context. Subtle adjustments can enhance realism without overpowering the subject.
- Layer and Blend: Combine multiple layers with varied blur intensities for complex scenes involving multiple toys. This layering adds depth and offers a richer narrative.
Experiment and watch your toy photos come to life!
Enhancing Realism With Layer Masks and Blending Modes
To elevate the realism in your toy photography, layer masks and blending modes offer powerful techniques for simulating motion blur. Start by duplicating your image layer. Apply a motion blur filter to the duplicated layer to create the desired effect. Next, add a layer mask to this blurred layer. Use a soft brush to selectively paint over areas where you want the blur to appear, revealing the sharper image beneath in parts needing clarity.
Blending modes can further refine your result. Experiment with modes like “Overlay” or “Soft Light” to seamlessly integrate the blur, enhancing depth and realism. Adjust the opacity to control the effect’s intensity. This method allows you to craft dynamic scenes, giving life and movement to static toys in your photographs.
Tips for Combining Multiple Motion Blur Techniques
When you combine multiple motion blur techniques, you can create stunning and dynamic toy photography. Start by layering different blur types to add depth and realism. Here’s how you can enhance your edits:
- Vary Blur Directions: Apply horizontal blur for speed and vertical blur for drama. Mix them to simulate chaotic movements, like a toy mid-action.
- Adjust Blur Intensity: Use subtle blurs for background elements to maintain focus on the main subject while suggesting movement. For foreground blurs, increase intensity to highlight motion.
- Blend with Layer Masks: Use masks to control where each blur effect appears. This allows you to selectively apply blurs, ensuring that important details aren’t lost in the process.
Frequently Asked Questions
Can Motion Blur Be Achieved Through Camera Settings Alone?
Yes, you can achieve motion blur through camera settings. Lower the shutter speed to capture movement. Make certain you use a tripod to stabilize the camera, so only the subject blurs while the rest of the scene stays sharp.
What Are Common Mistakes When Applying Motion Blur in Editing?
You might overdo the blur, making toys look unnatural. Don’t forget to match the direction of movement. Guarantee consistent lighting and shadows. Avoid sharp edges where blur should occur, and don’t neglect the background integration.
How Do You Fix Overdone Motion Blur Effects?
When your photo looks like a whirlwind, dial back the blur. Use layer masks to selectively erase excess blur, revealing sharpness beneath. Adjust opacity levels to achieve a balanced effect, keeping your subjects crisply dynamic.
Are There Mobile Apps for Creating Motion Blur Effects?
You can definitely find mobile apps for creating motion blur effects. Apps like Snapseed and Adobe Photoshop Express offer tools to simulate motion. Just download one, explore its features, and start enhancing your toy photography with realistic blur!
How Does Lighting Affect the Application of Motion Blur in Editing?
When you add motion blur in editing, lighting plays an essential role. Poor lighting can make the blur look unnatural or muddy. Make sure your lighting enhances the effect, highlighting movement without overpowering or diminishing the visual appeal.
At a Glance
In the whimsical world of toy photography, motion blur is your magic wand, transforming static scenes into dynamic tales. By mastering techniques like linear, radial, and path blur, you breathe life into your plastic protagonists, making them race, spin, and dance. With the right blend of tools and imagination, you’re not just capturing toys—you’re crafting stories. So, wield your editing brush like an artist, and let your miniature subjects leap beyond the confines of reality.


