To ace toy photography, adjust your camera like a pro. Use a low f-stop for a dreamy background. For movement, opt for a quicker shutter speed. Adjust ISO to balance light and minimize noise. Match white balance with your light source for vibrant colors. Experiment with focal lengths to highlight toy features. Manual focus lets you capture those intricate details. Immerse yourself in these adjustments and your toy pics will shine. Stay tuned for a deeper exploration into other tips!
Understanding Aperture and Depth of Field
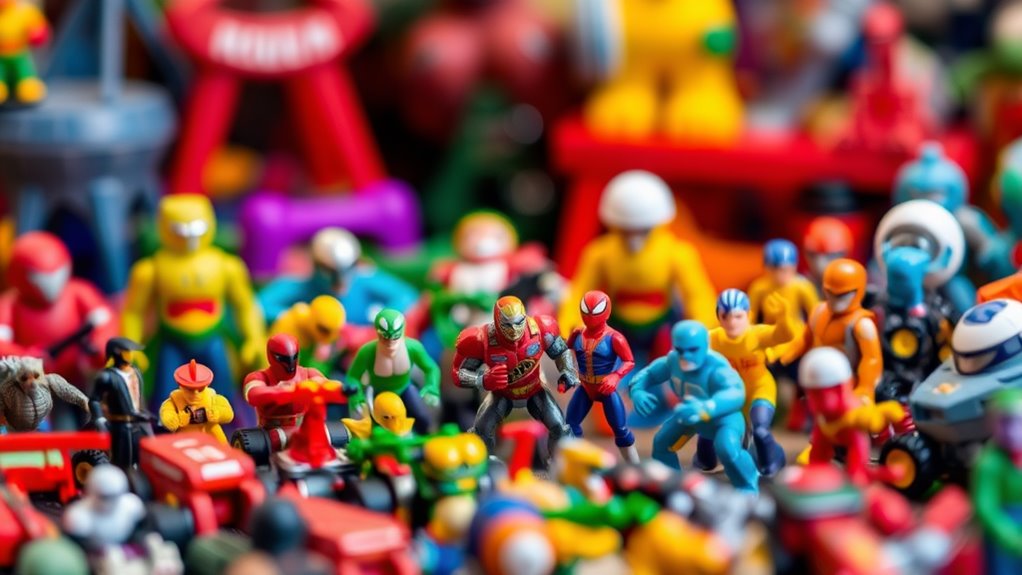
Understanding aperture and depth of field is essential for mastering toy photography. You need to know that aperture, measured in f-stops, controls the amount of light entering the camera. A lower f-stop (like f/2.8) means a wider aperture, allowing more light in and creating a shallow depth of field. This is perfect for isolating your toy subject from the background, making it pop. Conversely, a higher f-stop (like f/16) results in a smaller aperture, letting less light in and offering a deeper depth of field. This keeps more of the scene in focus, useful when capturing intricate details in a diorama. By adjusting the aperture, you'll control the artistic effect, enhancing how your toy subjects are perceived.
Selecting the Right Shutter Speed
When capturing the perfect toy photograph, selecting the right shutter speed is essential. Shutter speed controls how long your camera's sensor is exposed to light. It determines whether your photo is sharp or blurred. For static toys, use a faster shutter speed, like 1/250 or higher, to freeze details without motion blur. If you're photographing toy action scenes, experiment with slower speeds, like 1/60, to convey movement. Always consider your toy's size and movement. For smaller toys, faster speeds prevent tiny shifts from disrupting focus. Balance light availability with shutter speed; brighter conditions allow for faster speeds. Practice and adjust based on your creative vision and desired outcome. With the right shutter speed, your toy photography will shine. Additionally, consider using a tripod to maintain stability, especially with slower shutter speeds, to avoid any unwanted camera shake. To further enhance your toy shots, remember the best shutter speed tips for toys can vary based on the scene’s dynamics and lighting, so don’t hesitate to take several test shots. Experimentation is key, as each toy may present its own unique challenges and opportunities for stunning photography.
Adjusting ISO for Optimal Lighting

When adjusting ISO for toy photography, you'll need to strike a balance between light sensitivity and noise reduction. A lower ISO helps reduce noise, enhancing the sharpness and color accuracy of your images. Experiment with different settings to find the perfect combination that brings your toy scenes to life with vivid detail.
Balancing Light Sensitivity
Although capturing the perfect shot in toy photography requires various adjustments, balancing light sensitivity by adjusting the ISO setting is essential for achieving ideal lighting. Start by understanding your environment's lighting conditions. If you're shooting in a dimly lit space, increase the ISO to make the sensor more sensitive to light, capturing brighter images. Conversely, in a well-lit area, lower the ISO to avoid overexposure. Keep in mind, higher ISO settings can introduce graininess, so aim for the lowest ISO that still allows you to achieve the desired brightness. Experiment with different ISO levels to find what works best for your scene. By mastering ISO adjustments, you'll control light sensitivity effectively, ensuring your toy photos are vibrant and well-lit.
Reducing Noise Levels
To reduce noise levels in your toy photography, focus on adjusting the ISO for ideal lighting. Start by setting your camera to the lowest ISO setting that still captures enough light without introducing graininess. Lower ISO values, like 100 or 200, are perfect for bright environments or when using additional lighting. If you're shooting in dim conditions, slightly increase the ISO to maintain image clarity but avoid going too high, as this introduces digital noise.
A tripod can also be helpful, allowing you to use slower shutter speeds without camera shake, thereby keeping the ISO low. Always review your photos on a larger screen to check for noise. Adjust as necessary, gradually finding that sweet spot where your toys look sharp and vibrant, without unwanted noise.
Enhancing Color Accuracy
Achieving vibrant colors in your toy photography hinges on getting the lighting just right, which can be expertly managed by adjusting your ISO settings. When you increase your ISO, your camera becomes more sensitive to light, allowing you to capture vivid colors even in dim environments. However, setting it too high can introduce noise, which dulls colors and reduces clarity.
Start by identifying the lighting conditions. In bright settings, use a lower ISO to maintain color accuracy. In low-light situations, a moderate ISO can help without sacrificing quality. Experiment with different levels to find that sweet spot where colors pop, but noise stays minimal. Remember, balancing ISO with aperture and shutter speed is essential for the best results, ensuring your toys look as dynamic as possible.
White Balance Settings for Accurate Colors

To achieve accurate colors in your toy photography, adjusting the white balance is essential. You'll want to take into account the influence of natural lighting and tweak the color temperature settings accordingly. Don't hesitate to use a custom white balance for more precise control and to guarantee your toys' colors pop just right.
Color Temperature Adjustments
When photographing toys, setting the correct color temperature is essential for capturing accurate colors, as it directly influences the white balance. You'll want to adjust your camera's settings to match the light source's color temperature. For instance, fluorescent lights cast a cool tone, so you'll need to increase the color temperature setting to counteract this effect. Conversely, incandescent bulbs often emit warm tones, requiring a lower setting.
Most cameras have presets like daylight, cloudy, or tungsten, which can help you find the right balance quickly. However, experimenting with the manual settings gives you more control. Use a gray card as a reference to fine-tune your adjustments. This way, your toy photos will pop with true-to-life colors, enhancing their charm and appeal.
Natural Lighting Influence
Although natural lighting can be unpredictable, it often provides the best illumination for toy photography, ensuring vibrant and true-to-life colors. As you experiment with outdoor settings, you'll notice how sunlight highlights your toy's details, making them pop. But to capture these colors accurately, pay attention to your camera's white balance settings.
Natural light changes throughout the day, so it's essential to adjust your settings accordingly. On a clear day, set your white balance to 'Daylight' to maintain color accuracy. If you're shooting during golden hour, use 'Cloudy' or 'Shade' settings to warm up the scene slightly.
Avoid letting your camera's auto settings take control, as they might misinterpret the lighting conditions. Instead, actively choose settings that best match the natural light.
Custom White Balance
A custom white balance is your secret weapon for capturing accurate colors in toy photography. When working with various lighting conditions, like natural light or artificial setups, your camera's auto white balance might struggle to maintain true colors. By setting a custom white balance, you guarantee that your vibrant toy figures look exactly as they should.
Start by using a white or gray card in the scene where you're shooting. Take a picture of the card, then adjust your camera's white balance settings to use that reference. This technique helps your camera understand the lighting environment and correct color shifts accordingly. Custom white balance isn't just for professionals, it's a simple trick that can elevate your toy photography from good to exceptional.
Choosing the Best Focal Length
Why is choosing the best focal length so essential in toy photography? You'll find that it shapes the way your audience perceives your miniature world. A short focal length, like 24mm, captures a wide field of view, making it perfect for establishing shots. It creates an immersive scene where the toys look as if they belong to a larger landscape. On the other hand, a longer focal length, such as 85mm, isolates your subject, providing a more intimate and detailed look. This is fantastic for focusing on specific features or expressions. Remember, each focal length offers a unique perspective, so experiment with your lens to see what best suits your creative vision. By doing so, you'll bring your toy stories to life. Additionally, understanding the best focal lengths for toys can significantly enhance your storytelling capabilities. For instance, using a mid-range focal length like 50mm strikes a balance, allowing for both context and detail without overwhelming the viewer. Ultimately, leveraging the right focal length empowers you to craft a narrative that resonates deeply with your audience.
Utilizing Exposure Compensation
In toy photography, using exposure compensation helps you balance light and shadow effectively. When you're shooting against bright backgrounds, adjusting the exposure guarantees your toys don't get lost in the glare. This technique also enhances the intricate details of your toys, making them the focal point of your photos.
Balancing Light and Shadow
When capturing the miniature world of toy photography, balancing light and shadow becomes essential for achieving that perfect shot. By mastering exposure compensation, you can control how much light hits the sensor, preventing overexposed highlights or underexposed shadows. Start by evaluating the scene's lighting conditions. If shadows overwhelm your toy's details, increase exposure compensation slightly to brighten them. Conversely, if highlights wash out the scene, dial it down to preserve details. Always check your camera's histogram to verify a balanced exposure. Experiment with small adjustments and observe the changes in real-time. Remember, your goal is to reveal intricate details without losing the mood created by shadows. With practice, you'll harness light and shadow to bring your miniature subjects to life.
Adjusting for Bright Backgrounds
Ever struggled with capturing toys against bright backgrounds? This common challenge can wash out your subject, making your toys look dull. To fix this, try using exposure compensation. It's a handy tool on most cameras that lets you adjust the brightness of your images.
Start by dialing down the exposure. Lowering it can help the details of your toy stand out against the bright backdrop. Don't worry about making the background darker; your focus is on the toy. Check your camera's exposure indicator and adjust in small increments. This guarantees you find the right balance without overcompensating.
Practice makes perfect. Experiment with different compensation levels to see what works best for each scene. Soon, you'll capture stunning toy photos effortlessly!
Enhancing Toy Details
Although capturing toys in vibrant detail can be challenging, exposure compensation is your secret weapon. Adjusting exposure compensation allows you to tweak the light entering your camera, enhancing the intricate details in your toy photography. When you increase exposure, brighter areas become more prominent, while decreasing it can prevent details from washing out in overexposed lighting. Here's how exposure compensation helps:
- Brings out textures: Make sure even the smallest details are visible.
- Balances light and shadow: Keeps features from being lost in too much contrast.
- Improves color saturation: Makes colors more vibrant without oversaturation.
- Prevents glare: Reduces the harsh effect of reflective surfaces.
Experiment with small adjustments to find the sweet spot. You'll enhance toy details and create stunning images that showcase your subjects perfectly.
Manual Focus Techniques for Sharp Images
Achieving sharp images in toy photography often hinges on mastering manual focus techniques. You'll gain full control over where the camera focuses, essential for capturing intricate toy details. Start by switching your camera to manual focus mode. Use the viewfinder or live view screen to zoom in on your subject. This lets you adjust the focus ring with precision. Pay attention to the toy's most important features, like eyes or facial expressions, making sure they're crisp and clear.
Lighting plays an important role too. Make certain your subject is well-lit to make focusing easier. Practice with different distances and angles to understand how your lens behaves. Remember, patience is key. With practice, manual focusing will become second nature, improving your toy photography considerably.
Setting Up Custom Picture Profiles
While manual focusing sharpens your images, setting up custom picture profiles enhances the overall look of your toy photography. Adjusting picture profiles allows you to tailor the color, contrast, and sharpness to match your creative vision. By customizing these settings, you can guarantee that your toys' colors pop and their details stand out.
Consider the following adjustments:
- Contrast: Increase it for more dramatic shadows or reduce it for softer images.
- Saturation: Boost it to make colors more vibrant, or dial it down for a muted effect.
- Sharpness: Add a touch more to highlight intricate toy details.
- White Balance: Adjust to guarantee accurate color representation under different lighting conditions.
Experiment with these settings to create a signature style that elevates your toy photography.
The Role of Histogram in Exposure Control
How often do you find yourself struggling to capture the perfect exposure in your toy photography? It can be tough, but using your camera's histogram can make a significant difference. The histogram is a visual representation of the tonal range in your photo, helping you see if your image is underexposed or overexposed. By examining this graph, you can adjust your camera settings to guarantee a well-balanced exposure, capturing the intricate details of your toys.
Pay attention to the peaks and valleys; they indicate the distribution of shadows, midtones, and highlights. If the peaks are bunched to the left, your photo might be too dark. To the right, it could be too bright. Adjust your exposure settings accordingly to achieve the perfect balance.
Fine-Tuning Dynamic Range Settings
When capturing toy photography, understanding and fine-tuning your camera's dynamic range settings can greatly enhance your images. Dynamic range allows you to capture details in both the shadows and highlights, essential for toy photography. To optimize this, start by setting your camera to a mode that allows manual adjustments. Focus on balancing light and shadow without losing important elements. Here are some tips to help you:
- Use HDR mode: Capture a wider range of tones in one shot.
- Adjust exposure: Prevent overexposed highlights and underexposed shadows.
- Shoot in RAW: Gain more flexibility in post-processing.
- Use fill light: Reduce harsh shadows in your scene.
Frequently Asked Questions
What Camera Accessories Are Essential for Toy Photography?
You'll need a macro lens for detailed shots and a tripod to stabilize your camera. Use a lightbox for consistent lighting. Don't forget extra batteries and memory cards to keep shooting without interruptions.
How Can I Create Interesting Compositions With Toys?
Craft enchanting compositions by considering contrast and creativity. Position toys with purpose, play with perspectives, and use props. Experiment with angles and lighting to evoke emotion and tell a story. Your unique vision will shine through.
What Are Some Tips for Achieving Realistic Lighting Effects?
To achieve realistic lighting, experiment with natural light sources like windows or soft diffused lamps. Use reflectors to manipulate shadows and highlights. Don't forget to adjust white balance for accurate colors, and always test different angles.
How Can I Use Props Effectively in Toy Photography?
To use props effectively, choose ones that complement your toy's theme. Experiment with scale to maintain realism. Position props strategically to create depth and interest. Don't overcrowd the scene; focus on enhancing the story you're telling.
What Are Common Mistakes to Avoid in Toy Photography?
Did you know that 60% of toy photos lack proper lighting? Don't let poor lighting ruin your shots. Use natural light and avoid harsh shadows. Pay attention to composition; cluttered backgrounds can distract from your toy's details.
At a Glance
You've taken the essential steps to capture enchanting toy photography. Mastering manual modes like aperture and adjusting for depth of field display your dedication. Shutter speed selections guarantee sharp scenes, while ISO adjustments illuminate images perfectly. White balance brings brilliant, accurate colors, and finding the right focal length is fundamental. Focus firmly, utilize custom picture profiles, and heed the histogram for exposure excellence. Your dynamic range decisions will define your distinct style. Immerse yourself and develop delightful, detailed displays!


