For dynamic mobile toy photography without a macro lens, focus on manipulating light and angles. Use natural light during golden hour for warmth and depth. Experiment with low angles and off-center compositions to create grandeur and intrigue. Leverage your phone’s camera features like HDR mode and portrait settings to blur backgrounds. Add props to provide layers and engage the viewer. With the right techniques, you can craft compelling scenes that capture attention effortlessly. There’s more to discover beyond this. Additionally, consider incorporating techniques from smartphone photography with macro lenses to bring out intricate details in your subject. These close-up shots can reveal textures and features that enhance the storytelling aspect of your images. Don’t hesitate to explore post-editing tools to further elevate your photographs and turn them into stunning visual narratives.
Mastering Light for Enhanced Depth
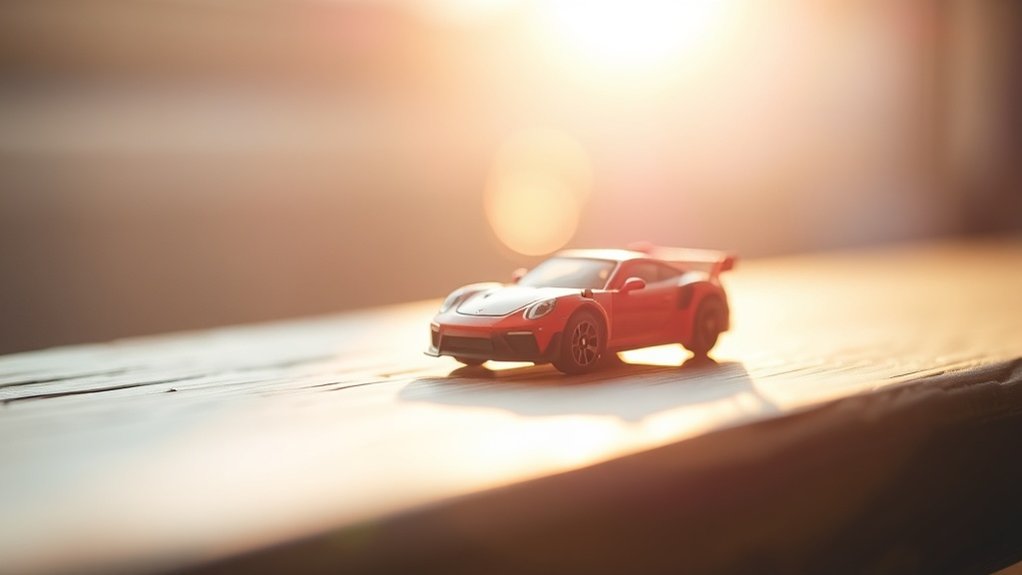
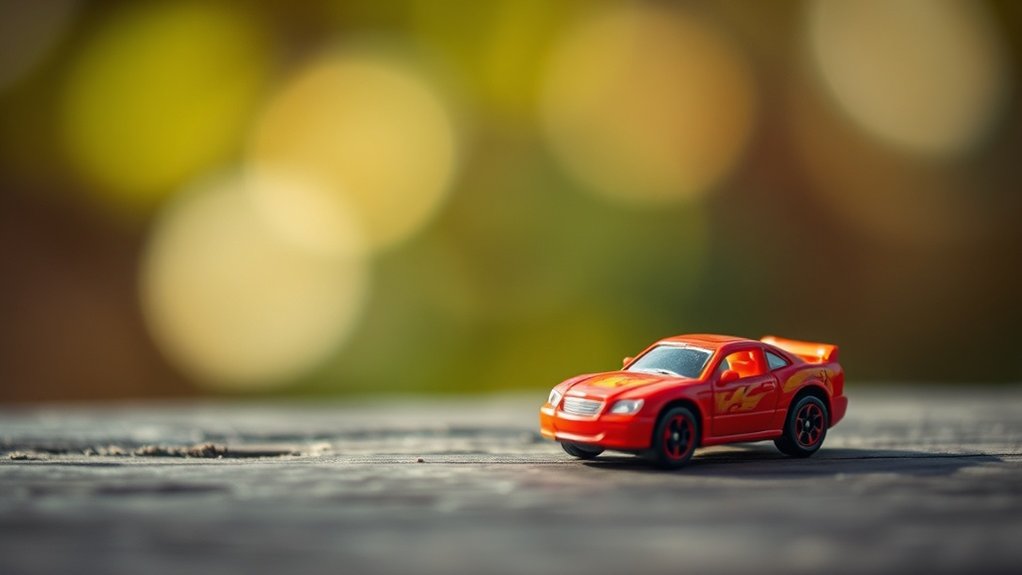
When capturing toy photography, understanding how to master light can greatly enhance the depth of your images. You’ll notice that natural light is your best friend. It’s soft, diffused, and helps bring out the details in your miniature subjects. Try shooting during the golden hour—those magical moments just after sunrise or before sunset—when the light is warm and shadows are soft.
Experiment with backlighting to create silhouettes and add drama. Position the light source behind your toy and watch as it creates enchanting contrasts. Don’t forget to use reflectors, like white paper or a small mirror, to bounce light back onto the subject, filling in shadows. By manipulating light, you can transform flat images into dynamic, three-dimensional scenes that truly pop. Experiment with adding movement to your shots by incorporating other toy figures or props that suggest action. This can further enhance the storytelling aspect and bring your images to life. Explore various toy photography techniques for action scenes to capture the excitement and energy that these dynamic compositions can convey.
Playing With Perspective and Angles
When you’re shooting toys with your mobile, playing with perspective and angles can transform your images. By experimenting with creative angle selection, you can make small figures appear larger than life or create unique scenes. Use perspective distortion tricks to add depth and drama, making your toy photography truly stand out.
Creative Angle Selection
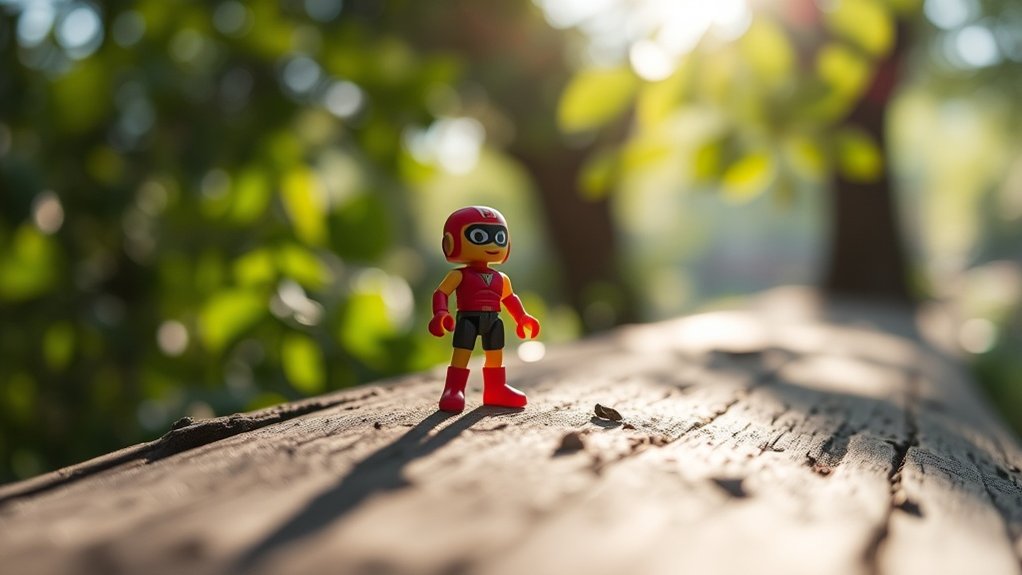
Have you ever wondered how a small shift in perspective can transform your toy photography? By creatively selecting angles, you can give your toy subjects a whole new life. Experiment by getting down low or shooting from above. Each angle tells a different story. Try capturing your toys at eye level to create a sense of intimacy, or tilt your camera slightly to add dynamic tension.
Consider the background too. A simple change in angle can minimize distractions and highlight your toy. Don’t hesitate to experiment with off-center compositions. This can add intrigue and make your photos stand out. Use angles to exaggerate size or create unexpected silhouettes. Remember, your phone is versatile, so move around and explore the limitless possibilities!
Perspective Distortion Tricks
Ever wondered how to add a spectacular twist to your toy photos? Playing with perspective and angles can create mind-bending effects that make your toys look larger than life. By strategically positioning your phone and the toys, you can manipulate how they appear in the frame, adding depth and drama.
To master perspective distortion tricks:
- Low Angles: Shoot from a low angle to make toys appear towering and grand, creating an epic feel.
- Forced Perspective: Place a small toy closer to the camera and a larger object further away to make them appear similar in size.
- Tilt Shots: Slightly tilt your phone to introduce dynamic lines and tension, drawing the viewer’s eye across the image.
Experiment with these techniques and watch your toy photography transform!
Exploring Built-in Camera Features
As you investigate mobile toy photography, it’s essential to explore the built-in camera features of your smartphone to elevate your shots. Start by familiarizing yourself with the camera’s manual settings. Adjusting the ISO, white balance, and exposure can dramatically enhance your photos. Use the grid lines to compose your shot with precision, ensuring your toy is perfectly placed. Experiment with the HDR mode to capture more detail in varied lighting conditions. Don’t forget about the portrait mode; it can simulate a depth effect, making your subject stand out against a blurred background. Explore various filters and editing tools available in your camera app to give your photos a unique touch. Mastering these features will transform your mobile toy photography. Additionally, consider the importance of natural lighting when setting up your shots; soft, diffused light can make a significant difference in the overall quality of your images. Remember to keep the background simple to avoid distractions, allowing your toy to be the focal point of the photograph. For even more enhancement, seek out mobile toy photography tips online to learn new techniques and gain inspiration from fellow enthusiasts.
Utilizing Props for Added Dimension
To enhance your toy photography, try incorporating props that add dimension to your shots. Experiment with creative prop placement to create interesting scenes and layer elements to achieve visual depth. By doing this, you’ll make your photos more engaging and visually dynamic.
Creative Prop Placement
Props can transform your mobile toy photography by adding depth and interest to your shots. Think of them as tools to create miniature worlds around your toys. You can use everyday items to bring your scenes to life and make them pop. Here’s how:
- Background Elements: Use leaves, fabric, or paper to create a dynamic backdrop that complements your toy, enhancing the scene’s storytelling.
- Foreground Focus: Place small objects like pebbles or twigs in the foreground to add layers, making the toy stand out prominently.
- Interaction Points: Incorporate props that interact with the toy, like a tiny ladder or a miniature tree, to add realism and engage viewers.
Experiment with different angles and distances to find what best highlights your toy’s character and story.
Layering for Visual Depth
When you layer props strategically, your mobile toy photography gains incredible visual depth. Start by selecting props that complement your toy’s theme. Arrange them in the foreground, midground, and background to create a sense of space. This layering technique draws the eye into the scene and adds complexity without needing a macro lens.
Place smaller items up front to lead into the main subject, and use larger props in the back to frame it. Experiment with angles and distances between layers to find what works best. Natural elements like leaves or stones can enhance realism, while colorful objects add vibrancy. By paying attention to how each prop interacts with the others, you’ll craft a more engaging and dynamic image.
Embracing Backgrounds and Foregrounds
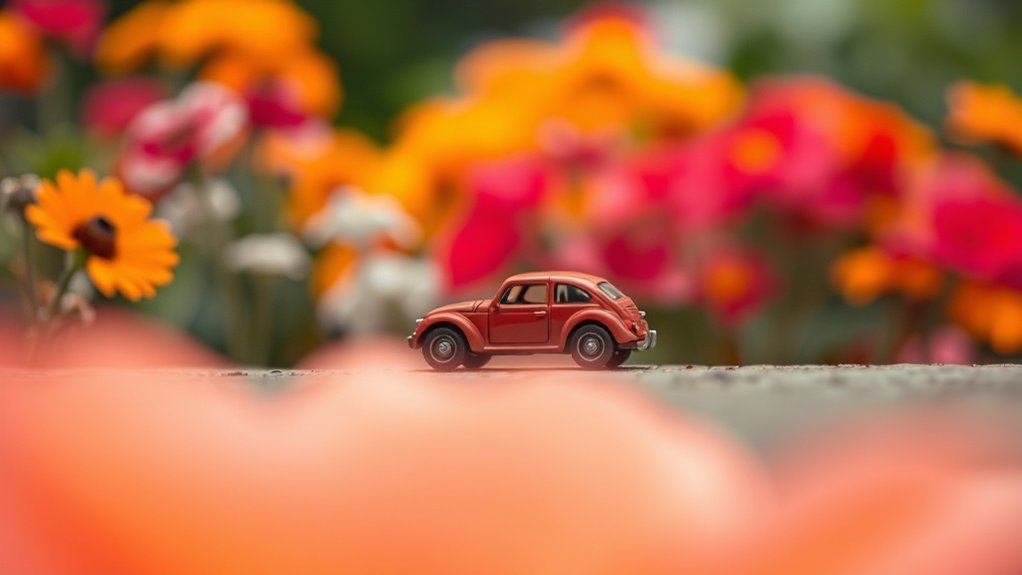
While capturing the charm of your favorite toy, the background and foreground can either enhance or detract from your photo’s impact. To make your toy pop, align contrasting elements in the background and foreground. This emphasizes the toy and adds depth without needing a macro lens. You don’t want clutter, so keep the background simple but engaging. Look for natural lines or shapes that guide the viewer’s eyes toward the toy.
To effectively use backgrounds and foregrounds:
- Choose a complementary background: It should highlight the toy without overpowering it.
- Include natural elements: Leaves, stones, or fabrics can add texture and depth.
- Use depth of field creatively: Blur backgrounds with distance to focus attention on the toy.
Experiment and see what works best for your unique style!
Post-Processing Tips for Depth Enhancement
Capturing the perfect shot is just the beginning; enhancing it through post-processing can elevate your toy photography to new heights. Begin by adjusting the contrast to make your subject pop. Increasing contrast helps separate the toy from the background, adding depth. Use the blur tool to soften backgrounds, further emphasizing the toy. You can also experiment with the vignette effect; it subtly darkens the edges, drawing focus to the center.
Don’t overlook sharpening—gently increase sharpness on the toy while keeping the background softer. This contrast in clarity enhances depth perception. Utilize selective color adjustments to make your toy stand out more vividly. Finally, play with shadows and highlights to create a dynamic range, adding layers and dimension to your image.
Frequently Asked Questions
What Apps Are Best for Editing Mobile Toy Photos?
You’ll find Snapseed, Lightroom, and VSCO great for editing mobile toy photos. Each app offers tools to enhance colors, adjust lighting, and add depth. Explore their features to transform your toy photography into enchanting art.
How Can I Prevent Motion Blur in Toy Photography?
To prevent motion blur in toy photography, stabilize your phone using a tripod or steady surface. Use a fast shutter speed and take photos in well-lit environments. Experiment with burst mode to capture sharp images.
What Phone Settings Optimize Toy Photography Without a Macro Lens?
To make your toy photography sing, adjust your phone’s settings by lowering ISO for less noise and increasing shutter speed. Use portrait mode to blur the background, and guarantee good lighting to highlight details.
How Do I Achieve Bokeh Effects in Mobile Toy Photography?
To achieve bokeh effects in mobile toy photography, adjust your phone’s focus manually. Get close to the toy, ensuring the background remains distant. Use portrait mode if available, and experiment with lighting to enhance the effect.
What Are the Best Times of Day for Outdoor Toy Photography?
Capture magic during the golden hours—those fleeting moments at dawn and dusk when the sun paints the world with soft, warm hues. It’s when shadows dance lightly, adding depth and drama to your toy photography.
At a Glance
You’ve got the tools to make your toy photography shine. By mastering light, playing with perspective, and exploring your camera’s features, you can create depth without a macro lens. Props and backgrounds will add that extra dimension, making your shots pop. Don’t forget, post-processing can be the cherry on top, enhancing everything beautifully. So, plunge in headfirst, and watch your creativity bring your toy scenes to life. Happy shooting, and may your photos speak volumes!


