For engaging outdoor toy photography, use natural props like stones and pebbles to add texture and depth, and leaves and foliage for vibrant, lush settings. Water features like streams introduce dynamic reflections and motion. Enhance scale with trees and branches. Flowers infuse colors and intricate patterns, while sand and soil ground compositions naturally. Grass and moss create layers and a natural frame. Discover how these elements transform your photography with endless creative possibilities.
Stones and Pebbles
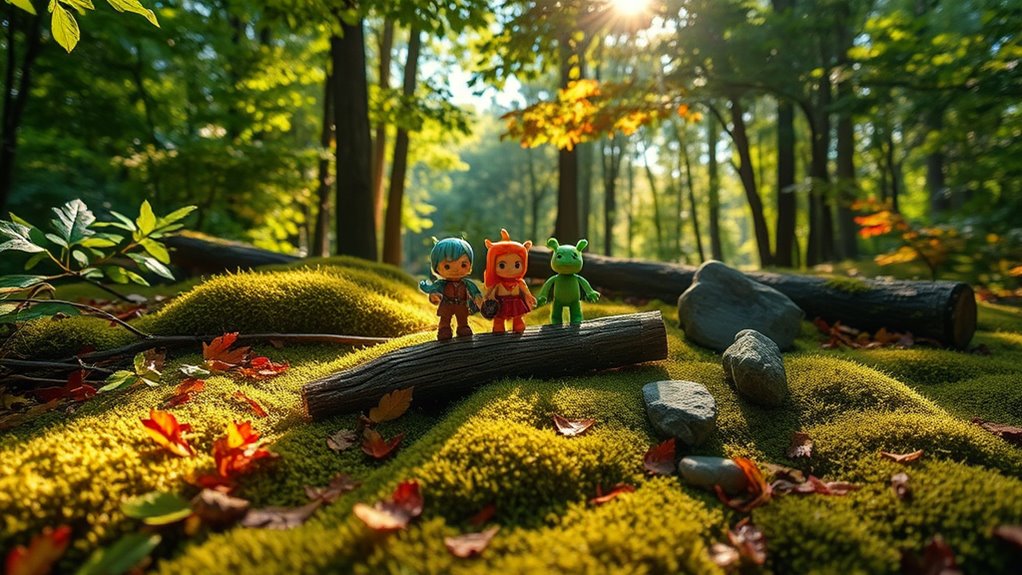
Stones and pebbles are versatile elements that can add texture and depth to your outdoor toy photography. You can use them to create realistic environments, like miniature mountains or rocky terrains for action figures. Their varied sizes and colors guarantee each shot feels unique and dynamic. When capturing a scene, consider placing pebbles around the toys to simulate natural surroundings or enhance the composition's balance.
Experiment with different arrangements to see how shadows and light play off the stones' surfaces. Since stones often evoke rugged or adventurous themes, they can amplify storytelling in your photos. By strategically positioning them, you can guide the viewer's eye and highlight your subject. Remember, the natural variety of stones means endless creative possibilities for your images.
Leaves and Foliage
Leaves and foliage can bring a vibrant and natural touch to your outdoor toy photography. They provide a dynamic backdrop, adding depth and texture to your shots. When arranging your scene, use leaves to create a lush environment, enveloping your toy in a mini forest. Experiment with various colors and sizes, from large, dramatic leaves to tiny, delicate ones. You can play with shadows and highlights by positioning your toys under or between leaves, enhancing the mood of your image.
Consider the season's impact; autumn leaves offer rich, warm tones, while spring foliage provides fresh, lively greens. Don't hesitate to mix different types of leaves to create contrast and interest. Capture your toy's story against nature's intricate, ever-changing canvas, making each shot unique.
Water Features
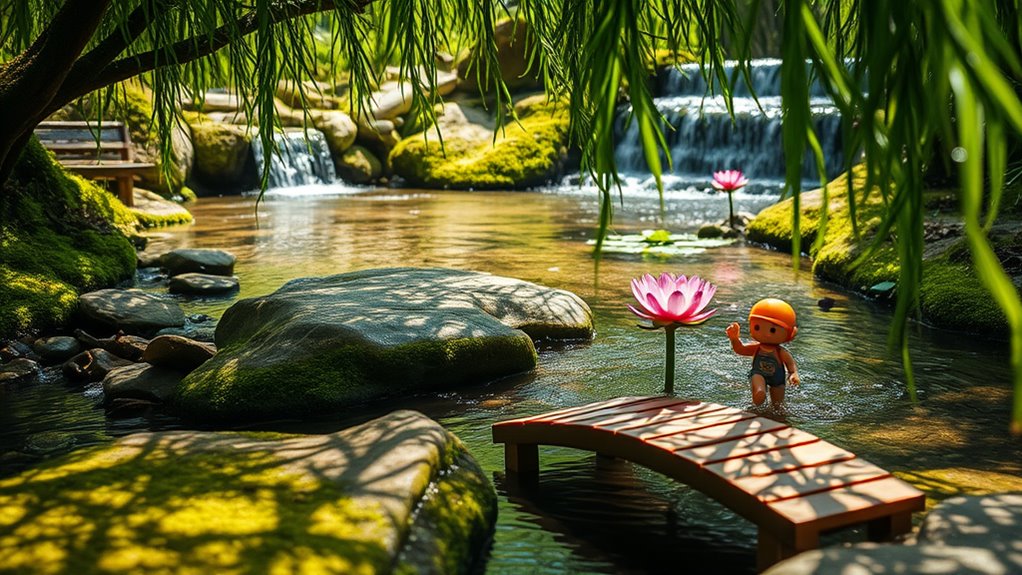
When you integrate water features into your outdoor toy photography, you add a dynamic and reflective element that can transform your images. Water offers movement, texture, and depth, making your photos more enchanting. Here's how you can effectively use water features:
- Puddles: They provide natural reflections and allow for creative angles. Position your toy close, and capture the mirror-like surface.
- Streams: Flowing water adds motion and can create a sense of adventure. Place toys strategically near the water's edge.
- Waterfalls: Even small ones deliver dramatic backgrounds and a sense of scale. Use the cascading water as a backdrop.
- Lakes or Ponds: These offer calm surfaces perfect for serene, balanced compositions. Try shooting during sunrise or sunset for stunning reflections.
Using these elements enhances storytelling in your photography.
Flowers and Blossoms
Although often overlooked, flowers and blossoms can infuse your outdoor toy photography with vibrant colors and intricate patterns, making your images pop with life. By incorporating these natural elements, you'll add depth and interest to your compositions. Imagine a toy figurine standing amidst a field of daisies or nestled within a patch of wildflowers. The contrasting colors and textures create a dynamic backdrop, enhancing your subject's visual appeal.
When selecting flowers, consider their size relative to your toys. Smaller blossoms like violets or forget-me-nots pair well with miniature figures, while larger blooms like sunflowers can provide a dramatic setting for bigger toys. Don't hesitate to experiment with different angles and lighting. Morning and late afternoon light will highlight the delicate petals beautifully, adding a soft, natural glow.
Trees and Branches
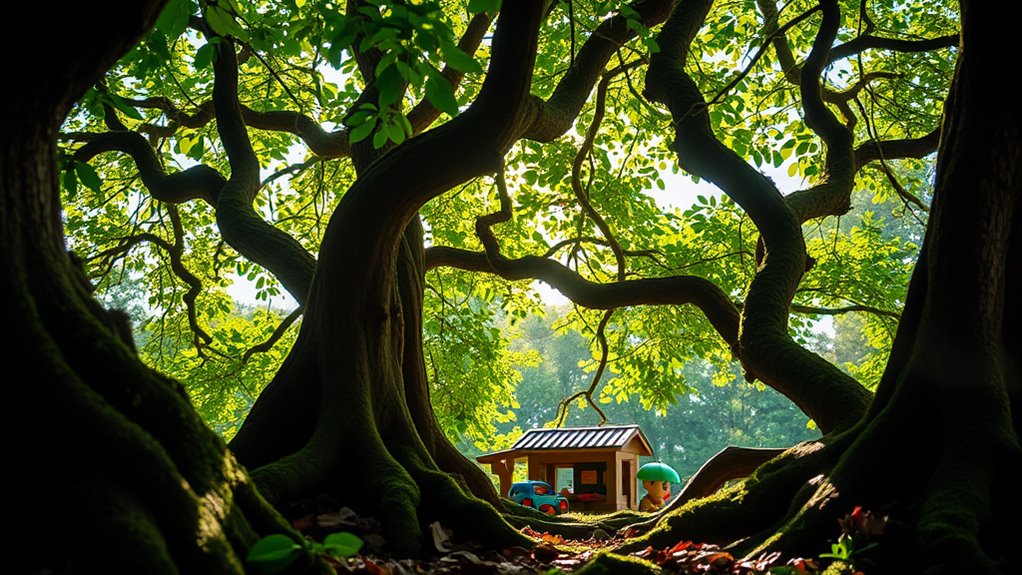
Imagine the towering presence of trees and branches adding a sense of scale and majesty to your outdoor toy photography. They frame your subjects beautifully, casting natural shadows and textures. Whether you're shooting action figures, dolls, or vehicles, using trees and branches can transform your scene. Here's how you can make the most of these natural elements:
- Scale: Position toys at the base of trees to emphasize their small size.
- Texture: Focus on the bark's intricate details for added depth.
- Perspective: Shoot from a low angle, looking up to create an epic scene.
- Contrast: Use branches to provide a stark contrast against the sky.
Experiment with these techniques, and you'll find trees and branches indispensable in your photography toolbox.
Sand and Soil
When you use sand and soil in your outdoor toy photography, you can create intriguing textures and patterns that add depth to your shots. These natural elements provide a versatile backdrop, allowing you to set different scenes from desert adventures to muddy battlegrounds. Experiment with arranging toys to interact with the terrain, and you'll discover endless possibilities for creative compositions.
Textures and Patterns
Sand and soil offer a rich tapestry of textures and patterns that can dramatically enhance your outdoor toy photography. Embrace their natural beauty to create striking compositions that enchant viewers. Here's how you can use these elements creatively:
- Ridges and Ripples: Capture the gentle waves in sand or soil to mimic vast landscapes, giving toys a sense of scale and adventure.
- Footprints and Tracks: Utilize existing marks or create your own to tell a story—whether it's a toy animal's journey or a mini car's path.
- Contrasting Colors: Highlight the color differences between sand, soil, and toys for added depth and visual interest.
- Surface Variations: Play with smooth and rough surfaces to introduce dynamic contrasts and make your photos pop.
Engage with these textures and patterns for enchanting shots!
Natural Backdrop Options
While capturing toy photography outdoors, don't underestimate the power of natural backdrops like sand and soil to elevate your shots. These elements offer a versatile and authentic setting, enhancing the story you're telling with your toys. Sand provides a neutral tone that highlights your subject and allows for creative play with textures. You can mold it into dunes, or smooth it for a clean look. Soil, with its earthy tones, adds depth and warmth, perfect for creating a rustic or adventurous scene. It also offers grip for toys with wheels or feet, keeping them stable. Pay attention to natural light and shadows for added drama. Experiment with different angles to find the perfect composition that complements your toys and the natural backdrop. In addition to sand and soil, other natural elements like rocks, foliage, and water can also serve as some of the best backgrounds for toy photography. These features not only add visual interest but also help tell a more immersive story, allowing viewers to connect with your creations on a deeper level. Embrace experimentation and be open to discovering unique scenes that enhance your photographic narrative.
Grass and Moss
When you use grass and moss in your toy photography, you enhance the natural texture that makes your scene more realistic. These elements offer a beautiful color contrast, highlighting toys against their vibrant greens. Plus, grass and moss create depth and layers that add dimension to your photos.
Enhancing Natural Texture
To truly elevate your outdoor toy photography, incorporating the natural textures of grass and moss can make a significant difference. These elements provide depth and authenticity to your shots, enhancing the overall visual appeal. Here's how you can use them effectively:
- Layering: Use grass and moss to create layers in your composition. This adds dimension and brings your scene to life.
- Framing: Position your toys amidst the grass and moss to naturally frame your subject, guiding the viewer's eye.
- Contrast: The rich texture of moss combined with grass can highlight the details of your toy, making it stand out.
- Depth: Moss can add a sense of depth, creating the illusion of a vast, miniature landscape.
Experiment and watch your photos transform!
Complementary Color Contrast
In outdoor toy photography, using complementary color contrast between grass and moss can dramatically enhance your images. When you place a toy in a setting where vibrant green grass meets the muted, softer tones of moss, you create a striking visual balance. This contrast draws the viewer's eye to the toy, making it the focal point while the natural background complements it perfectly.
Experiment by positioning toys where these two elements intersect. The lushness of grass paired with the tranquility of moss can evoke different moods or themes, whether it's adventure or serenity. You'll find that the contrasting greens not only add depth but also highlight the details and colors of your toy subject. Capture various angles to see which contrasts work best for your vision.
Creating Depth and Layers
Though often overlooked, creating depth and layers with grass and moss can transform your outdoor toy photography. By using these natural elements, you can add texture and dimension, making your shots more engaging. Here's how you can do it:
- Foreground Interest: Place small toys in the grass to create an interesting foreground. It draws the viewer's eye into the scene.
- Background Blur: Use a shallow depth of field to blur distant grass or moss, adding layers without cluttering the composition.
- Color Contrast: Utilize different shades of green to create visual separation between the subject and the background.
- Natural Framing: Frame your toy with surrounding grass or moss to give a sense of scale and focus.
These techniques will elevate your toy photography to new heights.
Frequently Asked Questions
What Time of Day Provides the Best Natural Lighting for Outdoor Toy Photography?
You'll get the best natural lighting for outdoor toy photography during the golden hours, just after sunrise or before sunset. This soft, warm light enhances colors and adds depth, making your photos look more enchanting and professional.
How Can Weather Conditions Impact the Outcome of Outdoor Toy Photography?
When it rains, it pours—you'll find weather impacts your shots. Cloudy skies diffuse sunlight for softer images, while harsh sun creates shadows. Wind can add motion, but too much might knock over your toys.
Are There Any Recommended Camera Settings for Capturing Outdoor Toy Photos?
You'll want to adjust your camera settings for outdoor toy photography by using a low ISO to reduce noise, a small aperture for depth of field, and a fast shutter speed to capture movement clearly.
How Do I Prevent Toys From Getting Damaged During Outdoor Photography Sessions?
Make certain toys stay safe by placing them on a soft surface like a blanket. Avoid direct sunlight and moisture. Use gentle cleaning materials post-shoot. Carry a protective case to transport them securely to and from locations.
What Are Some Creative Ways to Incorporate Shadows Into Toy Photography?
Shadows are your paintbrush in toy photography, adding depth and drama. Position toys to let natural sunlight cast intriguing shapes. Experiment with angles, and don't be afraid to play with contrasts to create striking, lifelike scenes.
At a Glance
You've got the perfect setting for your toy photography with stones that tell stories, leaves that dance in the breeze, and water that mirrors the sky. Flowers burst with color, while trees offer shade and branches cradle your subjects. Sand whispers tales of time, soil lays a rich foundation, and grass and moss invite a touch of nature's carpet. Embrace these natural props, and let your creativity blossom in the great outdoors, capturing magic in every frame.


