
To capture dynamic poses in miniature photography, focus on conveying movement and depth. Tilt your figures to suggest action, and play with limb placement to enhance dynamism. Use angles to add excitement and emphasize flow within the scene. Introduce layering by placing elements in the foreground, middle ground, and background to create depth. Control your lighting—side lighting for shadows, diffused for details—to enhance realism. Explore various angles to highlight movement and drama, ensuring the composition tells a compelling story. By experimenting with these techniques, you'll reveal new dimensions in your miniature photography sessions. Discover how each technique can elevate your images.
Understanding Scale and Proportions
Grasping the concept of scale and proportions is vital for capturing stunning miniature photography. When you're working with tiny models, you need to guarantee that each element within the frame harmonizes in size and perspective. Start by considering how your miniatures will relate to their surroundings. If you're photographing a small figurine, think about the elements you'll place around it—whether they're everyday objects or other miniatures. The right balance will create a convincing scene.
Pay close attention to the lens choice and camera angle. Wide-angle lenses can exaggerate proportions, making your subject appear larger in the foreground. This effect can be useful if you want to emphasize a particular feature, but it might distort your scene if not used carefully. Instead, try a macro lens for detailed shots that maintain natural proportions.
Lighting also plays a vital role in defining scale. Soft, diffused lighting can help highlight details without overshadowing the miniature's features. Shadows can add depth and dimension, making your scene feel more realistic. By understanding and controlling these elements, you'll be able to create miniature worlds that captivate and intrigue.
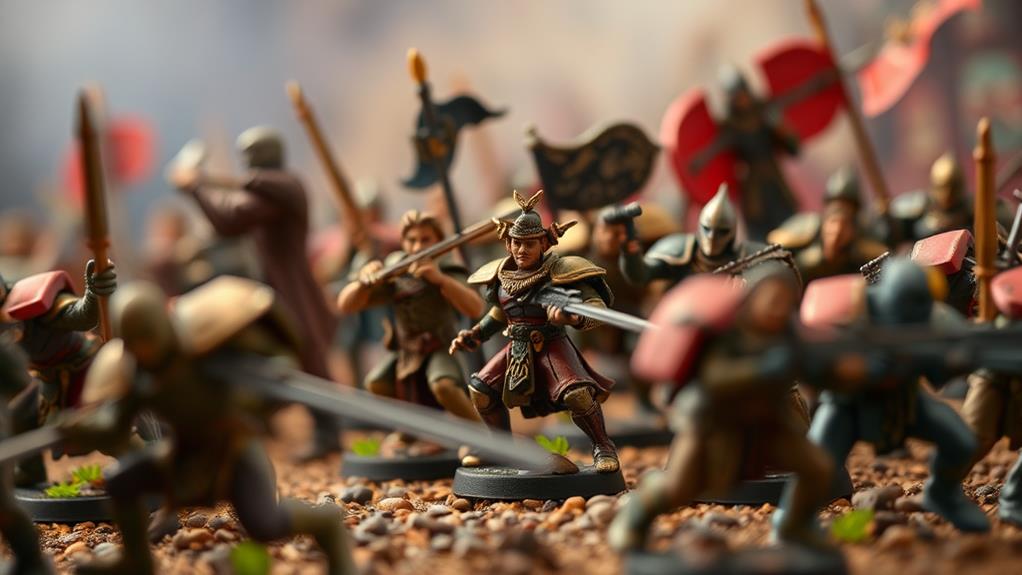
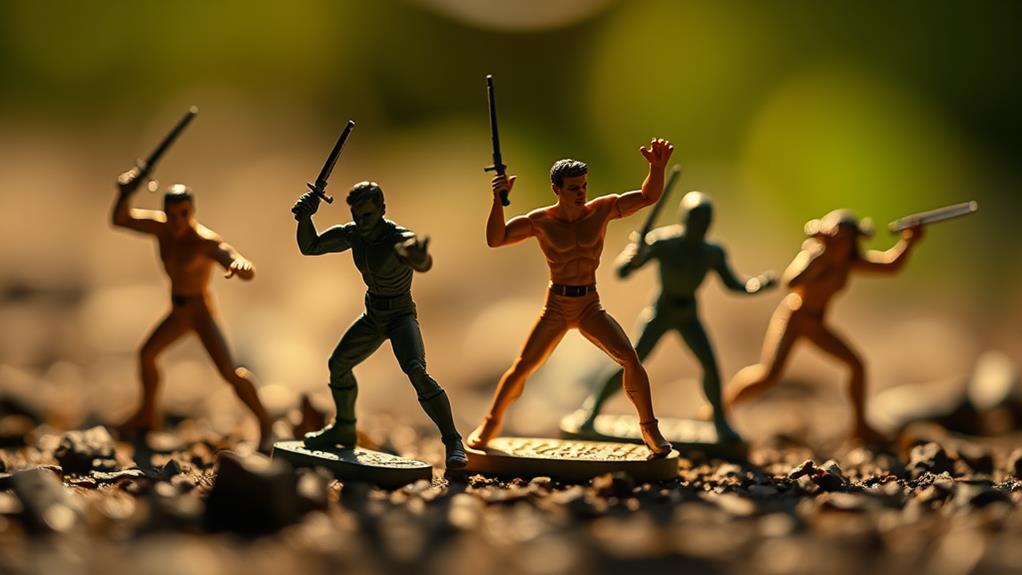
Utilizing Action-Oriented Poses
To bring your miniatures to life, focus on utilizing action-oriented poses that convey movement and emotion. When you position your figures in dynamic stances, you capture the essence of their character and story. Imagine the scene unfolding in real life. Is your miniature about to launch into battle, leap across a chasm, or perhaps dodge an unseen enemy? Consider the story you want to tell and use poses that reflect that narrative.
Start by experimenting with angles. Tilting a figure forward or backward can suggest movement. A warrior leaning forward, weapon poised, hints at aggression and action. If you've got a character with flowing garments or hair, positioning them as if caught mid-motion can add drama and flair. Don't forget about limb placement; extended arms or bent knees can further imply dynamic movement.
Lighting plays an important role too. Shadows can enhance the sense of action, giving depth and highlighting key details. Adjust your lighting to accentuate the pose and emphasize movement. Remember, the goal is to give viewers a sense of immediacy and excitement. Action-oriented poses not only capture attention but also invite viewers into a miniature world brimming with life and energy.
Creating Depth With Layering
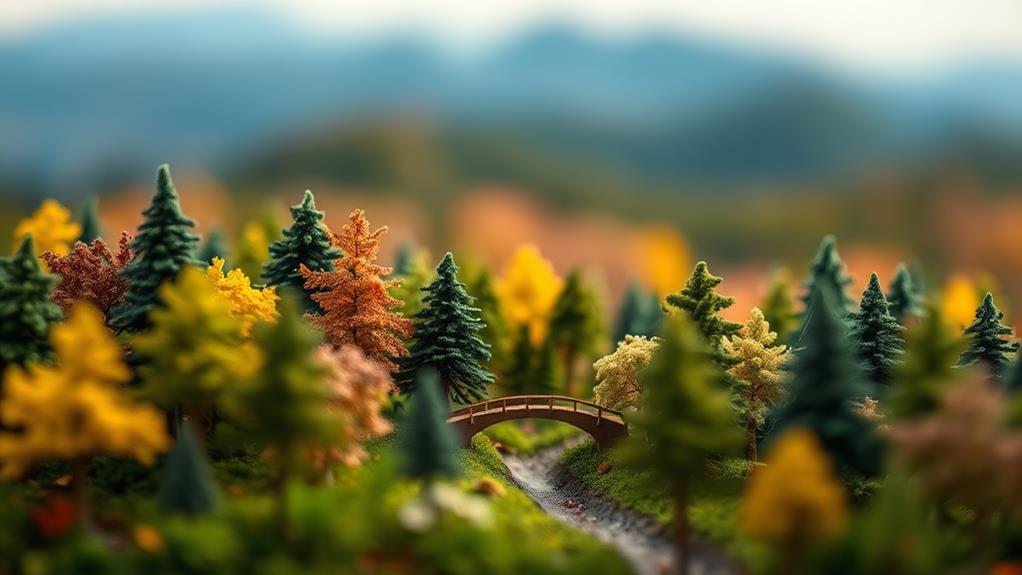
How can you make your miniature scenes pop with realism and depth? One key technique is layering. Start by arranging elements in the foreground, middle ground, and background of your scene. This separation creates an illusion of depth, inviting viewers to explore each layer. Position larger or brighter objects in the foreground to draw immediate attention, while subtler elements in the background add context and richness.
To enhance this effect, use varying heights and distances between your miniatures. Placing some figures slightly elevated or recessed can mimic the unevenness found in real landscapes. Incorporate objects like rocks, trees, or buildings to serve as natural dividers between layers. These elements not only provide depth but also anchor your miniatures in a believable setting.
Lighting plays an important role in layering, too. Use shadows to emphasize the space between layers, creating a dramatic contrast. Experiment with different light angles to see how they affect depth perception. Consider using a soft focus on the background to make the primary subjects stand out more prominently. By thoughtfully arranging and lighting your scene, you'll craft a dynamic composition that captivates and immerses the viewer.
Emphasizing Movement and Flow
Capturing a sense of movement and flow in your miniature photography adds liveliness and tells a story within your scene. To achieve this, focus on the positioning and orientation of your miniatures. Consider how their limbs, clothing, and hair might naturally move. You want to create a sense of action even in static poses, so think about what your figures are doing and how they interact with their environment.
One way to emphasize movement is to use accessories and props that suggest motion, like a waving flag or flying debris. Use these elements to guide the viewer's eye through the scene, creating a flow that enhances the narrative.
Here's a quick guide to help you emphasize movement and flow:
| Technique | Description |
|---|---|
| Dynamic Posing | Pose figures mid-action, like running or jumping. |
| Accessories | Add props like flags or capes to suggest wind. |
| Layering Elements | Use overlapping props to create depth and motion. |
| Natural Curves | Position limbs and objects to form gentle arcs. |
Experiment with these techniques, and you'll find your miniature photography becoming more dynamic and engaging. Keep practicing, and soon, your scenes will come alive with story and movement!
Choosing the Right Angles
Finding the perfect camera angle can make or break your miniature photography. The right angle adds depth and character, transforming your tiny subjects into fascinating scenes. Start by getting down to their level. Shooting from a lower angle often creates a more intimate and engaging perspective, making your miniatures appear larger than life. This also helps emphasize detail, drawing viewers into the world you're creating.
Experiment with different angles to see what works best. A slight tilt can add drama or motion, while a head-on shot might showcase symmetry and structure. Remember to contemplate the story you want to tell. If your miniature is in action, a dynamic angle might convey speed or energy. For a more serene scene, a straightforward angle could highlight calmness and balance.
Don't be afraid to move around and try various positions. Sometimes the most unexpected angles yield the most compelling results. Use your camera's screen or viewfinder to frame the shot before committing. Take multiple shots from several angles, so you have options during editing. By thoughtfully choosing your angles, you'll bring your miniatures to life, creating images that fascinate and inspire.
Enhancing Drama With Lighting
Angles lay the groundwork for your miniature photography, but lighting is where you truly craft mood and drama. By manipulating light, you can transform a simple scene into an evocative visual story. Start by considering the direction of your light source. Side lighting adds depth, creating striking shadows that enhance textures and details. This can lend an air of mystery or intensity to your miniatures.
Experiment with backlighting to create silhouettes or highlight translucent elements, giving your figures an ethereal glow. Use diffused light for softer shadows, which can evoke a gentle, serene atmosphere. A simple way to achieve this is by placing a white sheet or diffuser between your light source and subject.
Don't forget the power of colored lights. Colored gels over your lights can shift the mood dramatically. For instance, a blue hue might introduce a cold, somber feeling, while red might suggest warmth or tension.
Frequently Asked Questions
How Can I Improve the Stability of My Posed Miniatures During a Photoshoot?
Use a small dab of tacky putty to secure miniatures. Position them on a stable surface, and balance weight distribution. Adjust lighting gently to avoid vibrations. Practice gentle handling to maintain pose integrity throughout the photoshoot.
What Are Common Mistakes to Avoid in Dynamic Miniature Photography?
You often overlook lighting, resulting in harsh shadows or overexposure. Don't forget to stabilize your camera to avoid blurry shots. Avoid cluttered backgrounds that distract from the main subject. Always check focus to prevent unintentional blurriness.
How Do I Select the Best Background for Dynamic Miniature Scenes?
Picture vibrant skies or shadowy forests that complement your miniature's mood. Choose a background that enhances the story you're telling. Avoid overly busy patterns; subtle textures or colors can make your scene pop without overshadowing your subject.
What Are Some Tips for Maintaining Consistency in a Series of Miniature Photos?
To maintain consistency, use the same lighting, background, and camera settings. Keep your theme unified and make certain each photo's composition aligns with the series' style. Regularly review your photos to confirm they're cohesive and maintain a consistent narrative.
How Can I Incorporate Storytelling Into My Miniature Photography Setup?
Did you know 70% of engaging photos tell a story? Start by crafting a narrative around your miniatures. Use props, lighting, and angles to enhance the plot. Let each element contribute to the unfolding tale.
At a Glance
In miniature photography, think of your camera as a magician’s wand, bringing tiny worlds to life. By understanding scale and proportions, you can create a seamless illusion. Use action-oriented poses and clever layering to craft depth, while emphasizing movement adds a dynamic flow. The right angles are your secret weapon, and lighting serves as your spotlight, enhancing drama. Master these tips, and you’ll transform small scenes into grand performances, enchanting your audience with every shot. Experimenting with different backgrounds and props can amplify the storytelling aspect of your images, making each scene even more captivating. Remember, the best tips for miniature photography also include being patient and taking your time to fine-tune each detail, as small adjustments can yield striking results. With practice, your keen eye for composition will elevate your craft, ensuring each photo transports viewers into the enchanting realms you create.


