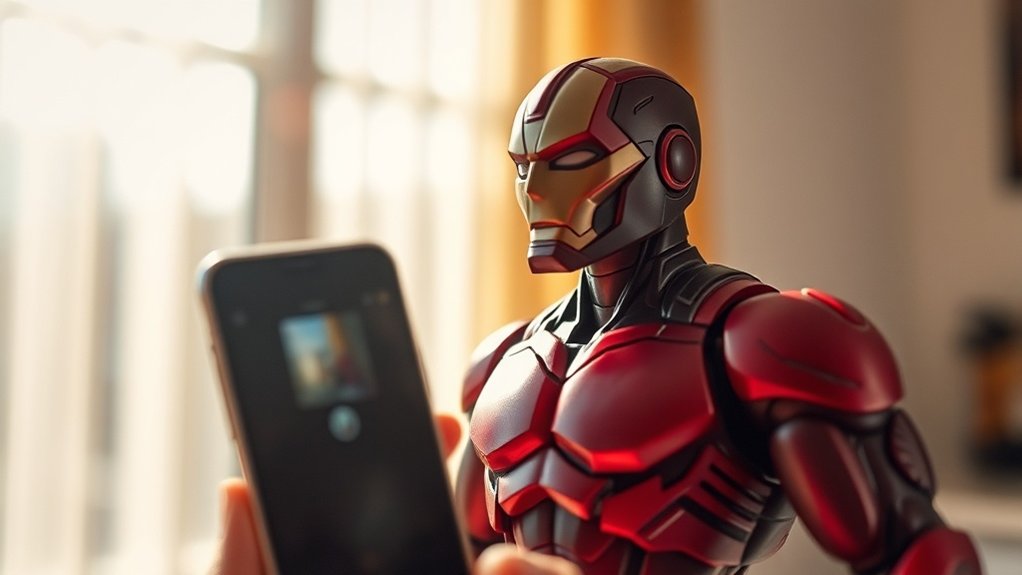
When you immerse yourself in smartphone toy photography, HDR mode becomes your best tool for capturing vivid details. It combines multiple exposures, ensuring both shadows and highlights are well-represented, creating a balanced scene. To set up, choose simple backgrounds and experiment with angles for dynamic shots. Proper lighting enhances detail, while editing apps fine-tune your masterpiece. As you explore these techniques, you’ll uncover more ways to elevate your toy photography using HDR. Incorporating toy photography techniques with smartphones allows you to push your creativity further, experimenting with different perspectives and compositions. Additionally, consider utilizing props or incorporating natural elements to add depth to your images. By continuously refining your skills through practice, you’ll discover innovative ways to bring your toy scenes to life.
Understanding HDR Mode in Smartphone Photography

When you explore smartphone photography, understanding HDR mode is vital for capturing stunning images. HDR, or High Dynamic Range, combines multiple shots taken at different exposures into one vibrant photo. This technique balances the lightest and darkest parts of your picture, highlighting details you might otherwise miss. As you snap photos, HDR guarantees that shadows and highlights are well-represented, providing depth and richness to your images.
To use HDR effectively, keep an eye on scenes with high contrast, like a toy figure backlit by the sun. Your smartphone automatically handles the complex processing, but knowing when to engage HDR can elevate your photography. Don’t shy away from experimenting; it’s through trial and error that you’ll refine your skills and capture enchanting toy photographs.
Setting Up Your Miniature Scene for HDR
Crafting the perfect miniature scene for HDR photography involves several key steps to guarantee your toy photos pop with detail and vibrancy. Start by selecting a suitable background that complements your toy. Keep it simple to avoid distracting from the subject. Then, arrange your toys thoughtfully, considering composition and balance. Use small props or natural elements like stones or leaves to add interest and depth.
Ensure your scene is stable and free from unwanted clutter. This helps your smartphone’s HDR mode capture every detail without interference. Experiment with angles to find the most dynamic perspective. Sometimes, a lower angle can make toys appear larger and more lifelike. Pay attention to shadows and reflections, as they contribute considerably to the scene’s realism and overall impact.
Mastering Lighting Techniques for Toy Photography

Lighting can transform your toy photography from ordinary to extraordinary. To master lighting techniques, start by experimenting with natural light. Morning and late afternoon offer soft, diffused lighting that enhances details. Avoid harsh midday sun, which can create unwanted shadows. If shooting indoors, use desk lamps or LED panels to mimic this soft light. Position your light source at different angles to see how it affects shadows and highlights.
Consider using reflectors to bounce light onto your subject, filling in shadows and adding depth. You can even make DIY reflectors with white paper or foil. Don’t forget about backlighting—it can create dramatic silhouettes and add a magical glow to your toys. Always take test shots to refine your setup and achieve the desired effect.
Composing Striking Shots With HDR
HDR, or High Dynamic Range, photography can elevate your toy photos by capturing more detail in both shadows and highlights. To compose striking shots, start by finding a balanced composition. Position your toy in a way that draws attention to its features. Use leading lines or natural frames like branches or window edges to guide the viewer’s eye.
Keep your background simple to emphasize your subject. HDR mode will guarantee that even the finest details stand out, from the glint in a toy’s eye to intricate textures. Experiment with angles—shoot from low or high perspectives for a dynamic look. Remember to keep your hands steady or use a tripod to avoid blur. With practice, your HDR compositions will captivate viewers.
Editing and Enhancing HDR Toy Photos
Once you’ve mastered capturing enchanting HDR shots of your toys, it’s time to refine them through editing. Start by using your smartphone’s built-in editing tools or a dedicated app like Snapseed or Lightroom Mobile. Adjust the brightness and contrast to highlight your toy’s features, making them pop. Enhance colors to guarantee they look vibrant yet true to life. Use the sharpening tool sparingly to enhance details without introducing noise. Pay attention to shadows and highlights, balancing them to maintain depth. Don’t forget to crop your image for the best composition. Finally, experiment with filters, but avoid overdoing it, as you want to preserve your HDR photo’s natural look. With a few tweaks, your toy photos will truly shine.
Exploring Creative Possibilities With HDR in Toy Photography
With HDR, you can make toy details pop and bring out nuances that might otherwise go unnoticed. It’s also a great tool for balancing light and shadows, giving your shots a more dynamic and realistic look. Experiment with HDR settings on your smartphone to see how they can transform your toy photography.
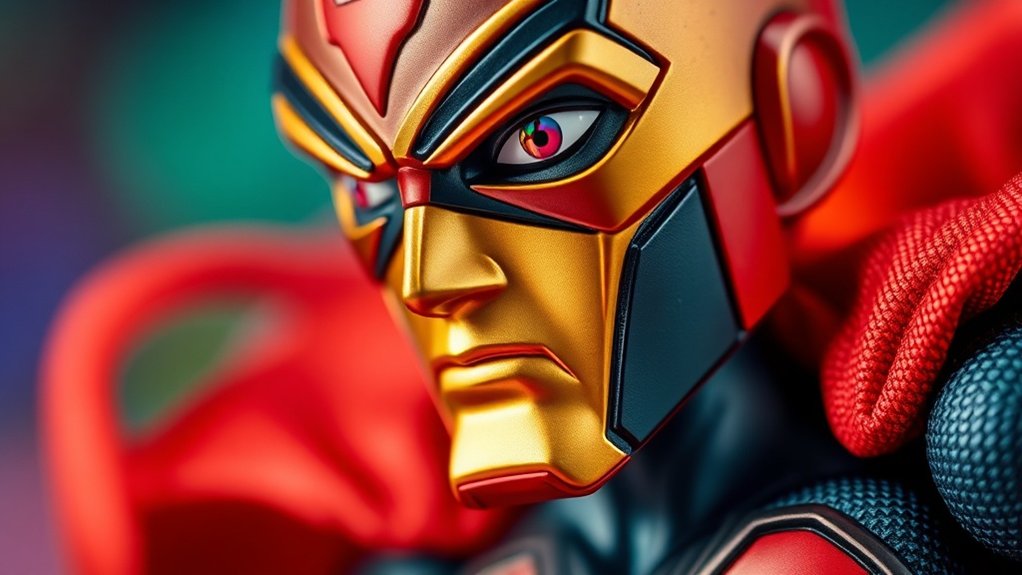
Enhancing Toy Details
Capturing the intricate details of your favorite toys becomes an exciting endeavor when you explore the creative possibilities of HDR photography. With HDR, you can highlight textures and bring out subtle features that might otherwise go unnoticed. It works by combining multiple exposures, allowing your smartphone to capture a broader range of colors and details. Imagine focusing on the fine stitching of a doll’s dress or the complex patterns on a toy soldier’s uniform. HDR mode helps emphasize these elements, making them pop vibrantly.
To get started, verify your smartphone’s HDR mode is enabled. Position your toy in a spot with good, even lighting. Experiment with angles to find shots that best showcase your toy’s unique features, capturing its essence in stunning clarity.
Balancing Light and Shadows
When photographing toys, balancing light and shadows can dramatically enhance their visual appeal. HDR mode on your smartphone is a game-changer for this. It captures a range of exposures, ensuring both highlights and shadows are detailed. You can explore creative lighting setups to maximize HDR’s potential.
Consider these tips:
- Use natural light whenever possible for softer shadows and a more realistic look.
- Experiment with backlighting to create dramatic silhouettes or highlight specific features.
- Position reflectors or white paper to bounce light, softening harsh shadows.
- Adjust your camera’s exposure settings to find a balance that enhances toy details without losing shadow depth.
HDR mode helps you create striking images with balanced light and shadows, making your toy photography truly stand out.
Frequently Asked Questions
What Apps Are Best for Editing HDR Toy Photos on Smartphones?
You’re wondering which apps are best for editing HDR toy photos on smartphones. Try Adobe Lightroom for its precision or Snapseed for its user-friendly interface. Don’t overlook VSCO for artistic filters and professional-grade adjustments.
How Can I Prevent Overexposure When Using HDR Mode?
To prevent overexposure in HDR mode, adjust your smartphone’s exposure settings manually before shooting. Tap to focus, then slide the exposure bar down slightly. Experiment with different lighting angles to balance highlights and shadows effectively.
Can I Use HDR Mode for Action Shots of Toys?
You can definitely use HDR mode for action shots of toys. It captures dynamic range, perfect for contrasting lighting. Coincidentally, HDR might blur fast movements, so try stabilizing your phone or using a burst mode for clarity.
What Are Some Common Mistakes to Avoid in HDR Toy Photography?
In HDR toy photography, avoid overexposing highlights and underexposing shadows. Don’t forget to stabilize your smartphone to prevent blurriness. Guarantee consistent lighting to maintain realistic colors and details, and watch for halo effects around your toys.
Are There Specific Smartphone Brands Better for HDR Toy Photography?
When it comes to HDR toy photography, your smartphone choice can make or break your shots. Samsung and Apple devices are legendary, offering mind-blowing HDR capabilities that’ll transform your toy photos into dazzling masterpieces. Choose wisely!
At a Glance
You’ve now got the tools to turn your smartphone into a magic lantern for toy photography. By mastering HDR mode, setting up scenes, and playing with light, your shots will burst with detail and life. Remember, editing is your digital darkroom, where creativity knows no bounds. So, grab your smartphone, channel your inner Ansel Adams, and get snapping. Who knew your pocket gadget could rival the artistry of the Renaissance? Keep experimenting and let your imagination run wild!


