For capturing stunning toy photography, choosing the perfect snowy diorama set is essential. Consider whether you want a serene snowfall or a bustling winter village scene. Look for sets with snow-covered trees and tiny cabins, ensuring the size and details match your theme. Prioritize quality and realism by checking reviews. Opt for modular pieces for flexible arrangements. With the right set, your photos will shine—discover how to elevate your shots even more.
Choosing the Perfect Snowy Diorama Set
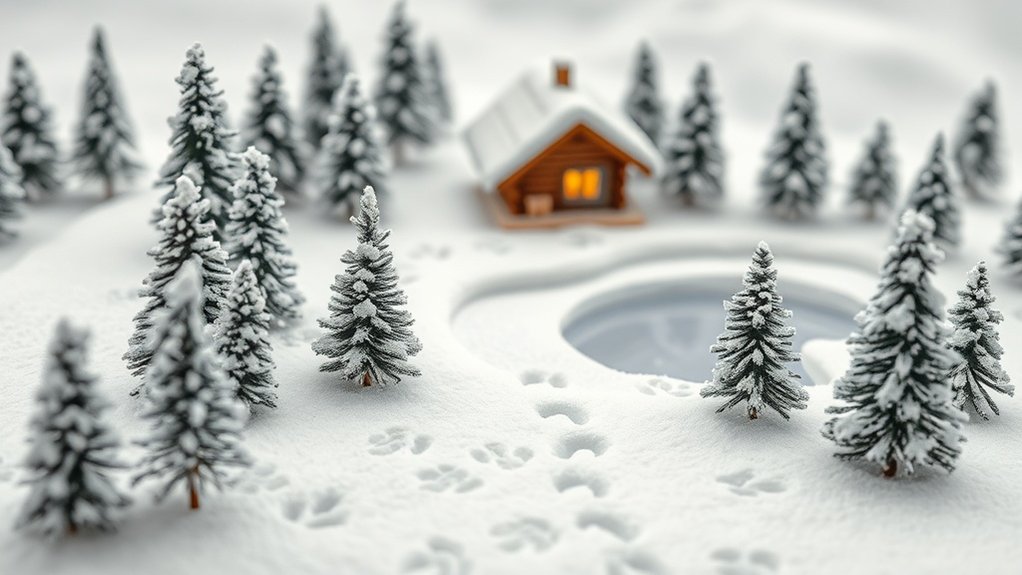
How do you find the ideal snowy diorama set to capture the magic of winter? Start by envisioning the scene you want to create. Think about the mood—do you prefer a serene snowfall or a bustling winter village? Once you’ve got a vision, search for sets that match your theme, considering size and detail. Look for elements that evoke the season, like snow-covered trees or tiny cabins. Check reviews to verify quality and realism, which are vital for stunning photos. Don’t forget about the background; a well-chosen backdrop can enhance the scene’s depth. Finally, consider sets with modular pieces, allowing flexibility in arrangement, so you can tell different stories with the same set. This approach guarantees your diorama truly captures winter’s essence.
Essential Materials for Crafting Winter Scenes
When crafting a winter scene, start by selecting the right snow texture materials to create a realistic snowy landscape. You’ll also want to focus on building miniature trees to add depth and character. Don’t forget to enhance light effects to bring your diorama to life with a warm, inviting glow.
Choosing Snow Texture Materials
Crafting a convincing snowy winter diorama starts with selecting the right snow texture materials. You’ll want to explore options like baking soda, which provides a fine, powdery snow effect. For a more realistic touch, try using model railroad snow or microballoons, which offer a fluffy, light texture. These materials are excellent for creating drifts and piles. If you’re aiming for a sparkly effect, add a sprinkle of glitter. Just remember to use it sparingly to avoid an overly shiny look. Styrofoam shavings can add depth and dimension, perfect for larger scenes. It’s essential to experiment with different combinations to achieve the desired effect. Don’t forget to test your materials under lighting conditions to guarantee they photograph well.
Building Miniature Trees
Creating realistic miniature trees is a key step in bringing your winter diorama to life. Imagine the charm of snow-draped branches and tiny leaves that make your scene feel alive. Start by gathering essential materials like floral wire, which serves as the tree’s sturdy base. Wrap it with brown floral tape for a realistic bark texture. Use clump foliage for creating lush branches, and don’t forget a touch of white paint for that snowy effect.
Crafting these trees lets you create:
- A serene winter wonderland that feels untouched by time.
- A cozy forest backdrop perfect for storytelling.
- A whimsical escape that sparks imagination and joy.
- A personalized masterpiece reflecting your unique vision.
With each tree, you’ll add depth and magic to your scene.
Enhancing Light Effects
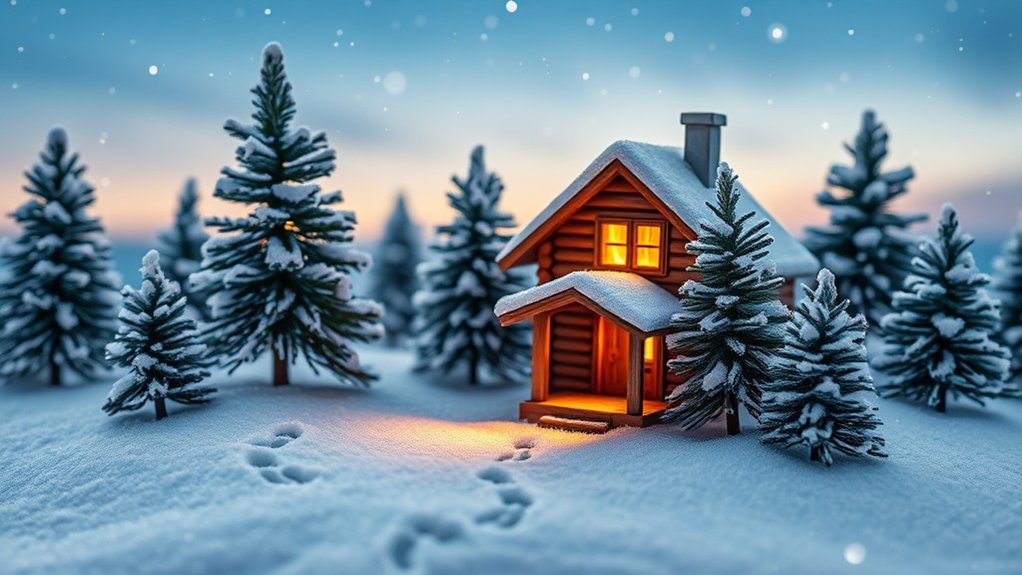
To truly captivate and immerse your audience in your winter diorama, enhancing light effects is crucial. Start by using LED lights to mimic natural sunlight or moonlight. These lights can be easily concealed within your scene, providing a realistic glow. For a soft, snowy ambiance, place white or blue-tinted lights strategically around your set.
Consider adding a small mirror or reflective surface to bounce light, creating depth and dimension. You can also use cotton batting to diffuse the light, simulating fog or a soft snowfall. Experiment with different angles and intensities to find the perfect balance. Remember, shadows play a significant role in setting the scene’s mood, so adjust your lighting to create dramatic effects. A well-lit diorama can transform your photography entirely.
Techniques for Realistic Snow Effects
To create realistic snow effects in your diorama, focus on crafting faux snow textures and using lighting to enhance the illusion. You can simulate powdery snow by using materials like baking soda or fine white glitter. For lighting, experiment with cool-toned LEDs to mimic the crisp, bright light reflecting off fresh snow.
Crafting Faux Snow Textures
When constructing your winter diorama, achieving realistic snow textures can transform your scene from ordinary to extraordinary. To create convincing faux snow, you need to think creatively and experiment with different materials. Here are a few ideas that can evoke those chilly, snowy feelings:
- Baking soda and glitter: Mix them for a sparkling, powdery effect.
- Shredded coconut: Perfect for a soft, fluffy appearance.
- White sand: Ideal for a smooth, freshly fallen snow look.
- Cotton balls: Excellent for drifts and mounds with a touch of dimension.
Each of these materials offers unique qualities, so don’t hesitate to combine them for varied textures. Remember, your diorama’s magic lies in those delicate details that make the snow appear lifelike and enchanting.
Lighting for Snow Illusion
Lighting plays an essential role in creating the illusion of realistic snow in your diorama. To achieve this effect, start by using soft, diffused lighting. This helps mimic the gentle, even illumination of a snowy day. Consider placing a white reflector or using a softbox to bounce light, reducing harsh shadows. For a natural look, use cool, bluish lights to imitate the crisp, chilly atmosphere of winter.
You can enhance the illusion by adding a subtle shimmer. Try incorporating a small LED light beneath translucent “snow” areas to create a sparkling effect. Experiment with positioning to get the perfect balance. Also, using a dimmer switch allows you to adjust the light intensity, giving you control over mood and time of day.
Lighting Tips for a Magical Winter Atmosphere

Creating a magical winter atmosphere in your diorama hinges on getting the lighting just right. You want to evoke feelings of wonder and enchantment, transforming your scene into a snowy wonderland. Opt for soft, diffused lighting to mimic the gentle glow of a winter’s day. Use warm, white lights to create a cozy contrast against the chilly snowy backdrop. For added magic, consider incorporating subtle blue tones to suggest an icy chill in the air.
- Soft glow: Evokes warmth and comfort, inviting viewers to linger.
- Warm white lights: Contrast with the snow, adding depth and coziness.
- Blue hues: Infuse an icy touch, enhancing the wintery feel.
- Spotlight effects: Highlight key elements, drawing attention and creating drama.
With these tips, your diorama will sparkle with winter’s magic.
Composition Ideas to Showcase Your Toys
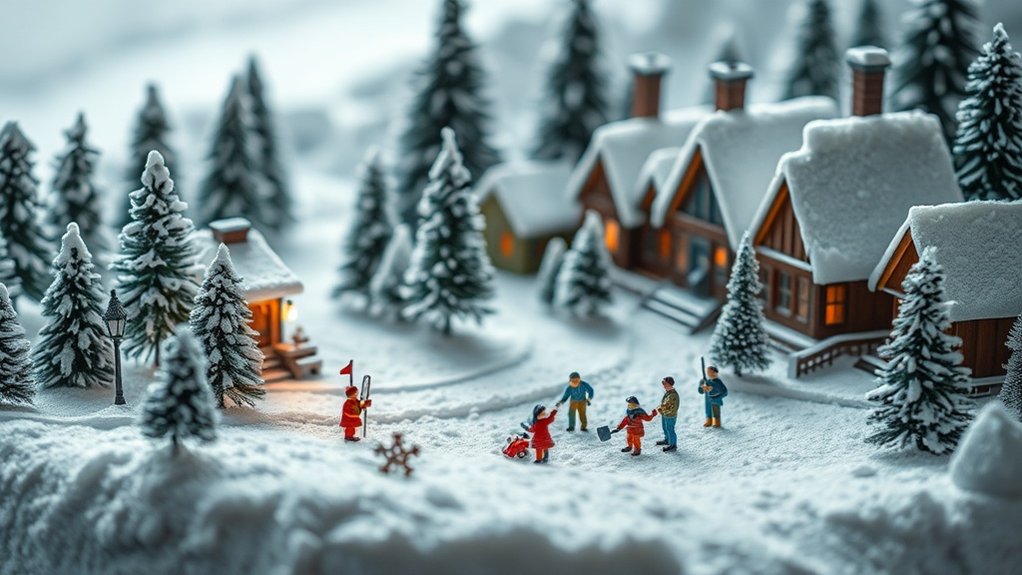
How do you make your toys stand out in a snowy winter diorama? Start by considering the rule of thirds. Position your toy off-center for a dynamic look that draws the viewer’s eye. Use leading lines like snow-covered branches or paths to guide focus toward your subject. Play with perspective by placing the toy in the foreground and the snowy landscape in the background, creating depth and dimension.
Incorporate contrast by using toys with vibrant colors against the white snow, making them pop. Experiment with angles; shooting from a lower angle can give your toy a larger-than-life appearance. Finally, include natural elements like pinecones or twigs for authenticity and scale, enhancing the scene’s realism and making your toy the star of the show.
Post-Processing Tricks to Enhance Your Photos
While capturing a mesmerizing snowy winter diorama is essential, post-processing can take your photos to the next level. By enhancing details and adding effects, you can create images that truly captivate the viewer. Start by adjusting the brightness and contrast to make your toys pop against the snow. Play with color balance to emphasize the chilly atmosphere. Don’t forget to sharpen the details for a crisp look.
To evoke emotion in your audience, consider these tips:
- Add a subtle vignette to draw the eye towards your subject.
- Use lens flare effects to mimic real sunlight glinting off snow.
- Incorporate a soft glow for a magical, dreamy touch.
- Experiment with snow overlays to add dynamic motion and realism.
These tricks can transform your diorama into a winter wonderland masterpiece.
Frequently Asked Questions
How Do I Store My Diorama Sets Between Photography Sessions?
Store your diorama sets by disassembling them gently, if possible. Use labeled boxes or containers to keep parts organized. Avoid moisture and direct sunlight. Stack carefully to prevent damage, and you’ll guarantee they’re ready for the next session.
Are There Specific Toys That Work Best With Winter Dioramas?
Did you know 70% of toy photographers prefer action figures in winter dioramas? Choose toys with contrasting colors or winter-themed accessories. Experiment with different scales to find what captures your scene’s essence best in snowy settings.
What Safety Precautions Should I Take When Using Artificial Snow?
Make certain you’re in a well-ventilated area when using artificial snow. Wear gloves and a mask to avoid inhaling particles or skin irritation. Keep it away from pets and children, and always read the product’s safety instructions.
Can I Use Natural Elements Like Real Snow or Ice in My Diorama?
Yes, you can use real snow or ice, but make sure to protect your toys from moisture damage. Seal any delicate parts and quickly dry everything after your shoot to prevent warping or discoloration.
How Do I Prevent My Toys From Getting Damaged During Outdoor Shoots?
Protecting your toys is essential. Would you risk their charm in harsh weather? Use waterproof sealants, keep them elevated from wet surfaces, and carry a soft cloth to wipe off moisture. Your toys deserve the best care!
At a Glance
You’ve now got the tools to create stunning snowy diorama sets for your toy photography. Remember, a well-crafted scene can elevate your shots, making them truly magical. Did you know that 60% of toy photographers say diorama sets dramatically improve their work? So, immerse yourself in your creative process with confidence. Experiment with materials, lighting, and composition. And don’t forget, a little post-processing can go a long way in bringing your winter wonderland to life. Explore various textures and colors to create depth in your scenes, and consider incorporating seasonal elements like faux snow or tiny evergreen trees for added realism. For those looking for more guidance, check out some toy photography diorama tips online, as they can provide inspiration and techniques to enhance your setups. Lastly, remember to enjoy the process and let your personality shine through in each shot you take.


