To create the perfect toy photography scene, choose a location with complementary backgrounds that enrich your theme. Plan your composition using the rule of thirds, integrating textures and features for depth. Utilize natural or artificial lighting to set the mood, softening harsh shadows. Set your camera for clarity, focusing on the toy while blurring the background. Finally, enhance your photos with thoughtful post-processing. Embrace these steps for enchanting, story-filled images and explore further to refine your skills.
Choosing the Right Location
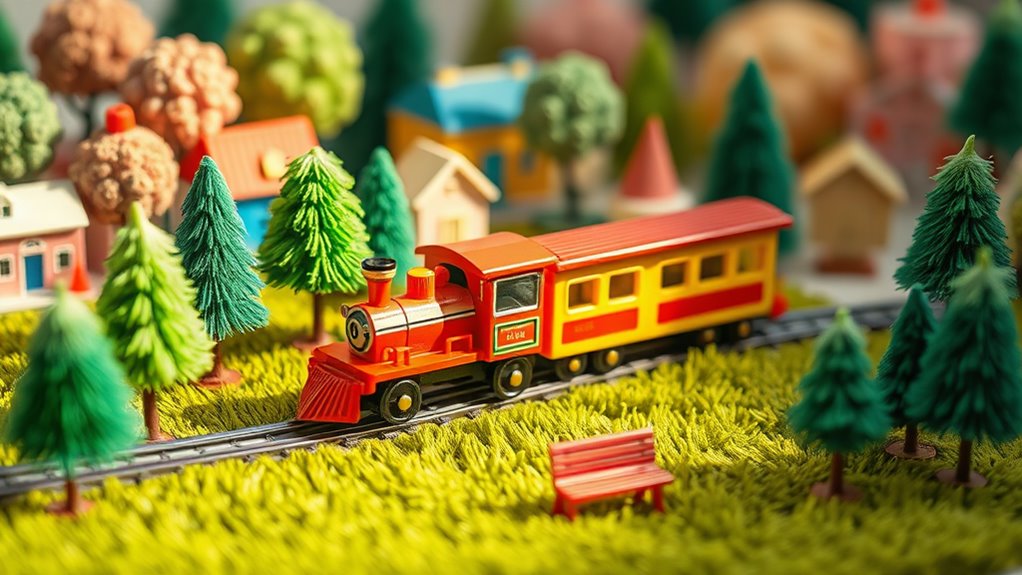
Why does the location matter so much in toy photography? It's because the setting you choose can dramatically transform how your toys are perceived. A well-chosen location can add context, emotion, and depth, making your miniature scenes come alive. When you're scouting locations, think about the mood you want to create. Are you aiming for a whimsical forest adventure or a bustling cityscape? The location should complement the story you're telling with your toys.
Consider lighting conditions, too. Natural light can enhance your photos, but be mindful of harsh shadows or overly bright spots. Look for places with interesting textures and unique features that add character to your shots. Remember, it's not just about the toys themselves; the surroundings can make your images truly enchanting.
Selecting Appropriate Backgrounds
When you've found the perfect location, the next step is selecting backgrounds that enhance your toy photography. A well-chosen background can dramatically impact how your toys are perceived, adding depth or telling a story. Consider the theme of your scene: a natural backdrop like a forest floor works wonders for adventure toys, while a futuristic setting suits sci-fi figures. Use colors that contrast with your toys to make them pop, or choose complementary shades for a harmonious look. Textures are essential too; rough surfaces can create drama, while smooth ones offer a clean, modern feel. Remember, the background should support your subject, not overshadow it. Experiment with different options until you find what elevates your toys most effectively.
Planning Scene Composition
To create compelling toy photography, start by planning your scene composition with intention and creativity. Begin by deciding the story or emotion you want to convey. Select toys that support this narrative, ensuring they complement each other regarding scale and style. Consider the rule of thirds to guide where you position your toys, creating balance and interest. Pay attention to how your toys interact with the background you chose earlier. Use elements like rocks, plants, or props to add depth and context, allowing viewers to immerse themselves in the scene. Experiment with angles and perspectives to find the most dynamic view. Remember, your composition should guide the viewer's eye and enhance the narrative without overwhelming the subject.
Lighting Techniques for Toy Photography
When setting up lighting for toy photography, you'll find that both natural and artificial light can dramatically enhance your scene. Use natural light to create soft, even illumination that highlights details without harsh shadows. Alternatively, experiment with artificial light setups to control the mood and create dynamic effects that make your toys pop.
Natural Light Utilization
Ever wondered how to make your toy photography pop with just the right lighting? Embrace the power of natural light. Start by shooting during the golden hours—early morning or late afternoon—when sunlight is soft and diffused. Position your toys near a window to capture this gentle illumination, avoiding harsh midday sun that creates unwanted shadows.
Use sheer curtains to soften direct sunlight if needed. Experiment with different angles; observe how light interacts with your toys, highlighting textures and colors. Reflectors can bounce light back onto the subject, reducing shadows and adding depth.
Be patient and flexible, as natural light changes quickly. Keep your camera settings adaptable, like adjusting ISO or exposure, to guarantee your toys are perfectly lit and vibrant in every shot.
Artificial Light Setup
While natural light can work wonders, sometimes you need more control over your scene's illumination. Artificial lighting gives you the precision to highlight your toys in creative ways. Start with a simple setup using desk lamps or LED panels. Position them at different angles to create depth and shadow. Use diffusers, like white cloth or paper, to soften harsh light and reduce glare.
Experiment with colored gels for mood effects. Want dramatic scenes? Try a single light source from above. Need even lighting? Place lights on either side. A light tent can help diffuse and evenly distribute light. Always review your shots and adjust the angles and intensity till you're satisfied. With practice, you'll master the art of artificial light in toy photography.
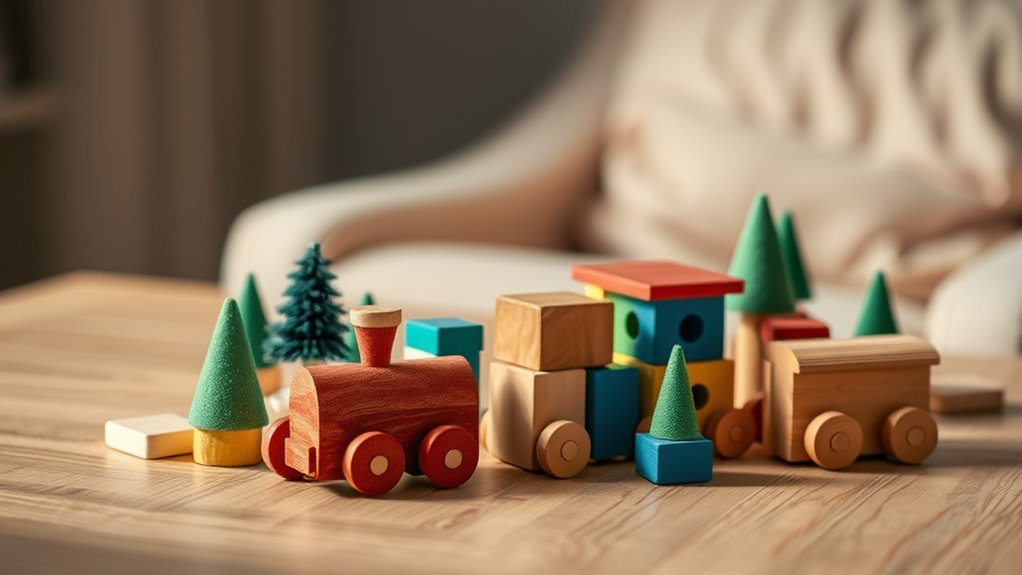
Selecting Props and Accessories
Choosing the right props and accessories can elevate your toy photography from simple snapshots to enchanting storytelling. When selecting items, consider how they complement and enhance your toys. Start by creating a list of essentials: Incorporating elements like miniature backgrounds, textured surfaces, or themed settings can add depth and context to your compositions. Furthermore, using realistic toy photography techniques, such as careful lighting and strategic angles, can bring your scenes to life, making them more engaging for viewers. Don’t forget to experiment with different props and accessories until you find the perfect combination that tells your unique story. Incorporate elements such as miniature furniture, natural materials, or themed backdrops to bring your scenes to life. Experimenting with realistic toy photography techniques will help you capture the unique personalities of your toys, making each image more engaging. Remember, the right props can not only set the mood but also tell a story that resonates with your audience.
- Scale: Choose props that match your toy's size to maintain realism. A tiny book for a small figure, for instance, adds charm without overwhelming the scene.
- Theme: Decide on a theme that aligns with your toy's character or setting, like a tiny campfire for an outdoor adventure.
- Color: Select props with colors that contrast or harmonize with your toy, drawing attention without clashing.
- Texture: Incorporate varied textures to add depth, like rough stones or smooth fabrics, enhancing visual interest.
These thoughtful choices transform your scene into a fascinating narrative.
Positioning and Posing Toys
When setting up your toy photography scene, the positioning and posing of your toys are vital for creating dynamic and engaging images. Start by considering the story you want to tell. Think about the characters' actions and emotions, and adjust their stances accordingly. Experiment with angles and distances to emphasize their features or interactions. Don't hesitate to bend or rotate limbs to achieve a natural pose.
Pay attention to the balance; toys should stand firmly without support showing in the frame. Use the rule of thirds to guide your composition, placing toys strategically within the scene. Lighting plays an important role in highlighting poses—ensure it complements your setup. Finally, take test shots and adjust as needed to capture the perfect moment.
Camera Settings and Equipment
When it comes to capturing stunning toy photos, choosing the right camera is essential. You'll also want to focus on ideal lighting techniques to make your toys stand out. With the right gear and lighting, your toy photography will reach new levels of creativity and clarity. Additionally, mastering the essential settings for toy photography, such as aperture, shutter speed, and ISO, is crucial for achieving the desired effects. Experimenting with different angles and perspectives can also add a unique touch to your images. Don’t forget to consider post-processing techniques to enhance colors and details, further elevating your toy photography.
Choosing the Right Camera
A crucial step in crafting enchanting toy photography is selecting the right camera that complements your creative vision. You don't need the most expensive gear to capture stunning shots, but understanding a few key features will help you make the best choice. Consider these factors:
- Megapixels: More isn't always better. A camera with 16-24 megapixels is often sufficient for detailed images.
- Lens Compatibility: Verify your camera can use different lenses, allowing flexibility in focus and depth of field.
- Manual Controls: Choose a camera that lets you manually adjust settings like shutter speed, aperture, and ISO for more creative control.
- Portability: A lightweight camera guarantees you can easily maneuver to capture the perfect angle or scene.
These elements will enhance your toy photography experience.
Optimal Lighting Techniques
To elevate your toy photography, mastering lighting techniques is crucial. Start by using natural light whenever possible. Morning or late afternoon light is soft and flattering, reducing harsh shadows. If you're shooting indoors, use a softbox or a diffuser to mimic this effect. Position your lights at a 45-degree angle to highlight details without casting unwanted shadows.
Adjust your camera settings to complement your lighting. Set a low ISO to reduce noise, and use a smaller aperture (higher f-stop) for greater depth of field. This guarantees your toy remains in sharp focus. A tripod is invaluable here, keeping your camera steady for longer exposures.
Experiment with different light sources like LED panels or desk lamps. Each source offers unique qualities to enhance your scene.
Utilizing Depth of Field
Although mastering depth of field might seem intimidating at first, it's a powerful tool that can bring your toy photography to life. By controlling what parts of your scene are in focus, you can guide the viewer's eyes and create stunning visual effects. Here's how you can effectively utilize depth of field:
- Aperture Settings: Use a wide aperture (small f-number) for a shallow depth of field to blur backgrounds and make your toy stand out.
- Distance: Position your camera close to the toy for a more pronounced depth effect.
- Lens Choice: A longer focal length can help achieve a more dramatic depth of field.
- Focus Points: Manually select the focus point to guarantee the toy is sharp while the background remains soft.
Experiment with these techniques to enhance your scenes.
Post-Processing and Editing Tips
Once you've captured your shot, post-processing and editing become essential steps to elevate your toy photography. Start by adjusting the exposure and contrast to make your image pop. Enhancing colors can bring out the vibrancy of your toys, but take care not to overdo it. Use cropping to refine the composition, ensuring the focus remains on the toy.
Next, remove any unwanted elements or dust spots that distract from the subject. Pay attention to the details and sharpen the image for crispness. Experiment with filters and effects, but keep your style consistent. Finally, resize your image for the intended platform, ensuring top-notch quality. By taking these steps, you'll showcase your toys in the best light possible.
Frequently Asked Questions
How Do I Store and Organize My Toy Photography Equipment?
You should store your toy photography equipment in clear bins for visibility. Label everything for easy access. Use shelves or a dedicated closet. Keep cables tidy with ties. Regularly check and replace faulty gear to maintain efficiency.
What Is the Best Way to Clean and Maintain Toys for Photography?
Clean your toys gently using a soft cloth and mild soap. Don't forget to dry them thoroughly. For maintenance, store them away from direct sunlight and dust. Regularly inspect for damage to keep them photo-ready.
How Can I Create a Narrative or Story in My Toy Photography?
You're the director of a miniature world, crafting tales through allegory. Position toys to symbolize broader themes or stories. Use lighting and props to enhance your narrative, inviting viewers to explore the deeper meanings within your scenes.
Are There Any Mobile Apps Recommended for Toy Photography Editing?
You're looking for mobile apps to enhance your toy photography. Try Snapseed for versatile editing, Adobe Lightroom for precise adjustments, or VSCO for unique filters. These apps can help you create stunning images right from your phone.
How Can I Achieve Unique or Creative Angles in Toy Photography?
Experiment with low angles and close-ups by getting down to the toy's level. Use your smartphone's grid feature for alignment. Try unconventional perspectives, like shooting through objects, to create more dynamic and engaging compositions in your photos.
At a Glance
You've mastered the art of toy photography, and coincidentally, each step led you to this moment. The location you chose, the backgrounds you selected, and the props you positioned all came together perfectly, almost as if by fate. Your lighting and camera settings captured the scene just right, highlighting every detail. With a little post-processing magic, your creation comes alive. It's no accident—you're now a toy photography pro, ready to capture tiny worlds with big impact.


