To storyboard toy photography like a film production, start by sketching scenes focusing on composition and lighting. Look for inspiration in films and everyday life, then break down your story into key shots with character interactions. Choose toys and props that enhance your narrative, ensuring they fit well regarding scale and style. Design a set that adds depth, using suitable backdrops and textures. With these elements, you’re ready to create a fascinating visual story. Discover how to bring it all together.
Understanding the Basics of Storyboarding

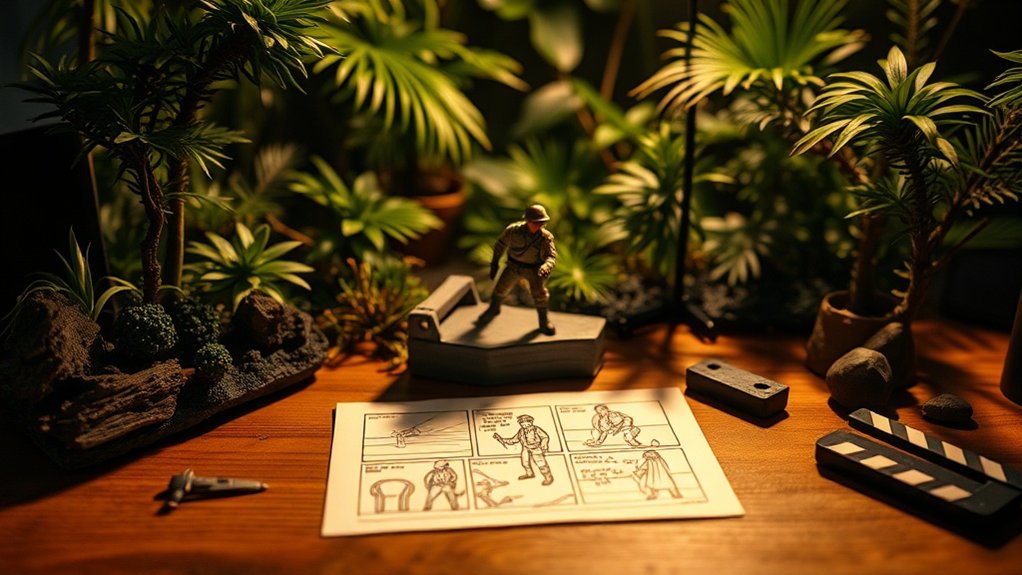
Storyboarding serves as a blueprint for your creative projects, and understanding its basics is essential for successful toy photography. You’ll want to start by sketching each scene, focusing on composition, lighting, and angles. It’s like creating a visual script, guiding you through each shot. Keep your drawings simple, as they’re meant to convey the essence, not the details. Consider the story you want to tell and how each frame contributes to it. Think about your characters’ placement and how they interact with the environment. Capturing dynamic poses can add depth and emotion. Remember, storyboarding helps you plan efficiently, minimizing surprises during the shoot. It’s your roadmap to a cohesive, engaging narrative, ensuring you’re well-prepared for the creative process.
Gathering Inspiration for Your Scene
As you sketch out your storyboard, drawing inspiration from various sources can elevate your toy photography to new heights. Start by exploring movies, comics, and art books that capture the essence of the scene you want to create. Notice how lighting, angles, and compositions tell a story. Don’t hesitate to revisit your favorite films or graphic novels for fresh ideas.
Nature can also provide unexpected inspiration. A walk in the park, observing how light filters through leaves, might spark new concepts for your work. Online platforms like Pinterest and Instagram offer a plethora of visuals to ignite your creativity. Remember, inspiration is everywhere, from everyday life to imaginative worlds. Keep your eyes open and your mind receptive, and let inspiration guide your creative process.
Planning the Visual Narrative

To craft a compelling visual narrative in toy photography, start by identifying the key moments and emotions you want to convey. Think about the story’s arc and how each scene contributes to the overall theme. Break down your narrative into a series of shots, each with a purpose that advances the story. Consider what emotions each toy character should express and how their interactions can be captured through angles and composition.
Sketching out your storyboard will help you visualize the sequence of shots. Focus on the framing and lighting directions for each scene. This approach guarantees consistency and clarity. By planning your visual narrative meticulously, you’ll create a sequence that’s not only engaging but also visually stunning, capturing the essence of storytelling through photography.
Selecting the Right Toys and Props
When selecting toys for your photography, focus on compatibility to guarantee they fit seamlessly within your visual narrative. Choose props that not only complement the toys but also enhance the story you’re telling. By considering these elements, you’ll create a cohesive and enchanting scene that draws viewers in.
Toy Compatibility Considerations
Choosing the right toys and props for your photography is vital because it sets the foundation for a compelling story. You need to think about how well the toys work together regarding scale, style, and theme. Make sure your figures are proportionate to each other and fit within the scene’s context. A robot towering over a medieval knight might not make sense unless that’s your story’s twist. Pay attention to the color palette, too; complementary colors can enhance visual appeal. Consider articulation and poseability; they’re essential for dynamic shots. Don’t forget about materials—mixing glossy and matte textures can add depth. Be mindful of compatibility, making certain your props and toys create a seamless, believable world that captivates your audience.
Essential Prop Selection
While starting on your toy photography journey, picking the right props is essential to crafting a scene that resonates. Begin by identifying the story you want to tell. Once you’ve got that, choose props that enhance and support the narrative. Consider the scale and compatibility of each toy and prop. A miniature tree won’t work well with a giant action figure unless you’re going for a comedic effect. Focus on details; a small prop can add depth and realism to your scene. Look for items that complement the colors and textures of your main subjects. Don’t clutter the scene—every prop should have a purpose. Experiment with different combinations to find what best captures your vision and evokes the desired emotions.
Designing the Set and Background
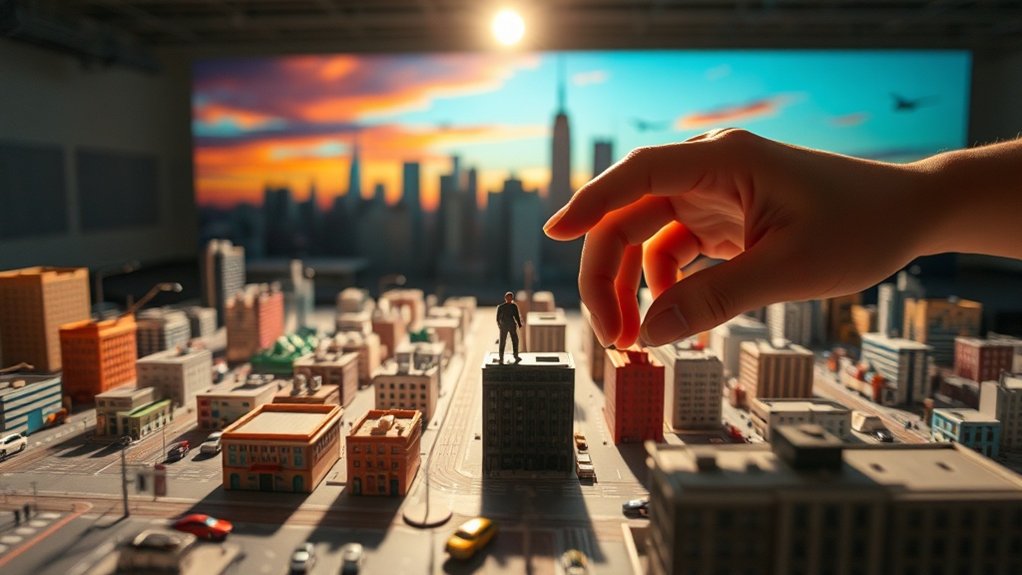
Every great toy photo starts with a compelling set and background. You’ll want to create a miniature world that enhances your story, capturing attention and imagination. Begin by selecting a backdrop that complements your theme. A simple textured fabric, printed scene, or even natural surroundings can work wonders. Think about the scale; it’s essential that the background doesn’t overwhelm the toys.
Next, incorporate elements that add depth and context. Use small props or structures to create layers, giving your scene a three-dimensional feel. Consider the colors and textures you’re using. Do they enhance or distract from the main subjects?
Finally, arrange your elements thoughtfully. Experiment with different configurations until you find a composition that feels balanced and visually appealing.
Crafting the Lighting and Mood
Lighting transforms your toy photography, setting the mood and bringing your scene to life. It’s not just about illuminating your subjects; it’s about creating an atmosphere that resonates with your story. Start by deciding what mood you want to convey. Is it a dramatic showdown or a serene landscape? Use soft lighting for a calm, gentle feel or harsh shadows for intense drama.
Experiment with angles. Side lighting can add depth, while backlighting creates silhouettes. Don’t forget color temperature; warm tones evoke coziness, while cool shades suggest mystery or tension. Use household items like lamps and flashlights creatively. Reflectors or diffusers can soften or focus your light. By thoughtfully crafting your lighting, you’ll elevate your toy photography from simple snapshots to cinematic stories.
Executing and Capturing the Shots
Once you’ve crafted the perfect lighting and mood for your toy photography, it’s time to focus on executing and capturing the shots. Start by positioning your camera at the desired angles you’ve planned in your storyboard. Make certain your tripod is steady to avoid blurs, and adjust the camera settings like aperture, shutter speed, and ISO to match your lighting conditions.
Frame your shot carefully, ensuring that every element in the scene contributes to the story. Take multiple shots from different perspectives to find the most compelling composition. Review your images frequently, checking for focus and exposure. Don’t hesitate to experiment; sometimes unexpected angles or adjustments can enhance your scene. Finally, capture the magic moment when everything aligns perfectly, bringing your storyboard to life.
Frequently Asked Questions
How Do I Create a Storyboard if I’m Not Good at Drawing?
You don’t need to be a great artist to create a storyboard. Use simple stick figures or digital tools. Focus on composition, angles, and movement. It’s about planning your shots, not creating perfect drawings.
What Software Can Assist in Digital Storyboarding for Toy Photography?
Imagine your ideas coming to life with software like Storyboard That or Canva. They’re intuitive and don’t require artistic skills. You’ll just drag and drop elements, creating vivid, engaging storyboards for your toy photography effortlessly.
How Can I Manage Time Effectively When Planning Complex Scenes?
You can manage time effectively by prioritizing tasks, setting clear deadlines, and breaking scenes into smaller parts. Use a timer to keep focused, and don’t forget to schedule breaks to maintain energy and creativity.
What Are Common Mistakes to Avoid in Toy Photography Storyboarding?
You might think storyboarding’s just for movies, but it’s essential here too. Avoid neglecting details, rushing the process, and ignoring lighting. Don’t forget to communicate your vision clearly; it prevents misunderstandings and enhances the final product.
How Can I Incorporate Motion Effects in Toy Photography Scenes?
You can incorporate motion effects by using techniques like slow shutter speeds, strategic lighting, and practical effects like cotton or fishing line. Experiment with angles and focus to create dynamic scenes that suggest action and movement.
At a Glance
You’ve transformed into a cinematic master, weaving epic tales with mere inches of plastic and imagination. Your storyboard’s a blockbuster blueprint, guiding your toy stars through dazzling adventures. Each shot, a masterpiece, each prop, a treasure. You’ve orchestrated light like a grand maestro, casting shadows that whisper secrets. So go, capture the universe in miniature! Let your toy photography rival Hollywood’s finest, and watch as your scenes leap from the frame, larger than life.


