For your action figure photography, master a three-point lighting setup: key, fill, and backlight. Position the key light at a 45-degree angle for focus, fill light opposite to soften shadows, and backlight for depth. Essential gear includes a sturdy tripod and a quality DSLR or mirrorless camera. Experiment with colored gels and light distances for creative effects. By fine-tuning these techniques, you’ll capture striking images that truly stand out. Explore further to refine your skills!
Understanding the Basics of Studio Lighting
When you’re diving into the world of studio lighting for action figures, understanding the basics is essential to capturing stunning shots. Start with the three-point lighting setup: key, fill, and backlight. Your key light is the primary source, casting the main shadows. Position it at a 45-degree angle to your subject. The fill light reduces shadows and should be softer, placed opposite the key light. Finally, the backlight separates your figure from the background, adding depth and dimension.
Selecting Essential Equipment for Your Setup
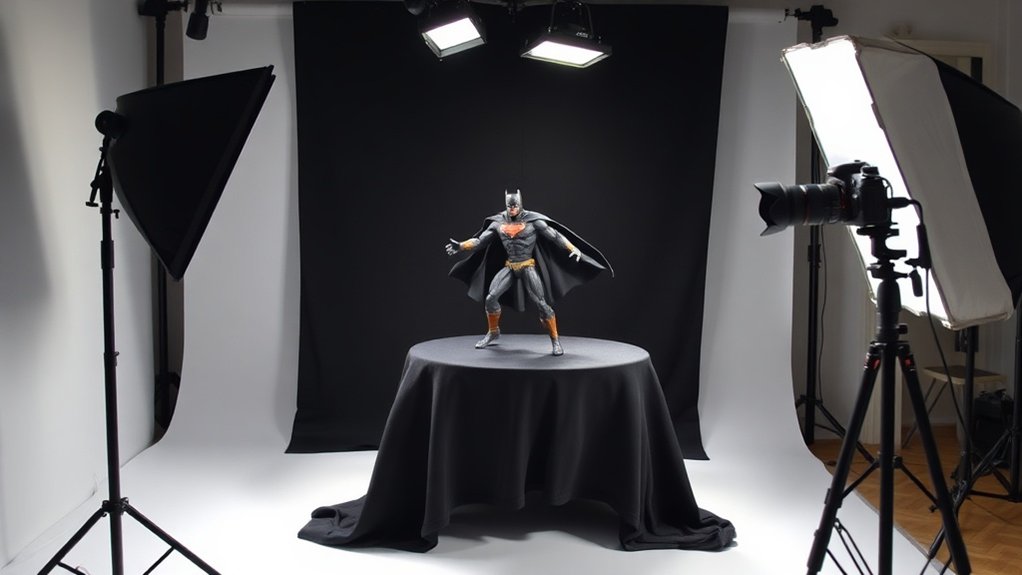
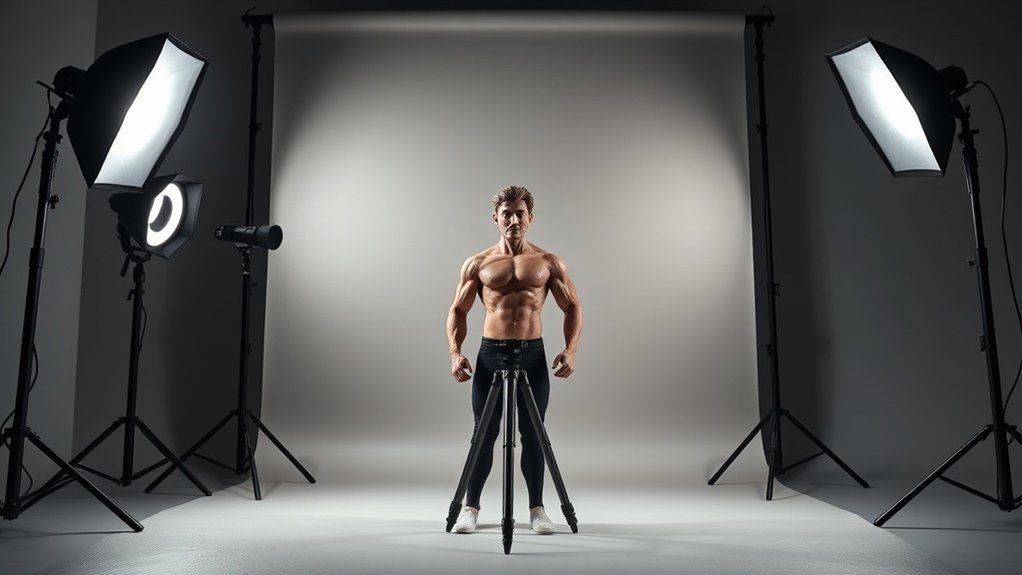
To create a professional studio lighting setup for action figures, you’ll need a few essential pieces of equipment. Start with a sturdy tripod to stabilize your camera, ensuring crisp, blur-free shots. Invest in a good quality DSLR or mirrorless camera, as they offer better control over exposure and focus compared to smartphones.
For lighting, softbox lights are a must. They diffuse light evenly, reducing harsh shadows and highlighting fine details. Consider a few LED panels for adjustable brightness and color temperature. Don’t forget a small reflector to bounce light into shadowy areas, enhancing your figure’s features.
Lastly, a background stand with different colored backdrops can help your figures stand out. These tools are vital for crafting engaging action figure photography.
Positioning Lights for Optimal Results
When positioning lights for your action figure photography, start with placing the key light to highlight your subject’s best features. Adjust the fill light to soften shadows and create a balanced look without washing out details. By experimenting with different angles and distances, you’ll find the perfect lighting setup for capturing stunning images.
Key Light Placement
Lighting is the unsung hero in capturing the essence of action figures, and proper key light placement is essential for achieving ideal results. Start by positioning your key light at a 45-degree angle from the subject. This angle creates dynamic shadows, adding depth and dimension to your figure. Adjust the height of the light so it’s slightly above the figure, pointing downwards. This setup mimics natural sunlight, highlighting details without washing them out. Avoid placing the light directly in front, as it flattens the subject. Experiment with distances to control the softness or harshness of the shadows. A closer light source will create softer shadows, while a farther one results in harder shadows. This simple yet effective setup will enhance your action figure photography.
Fill Light Adjustments
While the key light sets the stage, the fill light guarantees your action figure’s details aren’t lost in shadow. To achieve this, focus on positioning the fill light correctly. Here’s how:
- Angle and Distance: Position the fill light at a 45-degree angle from the subject, slightly lower than the key light. This minimizes harsh shadows and evens out the overall lighting.
- Brightness Levels: Adjust the fill light’s intensity to about half of the key light to maintain contrast without overpowering. This balance assures the action figure’s features stand out without looking flat.
- Diffusion: Use a diffuser or softbox to spread the fill light evenly. This softens shadows and highlights your action figure’s intricate details, giving it a natural, lifelike appearance.
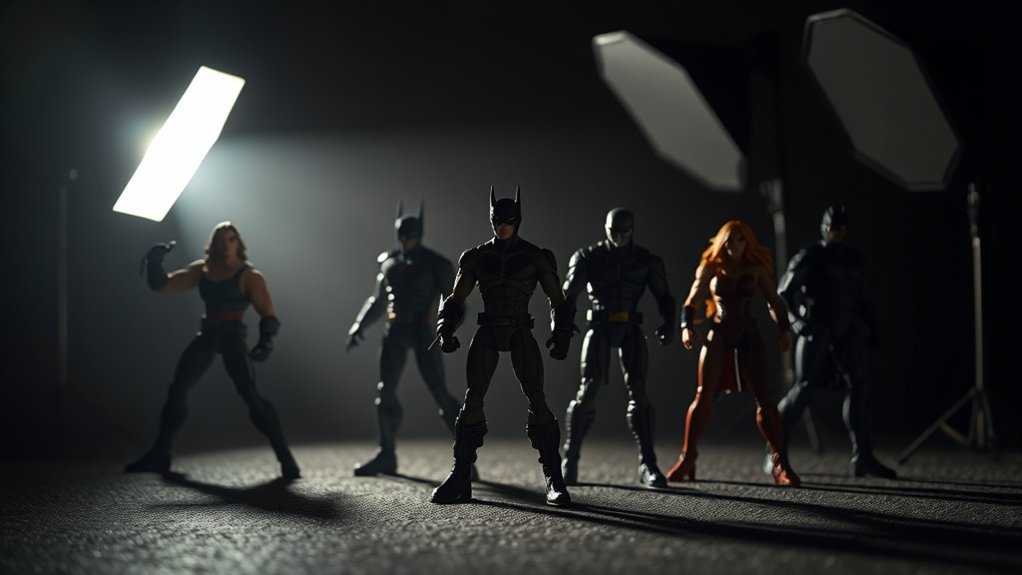
Creating Depth and Shadows
To create depth and shadows in your action figure photography, think about where you position your lights. Placing lights strategically can add dimension and interest to your shots. Try using backlighting techniques to emphasize outlines and create dramatic effects.
Positioning Lights Strategically
Strategically positioning your lights transforms a static display of action figures into a dynamic scene full of depth and shadows. To achieve this, focus on the direction and intensity of your light sources. Here’s how you can make it happen:
- Key Light: Place your main light at a 45-degree angle to the side of your figures. This creates dramatic shadows and highlights, enhancing the depth.
- Fill Light: Position a softer light on the opposite side to reduce harsh shadows without eliminating them completely, adding subtlety to the scene.
- Rim Light: Use a light from behind and slightly above to outline the figures, adding a three-dimensional effect.
Utilizing Backlighting Techniques
Backlighting can dramatically transform the way your action figures are perceived, giving them an ethereal glow and emphasizing their silhouette. By placing a light source behind your figure, you create a striking contrast between light and shadow, adding depth to your scene. This technique highlights the contours of your figures, making them stand out more vividly.
To achieve this effect, position a light behind your subject at a low angle, pointing slightly upwards. Experiment with different light intensities and distances to find the perfect balance. You can also use colored gels to add mood or atmosphere. Incorporate backlighting with other lighting techniques for a more dynamic setup. Don’t be afraid to adjust and play around, as lighting is all about experimentation and finding what works best for your vision.
Experimenting With Color and Gels

Ever wondered how to add a splash of drama to your action figure photography? Experimenting with color and gels can transform your shots from ordinary to extraordinary. By placing colored gels over your lights, you can create unique moods and enhance the story you’re telling through your figures. Here’s how you can start:
- Choose Your Colors: Decide the mood you want to convey. Reds can add intensity, while blues offer a cooler, more mysterious vibe.
- Layer Your Gels: Combine different gels on separate lights to create depth and interest in your scene.
- Positioning Matters: Adjust the angle and distance of your lights with gels to highlight specific features and bring your figures to life creatively.
Dive in and watch your figures pop!
Troubleshooting Common Lighting Issues
While experimenting with color and gels can elevate your action figure photography, you might encounter some common lighting issues along the way. One frequent problem is harsh shadows. To fix this, try diffusing your light sources using softboxes or umbrellas, which will create a softer, more even glow. Overexposure is another issue, often solved by adjusting your camera settings, like lowering the ISO or reducing shutter speed.
If your action figures appear too flat, consider adding a fill light to introduce depth. Additionally, color casts can disrupt your images. Correct this by using white balance settings or post-processing software to neutralize unwanted tints. Don’t forget to experiment and test different setups; it’s the best way to learn and refine your technique.
Frequently Asked Questions
How Do I Maintain Consistency in Lighting Across Multiple Photo Sessions?
To maintain consistent lighting, always document your setup. Use the same lights, angles, and camera settings. Mark positions on the floor with tape and take reference photos. Consistency in your process guarantees uniform lighting across sessions.
Can Natural Light Be Combined With Studio Lighting for Action Figures?
Yes, you can combine natural light with studio lighting. Use natural light for ambiance, then enhance details with studio lights. Balance the two by adjusting angles and intensities, ensuring your action figures remain the scene’s focus.
What Are the Best Camera Settings for Photographing Action Figures?
Think of your camera settings as the magic wand that brings action figures to life. Use a low ISO (100-200) for clarity, a small aperture (f/8-f/11) for depth, and adjust shutter speed for desired brightness.
How Can I Minimize Glare on Glossy Action Figure Surfaces?
To minimize glare on glossy surfaces, diffuse your light source using a softbox or white sheet. Position the light at an angle and avoid direct reflections. Adjust your camera’s angle to reduce unwanted shine effectively.
How Do I Safely Store Lighting Equipment When Not in Use?
Picture a treasure chest for your lights. You should neatly coil cables, store lights in padded cases, and avoid damp areas. This prevents damage and keeps everything ready for the next creative illumination adventure.
At a Glance
You’ve traveled through time to master the art of lighting action figures, like a Renaissance painter wielding LED lights. By understanding the basics, choosing the right equipment, and experimenting with color, you’ve become a maestro in creating depth and shadows. Remember, it’s all about positioning and tweaking until you achieve that perfect shot. So, grab your gear, channel your inner Da Vinci, and keep experimenting. Your action figures deserve to shine in their miniature spotlight!


