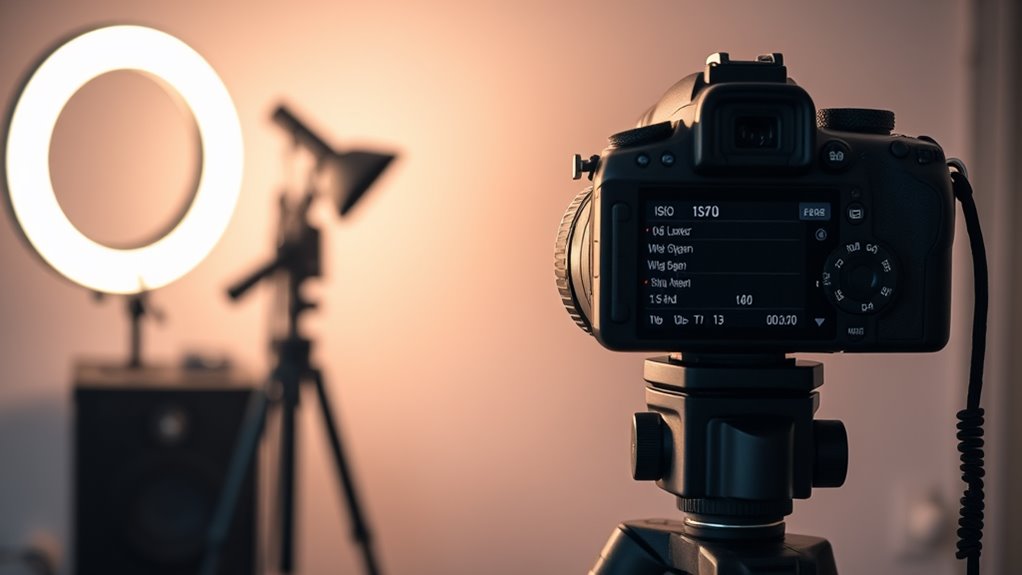
Mastering essential camera settings for toy photography will elevate your images. Use a small f-stop for a shallow depth of field, a fast shutter speed for sharp action shots, and adjust ISO for low light. Set white balance for true colors and experiment with custom picture styles. Use manual focus for precision or autofocus modes for convenience. Choose the right metering mode and try bracketing for exposure variations. Dive deeper to reveal more techniques and creative possibilities. Additionally, incorporating props and varied backgrounds can add depth and context to your scenes, enhancing storytelling elements in your shots. Exploring realistic toy photography techniques will allow you to create captivating images that resonate with viewers. Finally, don’t forget to consider lighting conditions, as natural light can often produce the most flattering results for your miniature subjects.
Understanding Aperture for Depth of Field
When you're diving into toy photography, understanding aperture is essential for controlling depth of field and achieving the perfect shot. Aperture refers to the camera lens opening that determines how much light enters. A small f-stop like f/2.8 creates a shallow depth of field, blurring the background and making your toy subject stand out. This effect is perfect for isolating your toy and adding drama to the scene.
Conversely, a larger f-stop like f/16 increases the depth of field, keeping more of the scene in focus. This setting is useful when you want both the toy and its environment to be sharp and detailed. By mastering aperture, you can creatively control focus, highlight details, and bring your toy photography to life.
Shutter Speed for Capturing Movement
Capturing movement in toy photography can add a dynamic element to your shots, and mastering shutter speed is key. When you're photographing toys in motion, adjusting the shutter speed can either freeze the action or create a sense of motion blur. Here's how you can effectively use shutter speed:
- Freeze Action: Use a fast shutter speed (1/500s or faster) to capture sharp, still images of moving toys.
- Create Motion Blur: A slower shutter speed (1/30s or slower) can introduce blur, giving the impression of movement.
- Balance Light: Consider your lighting conditions, as faster speeds need more light.
- Experiment: Try different speeds to find what best captures the energy you want.
Importance of ISO in Low Light Conditions
When you're shooting toys in low light, understanding ISO settings is essential to get the right exposure. You'll want to choose the ideal ISO to avoid noise while still capturing enough light, and using noise reduction techniques can help maintain image quality. Balancing ISO with shutter speed guarantees you capture sharp, well-lit images without compromising detail.
Optimal ISO Settings
In the domain of toy photography, understanding the ideal ISO settings is essential, especially in low light conditions. ISO controls your camera's sensitivity to light, and choosing the right setting can make or break your shot. Here's how you can optimize ISO for perfect toy photography:
- Start Low: Begin with the lowest ISO setting. This reduces noise and keeps your images crisp and clean.
- Evaluate Light: If your scene is too dark, gradually increase the ISO. Do it step by step to maintain quality.
- Balance with Aperture and Shutter Speed: Adjust these settings to allow more light in, minimizing the need to raise ISO too high.
- Avoid Excessive High ISO: High ISO can introduce noise. Aim for a balance to maintain image clarity.
Noise Reduction Techniques
Although low light conditions can be challenging, mastering noise reduction techniques can greatly enhance your toy photography. Start by understanding how ISO impacts noise. In low light, your camera may struggle to capture enough light, prompting you to increase the ISO. While this helps brighten the image, it also introduces noise—those pesky, grainy specks that can detract from your shots.
To reduce noise, use a camera with good low-light performance and shoot in RAW format. RAW files preserve more detail, allowing for better noise reduction during post-processing. Additionally, use noise reduction software to refine your images and experiment with in-camera settings, like long exposure noise reduction, to minimize unwanted grain. By carefully managing noise, you'll capture clearer, more striking toy photos.
Balancing ISO and Shutter
Balancing ISO and shutter speed is essential when shooting toy photography in low light. You need to understand how these settings affect your images. ISO determines your camera's sensitivity to light. In low light, a higher ISO lets you capture more detail without overexposing your shot. However, it can introduce noise. Here are steps to balance ISO and shutter speed effectively:
- Start Low: Begin with the lowest ISO and gradually increase until you achieve the desired exposure.
- Adjust Shutter Speed: Slow down the shutter to let in more light, but guarantee it's fast enough to avoid blur.
- Check Noise Levels: Increase ISO only as much as necessary to keep noise minimal.
- Review and Adjust: Continuously review your shots and adjust settings as needed.
White Balance for Accurate Colors
Why is white balance so essential in toy photography? It guarantees that the colors of your toys appear true to life, enhancing realism and appeal. If you've ever taken photos where the colors seemed off, like too yellow or blue, it's likely due to incorrect white balance settings. By adjusting the white balance, you can compensate for different lighting conditions, such as tungsten, daylight, or fluorescent, to achieve natural-looking colors.
Start by setting your camera's white balance to auto; it's often a good choice for varied lighting. However, for more control, experiment with presets or custom settings based on your environment. This adjustment prevents color casts from artificial lights, allowing your toys' vibrant hues to shine through and captivate viewers effectively.
Utilizing Manual Focus for Sharp Images
When capturing toy photography, using manual focus lets you have complete control over sharpness and depth. You can precisely target the focal point, ensuring your subject stands out in crisp detail. By adjusting the focus yourself, you'll also enhance the depth and bring life to your miniature scenes.
Mastering Focus Precision
How can you achieve the perfect focus in toy photography? Mastering manual focus is key to capturing sharp images. It allows you to take control and fine-tune details, ensuring your subject stands out. Here's how to do it:
- Use Focus Peaking: This feature highlights in-focus areas, making it easier to see what's sharp.
- Zoom In: Magnify the view on your camera's screen to precisely adjust focus on small details.
- Adjust Focus Ring Slowly: Move the ring gently to avoid overshooting the focus point.
- Tripod Stability: Keep your camera steady to prevent blur while adjusting focus.
Enhancing Depth Control
To take your toy photography to the next level, you need to master depth control, which brings a dramatic sense of dimension to your images. Start by switching to manual focus. This gives you precise control over which parts of your scene are sharp and which are blurred, enhancing the three-dimensional effect. By adjusting the focus ring, you can highlight your toy against a soft background, creating a standout subject.
Practice focusing on different parts of the toy, like the eyes or specific features, to see how it changes the image's depth. Use a wide aperture (like f/2.8) to blur backgrounds more effectively. Don't forget to review your shots and adjust as necessary. With practice, you'll create striking, sharp images that truly pop. Experiment with lighting conditions to enhance shadows and highlights, adding to the overall effect. Incorporating realistic toy photography techniques, such as using props and varied backgrounds, can further elevate your images. Always strive to capture the personality of the toy to make your photos more engaging and relatable.
The Role of Exposure Compensation
Although often overlooked, exposure compensation plays an essential role in toy photography, allowing you to fine-tune the brightness of your images. It helps you adjust for tricky lighting situations where your camera's metering might not capture the essence of your scene. To make the most of exposure compensation, consider these points:
- Evaluate Lighting: Assess whether your scene is too bright or too dark. Adjust exposure to bring out details in shadows or highlights.
- Experiment: Toy photography is creative. Don't hesitate to try different compensation levels to see what works best for your subject.
- Use Negative Values: If your scene is too bright, reduce exposure to avoid washed-out toys.
- Use Positive Values: If shadows hide toy details, increase exposure to bring them out.
These adjustments guarantee your images match your creative vision.
Customizing Picture Styles for Desired Effects
When diving into toy photography, customizing picture styles is key to achieving your desired effects. You can adjust settings like contrast, saturation, and sharpness to match the mood you're aiming for. Want to highlight a toy's vibrant colors? Boost the saturation. Prefer a more dramatic, moody scene? Increase the contrast for deeper shadows. If you're looking for a softer, dreamy look, consider reducing the sharpness. Most cameras offer preset picture styles, but don't hesitate to tweak them to fit your vision. Experimenting with these settings allows you to emphasize specific details and textures, bringing out the personality of the toys. Remember, the right picture style can transform your images, making your toy photography truly stand out.
Choosing the Right Metering Mode
When choosing the right metering mode for toy photography, start by evaluating the light conditions around your subject. You can use spot metering for precise control when focusing on specific details or opt for matrix metering to balance exposure across the entire scene. Understanding these options helps you capture the mood and details you want in your shots.
Evaluating Light Conditions
How do you decide on the best metering mode for toy photography? It's essential to evaluate the light conditions first. You'll want to guarantee your toys are well-lit and shadows are used effectively. Here's how you can evaluate:
- Natural Light: Observe if you have sufficient natural light. It can enhance colors and details without needing extra equipment.
- Artificial Light: Assess your artificial light sources. Are they casting unwanted shadows or creating harsh spots?
- Light Direction: Determine where the light is coming from. Front, side, and backlighting all create different effects.
- Light Intensity: Check the light's strength. Is it too bright, causing overexposure, or too dim, resulting in poor visibility?
Use these evaluations to guide your metering mode choice and capture stunning toy photos.
Spot vs. Matrix
Although choosing the right metering mode might seem challenging, understanding the difference between spot and matrix metering can make it easier. Spot metering focuses on a small, specific area in the frame. It's ideal for toy photography when you want to emphasize details, like a toy's face or a particular feature, without the surrounding light affecting exposure.
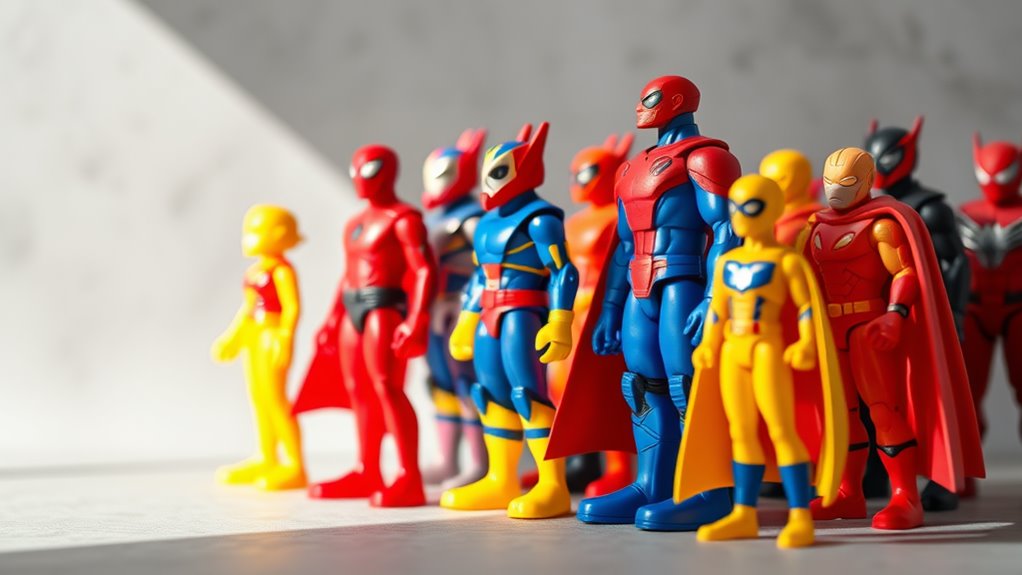
On the other hand, matrix metering evaluates the entire scene, balancing the exposure based on various areas of the frame. This mode is useful when capturing a group of toys or when the background is essential to your composition.
Try spot metering for dramatic, focused shots, and use matrix for balanced, extensive images. Switch between them to see which best fits your creative vision.
Setting Up the Right Autofocus Mode
Why is choosing the right autofocus mode essential for toy photography? Well, toys are small, detailed, and often require precision to highlight their unique features. The correct autofocus can make your photos stand out. Here's how you can choose the right mode:
- Single-Point AF: Use this for pinpoint focus on small parts or intricate details of the toy.
- Dynamic AF: Perfect when you need to capture toys in action, like spinning or moving parts.
- Continuous AF: Great for shooting toys in motion, this mode keeps the focus sharp as they move.
- Face Detection AF: Ideal if your toy has a face or specific front detail, ensuring it's the focal point.
Select the right mode, and your toy photos will shine!
Utilizing Bracketing for Exposure Variations
Now that you've mastered autofocus modes for capturing toy details, let's explore how bracketing can enhance your exposure settings. Bracketing allows you to take multiple shots at different exposures without adjusting settings manually for each one. This technique is perfect for toy photography, where lighting can be tricky and shadows might hide essential details. By using exposure bracketing, you'll capture a range of images from underexposed to overexposed. Later, you can select the best image or blend them for a balanced look. To start, access your camera's bracketing feature, set your desired exposure range, and shoot multiple frames. This approach guarantees you won't miss out on capturing the perfect lighting and detail for your toy photography.
Frequently Asked Questions
What Type of Lens Is Best for Toy Photography?
You'll want a macro lens for toy photography. It lets you capture intricate details and textures up close. A 50mm or 100mm macro lens offers versatility, allowing you to focus on your subject while maintaining a pleasing background blur.
How Can I Prevent Glare on Shiny Toy Surfaces?
To prevent glare on shiny toy surfaces, adjust your lighting. Use diffused light sources like softboxes or natural light. Position lights at angles to minimize reflections. A polarizing filter can also help reduce unwanted glare in your shots.
What Lighting Setup Works Best for Indoor Toy Photography?
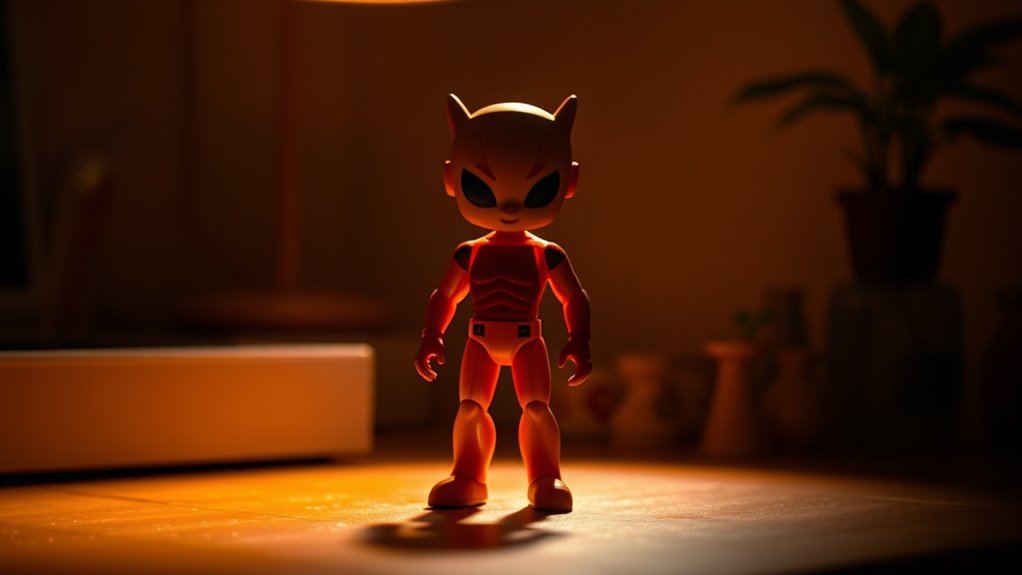
Use soft, diffused lighting to minimize harsh shadows and highlight details. Position lights at different angles for depth. Avoid direct overhead lighting, and try using reflectors to bounce light softly. Experiment with natural light for warm effects.
How Do I Achieve a Miniature Effect With Toys?
Imagine capturing a toy car looking like it's zooming through a tiny city. You'll need a wide aperture and a low angle. Use a tilt-shift lens or post-processing to blur edges, enhancing the miniature effect.
Are There Recommended Backgrounds for Toy Photography?
You should choose backgrounds that complement your toys, like simple, textured surfaces or themed settings that match your toys' story. Avoid busy patterns; they can distract from your subject. Experiment with lighting to enhance the background's effect.
At a Glance
In toy photography, mastering camera settings can elevate your images from ordinary to extraordinary. Did you know that using manual focus can improve image sharpness by up to 30% compared to relying on autofocus alone? By understanding aperture, shutter speed, and ISO, you'll capture stunning depth and movement even in low light. Always pay attention to white balance for true-to-life colors, and don't forget to experiment with bracketing and picture styles for creative effects. Happy shooting!


