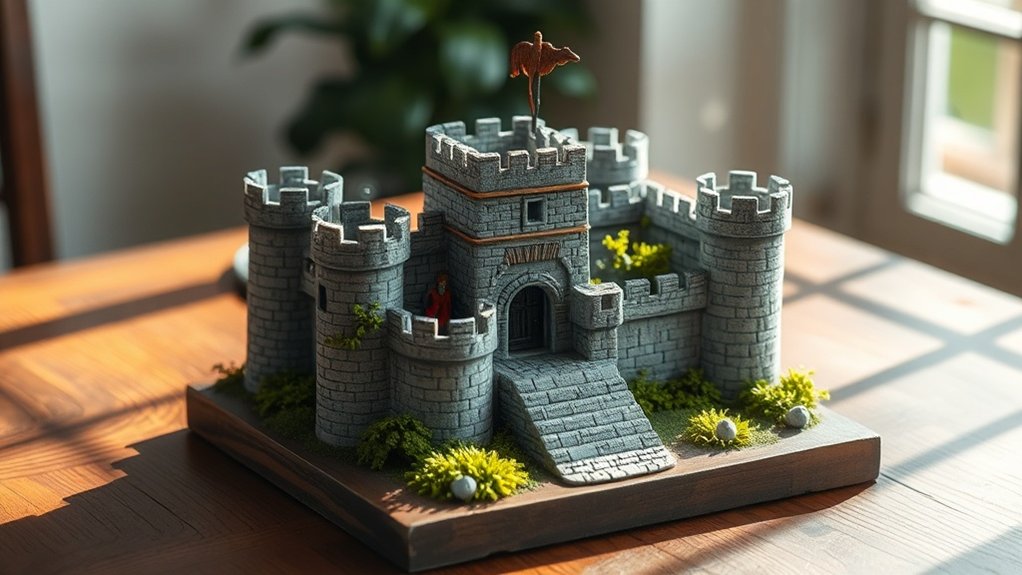
To build enchanting castle dioramas for toy photography on a budget, focus on selecting a theme that fits available figures, like a medieval fortress or magical kingdom. Gather materials from thrift stores and recycle household items for creative structures. Use techniques like textured paints for realism, and position dioramas in natural light. Consider scale and perspective to create a cohesive scene. Start building your unique diorama, and discover more exciting tips for cost-effective photography.
Choosing the Right Theme for Your Castle Diorama

How do you choose the perfect theme for your castle diorama? Start by envisioning the story you want to tell. Is it a medieval fortress, a magical kingdom, or a haunted ruin? Think about the mood you’re aiming for and which elements will best convey that atmosphere. Consider the toys or figures you already have and how they might fit into the setting. Align your theme with the figures to create a coherent scene.
Next, research different architectural styles and time periods. This will help you add authenticity to your diorama. Sketch out your ideas, focusing on key features like towers, gates, or courtyards. Remember, simplicity can be powerful, so don’t overcomplicate the design. Trust your instincts, and let your creativity guide you.
Sourcing Affordable Materials for Your Build
When you’re building a diorama on a budget, thrift store treasures can be a goldmine for unique and inexpensive materials. Don’t overlook recycled household items, as they can be repurposed into amazing props and backgrounds. Additionally, keep an eye out for discount craft supplies to stretch your budget further without sacrificing creativity.
Thrift Store Treasures
Although creating an enchanting toy photography diorama might seem expensive, thrift stores are a goldmine for affordable materials that can elevate your build without breaking the bank. Start by exploring shelves for unique finds like old picture frames, which can be repurposed as windows or doorways for your castle. Look for jewelry boxes or small wooden crates that make excellent bases or platforms. Don’t overlook fabric sections; scraps and old curtains can become perfect backdrops or castle banners. Miniature figurines or toy accessories are often hidden gems for adding detail to your scene. Keep an open mind and think creatively—many items can be transformed with a little imagination. Regular visits increase your chances of discovering great pieces that fit your vision.
Recycled Household Items
While it might surprise you, your household is a treasure trove of materials perfect for crafting dioramas. Start by rummaging through your recycling bin. Cardboard boxes can serve as sturdy bases or walls for your castle. Egg cartons make excellent brick textures, while paper towel tubes transform into towers. Don’t overlook plastic containers; they can become moats or dungeons with a bit of paint. Old newspapers and magazines are invaluable for creating texture through papier-mâché. Also, check your junk drawer for items like bottle caps and buttons. These small objects can be used as shields or embellishments. By creatively repurposing what you already have, you’ll not only save money but also add a unique touch to your diorama.
Discount Craft Supplies
Craft stores can be a treasure trove of affordable materials if you know where to look and how to shop smartly. First, always check the clearance section. You’ll often find discounted paints, brushes, and decorative items perfect for your diorama. Sign up for store newsletters to receive coupons and alerts on sales. Don’t hesitate to compare prices online before purchasing.
Explore dollar stores, as they’re often stocked with craft supplies like foam boards, glue, and small decorative pieces. Thrift stores can also surprise you with unique finds at a fraction of the cost.
Finally, consider buying in bulk or splitting costs with friends. Pooling resources can give you access to more materials while keeping expenses low. With these strategies, you’ll stretch your budget further.
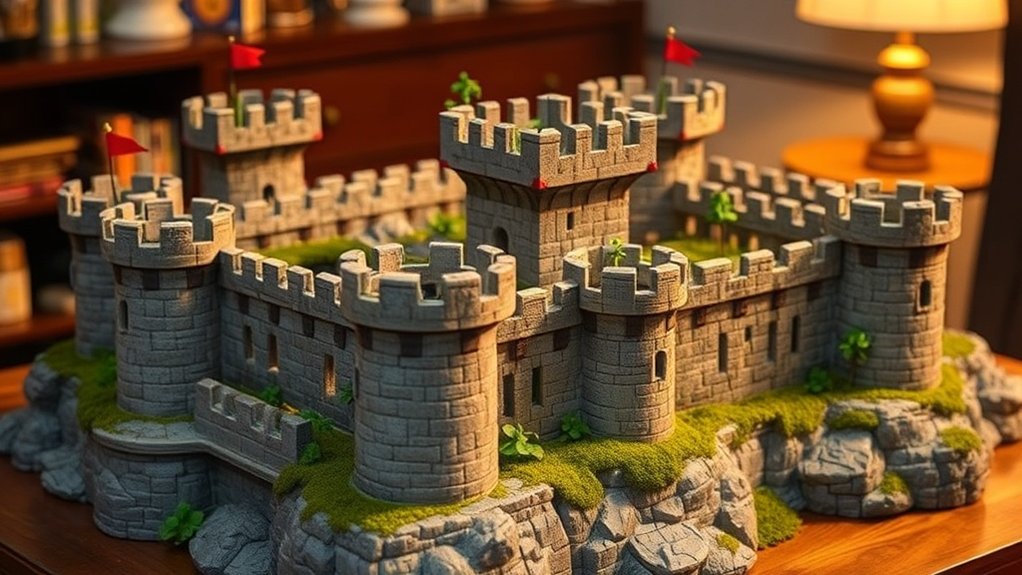
Creative DIY Techniques for Castle Structures
When building castle structures for your diorama, you can maximize creativity and minimize costs by using recycled materials. Employ cost-effective detailing techniques like textured paints or simple carving to add authenticity without breaking the bank. Additionally, consider modular designs to easily rearrange your pieces for different scenes, adding versatility to your setup.
Recycled Materials Advantage
Creating stunning castle dioramas doesn’t have to break the bank, especially when you leverage the advantages of recycled materials. Start by collecting items like cardboard boxes, egg cartons, and plastic containers. These everyday objects can transform into impressive towers, walls, and turrets with a bit of creativity. Cardboard is particularly versatile, allowing you to cut, fold, and layer to create realistic textures and structures.
Plastic containers can act as sturdy bases or unique architectural details. Plus, using recycled materials helps the environment and adds a unique, personal touch to your diorama. Experiment with different combinations to find what works best for your vision. By repurposing what you already have, you’ll save money while crafting an enchanting and eco-friendly castle scene.
Cost-Effective Detailing Techniques
To elevate your castle diorama without spending a fortune, focus on clever detailing techniques that bring your structures to life. Use simple, everyday materials to create impressive effects. For instance, transform basic cardboard into realistic stone walls. All you need is some paint and texturing tools.
Here are three cost-effective detailing techniques:
- Foam Carving: Use insulation foam to carve intricate stone patterns. It’s lightweight, easy to shape, and can mimic stone textures when painted.
- Coffee Grounds: Mix them with glue to create moss or dirt textures. This adds an authentic look to your castle’s base or surrounding grounds.
- Toothpick Detailing: Use toothpicks to create wooden textures or add small battlement details. They’re perfect for adding depth and character.
These techniques guarantee your diorama stands out without breaking the bank.
Modular Design Benefits
Building on the foundation of cost-effective detailing techniques, modular design takes your castle diorama to the next level with creative DIY methods for constructing impressive structures. By using modular components, you can easily assemble and reassemble sections of your diorama, allowing for flexibility and adaptability in your design. This approach saves you both time and money, since you can reuse parts for different setups.
You’ll find that working with modular pieces makes it easier to transport and store your diorama. Plus, it provides endless possibilities for customization, as you can swap out sections to create new scenes. With modular design, you can experiment with layout and aesthetics without committing to a permanent structure. Immerse yourself in this creative process, and watch your castle come to life!
Utilizing Recycled Items for Cost-Effective Details
When diving into the world of toy photography dioramas, repurposing recycled items becomes a game-changer for crafting intricate details without breaking the bank. You’d be amazed at what treasures can be found in your own recycling bin. With a bit of creativity, everyday items transform into essential diorama elements.
Consider these suggestions:
- Cardboard Tubes: Use them for towers or columns, adding a solid structure to your castle.
- Plastic Bottle Caps: Perfect for creating miniature shields or architectural embellishments.
- Egg Cartons: Cut and paint them to mimic stone walls or cobblestone walkways.
Each item offers a unique texture and shape, giving your diorama an authentic feel. By repurposing, you save money and make your creations eco-friendly.
Painting and Texturing on a Budget
One of the most effective ways to bring your diorama to life is through thoughtful painting and texturing, even when you’re on a budget. Start by using inexpensive acrylic paints. They’re versatile and come in a variety of colors. Mix your own shades to save money and achieve unique tones. For texture, consider using household items like sponges or old brushes to dab paint onto surfaces, creating stone or wood effects. Baking soda mixed with paint can mimic gritty textures like aged walls. Don’t overlook cheap craft paints or even leftover house paint for larger areas. Applying thin layers and dry brushing can add depth without needing expensive tools. Experiment with these cost-effective techniques to give your diorama a realistic and vibrant appearance.
Building Realistic Landscapes With Inexpensive Supplies
Crafting an impressive diorama landscape doesn’t require a hefty budget. Start by using everyday materials creatively. Gather natural elements like rocks, twigs, and sand from your surroundings. These add authenticity without costing a dime. For rolling hills or mountains, use crumpled newspaper or cardboard covered in plaster cloth, found at craft stores or online.
Here are some tips to build realistic landscapes:
- Textured Bases: Use foam boards or discarded packaging as your base. Cover it with a mix of white glue and sand for a rough, natural terrain.
- Foliage: Create trees using twisted wires for trunks and sponge pieces for foliage. Paint them green for a lifelike appearance.
- Water Features: Use clear resin or craft glue to simulate ponds or rivers, adding depth to your scene.
Lighting Tips for Enhancing Your Diorama Photography
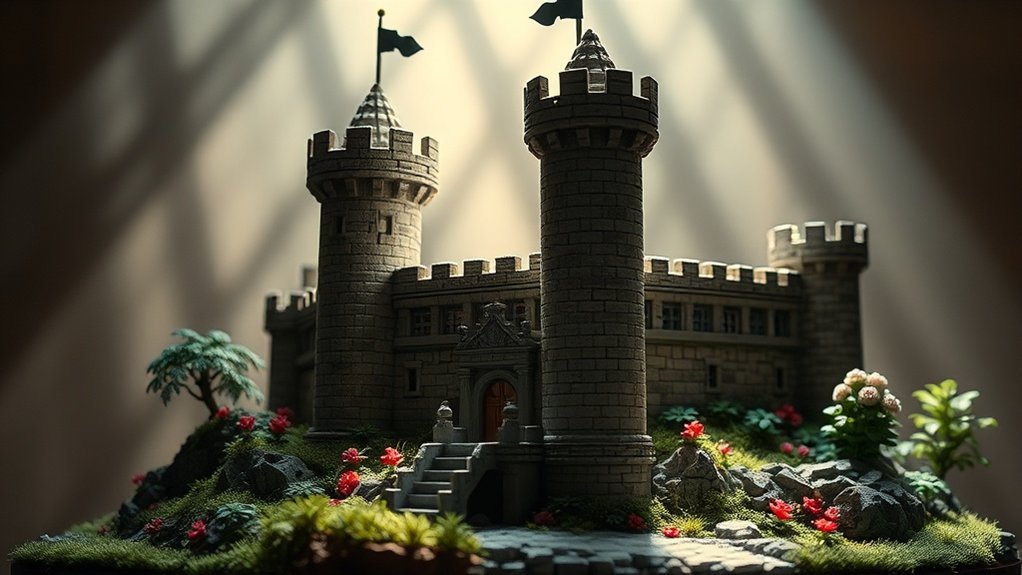
Lighting can transform your diorama photography from ordinary to extraordinary. Start by using natural light whenever possible; it adds a soft, authentic glow to your scenes. Position your diorama near a window for the best results, but avoid direct sunlight, which can create harsh shadows. If natural light isn’t available, use LED lights. They’re affordable, energy-efficient, and offer consistent light.
Experiment with different angles. Side lighting can highlight textures and details, while backlighting creates dramatic silhouettes. Use reflectors, like white paper or foil, to bounce light and soften shadows. Don’t forget about colored lights to evoke specific moods. A blue light can suggest a moonlit night, while warm tones mimic a sunset.
Finally, always review your shots and tweak as needed.
Incorporating Scale and Perspective in Your Scenes
When building your diorama, choosing the right scale is essential to making your scene believable and engaging. Enhance depth perception by positioning objects strategically to create a sense of distance, and guarantee you balance elements in the foreground and background to maintain harmony. By mastering these techniques, you’ll bring your toy photography to life on a budget.
Choosing Appropriate Scale
To create engaging toy photography dioramas, it’s essential to choose the right scale and integrate perspective effectively in your scenes. When selecting the scale, remember that it influences how viewers perceive your miniature world. Here’s how to make informed choices:
- Match Character and Environment Sizes: Guarantee your characters and props are proportionate. For instance, a 1:12 scale figure fits well with similarly scaled furnishings.
- Consider Focal Depth: A consistent scale helps maintain focus and realism. Choose backdrops and foreground elements that complement the main subjects in size.
- Utilize Forced Perspective: Experiment with positioning to make smaller elements appear larger or vice versa. By placing smaller objects closer to the camera, they can convincingly seem part of a larger scene.
With these tips, your dioramas will captivate viewers.
Enhancing Depth Perception
Although creating depth in toy photography dioramas can be challenging, mastering scale and perspective transforms your scenes into enchanting miniature worlds. Start by considering the size of your figures and props. Use smaller objects in the background to make them appear further away. Position larger pieces closer to the camera for an impactful foreground. Adjust your camera angle to enhance depth perception. Shooting from a low angle can create a towering castle effect, while a high vantage point offers an expansive view. Don’t forget to play with layers, placing elements at varying distances to add complexity. By carefully arranging these elements, you’ll trick the viewer’s eye, creating a mesmerizing sense of depth that makes your diorama come alive.
Balancing Foreground and Background
Balancing the foreground and background in toy photography dioramas is essential to creating realistic and engaging scenes. Start by considering scale—make certain that your toys and props fit naturally within the scene. When setting up your diorama, place objects with intention to enhance depth. Here’s how you can achieve balance:
- Layer Your Scene: Arrange elements at varying distances. Place smaller items in the back to create an illusion of depth, and larger ones in the front to draw the viewer in.
- Use Forced Perspective: Position objects cleverly to manipulate size perception. This can make smaller toys appear life-sized, enhancing realism.
- Maintain Consistency: Make certain that lighting and color tones match across all elements. This keeps the scene cohesive and believable, eliminating distractions.
Crafting Cost-Efficient Props and Accessories
Creating cost-efficient props and accessories for toy photography dioramas can be a fun and rewarding challenge. You can transform everyday household items into miniature treasures with a bit of imagination. Start by collecting materials like cardboard, fabric scraps, and bottle caps. These can become anything from castle turrets to royal banners. Don’t underestimate the power of paint and glue; they’re your best friends for adding realism and detail. Explore dollar stores for affordable miniatures or visit thrift shops for unique finds. Old jewelry pieces can be repurposed as regal artifacts. Crafting your own accessories not only saves money but also adds a personal touch to your scenes, making each shot uniquely yours. Immerse yourself, and let creativity lead the way!
Capturing Perfect Shots With Simple Photography Hacks
With your handmade props and accessories ready, it’s time to bring your toy photography dioramas to life with some simple photography hacks. First, consider lighting. Natural light can be your best friend, so shoot near a window or take your diorama outside for soft, even lighting. Second, stabilize your camera. A steady shot can make all the difference, so use a tripod or a DIY phone stand. Finally, play with angles. A low angle can make your toys appear larger-than-life, while a top-down view can capture more details.
Here’s a quick list to elevate your shots:
- Use Reflectors: Bounce light onto your subject for a professional look.
- Background Blur: Create depth by focusing on the subject.
- Colored Gels: Add mood with colored lighting effects.
Frequently Asked Questions
How Do I Transport My Finished Castle Diorama Safely?
Make certain your finished diorama’s secure by placing it in a sturdy box. Use bubble wrap or foam to cushion delicate areas. Label the box ‘Fragile’ and handle it carefully to prevent any damage during transport.
What Are Some Storage Solutions for Diorama Pieces When Not in Use?
Storing diorama pieces can feel like a game of Tetris. Stack them like puzzle pieces in clear bins, wrap fragile items in bubble wrap, and label everything. Shelving units keep your mini-worlds organized and ready for action.
How Can I Protect My Diorama From Dust and Damage Over Time?
You can protect your diorama by covering it with a clear plastic or acrylic case. Regularly dust it using a soft brush or compressed air. Keep it away from direct sunlight and in a stable environment.
What Are Some Common Mistakes Beginners Make in Toy Photography?
Diving into toy photography, you might overlook lighting, use cluttered backgrounds, or neglect focus, creating chaos instead of magic. Remember, practice patience and experiment. Don’t let impatience steal your creativity’s thunder—your journey’s just beginning!
How Do I Ensure Consistent Lighting in Outdoor Diorama Photography?
To guarantee consistent lighting in outdoor diorama photography, shoot during the golden hour for softer light, use reflectors to fill shadows, and avoid harsh midday sun. Always check the weather forecast to anticipate changes in lighting conditions.
At a Glance
Imagine you’re a knight in a grand tale, where every piece of your castle diorama is a kingdom built from creativity and resourcefulness. Just like a knight uses their armor wisely, you can use simple materials and clever techniques to craft a stunning scene on a budget. Remember, it’s not about the cost—it’s about the adventure of bringing your vision to life. So, grab your camera, and let your miniature world tell its epic story.


