In toy photography of cave or underground diorama builds, you create a miniature world with precision. Start by envisioning the atmosphere of your scene—mysterious or magical, scale it perfectly for your figures. Use materials like foam or clay to mimic rock textures and employ strategic lighting for depth. Choose props like moss and relics to tell a compelling story. Position your characters thoughtfully, and the narrative unfolds brilliantly. There’s much more to uncover!
Exploring the Essentials of Cave Diorama Design
When diving into the world of cave diorama design, it is crucial to understand the fundamental elements that bring these miniature environments to life. Start by envisioning the cave’s overall atmosphere and purpose. Are you creating a mysterious, shadowy cavern or a brightly lit, magical grotto? Decide on the scale of your diorama, guaranteeing it aligns with the figures you’ll use. Choose materials that mimic natural elements like rocks and stalactites. Consider lighting; it dramatically influences mood and depth. Position your light sources to highlight areas and create intriguing shadows. Plan the layout carefully, allowing for balance and visual interest. Achieving a realistic look involves thoughtful placement of elements to make the scene feel immersive and engaging to viewers.
Crafting Realistic Textures for Subterranean Settings
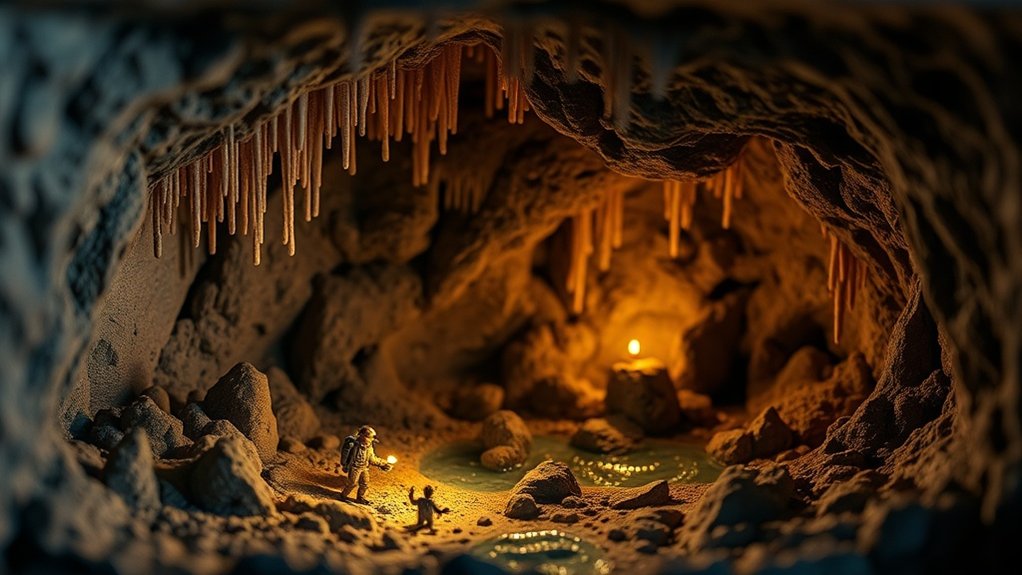
To create a convincing subterranean setting, focus on crafting realistic textures that capture the essence of what lies beneath the surface. Start by collecting reference images of caves or underground environments. Notice how rocks, soil, and minerals vary in color and texture. Use this inspiration to replicate these elements with materials like foam, clay, or plaster. Carve and mold them into rocky surfaces, adding cracks and crevices. Paint them with earthy tones, employing dry brushing techniques to highlight details. Consider adding organic matter like moss or lichen for authenticity. Use real sand or fine gravel to mimic soil. By layering textures and experimenting with different materials, you’ll create a rich, tactile environment that immerses viewers in the underground world.
Mastering Lighting Techniques for Underground Scenes

Although crafting textures is essential, mastering lighting techniques takes your underground scenes to the next level. You can create mood and depth by understanding how light behaves in enclosed, dark spaces. Start by using a dim, directional light source to mimic natural cave lighting. Position your light at an angle to cast intriguing shadows and highlight textures. Experiment with colored gels to add atmosphere—earthy tones enhance realism, while blues or greens introduce a mystical feel. Reflectors, even small ones, help bounce light into shadowy areas, revealing hidden details. Don’t forget to adjust your camera settings; a longer exposure can capture subtle light variations, adding drama and mystery. With practice, you’ll transform your dioramas into enchanting subterranean worlds.
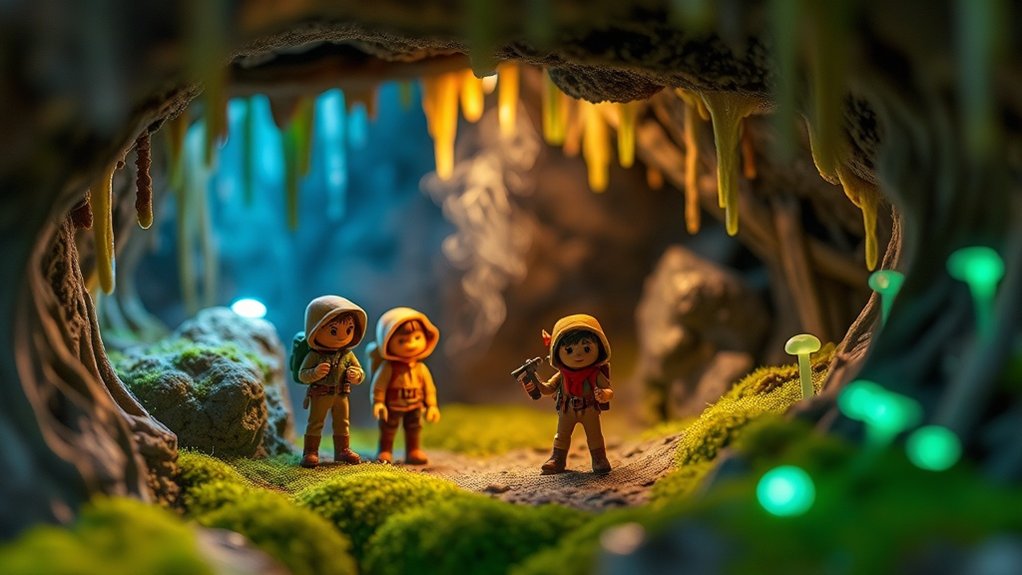
Choosing the Perfect Props for Your Underground Diorama
Creating an engaging underground diorama hinges on selecting the right props to bring your scene to life. You’ll want elements that enhance the realism and depth of your miniature world. Here’s a guide to help you choose:
- Natural Elements: Incorporate rocks, moss, and twigs. These add texture and authenticity to your underground setting.
- Scale Figures: Use figures that match your diorama’s scale. Whether it’s explorers or mythical creatures, they give context and storytelling depth.
- Lighting Accessories: Lanterns or torches can mimic underground illumination, adding mood and dimension.
- Unique Artifacts: Include items like ancient relics or hidden treasures to spark intrigue and mystery.
Creative Storytelling Through Cave Diorama Photography

When you explore cave diorama photography, the magic lies in weaving a compelling narrative through your shots. Each photograph tells a story, inviting viewers into a miniature world where imagination reigns. Start by envisioning the scene’s story: Is it an epic adventure, a mysterious discovery, or a peaceful retreat? Use lighting to evoke mood, highlighting shadows or illuminating paths to guide the eye. Position your characters dynamically; let their poses speak volumes. Props should enhance, not clutter, the narrative, creating a seamless blend of realism and fantasy. Experiment with angles to find the most dramatic perspective. As you capture each frame, think about the story’s progression. Your diorama becomes a stage, and you’re the storyteller bringing it to life.
Frequently Asked Questions
How Can I Safely Incorporate Water Features in My Underground Diorama?
You’re wondering about water features in your diorama. Use a waterproof base, like a plastic tray, to prevent leaks. Seal edges with silicone. Add a small pump for movement, and make certain electrical components are away from water.
What Materials Are Best for Creating Durable Diorama Structures?
Building a diorama is like crafting a mini fortress. Use foam board for lightweight strength, plaster for texture, and acrylic paint for color. Seal everything with a clear coat to guarantee durability and protect your masterpiece from damage.
How Can I Prevent Dust Accumulation in Detailed Cave Scenes?
To prevent dust in detailed scenes, regularly use a soft brush or compressed air for cleaning. You can also cover the setup with a cloth when not in use and consider using an air purifier nearby.
Are There Any Techniques for Soundproofing My Diorama Workspace?
You should use acoustic foam panels on walls and ceiling. Seal gaps with weatherstripping tape and install heavy curtains. Consider adding a thick rug on the floor. These steps help reduce noise and create a quieter workspace.
What Are the Best Storage Solutions for Large Dioramas?
Did you know 68% of hobbyists struggle with storage? For large dioramas, use vertical shelving and clear bins. They maximize space and keep your projects visible and accessible. Don’t forget to label everything for easy retrieval.
At a Glance
You’ve set off on an epic journey into the world of cave diorama photography, where your creativity knows no bounds! You’ve mastered crafting jaw-dropping textures, conjuring up the perfect lighting, and selecting props that could make even a dragon feel at home. Now, with storytelling skills sharper than a stalactite, you’re ready to capture breathtaking underground scenes that will leave everyone utterly spellbound. So, grab your camera and plunge into this magical subterranean adventure—your audience awaits!


