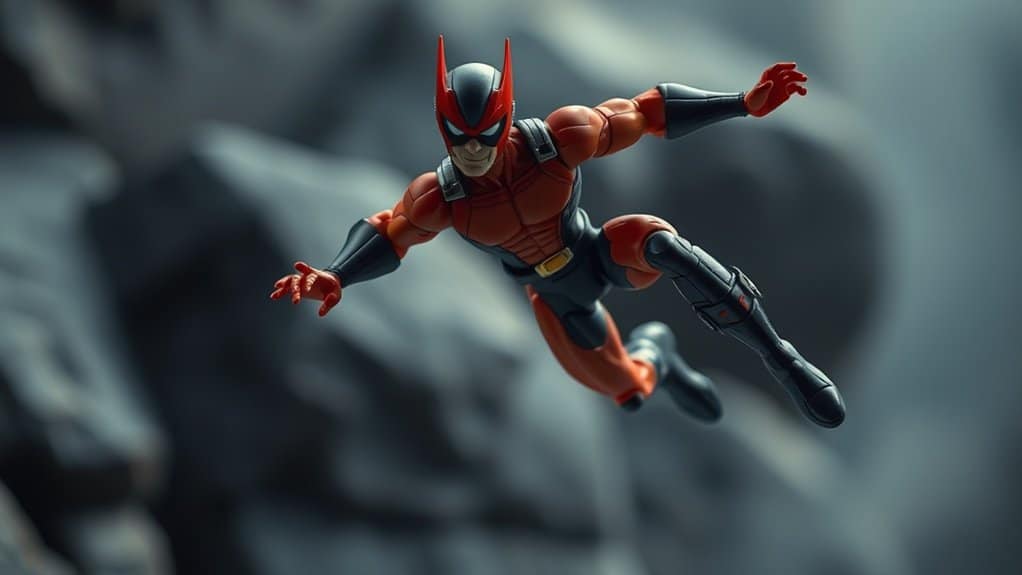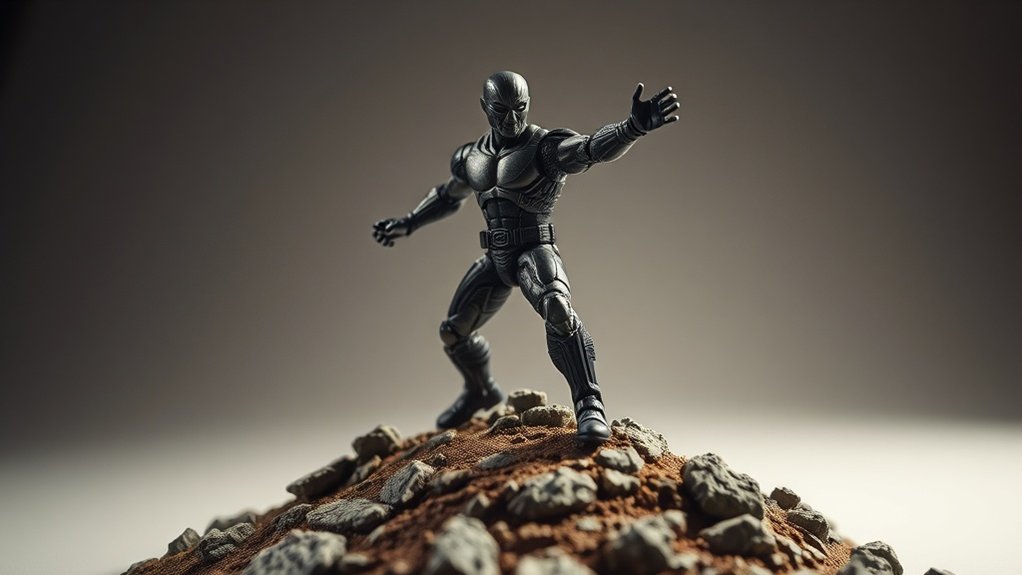
To shoot flying scenes in toy photography, pick small, vibrant toys like superheroes or aircraft that fit your theme. Use adjustable lighting to enhance details and experiment with low angles for dynamic shots. Invisible wire and stands help achieve realistic poses. Enhance with practical effects like cotton clouds or fan-induced wind. Edit for vibrant visuals and craft stories by developing characters and narratives. There’s more to discover that’ll elevate your toy photography skills.
Choosing the Right Toys for Flying Scenes
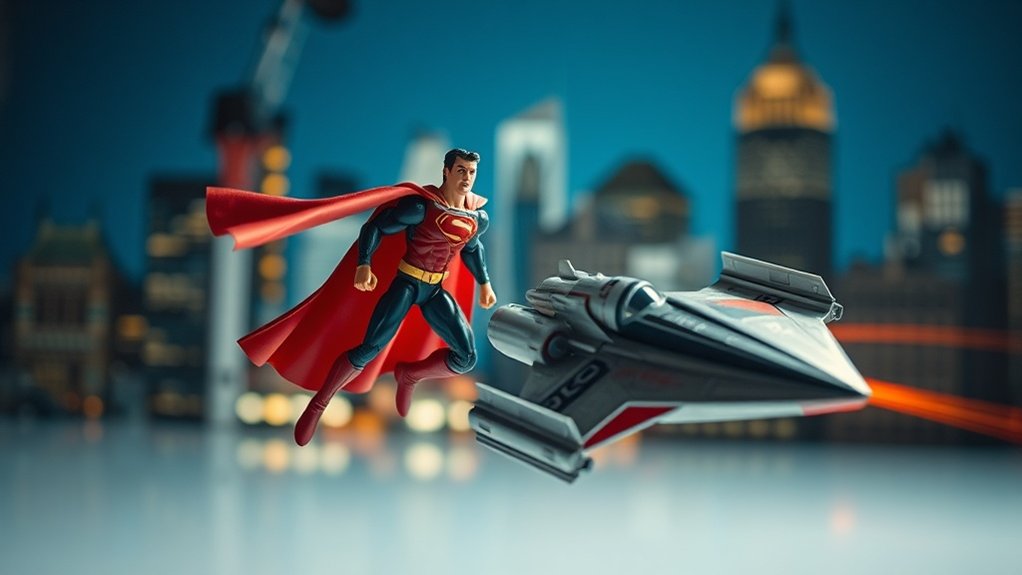
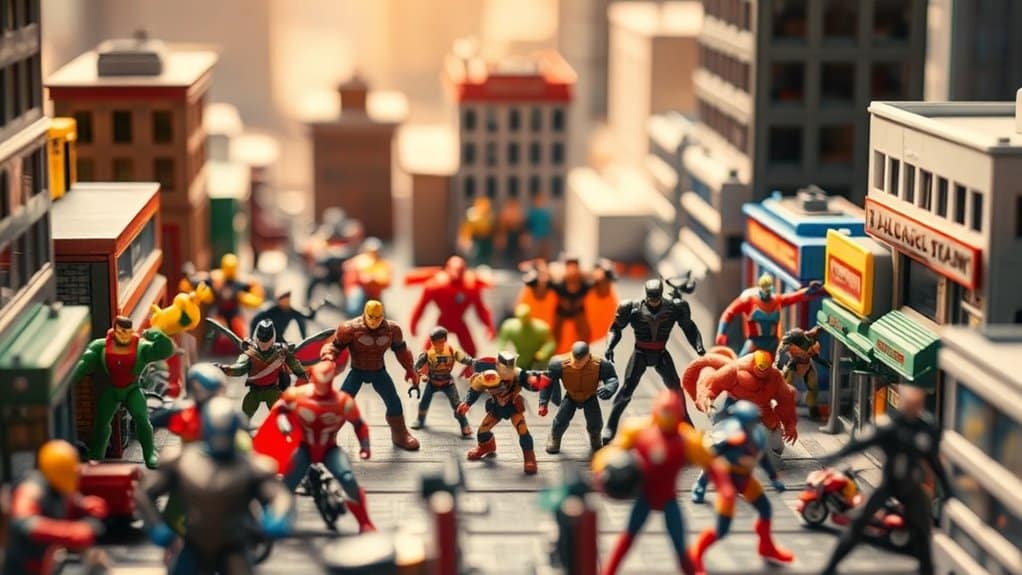
When setting up flying scenes in toy photography, selecting the right toys is essential for capturing dynamic and engaging images. You’ll want to choose toys that naturally fit the theme of flight, like superheroes, birds, or aircraft. These types of toys inherently suggest motion and excitement, making them perfect for such scenes. Pay attention to the toy’s size and articulation. Smaller toys are easier to manipulate and suspend, while articulated figures allow for more expressive poses. Consider toys with bright colors or interesting textures to add visual interest. Don’t forget about scale; make sure your chosen toys fit well within your scene’s context. With the right toys, you’ll create compelling images that capture the thrill and adventure of flight effortlessly.
Mastering Lighting Techniques for Realistic Results
To achieve realistic results in toy photography, you need to master light source positioning and shadow creation techniques. Start by experimenting with the angle and intensity of light to enhance details and bring your scene to life. Remember, shadows add depth and dimension, so play around with them to create a dynamic and realistic look.
Light Source Positioning
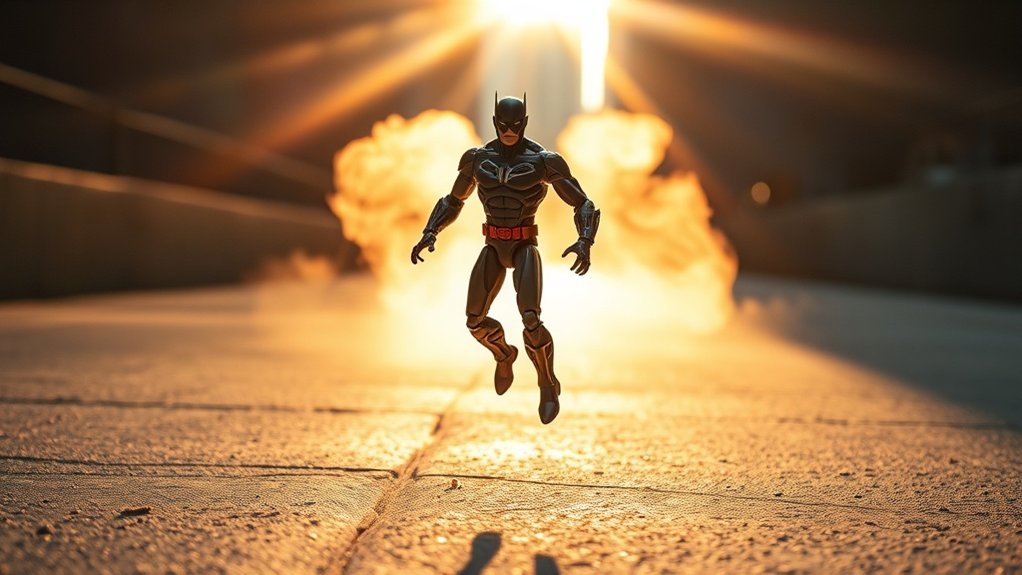
As you explore the world of toy photography, understanding the art of light source positioning becomes essential for achieving realistic results. Start by deciding the time of day you want to simulate. Position your main light source accordingly. For a sunrise or sunset effect, place the light low and angled horizontally to create long, dramatic highlights. If you’re aiming for midday brightness, position it overhead for softer, even illumination.
Next, consider the direction of the light. Front lighting highlights details but can flatten your subject. Side lighting adds depth by creating contrast and texture. Backlighting, on the other hand, can produce a striking silhouette effect, perfect for dynamic flying scenes. Experiment with different angles and distances to create the desired mood and enhance your scene’s realism.
Shadow Creation Techniques
Mastering the art of light source positioning naturally leads you to the intriguing world of shadow creation techniques. Shadows add depth and realism to your flying toy scenes, making them come alive. Start by positioning your light source at different angles; this helps create dynamic and believable shadows. Pay attention to the distance between your toys and the background. Closer distances result in sharper shadows, while further distances soften them.
Try experimenting with multiple light sources to create layered shadows, adding complexity to your shots. Don’t forget to adjust the intensity of your lights to mimic natural conditions, whether it’s a sunny day or a moody evening. Using reflectors can help control shadow harshness, giving you more creative control over your scene’s atmosphere.
Selecting the Best Angles for Dynamic Shots
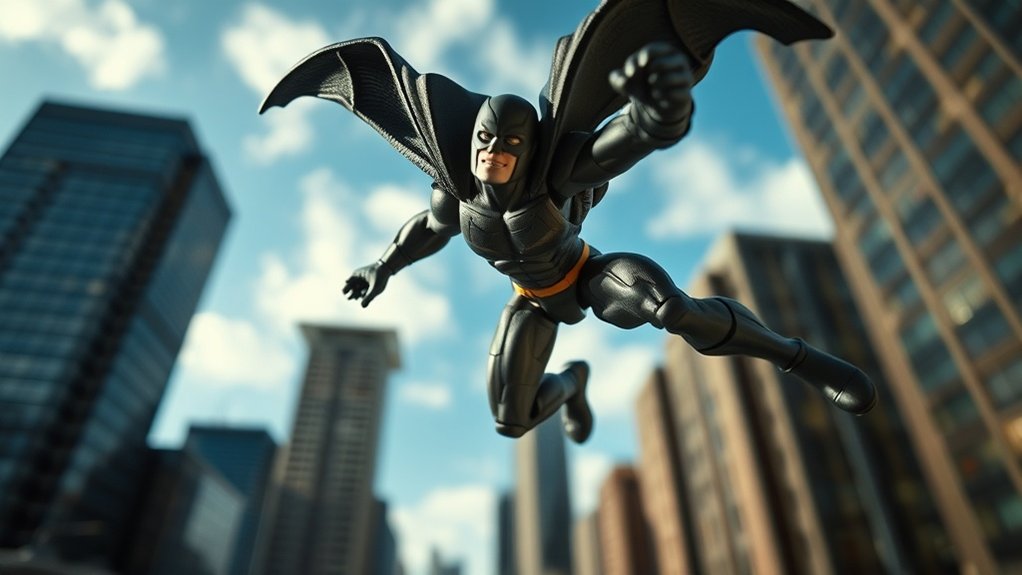
How do you find that perfect angle to make your toy photography pop? Start by experimenting with different perspectives. Lower your camera to the toy’s eye level for more engaging shots. Try shooting from below to give the impression of height and power, especially in flying scenes. A slight tilt can add drama, so don’t hesitate to rotate your camera. Aim for angles that accentuate movement and action.
Use leading lines to draw the viewer’s eye toward the key element of your photo. Look for natural framing options like tree branches or architecture to add depth. Sometimes, unconventional angles—like shooting from above or at a diagonal—can make your scene more dynamic. Remember, the right angle can transform a simple setup into an enthralling story.
Utilizing Practical Effects for Added Realism
When adding realism to your toy photography, practical effects can make all the difference. Start by incorporating everyday materials to create dynamic scenes. Use cotton or polyester stuffing to simulate clouds or smoke, giving the illusion your toy is soaring through the sky. Sprinkle sand or flour for realistic dust effects during a takeoff or landing shot. You can also use a fan to create wind, making capes or hair flow naturally, adding movement to your scene.
To capture the feeling of speed, try using water droplets or splashes. By placing a few drops around your toy, you’ll enhance the action of the scene. Experiment with lighting and shadows, using flashlights or lamps to emphasize certain elements and bring your flying scene to life.
Implementing Wire and Stand Techniques
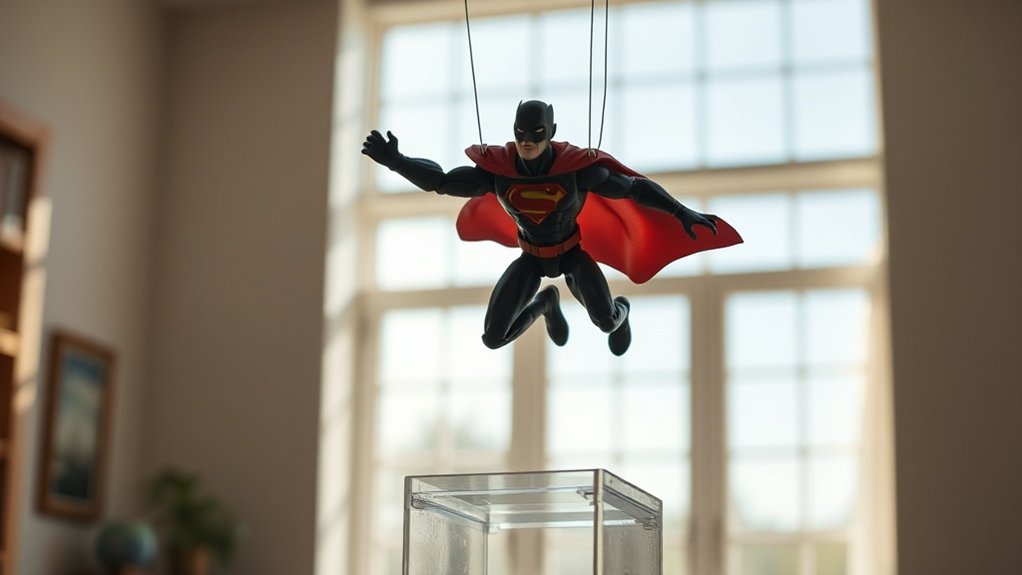
When you’re setting up for toy photography, choosing invisible supports is essential for creating believable scenes. Make sure you securely position your figures without causing any damage, using wires or stands that won’t show up in the final image. Once your shot is composed, you’ll need to edit out any visible wires to maintain the illusion of floating or dynamic movement.
Choosing Invisible Supports
Although capturing dynamic and lifelike scenes in toy photography can seem challenging, choosing the right invisible supports, like wire and stand techniques, can make all the difference. Start by selecting thin, flexible wire that’s strong enough to hold your toy without being too visible. You might already have some at home, or you can find it at craft stores. For heavier figures, consider using transparent stands. They provide a sturdy base while allowing you to position your toy at various angles. Remember, the goal is to create the illusion of flight or movement, so experiment with different placements. Try bending the wire or adjusting the stand to find the perfect balance, ensuring it remains hidden from the camera’s view.
Securing Figures Safely
To guarantee your toy figures are secured safely, start by carefully attaching the wire or stand to the figure in a way that minimizes visibility. Choose a thin yet sturdy wire, ideally one that blends with the background. Wrap it around the figure’s less noticeable parts, like joints or accessories, to keep it discreet. Secure the wire firmly, making sure the figure remains stable during the shoot.
When using stands, opt for adjustable ones that offer flexibility in positioning. Attach them to the figure’s base or other inconspicuous areas. Balance is key, so adjust the stand to prevent tipping. Always double-check stability by gently shaking the setup. This makes certain your figure won’t topple mid-shot, allowing you to focus on capturing stunning flying scenes.
Editing Out Wires
After securing your figures safely for the perfect shot, it’s time to tackle the challenge of editing out wires and stands. This step is essential for creating the illusion of flight in your toy photography. Here’s how you can seamlessly remove those supports using photo editing software:
- Use the Clone Stamp Tool: Select the Clone Stamp Tool to paint over wires and stands by sampling nearby areas. Adjust the brush size for precision and blend the edits smoothly.
- Utilize the Healing Brush: The Healing Brush Tool works wonders for blending imperfections. It automatically matches texture, lighting, and shading, making your edits look natural.
- Layer Masking: Create a duplicate layer and apply a mask. Carefully paint over wires and stands with a soft brush for non-destructive editing.
These steps guarantee your figures soar convincingly!
Enhancing Photos With Editing Software
Editing software can transform your toy photography from ordinary to extraordinary. You can enhance colors, adjust lighting, and add special effects to make those flying scenes look more realistic. Start by using software like Adobe Photoshop or Lightroom. Play with the contrast and saturation to make your toys pop against the background. Don’t forget to experiment with the shadows and highlights to add depth and dimension.
Use the clone tool to remove any unwanted elements and fix imperfections. If you’re aiming for dramatic flying effects, try adding motion blur to simulate movement. Layering textures can also give your photos a unique touch. Remember, subtlety is key; you want enhancements to elevate your image, not overshadow your subject. Practice and experimentation will refine your skills.
Inspiring Creativity Through Storytelling
Let your imagination run wild as you weave stories through your toy photography. By crafting a narrative, you’ll add layers of depth and intrigue to your images, making them more than just static scenes. Think about what story you want to tell. Are your toys superheroes saving the day or explorers discovering new worlds? Here’s how you can boost creativity:
- Character Development: Give each toy a personality. What are their strengths, weaknesses, and motivations?
- Setting the Scene: Choose a setting that complements your story. Use props to enhance the environment.
- Dynamic Action: Capture movement and emotion. Experiment with angles and lighting to convey action.
With a compelling story, your toy photography will captivate and inspire viewers, inviting them into your imaginative world.
Frequently Asked Questions
How Can I Prevent Toys From Falling During Shooting?
Use thin wires or fishing lines to suspend toys, ensuring they’re secure. You can also utilize stands or supports hidden from view. Always check stability before shooting, and consider using a gentle fan for realistic movement without falls.
What Safety Precautions Should I Take When Shooting Outdoors?
Did you know 60% of accidents happen outdoors? Guarantee safety by checking weather conditions and securing props. Use sandbags or weights to stabilize equipment. Be aware of your surroundings to prevent tripping or damaging your gear.
How Can I Create a Sense of Motion Without Digital Effects?
You can create a sense of motion by using practical effects like fans for wind, adjusting shutter speed for blurring, or physically moving objects during the shot. Experiment with angles and lighting to enhance dynamic movement.
What Camera Settings Work Best for Capturing Fast-Moving Toys?
You might’ve heard that shooting with a fast shutter speed captures fast-moving toys best. It’s true! Use a shutter speed of at least 1/1000, set a wide aperture, and increase ISO for proper exposure.
How Do I Store and Maintain Toys Used for Photography?
You should clean your toys regularly to prevent dust buildup. Store them in a dry, cool space to avoid damage. Use containers or display cases for added protection, ensuring they’re easily accessible for your photography sessions.
At a Glance
You’ve got the tools to tackle toy photography with flair and finesse. Choosing charming characters, mastering magical lighting, and selecting striking angles set the stage for stunning shots. Utilize unique, unseen wire and stand techniques, and let practical effects bring your scenes to life. Enhance every image with editing, and infuse your photos with fantastic storytelling. With this guide, your creativity will soar, capturing enthralling, cinematic scenes that truly tell a tale.