Enhancing toy photos with LED lighting is simple. Opt for daylight-balanced LEDs (5000K to 6500K) for natural results. Use dimmable lights for versatile intensity control and portable options for convenience. Position lights strategically, like a 45-degree angle to create engaging shadows and highlights. Experiment with colored LEDs for dramatic effects and try budget-friendly setups using household items. Balance natural light with LEDs to boost your shots. Explore these tips to elevate your toy photography.
Choosing the Right LED Lights for Toy Photography
When you're diving into toy photography, selecting the right LED lights can make all the difference in capturing the perfect shot. Start by considering the color temperature of your LEDs. Daylight-balanced lights, usually around 5000K to 6500K, are ideal as they mimic natural light, ensuring your toys look vibrant and true to life. Pay attention to brightness control too. Dimmable LEDs give you flexibility, allowing you to adjust the intensity to suit different scenes and moods. Portability is another key factor. Compact, battery-operated LEDs are convenient for on-the-go shooting. Finally, check for lights with adjustable mounts or stands, making it easier to direct light precisely where you need it. Smart choices in LED lighting set the foundation for stunning toy photos.
Positioning LED Lights for Optimal Shadows and Highlights
To capture the perfect balance of shadows and highlights in toy photography, it's crucial to position your LED lights thoughtfully. Start by placing one light source at a 45-degree angle to your toy. This angle helps create natural shadows that add depth and dimension. Experiment by adjusting the height of the light to emphasize features you want to highlight.
Use a second LED light as a fill light on the opposite side. Keep this light dimmer to soften harsh shadows without eliminating them. This setup maintains the contrast while ensuring details aren't lost in darkness.
Lastly, try backlighting your toy to create a subtle halo effect, adding depth and interest. Remember, small adjustments can make a big difference, so don't hesitate to tweak your setup.
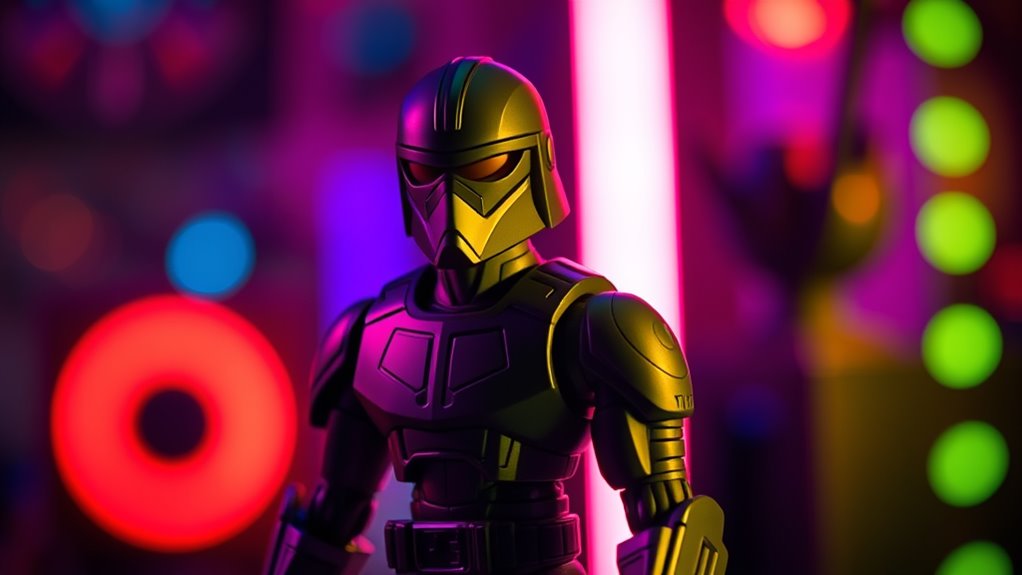
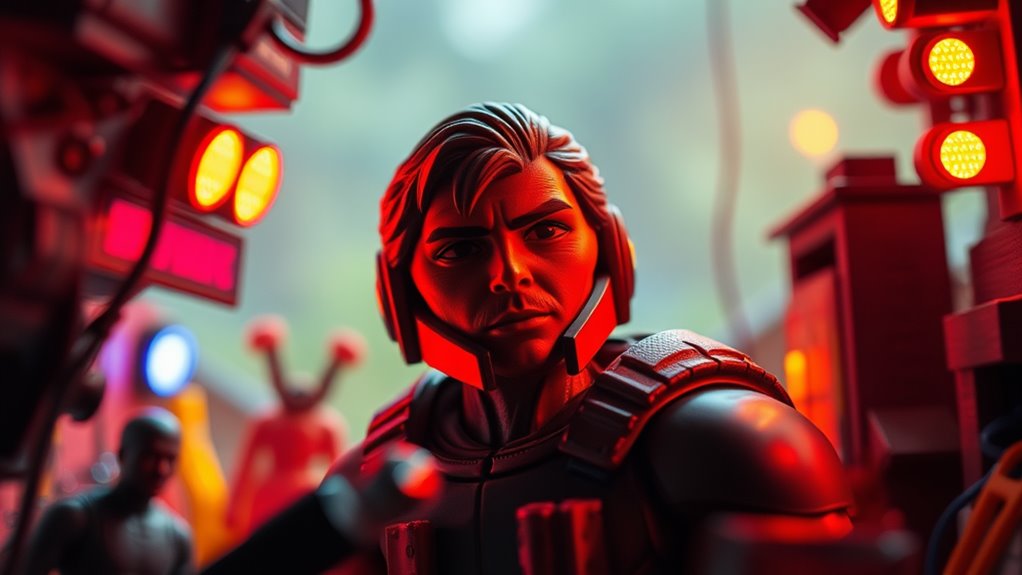
Creative Use of Colored LED Lights for Dramatic Effects
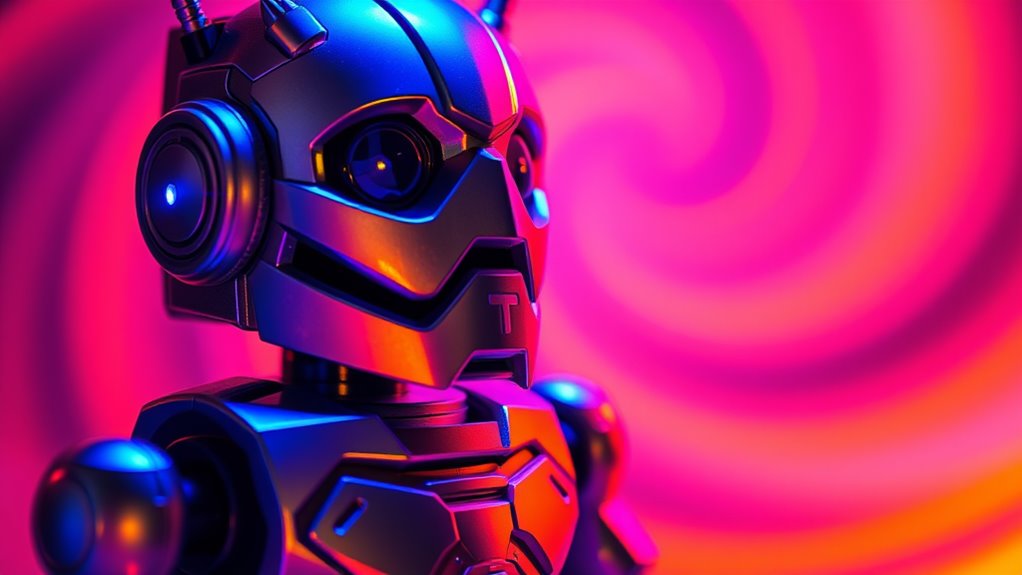
Although standard lighting setups are effective, introducing colored LED lights can dramatically transform your toy photos. By using these vibrant lights, you can create exciting and dynamic scenes that grab attention. Here's how you can use colored LEDs creatively:
- Create Atmosphere: Use blue or green LEDs to give a mysterious, underwater, or sci-fi feel.
- Highlight Details: Shine a red LED on specific areas to draw attention to intricate details.
- Simulate Settings: Emulate a sunset or sunrise with orange and pink LEDs, giving your toys a warm, natural glow.
- Enhance Mood: Mix different colors to evoke emotions, like using purple and red for a dramatic, intense scene.
Experiment with colors to discover how they can elevate your toy photography to new heights.
DIY LED Lighting Setups for Budget-Friendly Toy Photography
Building on the creative use of colored LED lights, you can craft impressive toy photos without breaking the bank by setting up your own DIY LED lighting. Start by gathering inexpensive LED strips or portable LED panels, which you can find online or at local hardware stores. Use white poster boards to bounce light, creating soft, even illumination. Experiment with colored cellophane or gels to add vibrant hues and dynamic effects. Position the LEDs at varying angles to highlight your toy's features and create depth. For added stability, mount your lights on adjustable stands or even repurpose household items like coat hangers. With a bit of creativity and resourcefulness, you'll have a versatile, cost-effective lighting setup that elevates your toy photography.
Techniques for Balancing Natural and LED Lighting in Your Shots
When shooting toy photos, seamlessly blending natural and LED lighting can enhance your images considerably. Start by positioning your toys near a window to capture the soft, diffused natural light. Then, use LED lights to add depth and highlight specific details. Here's how you can achieve a perfect balance: Experiment with different angles and distances to see how the interplay of natural and LED light affects your scene. Utilize realistic toy photography techniques by adjusting the color temperature of your LED lights to match the natural light, creating a harmonious look. Finally, consider using reflectors to bounce light back onto your toys, further enhancing the overall composition. Experiment with different angles and distances to find the most flattering perspective for your toys. Incorporating realistic toy photography techniques, such as selective focus and creative staging, can bring your images to life. Additionally, consider adjusting the color temperature of your LED lights to ensure they complement the natural lighting for a cohesive look.
- Assess the natural light: Evaluate the direction and intensity of natural light. Use it as the foundation for your composition.
- Position your LEDs: Place LED lights strategically to complement natural light, filling in shadows or emphasizing textures.
- Adjust the color temperature: Match or contrast the LED light's color temperature with natural light for desired effects.
- Experiment with angles: Change angles to see how shadows and highlights interact, creating dynamic and enchanting images.
Mastering this balance will make your toy photos pop!
Frequently Asked Questions
How Do I Prevent Reflections From LED Lights on Toy Surfaces?
You're dealing with LED reflections on toy surfaces? Try diffusing the light with a softbox or sheer fabric. Position the lights at different angles to minimize glare, and always check your camera's angles before shooting.
What LED Lighting Accessories Can Enhance Toy Photography?
Imagine your toys as actors on a stage, needing the perfect spotlight. Use diffusers for soft lighting, colored gels for mood, and light strips for dynamic backgrounds. These accessories will make your toy photos shine brilliantly.
How Can I Achieve a Soft Light Effect With LED Lighting?
To achieve a soft light effect with LED lighting, use diffusers or bounce the light off a white surface. Position the lights at an angle to reduce harsh shadows, creating a gentle, even illumination for your toy photography.
Are There Safety Concerns With Using LED Lights for Toy Photography?
Oh sure, your toys might suddenly come alive and lead a plastic revolt under LED lights! But seriously, LED lights are safe for toy photography. Just avoid overheating by keeping lights at a reasonable distance.
How Can LED Lighting Affect the Color Accuracy in Toy Photos?
LED lighting can affect color accuracy in toy photos by altering hues and tones. You should choose LEDs with high color rendering index (CRI) to guarantee true-to-life colors. Adjust your camera settings to balance any color shifts.
At a Glance
As you position each LED light, imagine sculpting a miniature world where vibrant colors and dramatic shadows dance around the toys. Let the glow of creativity guide your hands, painting stories with every click of the shutter. With each setup, you're not just capturing toys; you're capturing imagination itself. So, embrace the magic of LED lighting, blending it with nature's own to breathe life into your scenes, turning every shot into a fascinating, illuminated tale.


