
Transform your toy photography by integrating everyday household items to elevate your shots. Use books and plants for backgrounds, while kitchen utensils add unique textures and effects. Experiment with light from household lamps or use mirrors and water to enhance reflections. Fabric can bring depth, and recyclables like cardboard can serve as versatile DIY props. Embrace this creativity and discover how playful techniques can make your toy photos even more magical. By incorporating these essential props for toy photography, you open up a world of storytelling possibilities that bring your scenes to life. Think about using clothing or hats from dolls as quirky accessories to add character to your toys. As you explore and combine different elements, you’ll find that even the simplest items in your home can spark your imagination and lead to stunning, vibrant compositions.
Choosing the Right Toys for Your Photoshoot
Why is selecting the right toys essential for your photoshoot? The toys you choose set the tone and story of your entire project. You want to capture images that are both engaging and tell a story. Start by considering the theme. Are you aiming for a whimsical, adventurous, or nostalgic vibe? Choose toys that align with these feelings. Scale is another factor; smaller toys can create a sense of depth and wonder, while larger ones add drama. Also, consider color and texture. Bright, contrasting colors pop in photos, while varied textures add interest. Don't forget versatility—opt for toys you can pose easily. By carefully selecting your toys, you'll create compelling scenes that draw viewers into your miniature world.
Finding Interesting Backgrounds in Your Home
You don't need a professional studio to create enchanting toy photos; your home is full of potential. Look around for everyday objects like books, fabric, or plants that can add depth and interest to your composition. Use natural light from windows to highlight details and create dynamic shadows that enhance your scene.
Utilizing Everyday Objects
In the domain of creative toy photography, everyday objects can transform into enchanting backdrops that elevate your shots. Look around your home with fresh eyes; you'll find plenty of hidden gems. A kitchen counter can mimic a futuristic cityscape, while a textured bath towel could pass for a rugged desert. The possibilities are endless if you're willing to experiment.
To help you get started, consider these three ideas:
- Bookshelves: Arrange toys among books to create a library scene or a cozy nook.
- Fabric: Use colorful scarves or blankets as dynamic backgrounds that add texture and warmth.
- Mirrors: Create an illusion of endless space or add a dramatic flair by incorporating reflections.
Explore these options and watch your toy photography come to life!
Maximizing Natural Light
While some photographers rely on artificial lighting, harnessing natural light can bring a unique and vibrant quality to your toy photography. Start by exploring the best times of day when sunlight streams beautifully into your home. Early mornings or late afternoons usually offer a soft, golden glow that's perfect for capturing your toys in a magical light.
Position your toys near windows where natural light is abundant. You can use sheer curtains to diffuse harsh sunlight and create softer shadows. Don't overlook the potential of reflective surfaces like mirrors or white walls to bounce light creatively. Experiment with different angles and positions to see how light interacts with your toys, and watch them come to life with each shot. Embrace the beauty of the natural world inside your home.
Utilizing Everyday Objects for Scale and Perspective
When you use everyday objects in toy photography, you can create stunning scale and perspective effects. By experimenting with different angles, you can transform a simple household item into an intriguing backdrop that adds depth to your scenes. Don't forget to play with light sources to enhance textures and bring your miniature world to life.
Transformative Power of Angles
Even though the world of toy photography is filled with limitless creativity, the real magic often lies in the transformative power of angles. By adjusting your camera's position, you can turn everyday objects into compelling elements that enhance your toy scenes. For instance, shooting from a low angle can make a toy appear larger than life, while a high angle can emphasize its smallness. Here's how to harness angles effectively:
- Low Angles: Make small toys seem grand and imposing.
- High Angles: Highlight the toy's miniature nature and vulnerability.
- Close-Ups: Use macro shots to capture intricate details, making the toy the focal point.
Household Items as Backdrops
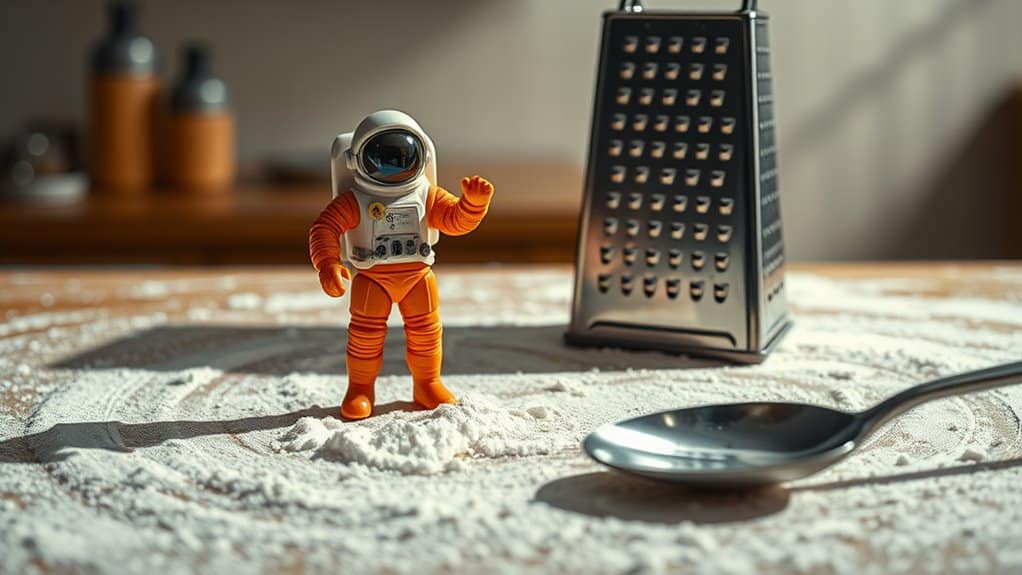
A few simple household items can transform your toy photography by adding depth and narrative to your scenes. Imagine using a coffee mug as a cave entrance or a stack of books as towering city skyscrapers. Everyday objects can provide scale and perspective, turning an ordinary setting into a miniature world. Try placing toys among potted plants to mimic a dense jungle or use a textured blanket to create mountainous terrain. Experiment by positioning toys on a kitchen counter, using utensils as oversized props that highlight your subject's small scale. Look for items with interesting textures or shapes, like a grater or a colander, to add an unexpected backdrop. You're only limited by your imagination and creativity, so explore your home for inspiration.
Playing With Light Sources
After exploring how household items can transform your toy photography, let's shine a light on another powerful tool: playing with light sources. Light can radically alter the mood, scale, and perspective of your shots. Use common objects to create imaginative effects. Here's how:
- Flashlights: Direct a flashlight through a colored plastic bottle to cast vibrant hues or shadows, giving your toys an otherworldly atmosphere.
- Smartphone Screens: Open a white or colored screen on your phone to produce soft lighting. Adjust the brightness to highlight different features of your toy.
- Lamps: Experiment with different lamp shades and bulbs. A desk lamp angled just right can replicate dramatic sunset lighting or simulate a spotlight.
Utilize these light sources to craft striking, imaginative scenes.
Creating Dynamic Lighting With Household Lamps
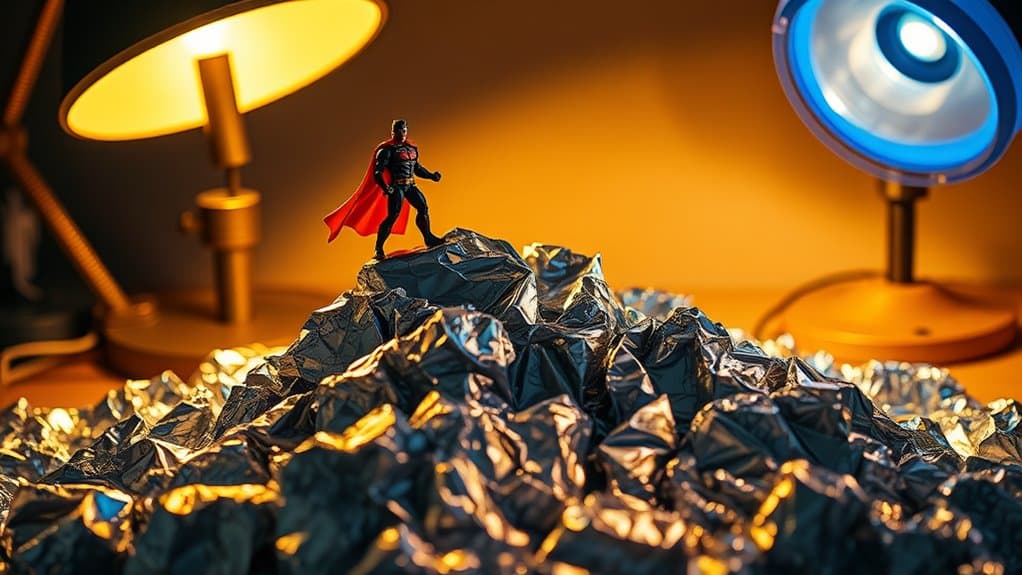
How can you transform ordinary household lamps into tools for dramatic toy photography? Start by experimenting with lamp placement. Position a lamp close to your toy figure to create bold shadows and highlights. Angle the light to emphasize your toy's features. You can use adjustable desk lamps for greater control. Try swapping out bulbs for different effects; a warm bulb adds coziness, while a cool bulb sharpens details. For softer lighting, drape a thin sheet or parchment paper over the lamp to diffuse light, reducing harshness. Play with multiple lamps to craft layered lighting, adding depth and fascination. Don't forget to adjust the lamp's height and angle to highlight your toy's unique characteristics, creating enchanting scenes in your photos.
Incorporating Fabric for Texture and Depth
When you introduce fabric into your toy photography, you open up a world of texture and depth that can transform your scenes. Fabrics like scarves, blankets, or even a simple sheet can create a stunning backdrop or foreground, adding richness to your images. Think about how the fabric's color and texture complement your toys, enhancing their story. Here's how to use fabric effectively:
- Backdrop: Drape a colorful fabric behind your toys to create a vibrant scene. It adds depth and sets the mood.
- Foreground: Use fabric to simulate terrain or environments, like a silky river or a snowy landscape.
- Props: Wrap fabric around figures or objects to add character and detail, bringing your toys to life.
Experiment and let your creativity flow!
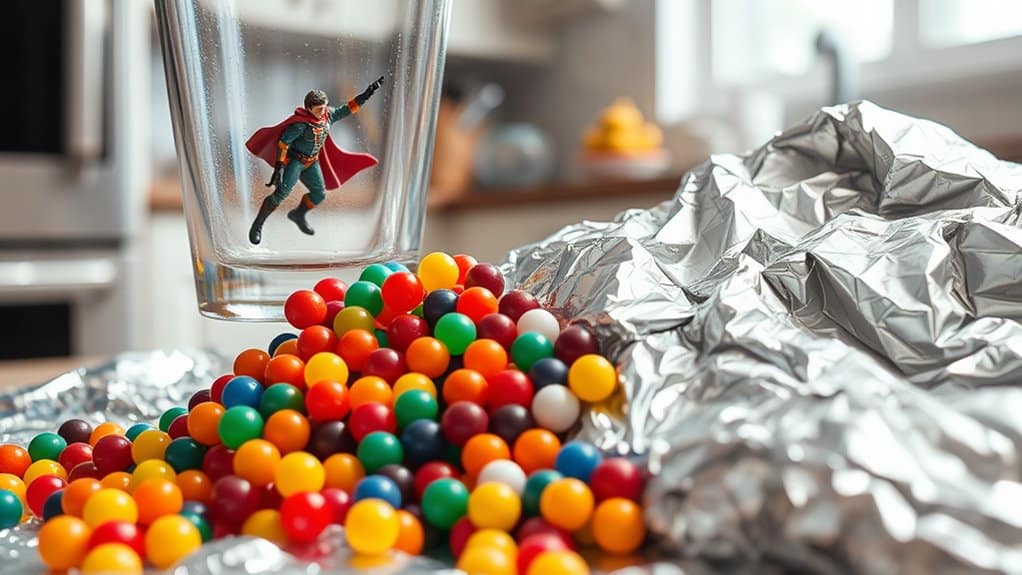
Using Kitchen Utensils for Unique Effects
Fabric isn't the only household item that can elevate your toy photography. Kitchen utensils can also add a creative twist to your shots. Grab a colander, for instance, and use it to cast interesting shadows over your scene. The perforated pattern can mimic starry skies or give a dramatic backdrop to your toys.
Consider using a fork to create parallel lines in sand or flour, simulating a desert landscape or a trail. A whisk, when spun, can add motion blur to action shots, making your toy figures look like they're in the middle of an exciting scene.
Don't overlook the humble spoon. Its reflective surface can add depth or capture unexpected reflections, offering a new perspective. With a bit of imagination, your kitchen becomes a playground for creativity.
Adding Greenery With Indoor Plants
While crafting your toy photography scene, incorporating indoor plants can breathe life into your composition. They add depth, color, and a natural touch, transforming your setup into a vibrant miniature world. Here's how you can maximize their potential:
- Play with scale: Small succulents or bonsai trees work wonders in mimicking real-life landscapes. Position them strategically to create a sense of scale and immersion.
- Leverage texture: The varied textures of leaves can enhance your scene's mood. Use ferns for a lush backdrop or cactus for a desert vibe.
- Control lighting: Plants can filter light beautifully, adding shadows and highlights. Experiment with positioning to see how light interacts with your scene.
Crafting Simple DIY Props From Recyclables
Even if you're new to toy photography, crafting simple DIY props from recyclables can elevate your scenes without breaking the bank. Start by gathering materials like cardboard, plastic bottles, and old magazines. These items are versatile and easy to manipulate. With a bit of creativity, you can turn a cardboard box into a miniature building or use bottle caps as futuristic city domes. Old magazines can be cut and folded to create colorful backdrops or props. Don't be afraid to experiment and combine materials. A little paint or tape can transform these items into something truly unique. Not only are you saving money, but you're also contributing to a more sustainable practice by reusing materials that might otherwise be discarded.
Experimenting With Water and Glass for Reflection Techniques
When you're ready to add a dynamic touch to your toy photography, consider experimenting with water and glass for stunning reflection techniques. These elements can create enchanting scenes and add depth to your images. Start by placing a glass sheet under your toy, then add a thin layer of water. This combination enhances reflections and creates a glossy finish.
Here's how to make the most of this technique:
- Position Your Light Source: Experiment with angles to find the best light reflection. Natural light often works wonders.
- Adjust Camera Angles: Capture from different perspectives to emphasize the reflection and toy details.
- Experiment with Depth: Vary the water amount for unique effects, from gentle ripples to mirror-like surfaces.
Have fun capturing those magical shots!
Frequently Asked Questions
How Do I Prevent My Toy Photography From Looking Cluttered?
Focus on simplicity. Use a clean background and arrange toys thoughtfully. Limit the number of props and guarantee they complement the main subject. Experiment with angles and lighting to highlight your toys without overwhelming the scene.
What Camera Settings Work Best for Indoor Toy Photography?
You should use a low ISO setting to reduce noise and a wide aperture for a shallow depth of field. Also, set a slow shutter speed if you've got a tripod to capture sharp, detailed images.
How Can I Achieve a Bokeh Effect in Toy Photography?
Think of bokeh as the soft whispers of light dancing in the background. Use a wide aperture like f/1.8, focus closely on your toy, and watch those dreamy blur circles blossom around your scene.
What Are Tips for Photographing Toys With Reflective Surfaces?
Position your light source at an angle to reduce glare, use a polarizing filter to minimize reflections, and experiment with diffused lighting. Adjust your camera settings for ideal exposure, and watch your reflections carefully in the framing.
How Do I Keep My Toys Steady During a Photoshoot?
Did you know 70% of toy photographers use Blu Tack to stabilize toys? Secure your toys by placing a small amount of Blu Tack or similar adhesive underneath them. It keeps everything steady for that perfect shot.
At a Glance
You've got the toys, the props, and the creative spark. But what will you create next? Picture the vibrant colors and intriguing shadows that dance across your scene, crafted from everyday items. Imagine the tiny worlds you can build, each more enchanting than the last. As you explore new angles and textures, the possibilities are endless. So, are you ready to transform the mundane into the magical and capture that perfect shot? The adventure starts now.


