Achieve realism in toy photography by starting with properly scaled mini props that match your toys. Experiment with angles, like low and high perspectives, and use natural light for authenticity. Focus on background details and make use of depth of field. Play with shadows and reflections to add dimension. Master composition for engaging scenes and create a narrative through storytelling. Consider editing for enhanced realism. Uncover these techniques to elevate your toy photography further.
Choose the Right Scale for Your Mini Props
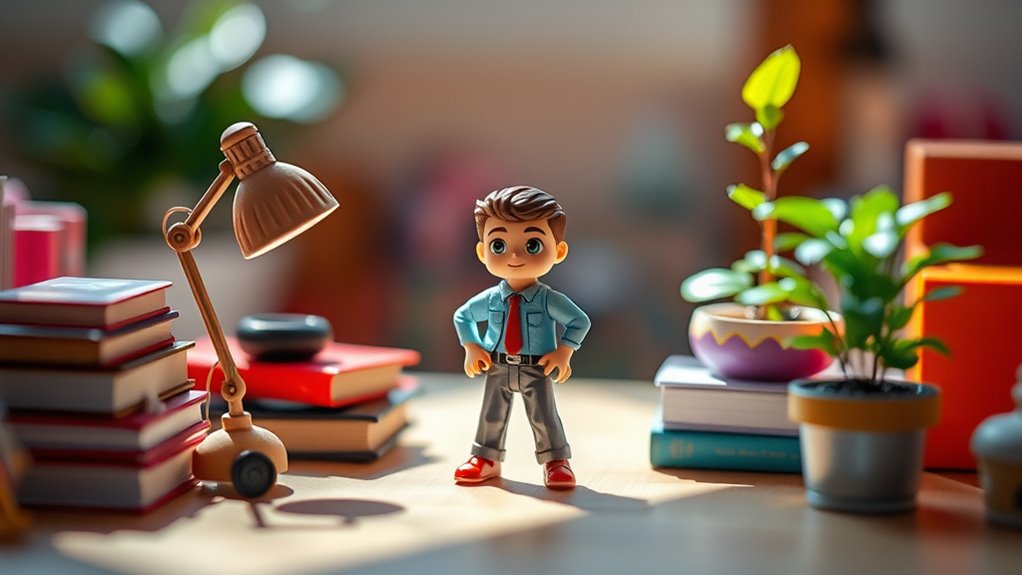
When you're diving into toy photography, choosing the right scale for your mini props is essential. It guarantees your scenes look realistic and cohesive. Start by matching the scale of your props to the toys you're photographing. If your toy is 1:12 scale, your props should be the same. This consistency helps maintain proportion and avoids distractions. Pay attention to detail; a tiny coffee cup meant for a dollhouse can make a huge difference. Always carry a small measuring tool to verify sizes while shopping for new props. Remember, the aim is to create a believable world where viewers get lost in the scene. With the right scale, your miniatures will enhance the story, making your photos truly enchanting.
Experiment With Different Angles and Perspectives
After ensuring your props are perfectly scaled, it's time to explore how different angles and perspectives can elevate your toy photography. By shifting your viewpoint, you can add depth and drama to your shots, making them more engaging. Here are some tips to get you started:
- Low Angle: Shoot from a low angle to give your toys a towering presence, creating a sense of grandeur.
- High Angle: Capture from above to emphasize the miniature scale and add a playful dimension.
- Close-Up: Focus on details by getting up close, highlighting textures and expressions.
- Tilted Frame: Experiment with tilting your camera for dynamic, off-kilter compositions that add movement.
Utilize Natural Light for Authenticity
Harnessing natural light can greatly enhance the authenticity of your toy photography, making your images feel more lifelike and vibrant. Start by shooting during the golden hours—just after sunrise or before sunset—when the light is soft and warm. This creates gentle shadows that add depth and dimension to your photos. Position your toys to capture the light from different angles, experimenting with backlighting or side lighting to achieve dramatic effects.
Avoid harsh midday sun, which can create unflattering shadows or overexposed highlights. If you're indoors, set up near a window to utilize the daylight streaming in. Natural light helps maintain the true colors and textures of your toys, enhancing realism. Remember, adjusting your camera settings for the available light will guarantee crisp, sharp images.
Pay Attention to Background Details
As you craft your toy photography, don't overlook the importance of background details, as they can either enhance or detract from your subject. A well-thought-out background sets the scene and adds depth to your story. Consider how each element interacts with your main subject to maintain focus and interest. Here's how you can improve your backgrounds:
- Consistency: Ascertain the background matches the theme and style of your scene. A medieval toy knight doesn't belong in a futuristic setting.
- Simplicity: Avoid clutter that competes with your subject. A minimalist background often emphasizes your toy better.
- Color Harmony: Use colors that complement or contrast effectively with your subject to make it pop.
- Texture: Add texture to create a sense of realism and dimension without overshadowing your toy.
Use Depth of Field to Your Advantage

To make your toy photography stand out, use depth of field to focus on key details while blurring the background. This technique draws attention to the main subject, creating a more striking and professional look. Experiment with different aperture settings to find the perfect balance that highlights your toy's features.
Focus on Key Details
When you're shooting toy photography, mastering depth of field can transform your images by highlighting key details. Focus on essential elements by adjusting your camera's aperture settings. A wider aperture creates a shallow depth of field, making your subject stand out. Here's how you can maximize this technique:
- Select the Right Lens: Use a lens with a wide aperture (like f/1.8 or f/2.8) to achieve a blurred background while keeping your toy sharp.
- Distance Matters: Position your camera closer to the toy for a more pronounced depth of field effect.
- Manual Focus: Use manual focus to pinpoint the exact detail you want to emphasize.
- Lighting is Key: Guarantee good lighting to avoid unwanted shadows that can distract from key details.
These tips will help your toy photography pop!
Blur Background Effectively
Although perfecting toy photography involves many techniques, effectively blurring the background can truly elevate your images. By using depth of field to your advantage, you can create a striking focus on your toy while softening distractions. Start by setting your camera to a wide aperture (a low f-stop number). This setting narrows the depth of field, keeping your subject sharp and your background beautifully blurred.
Position your toy a good distance from any background elements. The further away they are, the more pronounced the blur effect will be. Experiment with angles to see which perspective enhances the subject best. If you're using a phone, enable portrait mode for a similar effect. Don't hesitate to tweak settings and test until you get the perfect shot.
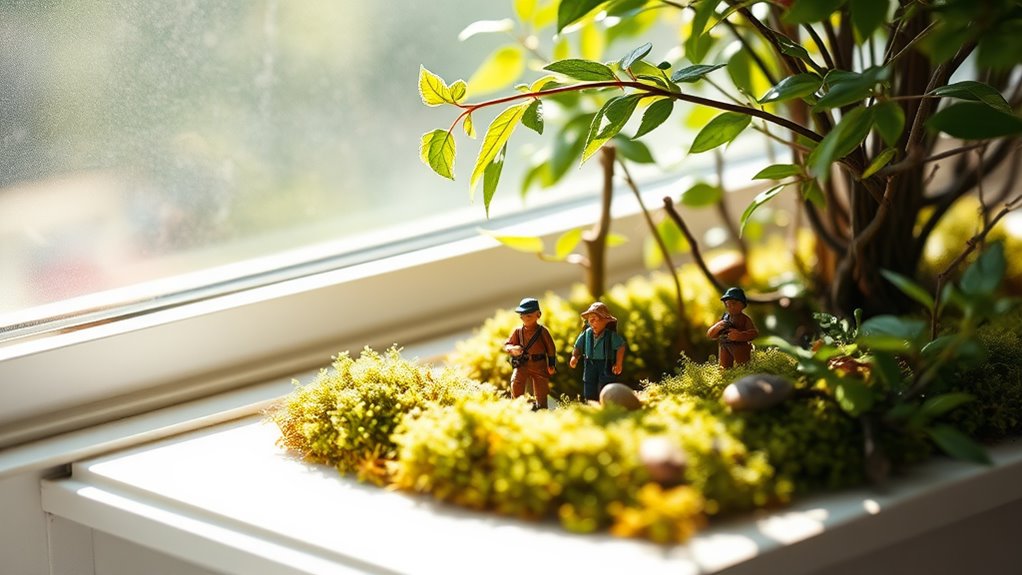
Incorporate Textures for Added Realism
To make your toy photography more lifelike, try using natural materials like sand, grass, or rocks to create authentic settings. Experiment with different surfaces to see how they interact with your toys, adding depth and interest to your shots. Don't forget to enhance these textures with lighting effects, bringing out details and creating a sense of realism that draws viewers in.
Utilize Natural Materials
Imagine taking your toy photography to the next level by incorporating natural materials into your scenes. By doing so, you'll add depth and realism that's hard to achieve with synthetic props alone. Here's how you can start: Experiment with elements like leaves, rocks, and twigs to create environments that feel authentic and immersive. Pairing these natural materials with your toys can enhance the story you’re telling and elevate the overall aesthetic of your images. For more ideas, check out these realistic toy photography tips to inspire your next shoot.
- Use Sand: Create miniature beaches or desert landscapes with fine sand. It adds texture and a sense of scale.
- Incorporate Stones: Small stones or pebbles make great boulders or rocky landscapes. They provide contrast and interest.
- Add Leaves: Use dried leaves for forest floors or jungle scenes. They introduce color and a touch of nature.
- Include Twigs: Twigs can be used as trees or logs. They're perfect for adding structure and dimension.
These elements transform your toy scenes into lifelike miniature worlds.
Experiment With Surfaces
When you explore different surfaces in toy photography, you're opening the door to a new level of creativity and realism. Surfaces can transform your scenes, adding depth and texture. Try using rough stones for rugged landscapes or glossy tiles for futuristic settings. Each surface tells a story, so think about how it complements your toys.
Experiment with fabric, like burlap for a rustic feel or velvet for elegance. Sandpaper can mimic gritty terrains, while crumpled foil creates an alien-like backdrop. The key is mixing and matching textures until you find what enhances your theme.
Keep an eye out for everyday materials—like wood grains or concrete—that can add authenticity. Your choice of surface can make miniature worlds feel lifelike, drawing viewers into your tiny universe.
Enhance With Lighting Effects
Lighting can make or break your toy photography, and a few strategic effects can dramatically elevate your work. By using creative lighting, you can transform ordinary scenes into enchanting images. Here are some tips to enhance your toy photography with lighting effects:
- Use Backlighting: Position a light source behind your toy to create a stunning silhouette effect, adding depth and mystery to your shot.
- Experiment with Colored Gels: Attach colored gels to your light sources to infuse your scene with mood and emotion, making your toys pop.
- Add Reflections: Place a reflective surface under your toy for a mirrored effect, enhancing the overall visual appeal.
- Play with Shadows: Cast shadows strategically to introduce drama and texture, giving your miniatures a more lifelike presence.
Play With Shadows and Reflections
Although often overlooked, shadows and reflections can transform your toy photography from ordinary to extraordinary. By strategically positioning your light source, you can create dramatic shadows that add depth and intrigue to your images. Try placing a toy near a reflective surface, like a mirror or a puddle, to capture an unexpected dimension in your shots. Reflections can double the visual impact and make your scene feel more dynamic and alive.
Experiment with different angles and distances to see how shadows and reflections change. You'll find that even slight adjustments can alter the mood and storytelling of your photograph. Shadows can evoke mystery, while reflections can add layers. Don't be afraid to play and explore; often, the best shots come from imaginative experimentation.
Master the Art of Composition
To truly master toy photography, focus on composition techniques like the rule of thirds, leading lines, and creating depth and perspective. Position your subject along grid lines to make your shots more dynamic and engaging. Use lines in the scene to guide the viewer's eye and play with angles to add a sense of depth that brings your toys to life.
Rule of Thirds
When diving into toy photography, understanding the Rule of Thirds can transform your compositions from ordinary to enchanting. This principle divides your frame into a 3×3 grid, helping you place subjects at intersecting points for balanced, dynamic shots. Here's how you can apply it:
- Grid Lines: Enable the grid feature on your camera or smartphone. It's a handy tool to visualize the Rule of Thirds.
- Positioning: Align key elements like a toy's eyes or face along these lines for an engaging focus.
- Negative Space: Use the grid to leave space around your subject, enhancing depth and context.
- Experimentation: Don't hesitate to break the rule. Sometimes, central composition works best.
Practicing these tips can elevate your toy photography to new heights.
Leading Lines
As you explore deeper into toy photography, leading lines become a powerful tool to guide your viewer's eye through your composition. You can use paths, roads, or even the edge of a table to create these lines, drawing attention to your toy subject. They help establish a visual journey, prompting your audience to follow the lines naturally.
When setting up your shot, look for elements in your scene that can serve as leading lines. Position them to direct focus toward the most important part of your image. Leading lines can also add depth by creating a sense of movement or flow. Experiment with different angles and orientations to find the most impactful arrangement. Practice regularly, and soon, you'll master this essential composition technique.
Depth and Perspective
Mastering depth and perspective in toy photography transforms your images from flat to dynamic, engaging viewers with a sense of realism. To achieve this, focus on how you position your camera and the toys. Experiment with angles to add depth and draw attention to the main subject. Use foreground and background elements to create layers and make the scene more immersive. Consider the following tips:
- Use a low-angle shot: It gives your toys a larger-than-life appearance, enhancing the scene's drama.
- Incorporate props: Place small items in the foreground or background to add context and scale.
- Experiment with focus: Blur the background to emphasize the toy, adding depth.
- Adjust lighting: Shadows can enhance depth, so play with different light sources.
Create a Storytelling Scene
Crafting a storytelling scene in toy photography can transform your images into fascinating narratives. Start by envisioning a story you want your toys to tell. Consider the emotions, actions, and settings that best convey your tale. Select props that enhance the story, like mini trees for an adventure or tiny furniture for a cozy scene. Arrange your toys and props thoughtfully, ensuring each element contributes to the narrative.
Experiment with angles and lighting to emphasize key parts of your story. Perhaps a low angle adds drama, or soft lighting creates a dreamy effect. Be mindful of your background; it should complement, not distract from, your story. Remember, each photo should evoke curiosity, inviting viewers to imagine the world beyond the frame.
Edit Photos for Enhanced Realism
While capturing a great shot is essential, editing can take your toy photography to the next level by adding a layer of realism. By refining your images, you can enhance textures, adjust lighting, and create depth, making your toy scenes look lifelike. Here are some editing tips to bear in mind:
- Adjust the Lighting: Use editing software to tweak brightness, contrast, and shadows. This can replicate natural lighting and add dimension to your photos.
- Enhance Colors: Boost or mute colors to match the mood you're aiming for, whether vibrant or subdued.
- Add Blur for Depth: Introduce a subtle blur to the background to create a sense of depth, making your toys appear more three-dimensional.
- Refine Details: Zoom in to sharpen any necessary details, ensuring your toys' features stand out.
Frequently Asked Questions
How Do I Choose the Best Camera for Toy Photography?
You should focus on cameras with good macro capabilities, allowing close-up shots. Look for adjustable aperture settings to control depth of field. DSLRs or mirrorless cameras with interchangeable lenses offer versatility, helping you capture realistic toy photos.
What Are Some Cost-Effective Mini Prop Options?
You can find affordable mini props at thrift stores, dollar stores, or online marketplaces. DIY options like crafting with household items or repurposing old toys work well too. Always keep an eye out for creative, budget-friendly finds.
How Can I Prevent My Toys From Falling Over During Shoots?
Imagine your toy standing firm, unyielding like a statue. Use sticky tack for stability, or create a discreet support using wire. Adjust their center of gravity, ensuring they're balanced and ready for their spotlight moment.
What Are Easy Ways to Create DIY Mini Props?
You can use materials like clay, cardboard, or fabric to create DIY mini props easily. Craft tiny furniture, accessories, or scenery by cutting, shaping, and painting them. Look around your home for repurposable items to enhance creativity.
How Do I Transport My Mini Props Safely for Outdoor Shoots?
Imagine you're heading to a scenic park for a shoot. Use a small tackle box with compartments to organize and cushion your mini props. It'll prevent damage and keep everything tidy during transport, ensuring a successful session.
At a Glance
You've initiated a creative journey with these tips, transforming simple toys into enthralling stories. Remember, the devil's in the details—every angle, shadow, and prop has the power to elevate your shots. Let natural light be your guiding star, creating authenticity and depth. As you edit, keep realism in your sights, enhancing without overdoing. Now, go and capture magic, for each click of the shutter is a brushstroke on your photographic canvas.


